Whether you are planning to give away, sell, or restore your laptop to an out-of-box state, a factory reset is the solution. Performing a factory reset not only improves system performance but also gets rid of any bugs or issues with the operating system.
Depending on your requirement, there are several ways to perform a factory reset on your HP laptop.
But before you start, here are a few things you should consider.
- Make sure that the laptop has at least 20GB of free space.
- Backup files, folders, and app data. Also, make a list of installed applications so that you can re-install them later.
- Keep the laptop connected to the AC power source throughout the reset process.
Via Windows Settings
The simple way to reset your HP laptop is through Windows settings. It provides an option to reset Windows and all its settings with just a few steps using the reset option. However, this method will only work if you have a healthy recovery partition on your drive.
Here’re the steps.
- Press the Windows and I key simultaneously.
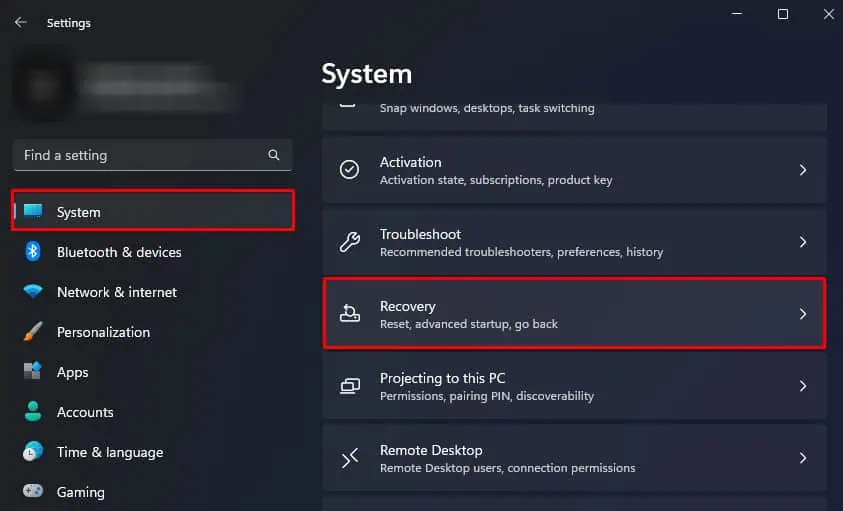
- Navigate to System > Recovery.

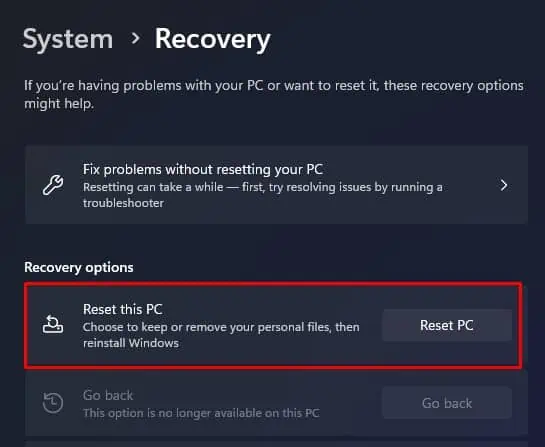
- Click on Reset PC.

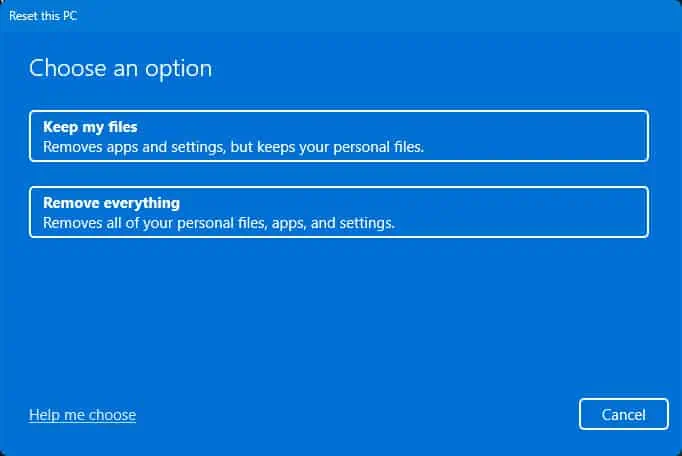
- Select Remove Everything.

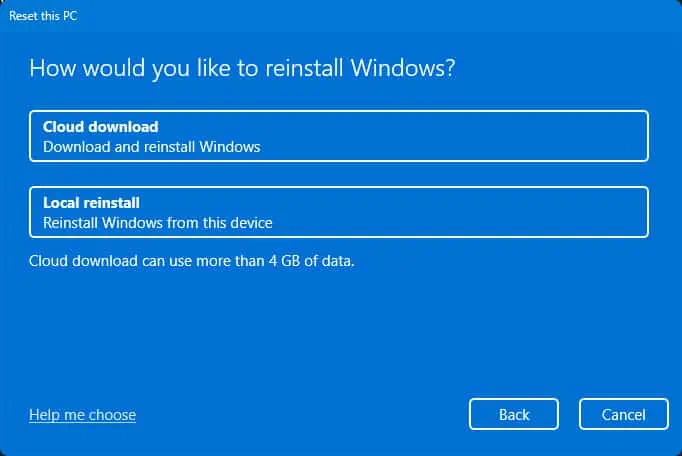
- Choose one of the options to reinstall Windows. If you have uninterrupted internet access, click on Cloud download. Select Local reinstall if you do not have internet access.

- Click on Next.
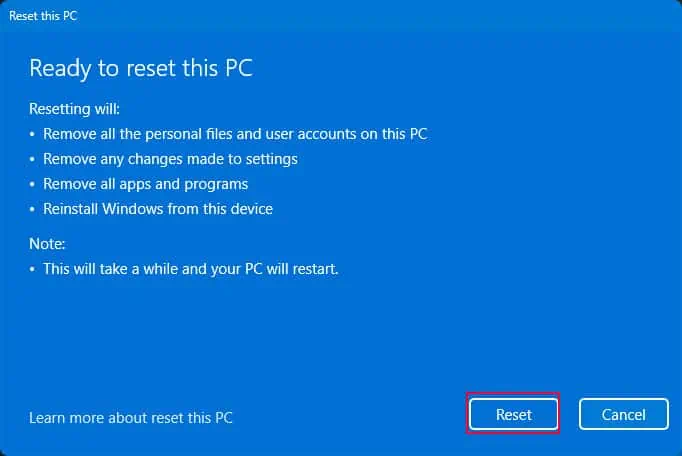
- Click on View apps that will be removed to get the list of apps that you need to reinstall.
- Click on Reset.

Through HP Cloud Recovery
HP Cloud Recovery tool allows you to factory reset your laptop to its original state. The tool will also provide pre-installed OEM software.
However, not all HP laptop supports it. So you can check the HP cloud recovery supported platform website to see if your laptop supports HP cloud recovery.
Before we begin the HP Cloud Recovery process, here are some things to keep in mind.
- HP Cloud Recovery is only supported on 64-bit HP systems produced in 2016 or later.
- If you are a Windows 10 user, its version should be higher than 15063.0.
- Make sure that your system is connected to the internet.
- You will need a blank USB drive with at least 32 GB of free space.
Creating a Bootable USB with HP Cloud Recovery Tool
Here’s how you can create a bootable USB drive with the HP cloud recovery tool.
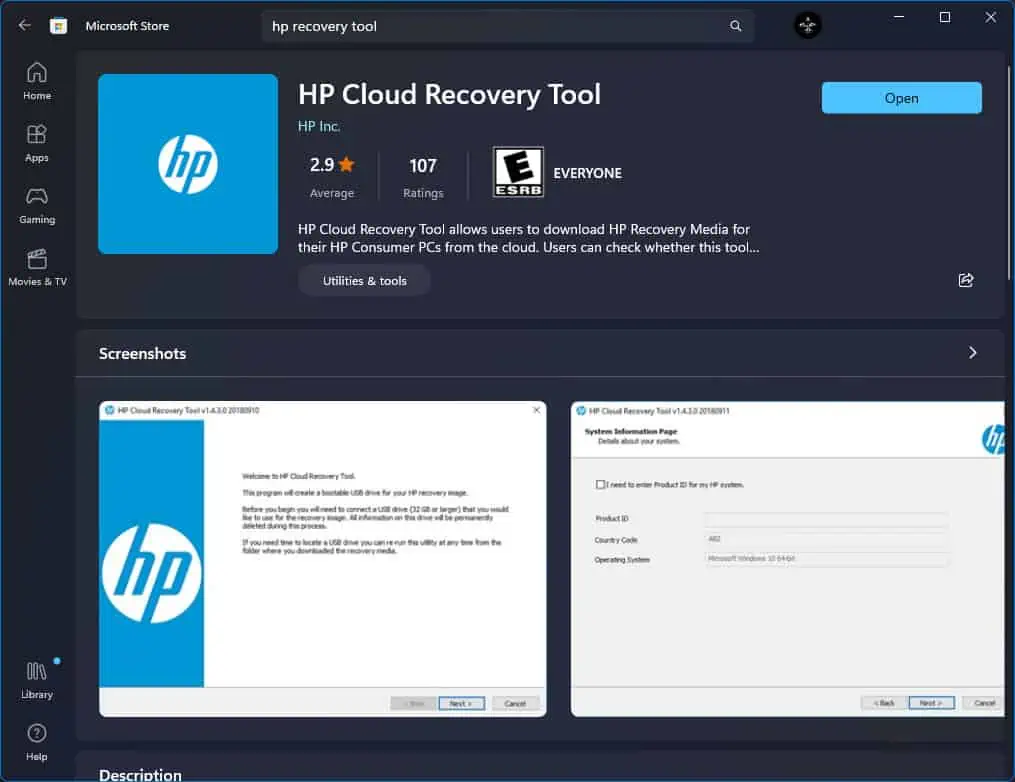
- Download and install HP Cloud Recovery Tool from Microsoft Store.

- Insert the blank USB drive into the PC and run HP Cloud Recovery Tool as Admin.
- Click Yes.
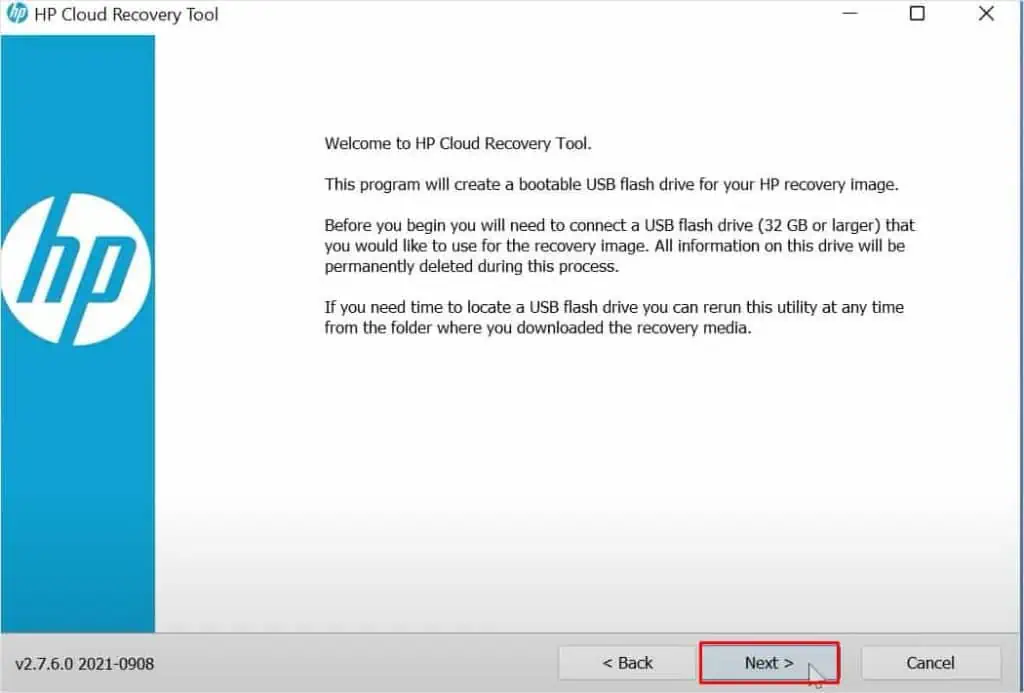
- Once the Cloud Recovery Tool opens, click on Next.

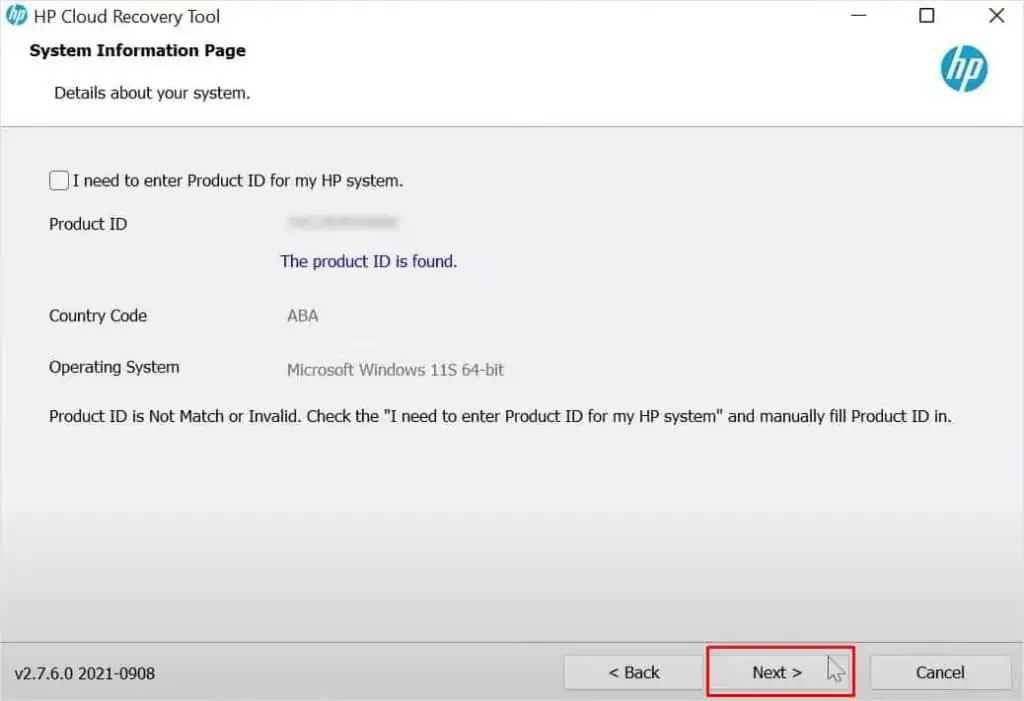
- If you are on the HP laptop that you are trying to reset, the tool should automatically detect the Product ID. If so, simply click on Next.

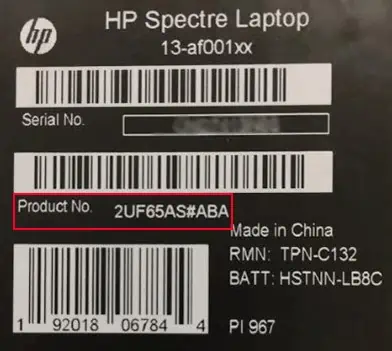
- If you are creating recovery software on another PC, check I need to enter the Product ID for my HP system and enter the Product ID of your HP laptop. You can get the details about the Product ID from the sticker on the base of your laptop.

- Once you have entered the product ID, click on Next.
- If you see Product ID is not a match message, your laptop is unavailable for HP cloud recovery. In such cases, I recommend factory resetting the laptop through Windows settings .
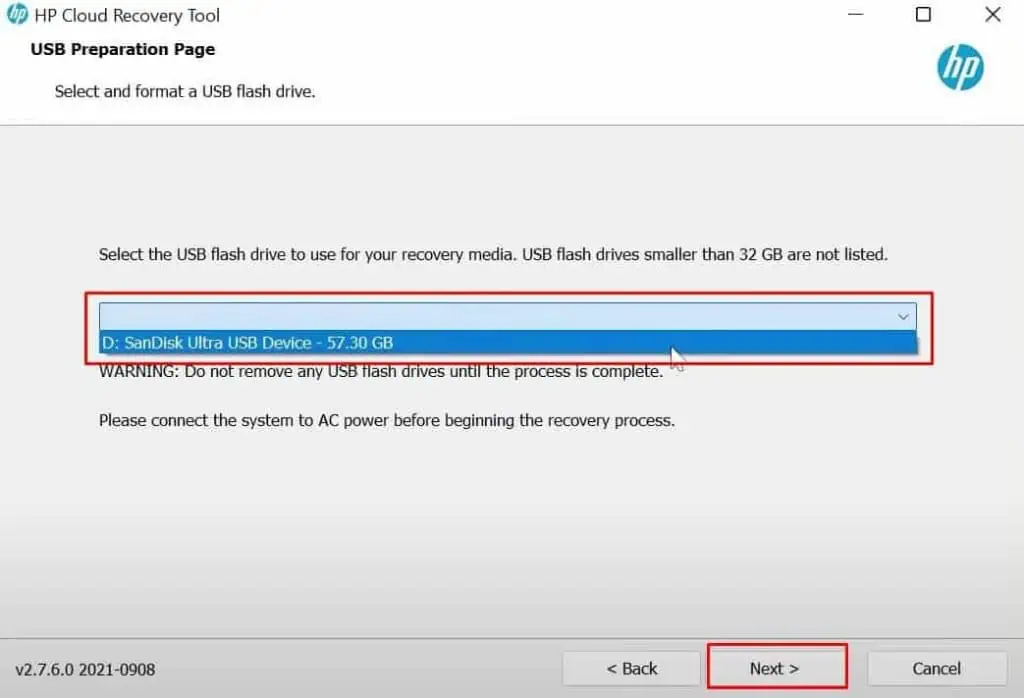
- Once you enter the Product ID, click on the dropdown menu and select your USB drive.

- Select Next.
- Click OK if it gives you a warning.
- Wait for the process to complete.
Change Boot Order
Once you have successfully created an HP system recovery bootable USB drive, you need to change the laptop’s boot order. This allows the system to prioritize the USB drive over the storage device containing the OS.
Also, make sure that you remove all the peripheral devices except the bootable USB drive.
To change the boot order on HP laptops,
- Completely shut down the laptop.
- Turn on the laptop and repeatedly press the F10 key to boot into BIOS settings.
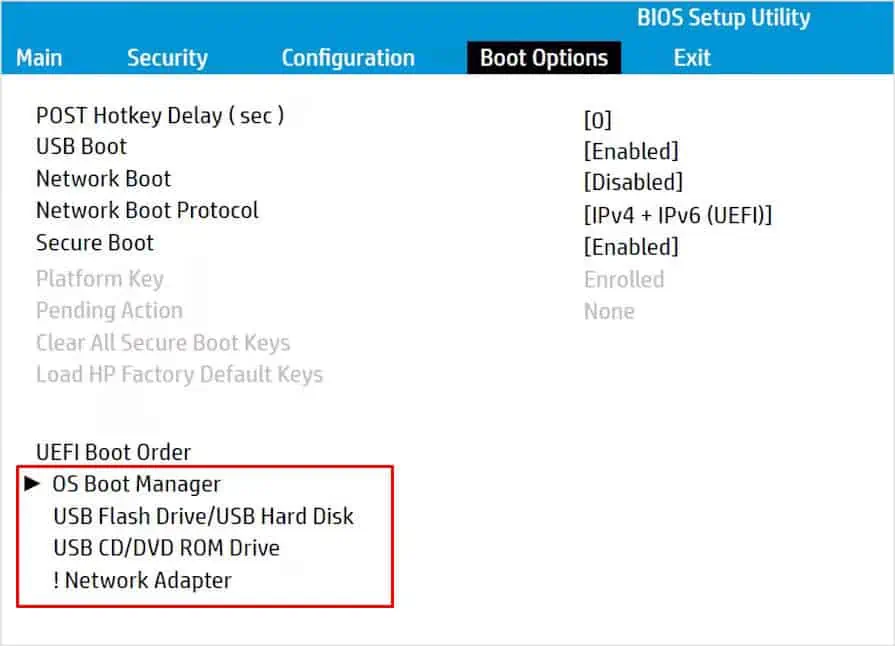
- Go to Boot Options. These options may be different depending on your laptop model. If you do not find boot options in Storage, navigate the BIOS to find Boot order settings.

- Here, you will see a list of storage devices connected to the laptop. Rearrange the list such that the bootable USB drive is at the top of the list.
- Navigate to Exit and select Save Changes and Exit.
Performing HP System Recovery
Now that you have changed the boot order, the system will now use the bootable USB drive to boot.
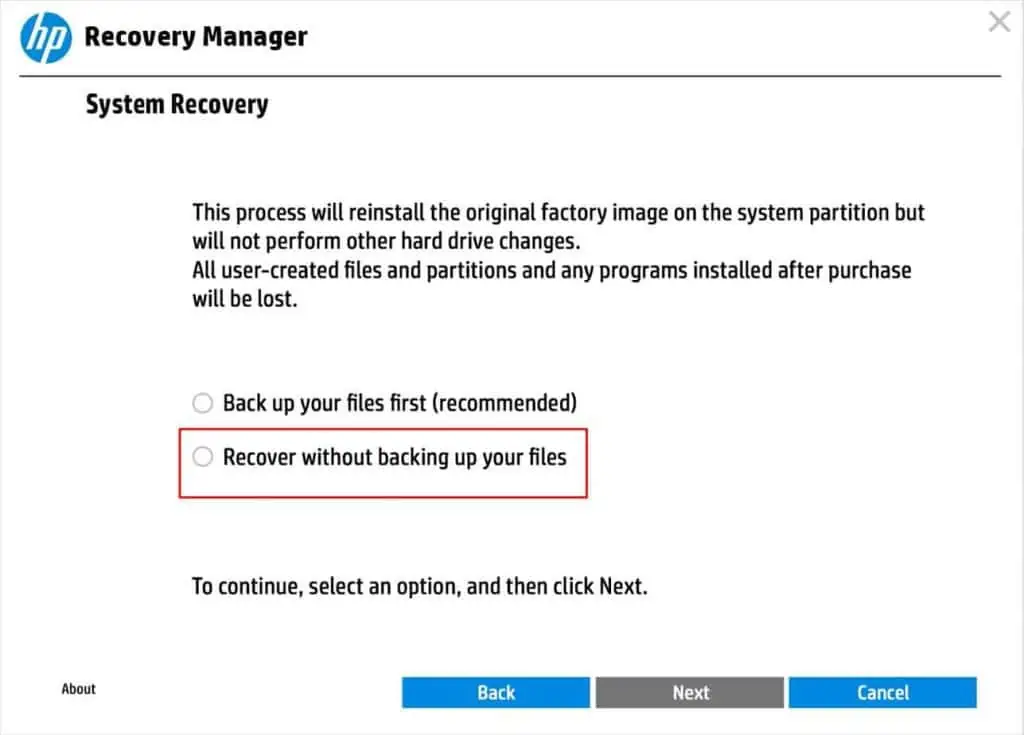
- Once you reboot after changing the boot order to the USB drive, you will be prompted to a System recovery screen.
- If it does not, go to the Boot menu by pressing F9 repeatedly and select the USB drive containing the Recovery.
- Here, select Recover without backing up your files, as you have already backed up necessary files, folders, and applications.

- Click on OK if it shows you a prompt that says all files, partitions, and programs will be removed.
- The reset process should now start.

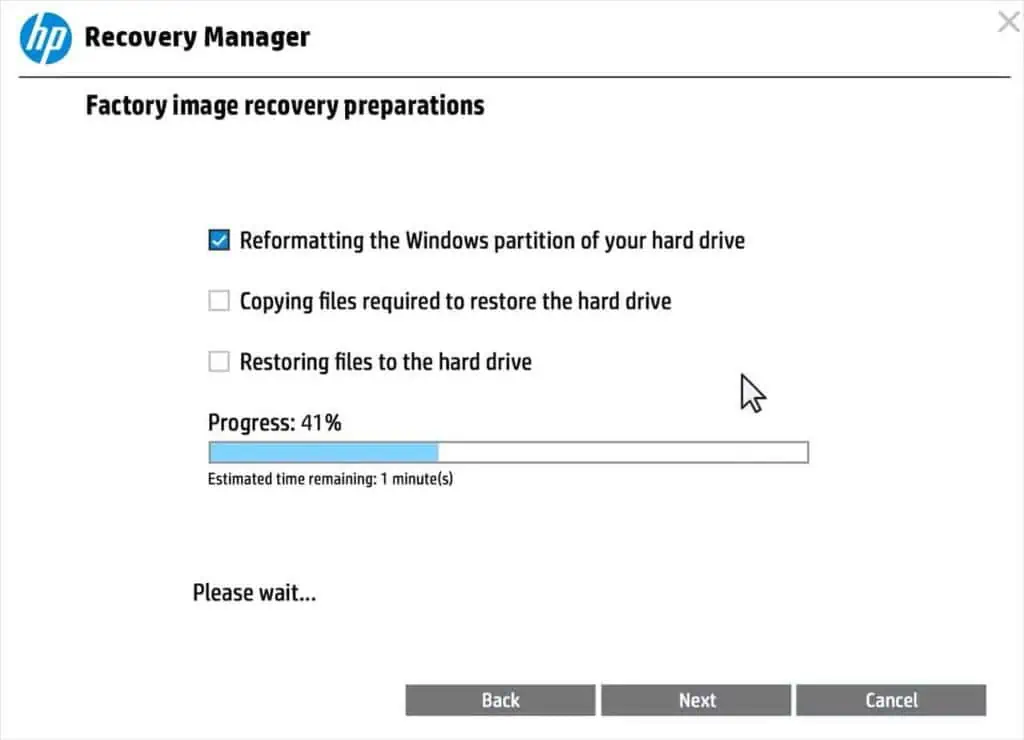
- Click on Skip if it asks for Factory image recovery preparations.
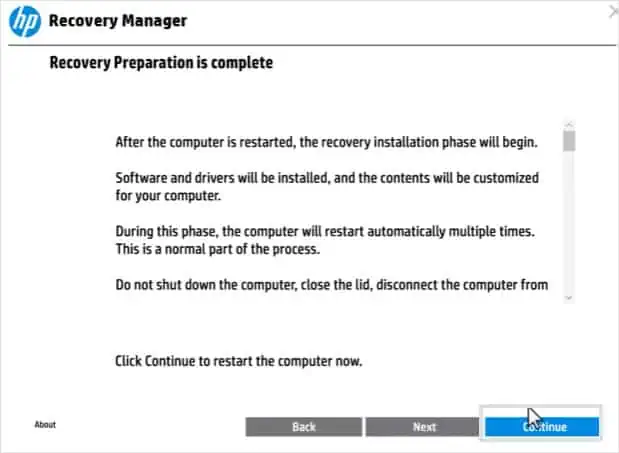
- Click on Continue.

- Wait for Windows to reinstall.
- Once the process completes, the laptop should return to its factory state.
Via Recovery Environment
You cannot access Windows Settings if the system fails to boot into OS or gets stuck in a boot loop. In such situations, you can factory reset the laptop using the Windows recovery environment.
- Turn off the PC and turn it back on.
- Again, when the Window logo appears, turn the laptop off by holding the power button.
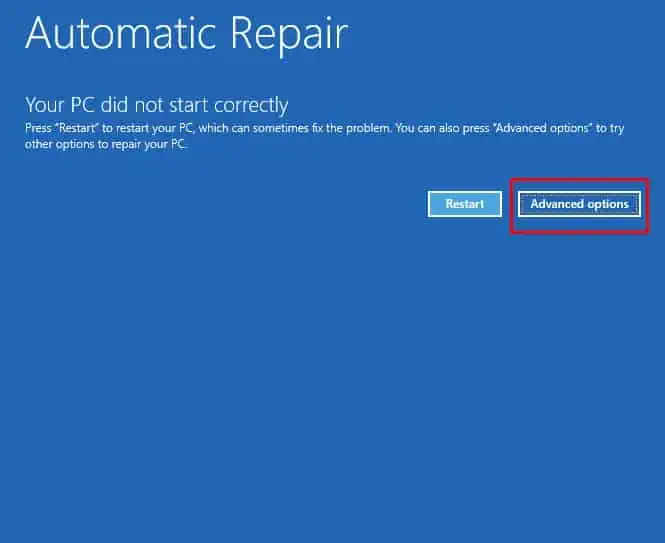
- Repeat this process until the Startup repair screen appears.
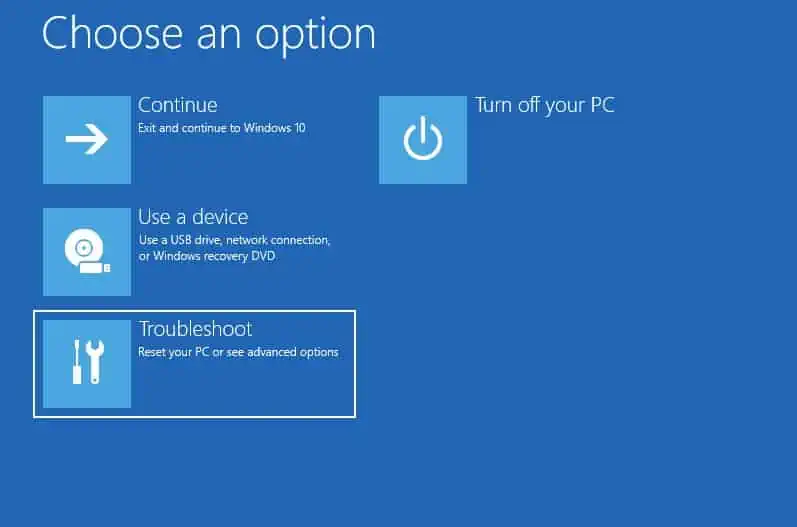
- Now, select Advanced Options to open Windows Recovery mode

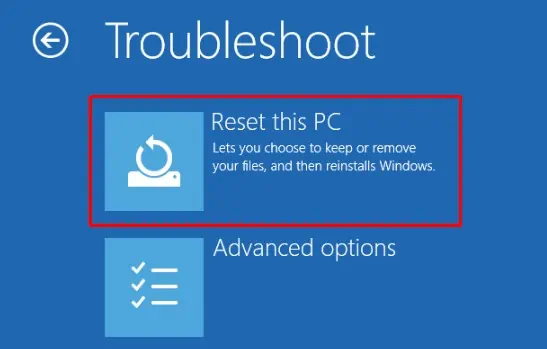
- In the Windows Recovery mode, click on Troubleshoot.

- Click on Reset this PC.

- Now, choose an option to Remove everything, which will remove all personal files, apps, and settings, or Keep files, which will only reset the OS, apps, and settings and keep personal files.
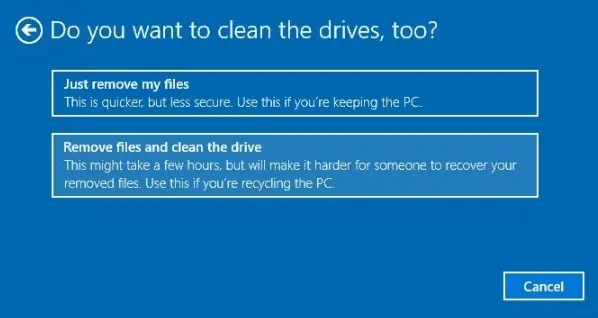
- Now, you will be prompted to two options Just remove my files and Fully clean the drive.

- Just removing my files will delete files from the PC. However, it is possible to recover the data with the right tools. So, I recommend fully cleaning the drive if you are selling your HP laptop after factory resetting it.
- Now, click on Reset.
Things To Do After Factory Reset
When you reset the PC, any drivers that you have previously installed will also be removed. Windows will only use its default set of drivers, but these drivers may be outdated. So if you are going to use the laptop after the reset, I recommend that you update Windows and the drivers.
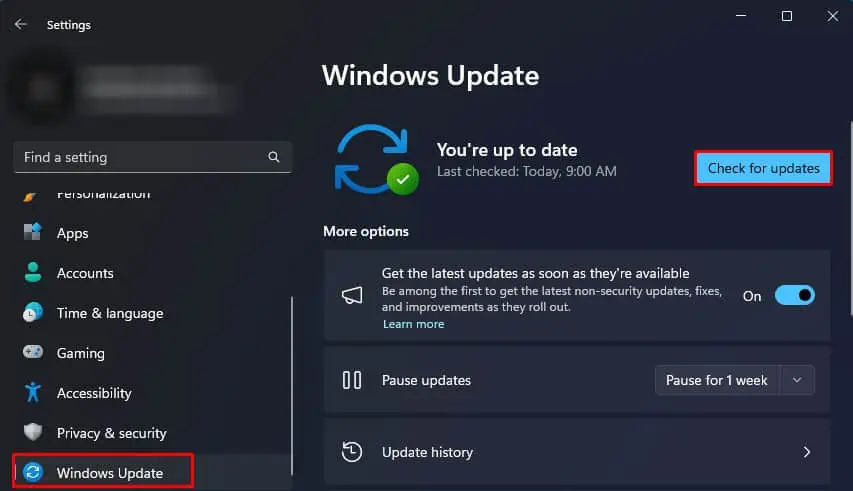
- Open Windows Settings.
- Go to Windows Update.
- Select Install Now or Check for Updates.

- Once the download completes, you will need to restart the PC to install the updates.
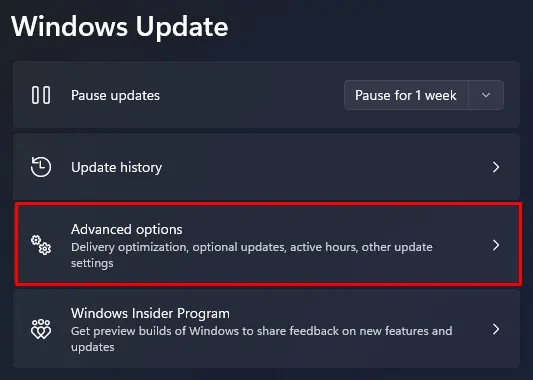
- In Windows update, click on Advanced options.

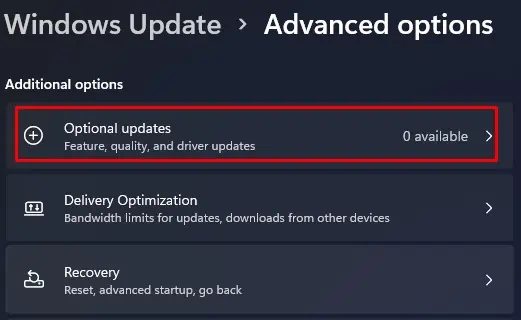
- Scroll down and click on Optional Updates and download any pending optional updates. You might not see the Optional updates on Windows 10 if you do not have pending option updates.

- Restart the PC once the installation is complete.
If you have AMD or NVIDIA GPUs, you will need to install their graphics driver from their respective websites.
If you have previously backed up your data, restore all the backed-up data and files.
Finally, reinstall the necessary apps and software, and customize Windows settings as per your needs.

