If only a few printers are connected to your network, you can easily discover them through the control panel or Windows settings. However, if you work in an environment with a lot of network or shared printers, finding the desired one can be challenging. In such cases, you can discover your desired printer using its IP address. Besides, printer manufacturers offer specific apps that help you find the printers on the network.
Using Control Panel
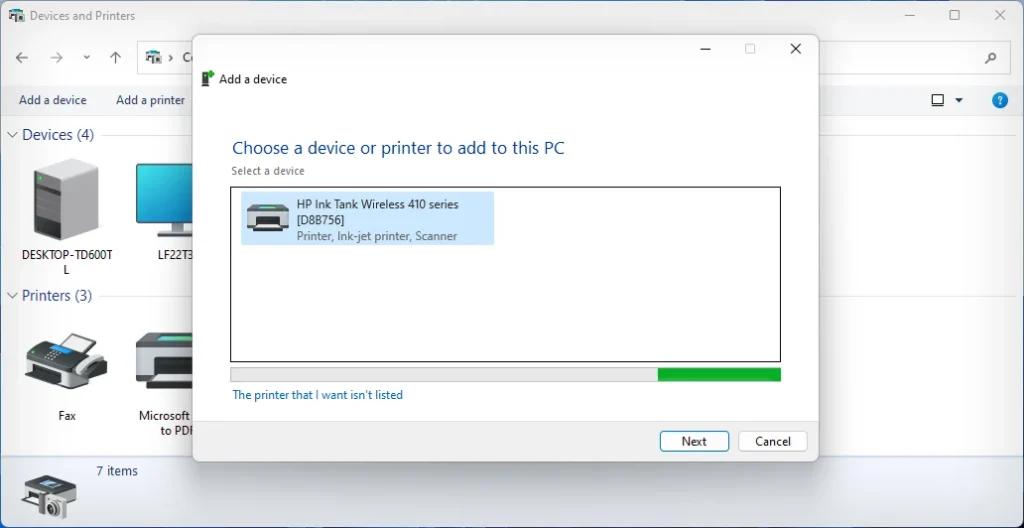
You can simply go to your computer control panel to see all the printers connected to a network. Once you find the printer, you can then add the printer to your system.
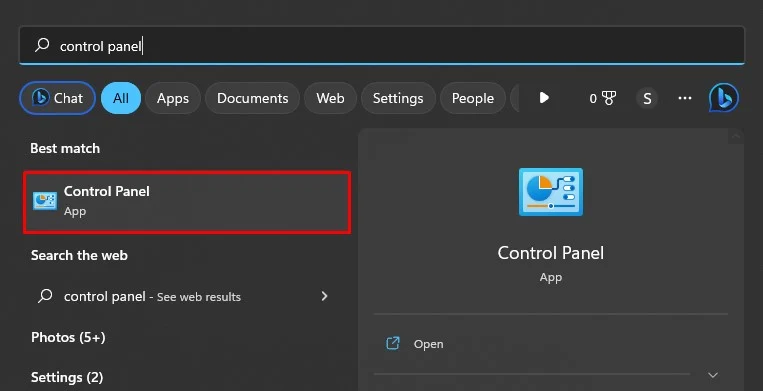
- Open Control Panel .

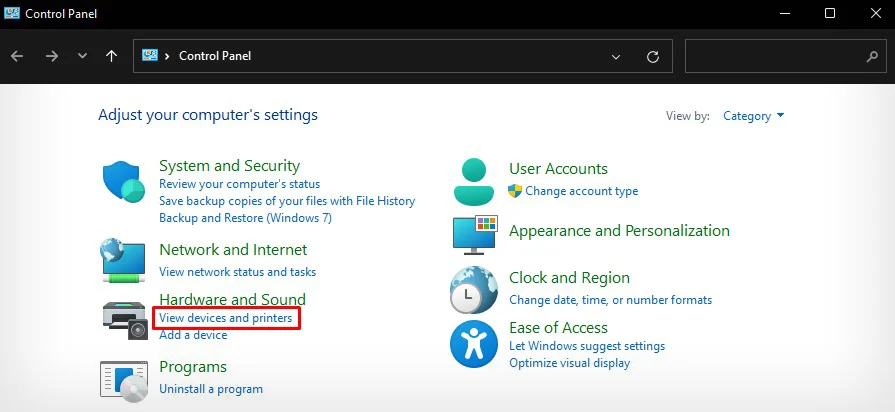
- Press the View devices and printers option in the Control Panel window.

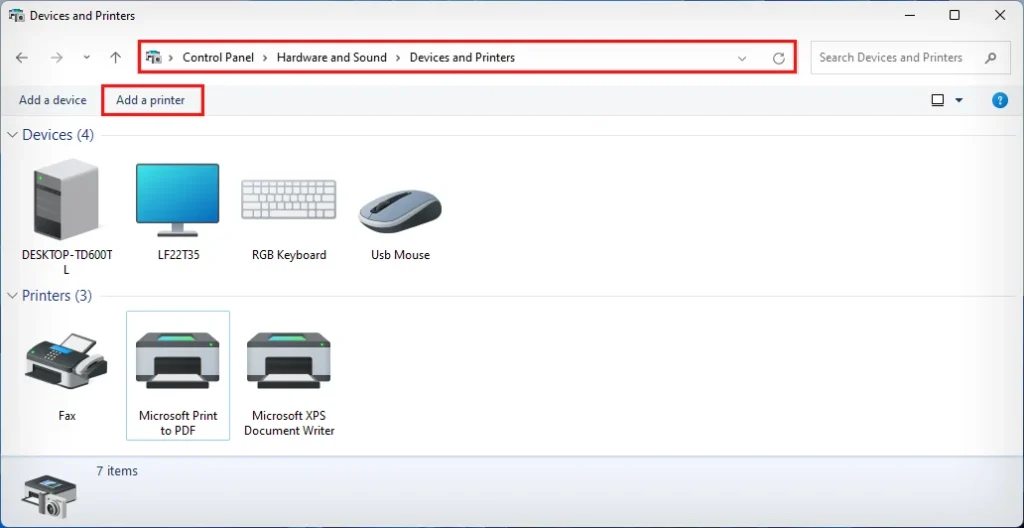
- Click Add a Printer button on the menu bar.

- You will see all the printers that are connected to a network in the new Add a device window.

- Select the desired printer.
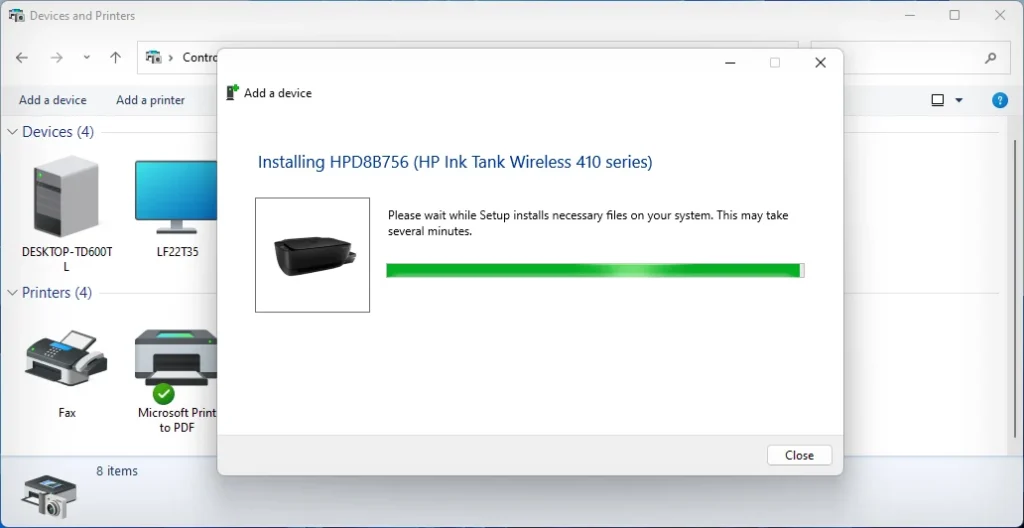
- Follow the instructions to add that printer to your PC.

Using Settings
If you are trying to find a shared printer over a network, you can do it easily from the settings of your computer.
Since Windows computers can not find the shared printer automatically, you need to know the name of the host computer to find it. If you don’t know which is the host computer exactly, you can check for all the computers on the network.
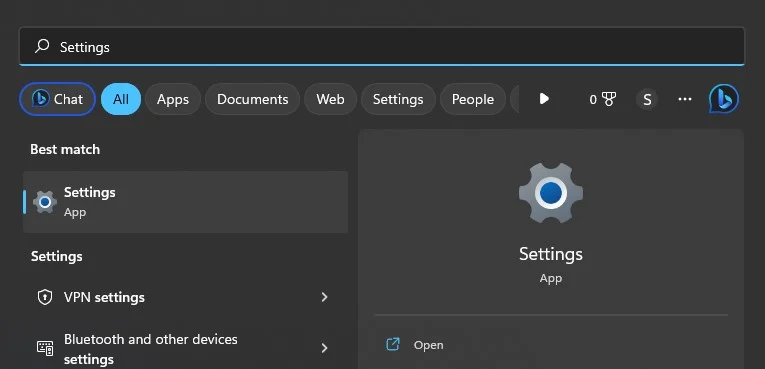
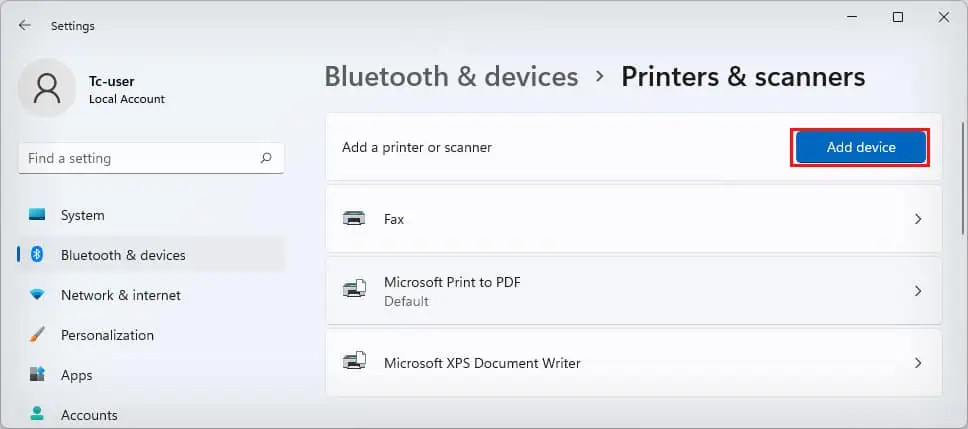
- Open Settings on your computer.

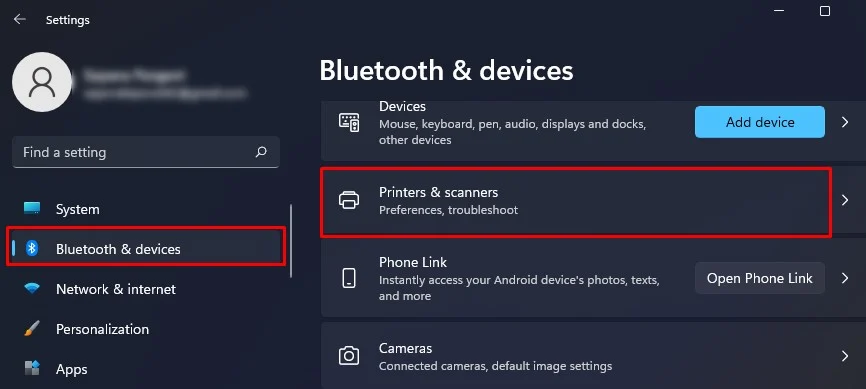
- Open Bluetooth & devices > Printers & scanners.

- Tap the Add device button.

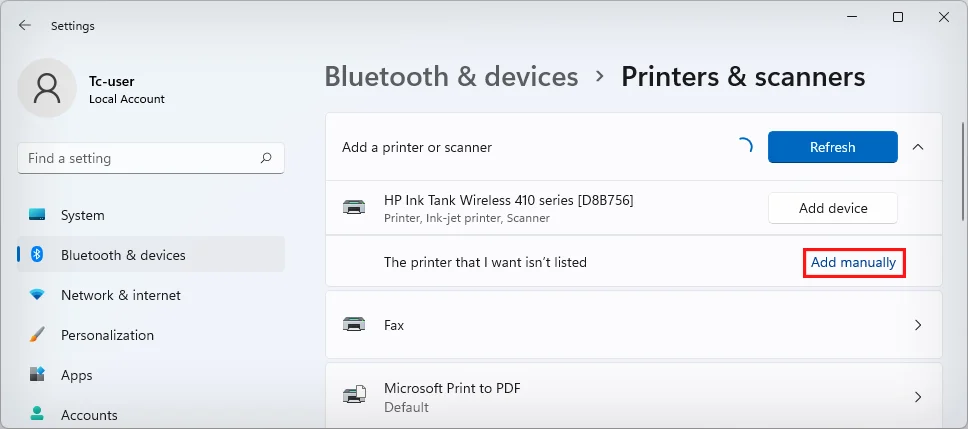
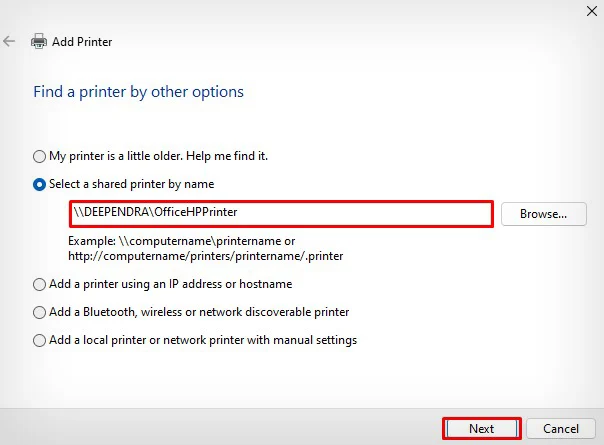
- Click Add manually.

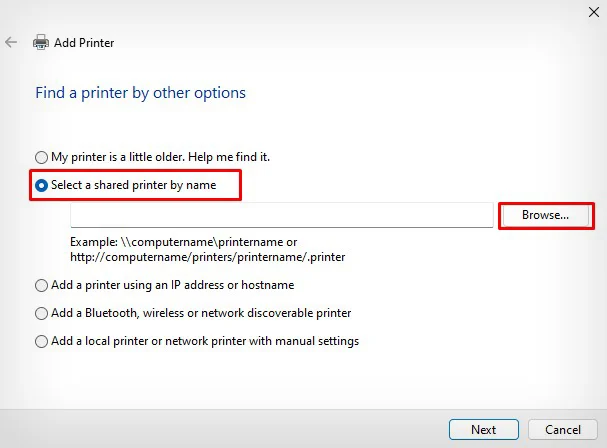
- Check the box next to the second option.

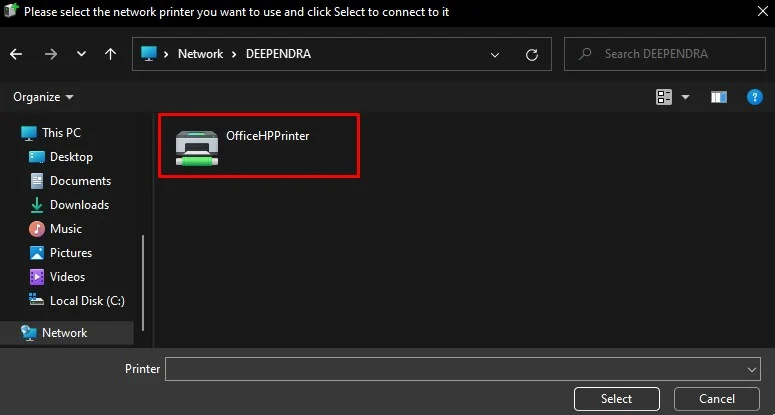
- Click Browse.
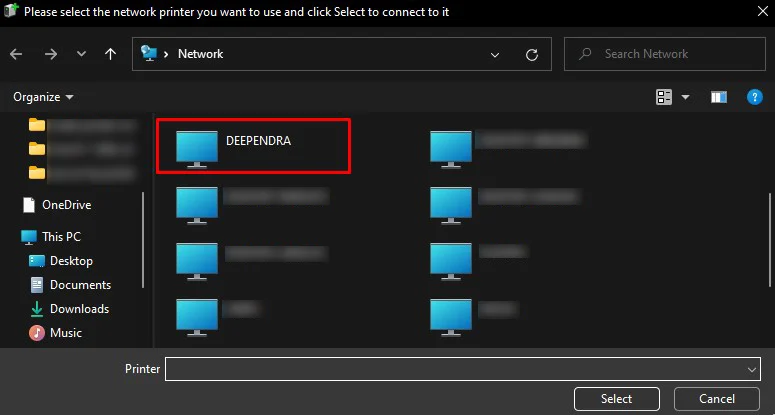
- Double-click to select the computer to which the printer is connected. As mentioned earlier, check for other computers too if you don’t know the host computer.

- Select the printer and press the Next button.

- It will add printer to your system.

Using Dedicated Printing Apps
There are also manufacturer-specific apps that will help you find the printers on a network. All you need to do is download the mobile apps for the printers like HP, Canon, Epson, and Brother. Then, go through the steps to add a printer.
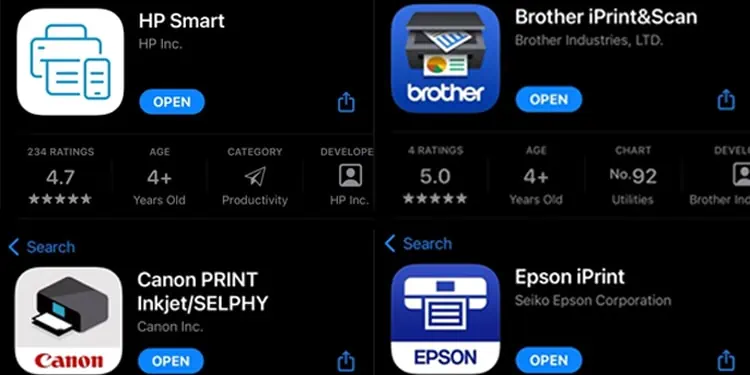
The app will find all the printers of that particular manufacturer on the network and display them to you. You can then select your desired printer and start printing.
| Printer Manufacturer | Mobile Apps |
| HP | HP Smart |
| Canon | Canon PRINT Inkjet/SELPHY |
| Epson | Epson iPrint |
| Brother | Brother iPrint&Scan |
Using IP Address of Printer
If you know the exact name of the printer, you can easily find it using the method discussed earlier. However, if you work in an environment with multiple printers connected to a network, it may be a tedious task to search for a particular printer in a list of thousands of printers.
In such cases, you should first find the IP address of a printer, then add it to your PC using that IP.
You can get the IP address through the host computer to which the printer is connected. Otherwise, you need to contact the system admin.
- Open Windows Settings.

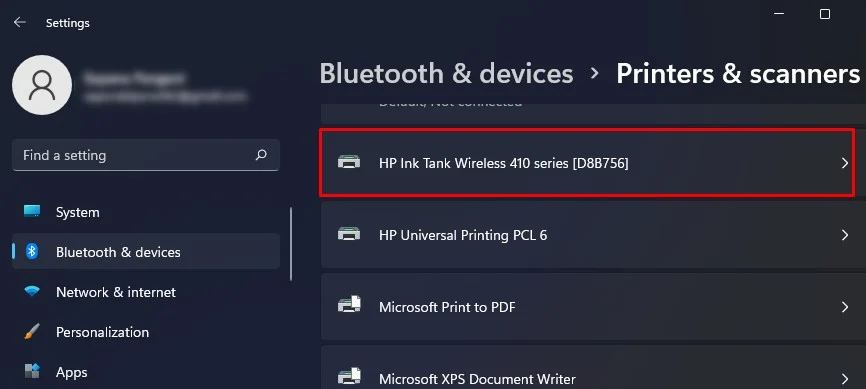
- Click Bluetooth & devices on the left pane and select Printers & scanners.

- Click the printer name whose IP you want to view.

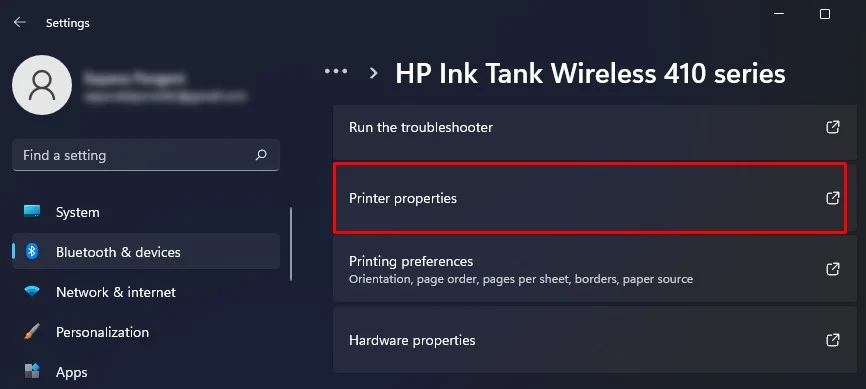
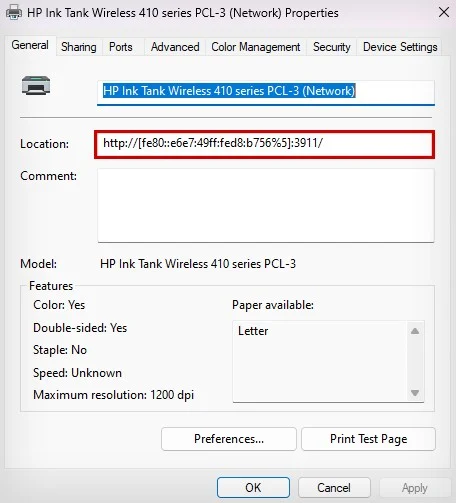
- Choose Printer properties.

- Grab the IP address from the Properties window.

- Now come to your system where you want to add the printer.
- Open Settings.
- Go to Bluetooth & devices > Printers & scanners.
- Tap Add device.

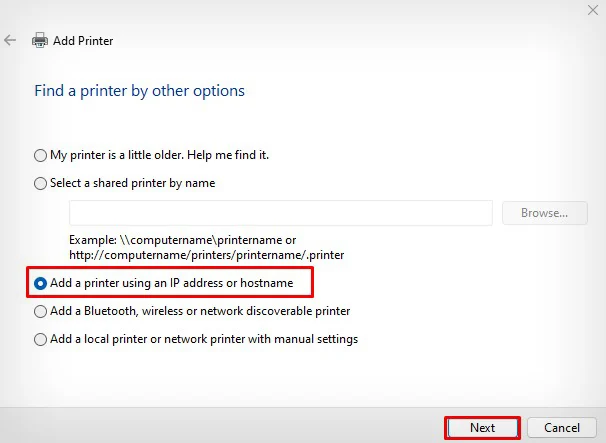
- Tap Add manually.

- Select the third option and click Next.

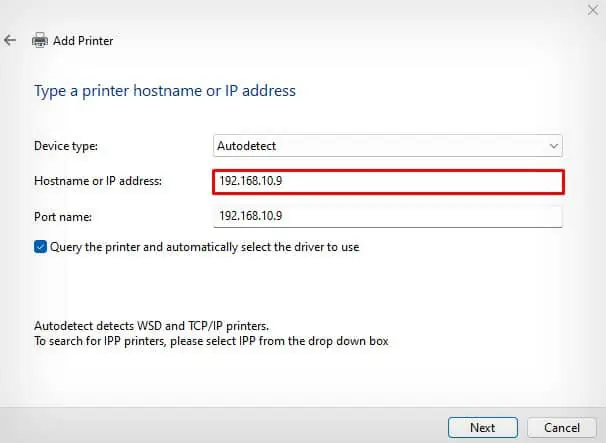
- Type the IP address and click Next.

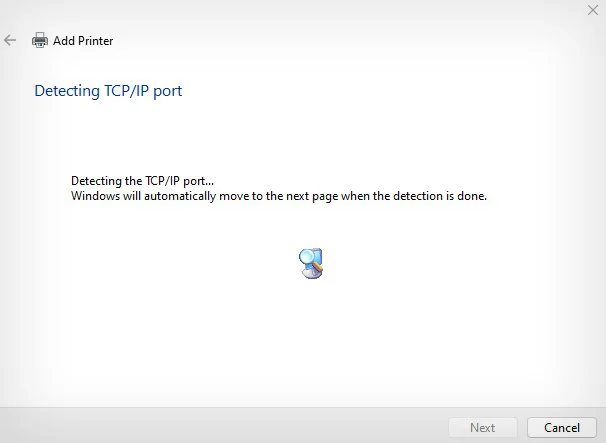
- Then follow the instructions on the screen to add the printer.


