A critical error occurs when the operating system terminates a program or process due to internal issues. These errors can be triggered by memory usage conflicts, corrupted files, etc.
If you turn off your computer while an update is running, your files may become corrupted. Antivirus software may have memory allocation problems with programs inside the OS.
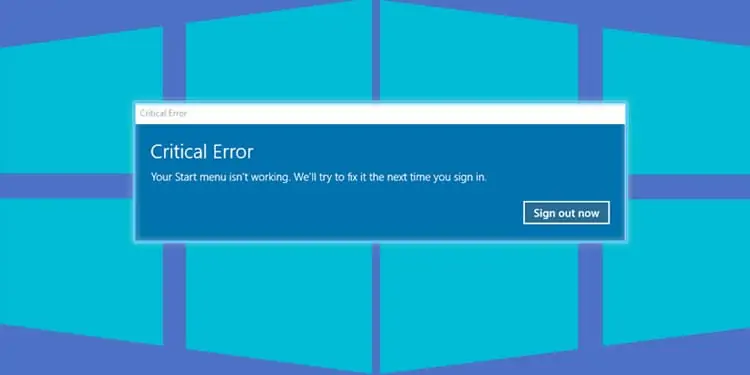
So, if you are greeted with this error, “Critical Error: Your Start menu isn’t working, we will try to fix it the next time you sign in” and there’s only one option to sign out; don’t be tempted to force shut down. Instead, try this list of fixes:
Critical Error: Your Start Menu Isn’t Working
This error is easily resolved by simply logging in and out of your account. If that doesn’t work, you can try these alternatives.
Re-install Your Start Menu
There may be some corrupted files that can cause your start menu from working. Your system files may get corrupted if you turn off your computer during an update. Sometimes you cannot fix the corrupted files by running SFC (detailed explanation on “Run System File Checker”).
However, you can fix them by simply re-installing your start menu. Follow these steps to reinstall your start menu.
- Press the windows + R key.
- Type powershell and press Shift+Ctrl+Enter. This opens your PowerShell as an administrator.
- You will see a blue screen. Now paste the following command after C:/windows/System32> and press enter.
Get-AppXPackage -AllUsers | Foreach {Add-AppxPackage -DisableDevelopmentMode -Register “$($_.InstallLocation)AppXManifest.xml”}Now, restart your computer to check if your start menu works.
Restart Windows Explorer
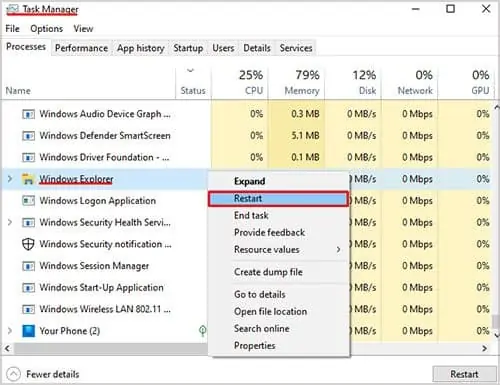
When you open your task manager, a process called Windows Explorer always runs in the background. Because of some unknown reasons, Windows Explorer can cause issues with the start menu. To fix this, you will need to restart your Windows Explorer. Follow these steps to restart your Windows Explorer.
- Press Ctrl+Shift+Esc. If you don’t have details of all the processes, click on “More details“.
- On the Process tab, search for Windows Explorer in Background Processes.
- Click on Restart.

All things on your screen will refresh, and the process will run again.
Run the System File Checker
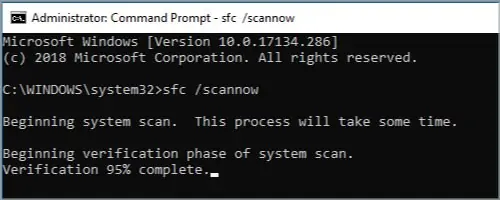
The System File Checker (SFC) should always be the first thing you run if you encounter any problem with your operating system. SFC is a windows utility tool that you can use to find and fix corrupted files in your windows.
To run the system file checker, you can follow these steps:
- Press the Windows + R key.
- Type cmd and press Shift+Ctrl+Enter to run the command as an administrator.
- Type sfc /scannow and press the enter key.

Wait for a few minutes for the SFC to complete. Restart your computer to check if the start menu error is fixed.
Disable Your Antivirus Software
Your antivirus software will have access to many components in your computer. Your antivirus can detect malicious files that shape your start menu. You can disable your antivirus to fix your issue. If this does not work, you can uninstall your antivirus.
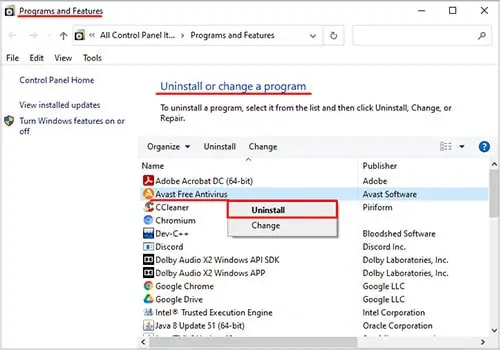
Since you cannot open your start menu, here are the steps you need to follow to uninstall your programs.
- Press the Windows + R key.
- Type appwiz.cpl and press enter.
- Search for your programs and click uninstall.

Restart your computer to see if the problem is fixed. If the problem is still not fixed after uninstalling the antivirus, you can enter safe mode and revert to normal mode.
Uninstall Your Recent Windows Update
If you’ve recently updated your windows, some unknown problem with the update may cause your start menu from working.
You can easily roll back to the previous version if you get problems with your computer. But, only do that if you face problems after the update. Follow these steps to uninstall your recent windows update.
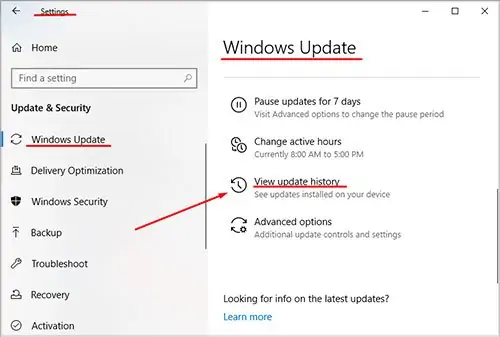
- Press the Windows + I key.
- Click on Update and Security.
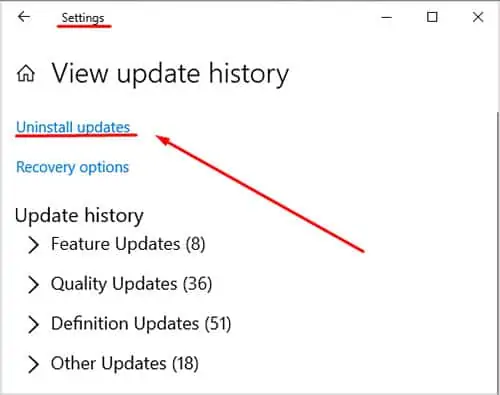
- Click on Windows update. Then click on Update history.

- Scroll down to Uninstall Updates.

This will open a new dialog box that contains records of all your updates. Uninstall the most recent update. Restart your computer after the uninstall is complete.
Start Your Windows in Safe Mode
In safe mode, most of your devices and drivers won’t run except for some basic ones like display drivers, and mouse drivers. These device functions are disabled so that we know these basic drivers are performing properly.
Starting your device in safe mode and again restarting in normal mode can solve your start menu problem. To start your computer in safe mode, you can follow these steps.
For Windows 10,
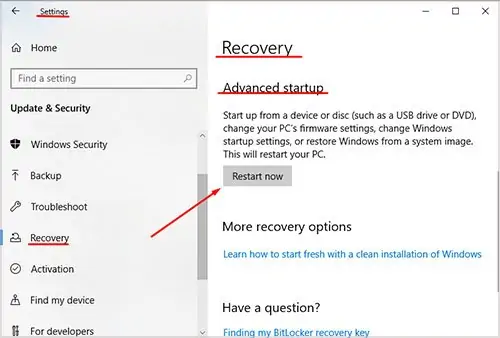
- Press the Windows + I key.
- Click on Update and Security, then click on Recovery.
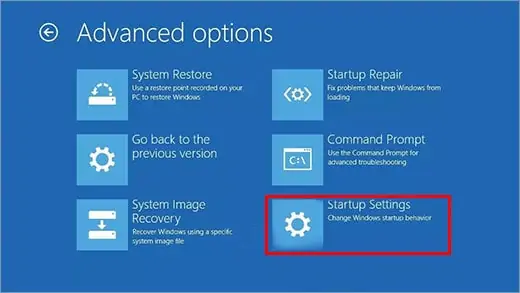
- On Advanced Startup click on Restart Now.

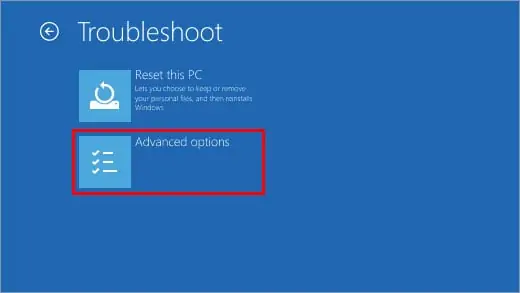
- When your PC restarts, select Troubleshooter.
- Select Advanced Option

- Select Startup Settings. Then, click on Restart.

- When your computer restarts, you will see multiple options for safe mode. Press F5 to start safe mode with the internet.
Restarting your computer again will take you back to normal windows.
For Windows 11,
- Press the Windows + I key.
- Click on System, then scroll down to Recovery.
After this, you can follow the Windows 10 steps from number 3.
For some reason, if you cannot enter the Settings, you can follow these steps.
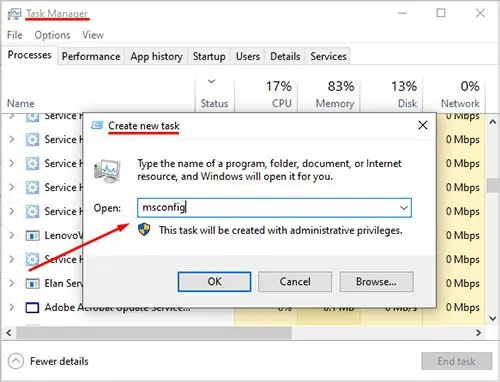
- Press Ctrl+Shift+Esc to enter task manager.
- Click on Files, then Run new task.
- Type “msconfig” and click ok.

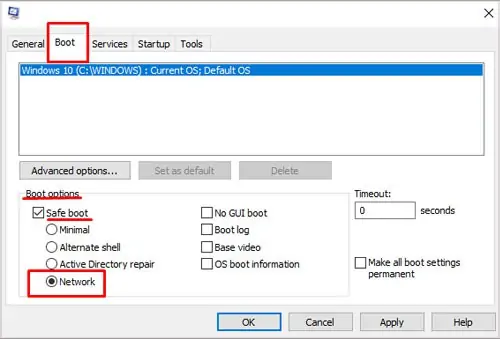
- Click on Boot, then tick the safeboot checkbox.
- Under safeboot checkbox, tick mark Network.

- Press Apply, then Ok.
- Restart your computer to enter safe mode.
To exit safe mode, you can follow the above step till number 4. Remove the checkmark from the Safe boot checkbox and restart your computer.
Creating a New User
Sometimes your account may face problems with an existing account. These problems include unresponsive search icons and start menu issues. Creating a new account can solve these issues. To create a new admin account, you can follow these steps.
- Open PowerShell as an administrator. (check above “Re-install your start menu”).
- Now, type net user yourname yourpassword /add after ‘C:/windows/System32>’, then press enter. Example: net user ruby ruby123 /add

- Restart your computer
You will see that the new user is created. Log in to the user to see if your start menu problem is fixed.
Reset Your Windows
You can try this final you do if nothing is working.
For Windows 10:
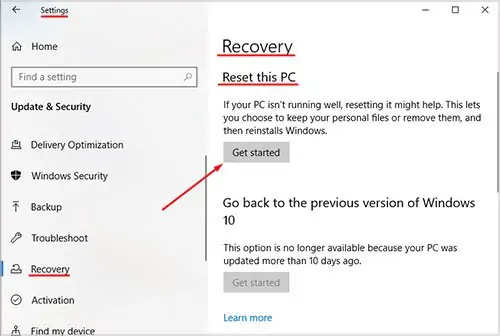
- Press the Windows + I key.
- Click on Update and Security, then click on Recovery.
- Under Reset this PC, click on get started.

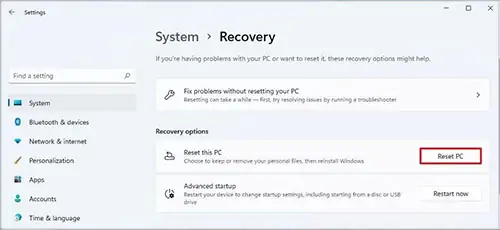
For Windows 11:
- Press the Windows + I key.
- Click on System, then scroll down to Recovery.
- On Reset this PC, click on Reset PC

You can view an option to keep or remove your files. You can choose to remove the files if you have backed up your storage.
After the reset is complete, try to install your application one at a time to figure out which application causes the start menu error.

