Sticky keys on a laptop is a common problem that occurs when the key actuation mechanism gets blocked. This mainly happens when dust and grime accumulate underneath the keycaps.
Sticky keys can lead to ghosting issues that can cause simultaneous multi-keypresses to not register. It can also cause issues like duplicate keystrokes or problems that can render the keys useless.
Luckily, if the keyboard is registering keypresses, you can solve this issue at home with minimal tools. However, you need to perform some careful maneuvering to remove the keycaps.
Step 1: Turn off Your Device
The first step is to turn off your laptop and remove any peripherals attached to it. This ensures that any attached peripherals cause no obstruction during the cleaning process.
- Save and close the running programs.
- Unplug any peripherals like a mouse, charger, or headphone attached to your laptop.
- Press the Start button to open the Start menu.
- Press on the Power symbol and select the Shut down option to turn off your device.

Step 2: Clean Dust and Dirt
After you have completely turned off your system, inspect the keyboard and check if there are any loose dirt particle deposits below the keycaps. If the gap between the key and the actuating mechanism is small, even a tiny amount of settled dirt can cause the keys to stick. So, here’s how you can clean off the dust and debris from the keyboard.
- Prop your laptop with the keyboard facing at an angle.
- Gently shake the laptop until loose dirt and debris fall off from under the keycaps.
- To dislodge stubborn or ingrained particles, use a soft brush and gently clean the dirty area. You may need help from another person to hold the laptop.

- After finishing, place the laptop on a flat surface and wipe it clean with a soft cloth.
Step 3: Use Compressed Air
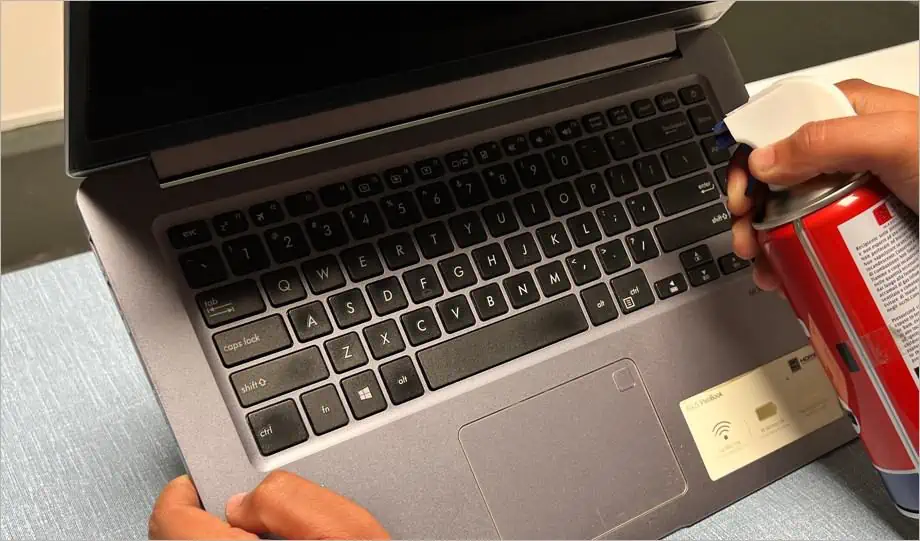
If the problem still persists after removing the dirt and dust, you will need to clean the keyboard more thoroughly using a can of compressed air. This method is useful for removing dust and debris from tight spaces where contact solutions cannot be used.
- Tilt your laptop at an angle where the keyboard is slanted.
- Place the nozzle of the canned air at a distance of around 3 inches and press the trigger.

- Always spray in short bursts and shake your laptop after spraying to loosen up the foreign particles.
- If condensation forms, let your laptop dry until the solvent disappears, and then turn it on.
If cleaning the keyboard using compressed air does not work, you will need to remove the keycaps and thoroughly clean the inner keyboard mechanism.
Step 4: Remove the Keycaps
If the sticky key issue is a result of seeped-in liquid or some other mechanical problems, you may need to remove the keycap from the keyboard.
As the caps are rather thin and break easily, you may need to refer to the user manual or your product’s support website. They include detailed instructions on how to remove and reattach the keycap safely without the risk of breaking or damaging it.
Here’re the steps for the rubber dome type keys.
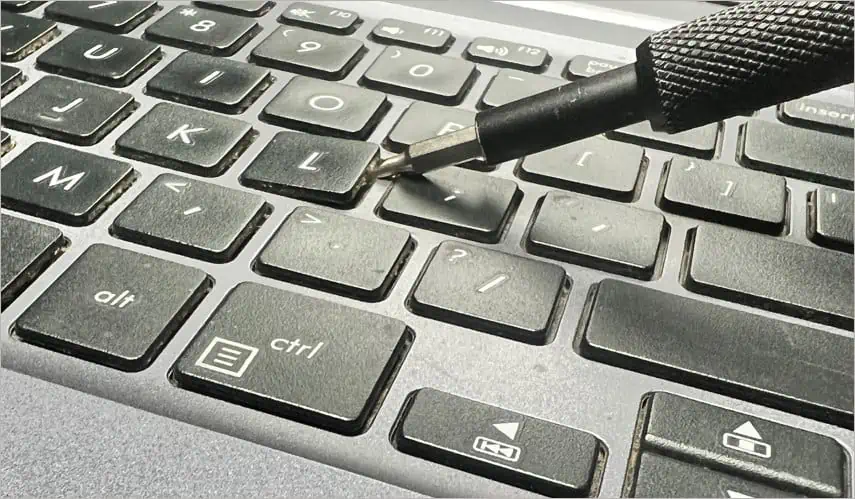
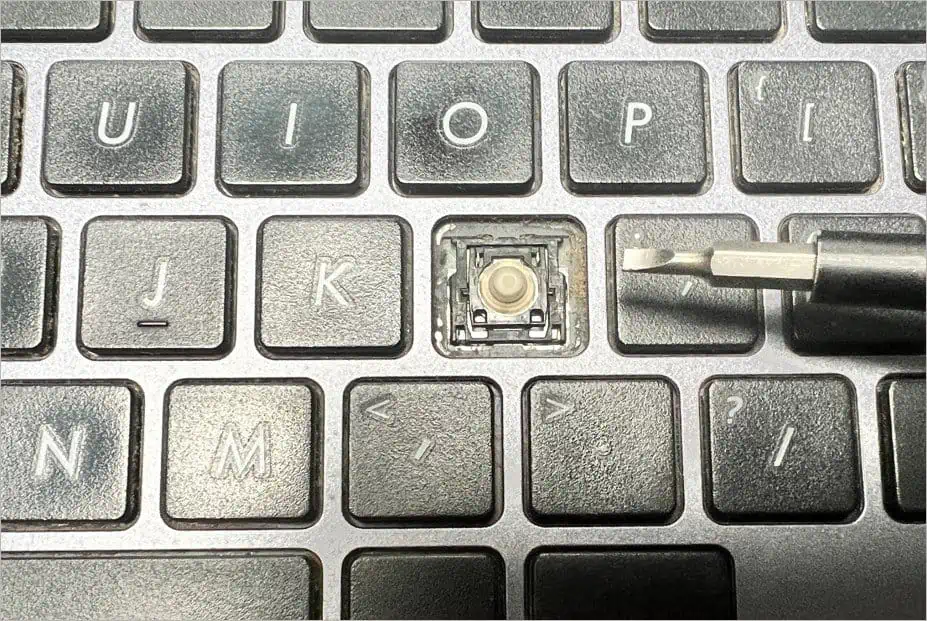
- Use a flathead screwdriver or a thin pry tool and place it between the gaps of the keycap.

- Do not insert the pry tool deep and underneath the retainer clip as it can break the retainer clip.
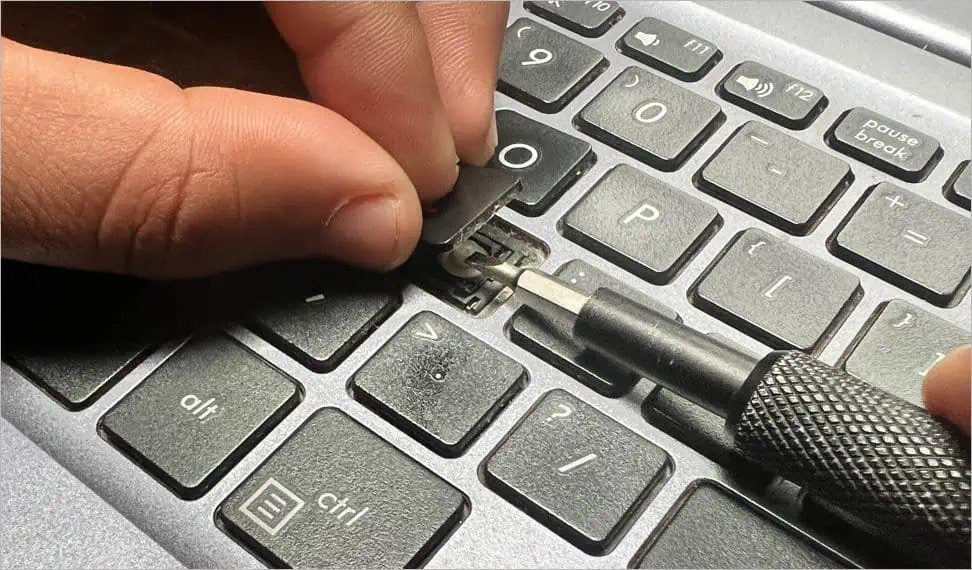
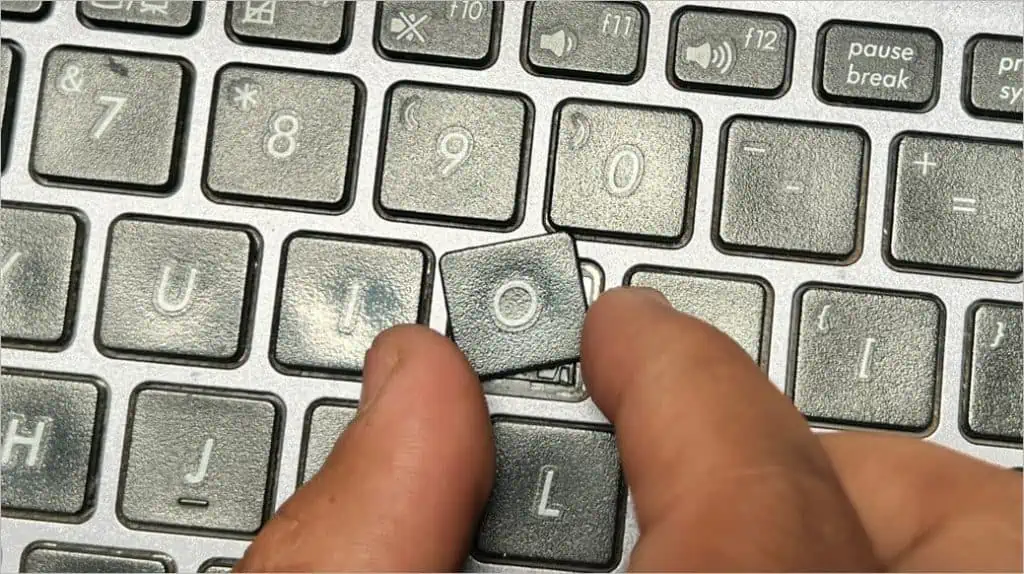
- Gently lift the keycap and hold it using your finger.
- Now, with the help of the pry tool or the screwdriver, push the retainer clip down to remove the keycap.

- For larger keys such as Shift, Enter and Spacebar, you will need to unlatch multiple retainer clips and hinges.
- If you need to remove the retainer clip as well, unlatch the plastic clip from the metal hooks and pry it off.

Step 5: Clean/Repair Clip Retainers
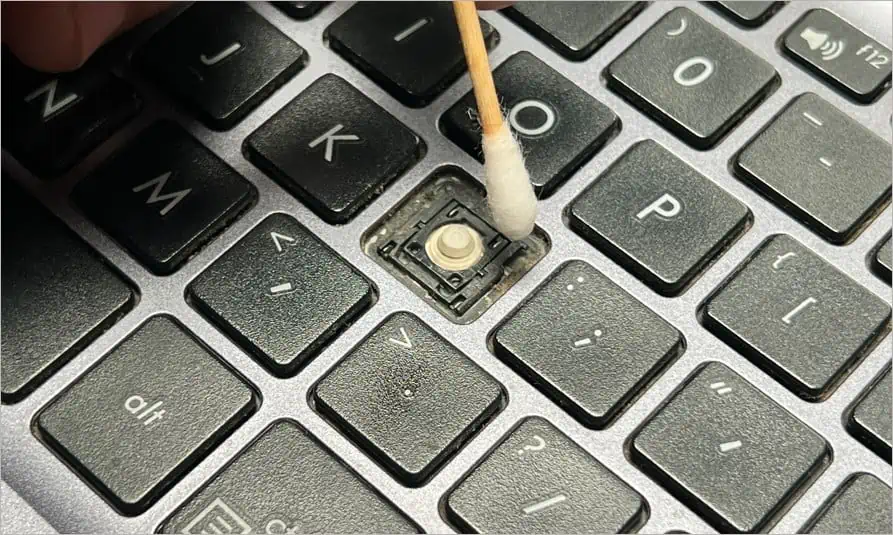
After you remove the keycaps, check if the actuating mechanism has any damage, dislodged parts, or corroded hinges. You will also need to clean off any dirt and grime present on the retainer clip and the surrounding areas. Use liquid cleaners such as Isopropyl Alcohol 70% (IPA) or electronic-safe solvents to remove dirt and dust particles.
- Dip a soft piece of cloth or a Q-tip in the contact solution and gently wipe the surface around the keys.

- After a thorough cleaning, let the contact solution dry off completely and then check if the keyboard works properly.
- If needed, replace the components and re-align any dislodged pieces.
- After aligning, place the retainer clip and latch it onto the metal hinges.

- After placing the plastic retainer, align the keycap properly on top of the retainer.

- Gently push it in to latch the keycap back into place.

