The CPU chip, as time progresses, will not be able to perform a task as efficiently as it used to. An older chip will have difficulty processing the data due to modern software and applications demanding more computing power, or the OS taking a lot of resources.
Moreover, an overheated processor, dusty heat sink, or multiple heavy applications running in the background are also some of the reasons your CPU does not give the desired performance.
In this article, we have gathered a few techniques to increase your CPU performance. However, let us look at why your CPU is performing poorly.
What Causes Poor CPU Performance?
One particular reason you might see a gradual performance drop is due to dust settled on the heat sink. The CPU heat sink is responsible for absorbing the heat generated from the CPU. The CPU cooler then cools down the heat sink by blowing air into its compartment.
Therefore, if you notice any performance dip, check if your heatsink has collected any dust. Besides this, here are a few reasons your CPU performance decreases.
- High CPU usage
- Dried Thermal Paste
- Dust Settled on the heat sink
- Low CPU fan RPM
- Low CPU capacity
- Computer with no dedicated GPU
How to Increase CPU Performance?
Depending on the causes mentioned above, let us discuss how you can increase your CPU performance.
Enable High-Performance Mode
In a computer without a dedicated GPU, your CPU handles unnecessary graphic processing tasks, such as animation, thumbnail icons, and smoothing the window’s edges. Disabling these visual effects will give a slight performance boost to your system.
In terms of gaming, you will also get an FPS Boost when you adjust your PC for high performance.
- Press the Windows + I key to open Settings.
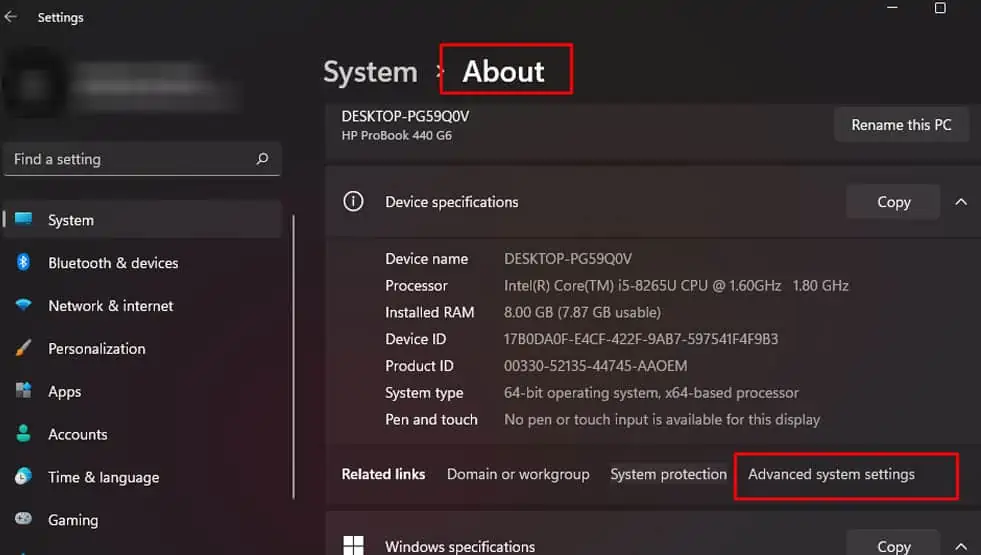
- Go to System > About.
- Here, click on Advanced System Settings.

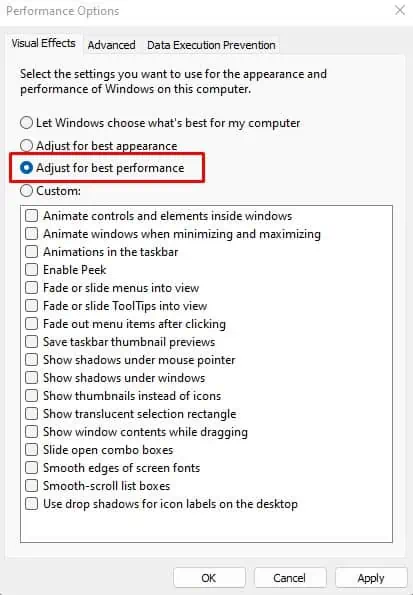
- Make sure that you are in the Advanced tab. Under Performance, click on Settings.
- On the Visual Effects tab, click on Adjust for best performance. For some users, your computer’s UI might feel a little off. If so, you can enable or disable the features according to your choice.

- Click Apply, then OK.
Change Processor Power Management Settings
If you are running an Intel chip, lowering the maximum power processor state to 99% can improve your CPU performance at a lower temperature. When you have set the maximum power processor to 100%, the processor will use all its resources, consuming more power and causing the CPU temperature to rise. And thus, the processor will start thermal throttling, decreasing its performance.
On 99%, the CPU fan will not spin at a high RPM and will not have an extreme temperature. So, the CPU will perform better with lower temperatures.
- Press the Windows + R key to open Run.
- Type
powercfg.cpland press Enter to open Power Options. - Click on Change plan settings on the selected plan.
- Click on Change advanced power settings.
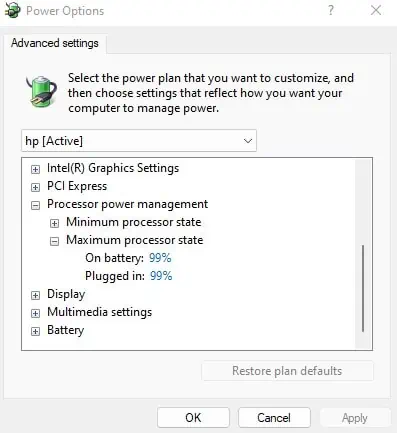
- Expand Processor power management, and then expand Maximum Processor state.
- Set On battery and Plugged in at 99%.

End Background And Startup Application
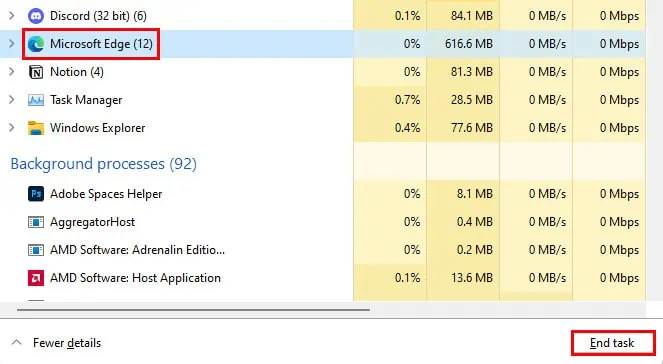
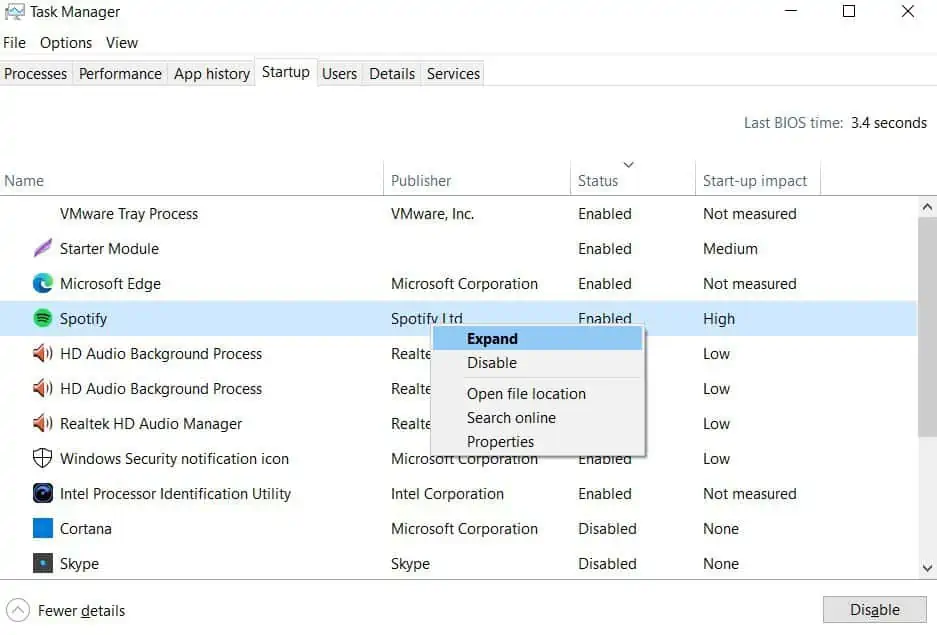
Multiple applications may run in the background right from the start when you turn on the computer. These applications will take resources, resulting in low computer performance. Therefore, it is best that you end any unnecessary background applications and disable the application that starts automatically during startup using the Task Manager.
Below are the steps to end background processes and disable the startup application.
- Press Ctrl + Shift + Esc simultaneously to open the Task Manager.
- Click on More details if the window just shows the list of running applications.
- Under Background processes, click on the application that takes a lot of CPU resources. Now, click End task.

- Now, Go to the Startup tab.
- Right-click on the application with Startup impact as high or low, and disable it.

Change Thermal Paste
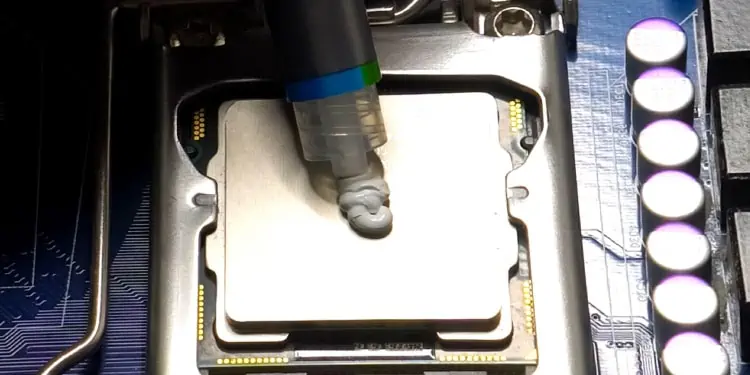
A CPU with a dried-up thermal paste does a bad job dissipating heat to the heat sink. This results in a rise in the CPU’s temperature.
Once the CPU’s temperature reaches a certain temperature, it lowers the performance to prevent itself from any damage due to extreme heat. This is called thermal throttling. So, if you find that your CPU is not performing as it used to, try changing the thermal paste.
Clean the Heat Sink And the Fan
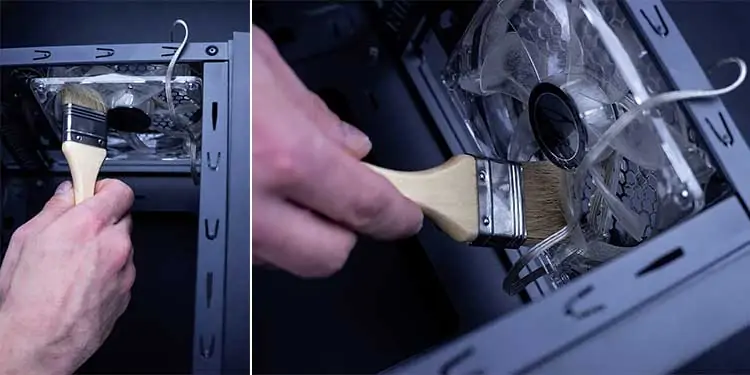
The dust settled on the heat sink traps heat, and the cooling fan won’t be able to cool it down. Moreover, when the CPU cooling fan’s RPM also decreases when dust gets settled on its blades.
Once dust enters the compartments of the heat sink and the fan, it does a poor job of cooling down the PC. And as discussed above, the CPU will start to thermal throttle.
Use a can of compressed air to clean your CPU heat sink and the cooling fan.
Overclock the CPU
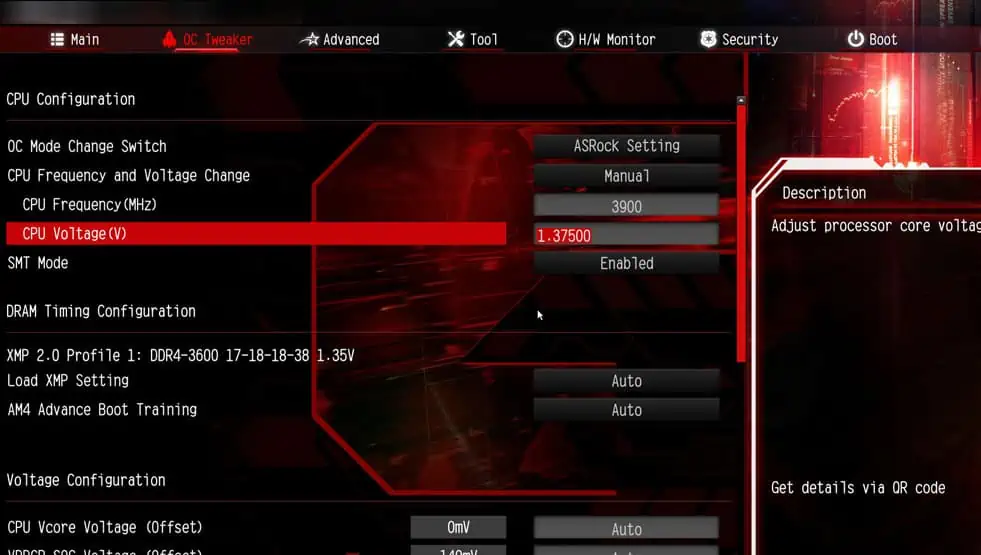
Overclocking a CPU improves its clock speed and makes it run at a higher speed than originally intended. This will result in overall improved computer performance and increased FPS in games.
When you overclock your CPU, you simultaneously increase its clock speed, and voltage supplied to it until the system becomes unstable. Let’s call this an unstable point. Once it is unstable, it turns off. And now you set the clock speed and voltage below this unstable point.
However, one disadvantage to overclocking could be that the CPU will run hotter and the CPU fans will spin at a higher RPM creating some noise.
Upgrade PC Components
If you have a higher-end CPU paired with poor-performing hardware components such as the RAM or the GPU, you will not be able to utilize the entire CPU’s performance. This is called a bottleneck.
When your CPU suffers from a bottleneck, it cannot reach its potential due to poor-performing hardware components. Upgrading these components will make your CPU perform better if it suffers from a bottleneck.

