One of the major reasons for your laptop’s performance drop is low-capacity RAM. The more memory you have, the better you can multitask and large applications can also run smoother.
You might have already tried to free up RAM space, reduce its usage, or even increase the Virtual memory. However, all these approaches are not going to physically increase your memory. The only possible way is to get a new RAM stick.
Step 1: Check Laptop Compatibility
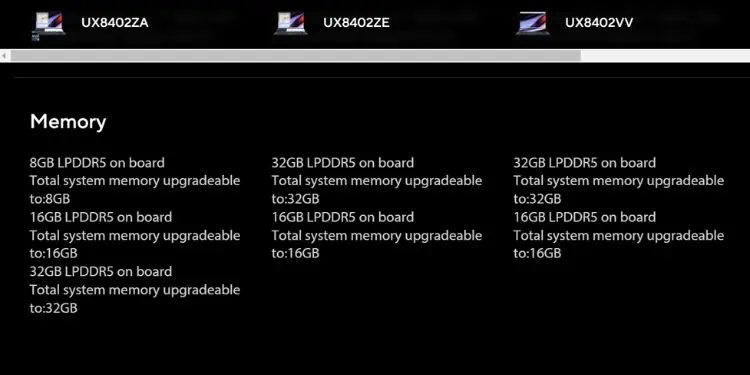
First things first, not all laptops support RAM upgrades. If your device has onboard memory (soldered into the motherboard) and there are no additional slots, it’s very likely that you can’t increase your RAM. However, some models with onboard RAM provide extra slots for upgrades.
It’s also essential to consider the appropriate DDR generation, maximum capacity, and frequency that your laptop supports. All of these specs are clearly mentioned in the user manual or you can view them from the manufacturer’s online specifications page.
Moreover, your OS also plays a vital role during RAM upgrades or replacements. If you’re running a 32-bit system, you should consider getting a single 4 GB module or two 2 GB sticks. But if it’s a 64-bit system like Windows 11, you can upgrade it to the maximum specifications of your laptop.
Contrary to what many people think, you can use two or more memory modules from different brands. As long as you use the correct form factor (usually SO-DIMM, but might be different on some laptops), generation (DDR3, DDR4, or DDR5) and speed, it is regarded as safe.
Since every module is built differently, manufacturers might be using different components (memory controller, materials, PCBs, etc.). Also, voltage, frequency, and latency mismatches could cause conflicts if you try customizing them. In fact, many users have complained about facing booting issues and crashes. That’s the reason most professionals recommend using sticks from the same brand.
Step 2: Get a New RAM Stick or Kit
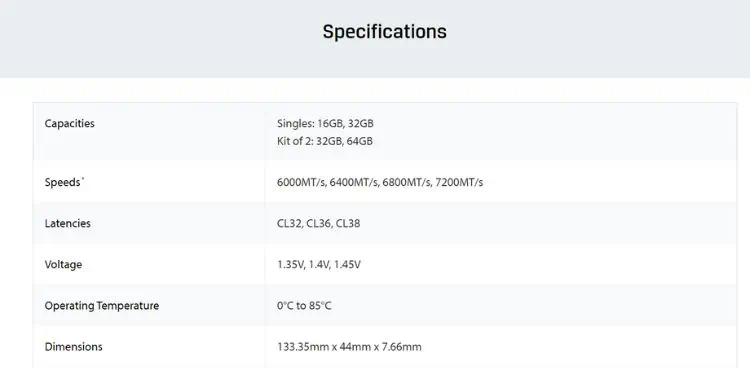
Considering the above specifications, you can proceed to get a new memory module. If your laptop supports single-channel RAM, the only option is to upgrade it with one with a higher capacity. Also, if you already have two sticks installed, you may purchase a RAM kit (two modules with the same memory batch, which is indeed the best match!).
However, if you only have one RAM and wish to add an extra module in the second channel, you’ll need to ensure they are compatible with each other. For this purpose, you can simply look up your primary stick’s specifications online and get a similar module.
When getting a new RAM stick or a kit, make sure you purchase trusted brands, like Kingson, Corsair, and Samsung.
Note: Some RAM manufacturers, like Kingston, allow you to search for compatible memory for your laptop and even offer a dedicated page to know where to get them based on your location.
Step 3: Shut Down & Open Bottom Panel
After getting the compatible RAM modules, you can finally start the upgrade. But even before that, you need to shut down your laptop properly and navigate to the RAM slot, which is usually underneath the bottom casing.
- First, close all the running programs.
- Press Alt + F4 to open the Shut Down Windows dialogue box.
- Ensure the Shut Down option is selected and hit Ok.

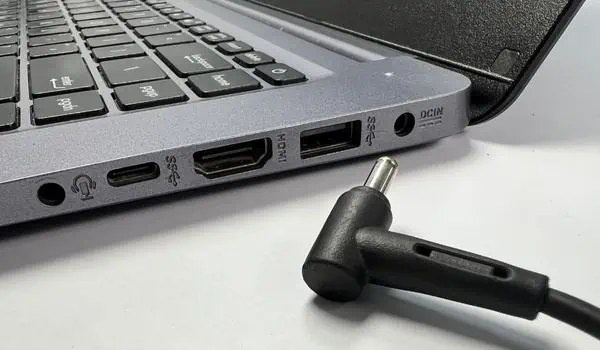
- Wait for your laptop to turn off completely. Then, start unplugging all the external peripherals along with its charger.

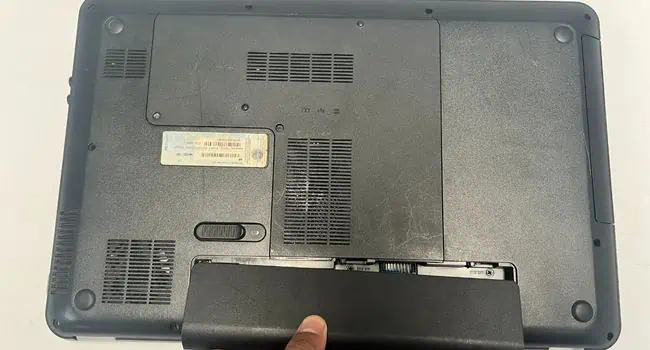
- If the notebook computer supports an external battery, remove it from the slot. The process might vary based on your laptop model. In most, all you require is sliding the switch and the battery should pop out.

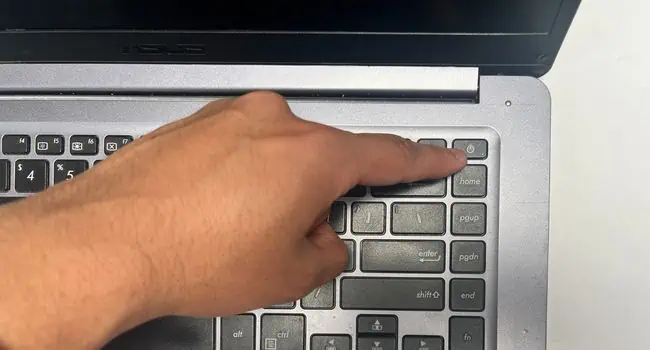
- Now, press and hold the power button for at least 10 seconds. This should discharge the remaining residual power from the laptop.

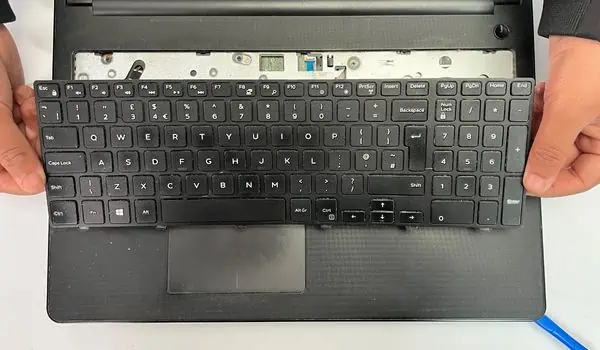
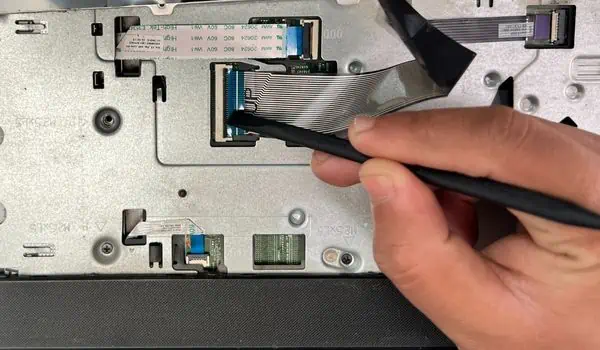
- Some older laptop models require opening up the keyboard panel and disconnecting the ribbon cable first. Otherwise, you won’t be able to remove the bottom panel.

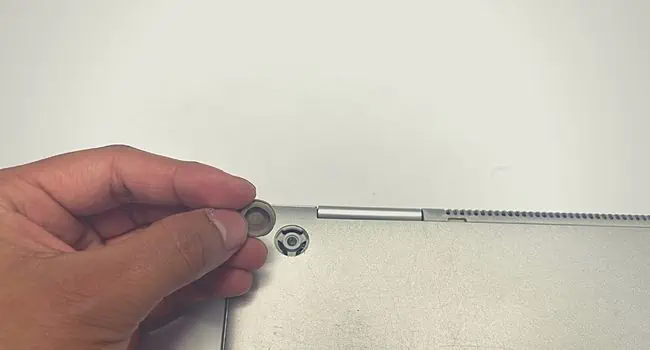
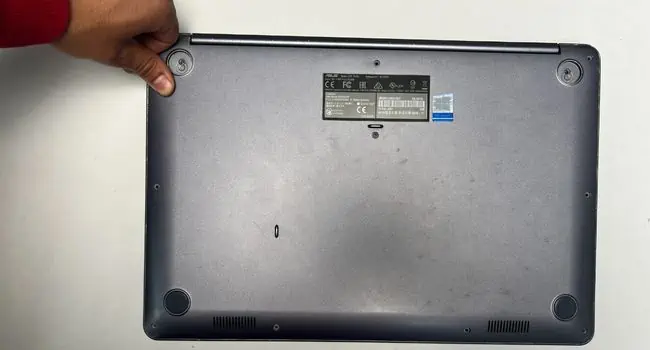
- Navigate to the back panel and start loosening the screws using the correct bit-size screwdriver.

In some laptops, they are hidden under rubber pads. So, you need to first pluck them off.
- Make sure you place the screws safely in a magnetic tray or mat.

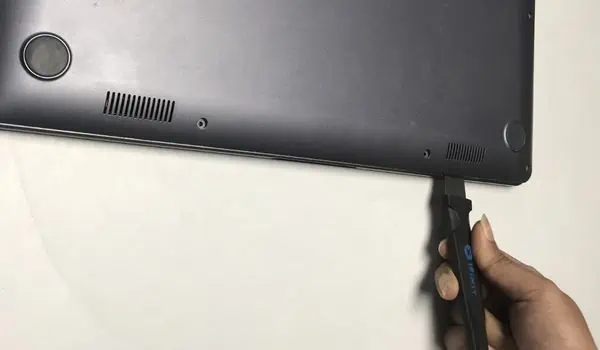
- Next, insert a flat-head tool or a plastic spudger inside the casing. Take extra care while doing so as this might cause scratches on the surface or inside of the casing.

- Then, pry out the bottom panel by applying little pressure upwards. Do this carefully ensuring you do not break any locks that hold the casing in place.

Note: Some older laptops have a dedicated section for your hard drive and RAM. If that’s the case, you do not require prying out the bottom panel. Instead, just open up the dedicated section to get to the RAM slot.
Step 4: Locate Slot and Remove Old RAM Modules
Once you’ve opened the bottom panel, you can now remove the presently installed module from its dedicated slot. But there are certain things to consider before doing that, and here’s a detailed guide on it.
Important: Before touching any internal component inside the laptop, make sure you ground yourself to prevent ESD to cause damage. You can do this by wearing an anti-static wrist wrap or touching a grounded metal object when operating the laptop.
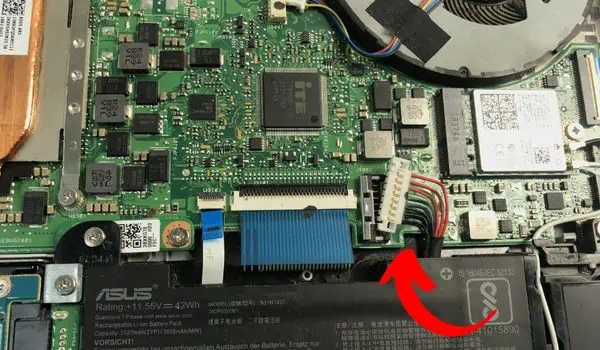
- Start by disconnecting the battery cable (if your laptop has an internal battery). It is located right above the battery. You can use a spudger or a screwdriver to carefully unseat it from the port.

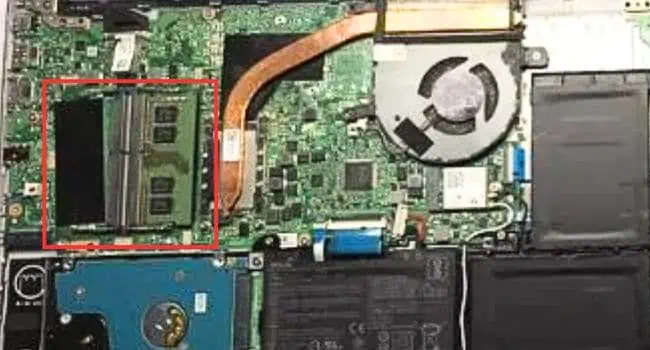
- Now, locate the RAM slot(s) on your notebook computer. The position varies for different models. So, you need to either locate it manually or look it up in the user manual.

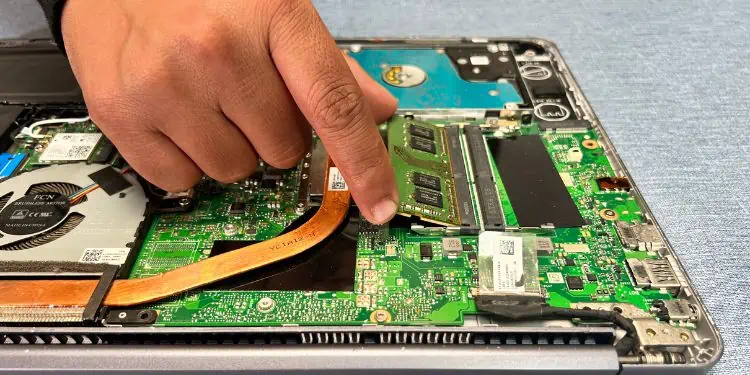
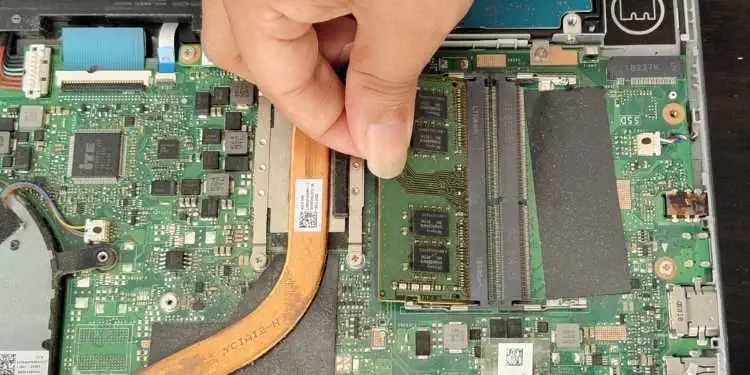
- Next, you should find two levers or tabs that keep the RAM stick seated securely. Use your fingers to push them outwards, which eventually pops the module out of its place.

- Then, hold the stick from the edges ensuring you do not touch the contact pins, and carefully pull it out of its slot.

- Repeat the steps if your laptop has another RAM installed. In some high-end devices, you might even find more than two.
- After removing all the memory modules, ensure you keep them safe in an anti-static bag to prevent them from ESD.
Step 5: New RAM Installation
Now that the old RAM sticks are removed, you can now proceed to install the new modules. But you need to know that your laptop’s inner section builds up dust and debris if you haven’t cleaned it before. Therefore, before the installation, we recommend cleaning the slots well.
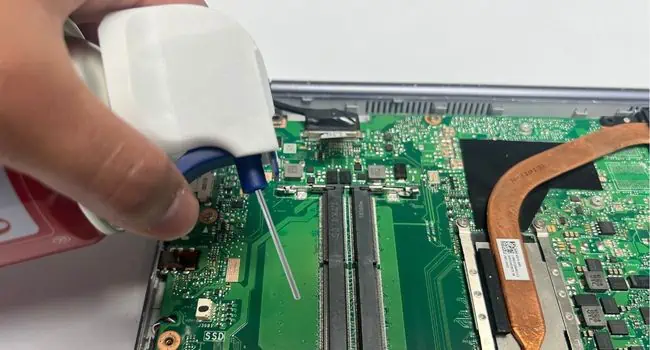
- Before anything else, use a can of compressed air to blow out dust particles from the RAM slots.

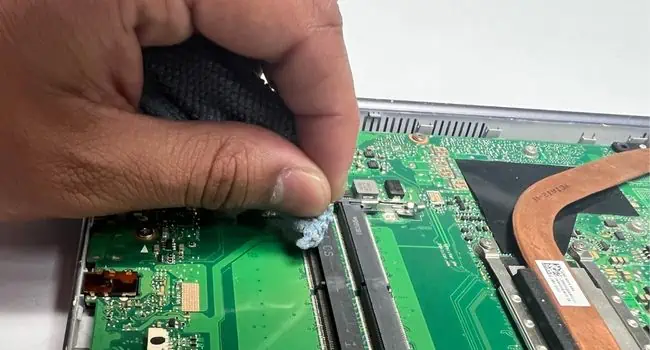
- You can even utilize a lint-free microfiber towel (dipped in a small amount of Isopropyl Alcohol) to clean the surface.

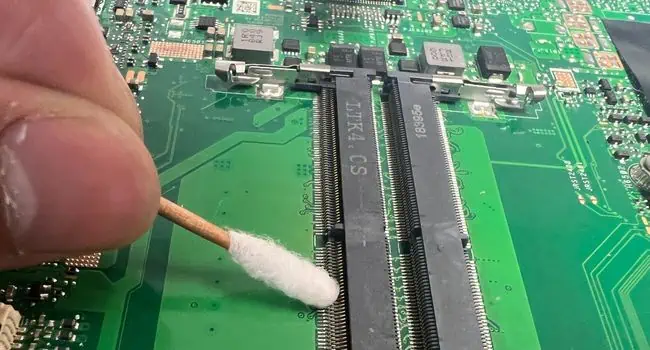
- Also, consider cleaning the notch, tabs, contacts, and retention clips. You can use a Q-tip for this purpose.

- Once your RAM slots are deeply cleaned, unpackage the modules in succession.
- As before, hold the stick from the sides and first check the alignment.

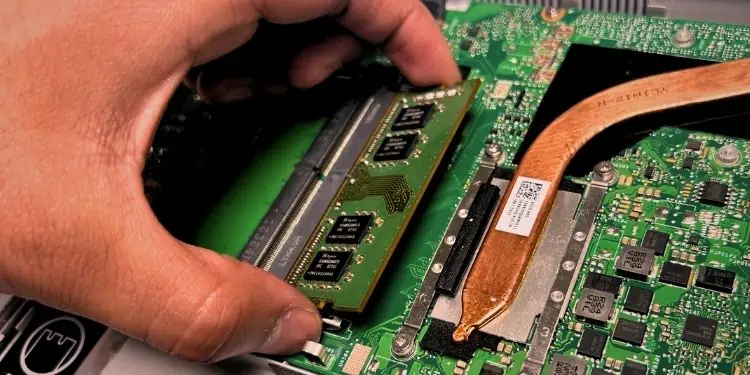
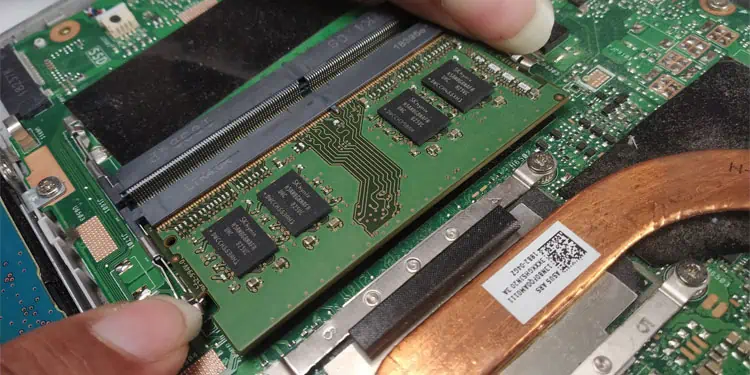
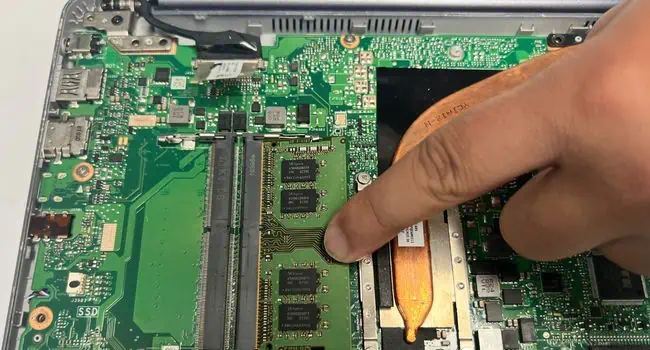
- Now, carefully seat the module in its slot.
- Then, push the stick downwards with a little pressure until the tabs snaps and holds it in place. You should hear a click sound to confirm it has been seated properly.

- Along with that, we also recommend wiggling the stick to confirm it isn’t loose. Otherwise, you’ll have to reseat the module as it might cause booting issues later.
- Repeat the steps if you are going to install two or more modules.
Step 6: Close Bottom Panel & Start Laptop
The next step is to reassemble your laptop parts. You need to reattach the internal battery cables, close the casing, reinsert the external battery (if available), and finally start your device:
- Reconnect the internal battery cable, ensuring proper alignment.
- Now, place the bottom panel back in place aligning the locks.
- Start pressing every corner with little pressure to ensure the casing is securely placed.

- Then, tighten all the screws the way they were placed before. Do not confuse the longer ones with the shorter screws.
- Place back the rubber pads (if available).
- Also, reconnect the keyboard cable and put back the panel (if you had removed it earlier).

- If your laptop has an external battery, you need to now reinsert it into the dedicated compartment. Align the pins and push them down gently until you hear a clicking sound.

- Next, plug in the power adapter and start your laptop.
Step 7: Test Your RAM & System Performance
You’re just not done yet! After the installation, it’s essential to know whether the upgraded RAM is now detected by your system. In case you’re having issues, your system may encounter booting issues.
Also, consider checking the RAM speed, capacity, and latency to ensure you’re achieving what you have paid for. Navigate to Windows Task Manager and check all these parameters. You’ll also notice there’s quite an improvement as the active processes will only take a small percentage of the physical memory.
You might notice that your memory frequency is lower than advertised. If your laptop supports overclocking, you might want to turn on the XMP profile to achieve the best out of the RAM. But do this at your own risk as it will void your warranty and may cause overheating and stability problems.
Additionally, we recommend performing a stress test to ensure your memory is stable even after a heavy workload. To learn more, here’s a detailed guide on what you should do after installing or upgrading your memory module.

