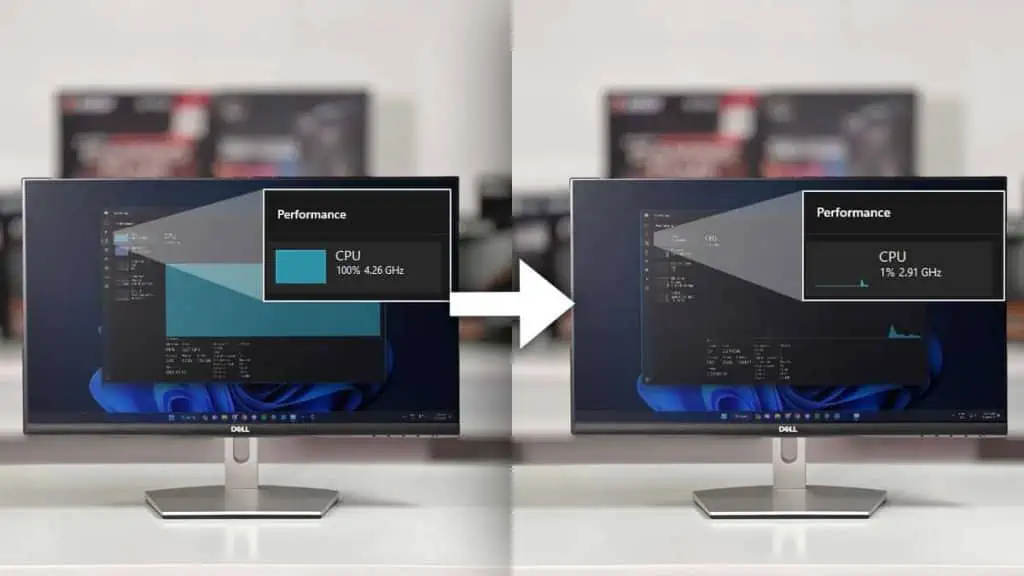
The best way to limit CPU usage is to run a limited number of processes. The more processes/applications an OS runs, the higher the CPU usage—resulting in a slow and choppy performance.
But if usage is high even when you don’t have many apps running, you can lower the CPU resources of that particular process by setting the process priority to low.
It is also possible to disable background apps or optimize OS performance to limit CPU usage.
Alright, now let’s check everything in detail!
Set Priority and Affinity
Lowering priority allows a process to use minimal system resources. On the other hand, setting affinity allows users to select the number of logical processors for that process.
Either way, it can help limit the CPU usage. But note that this also means the selected process runs slower.
- Press Ctrl + Shift + Esc to open the Task Manager.
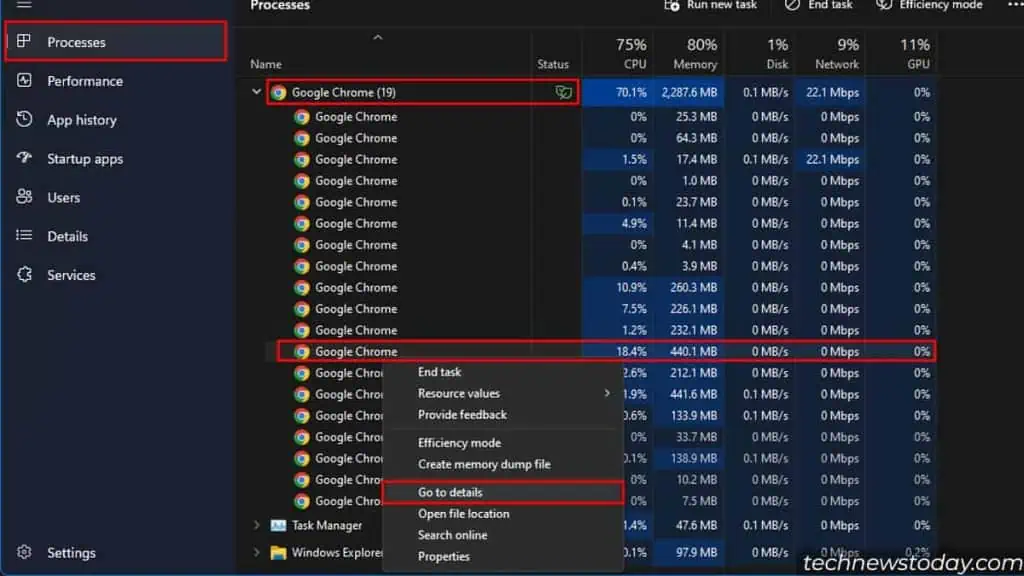
- Here, expand the application that is taking high CPU usage and right-click on it.
- Select Go to Details. You will now be prompted to the Details tab with a process highlighted.

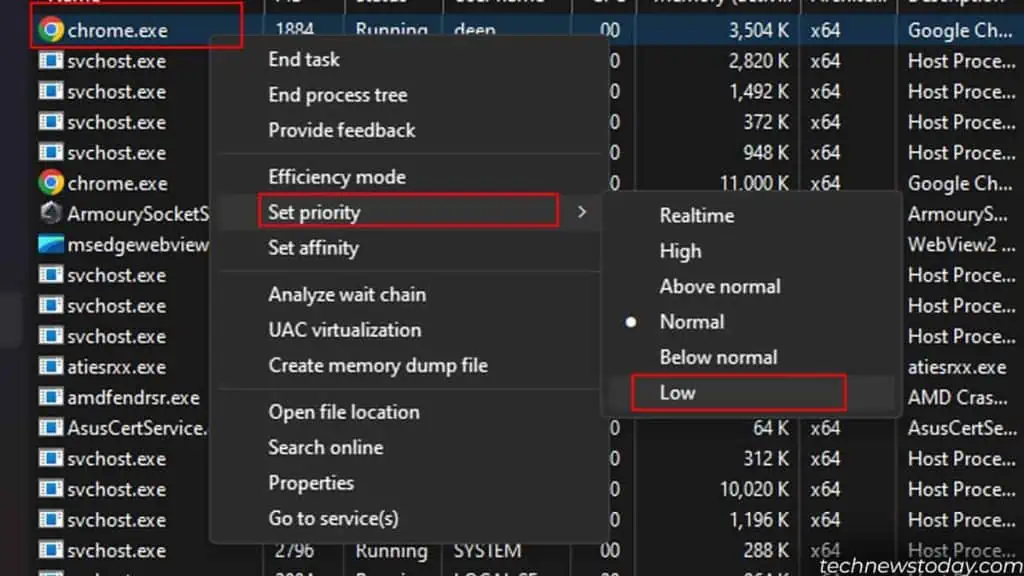
- Right-click on the highlighted process and set its priority to low.

- Again, right-click on the process and select Set Affinity.
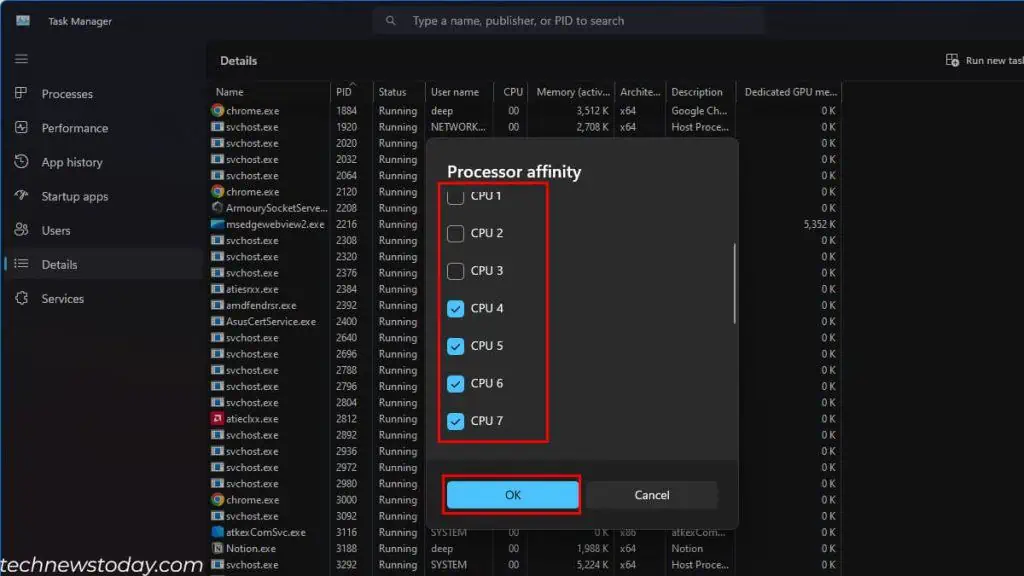
- Now, select the number of logical processors allowed to run the said process.

- Click on OK.
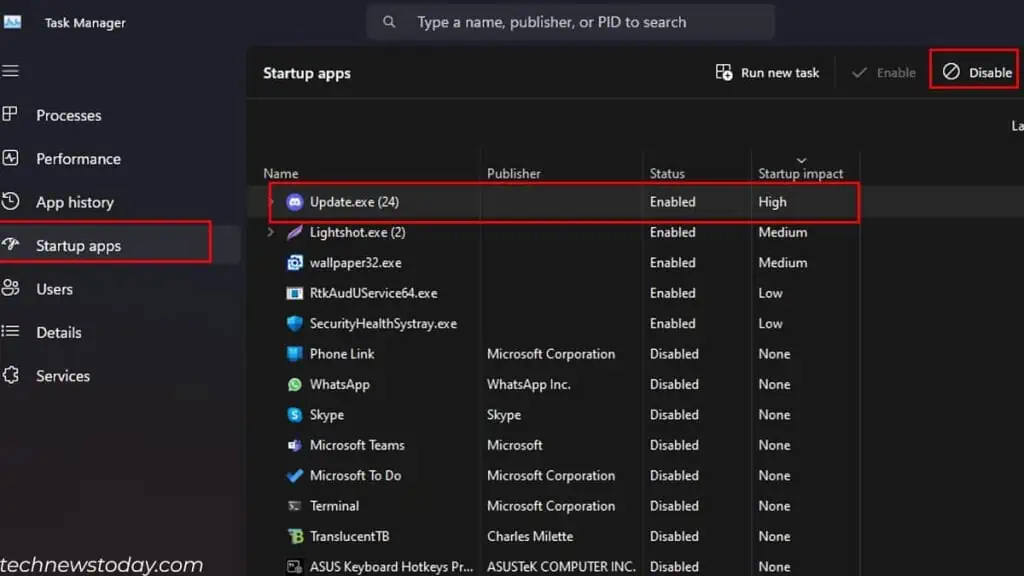
Disable Startup Apps
Your system might have a bunch of applications that run when you boot into the OS. These can hog up the CPU resources, increasing the usage right from the start.
To avoid this, I recommend that you disable unnecessary startup applications.
- Open Task Manager and head over to Startup Apps.
- Right-click on each unnecessary application.
- Select Disabled and repeat the same for all.

Adjust Windows for Best Performance
Adjusting Visual Effects to get the best appearance consumes a considerable amount of system resources.
If you have used a similar setting, I recommend reducing the Windows Animations. Here’s how:
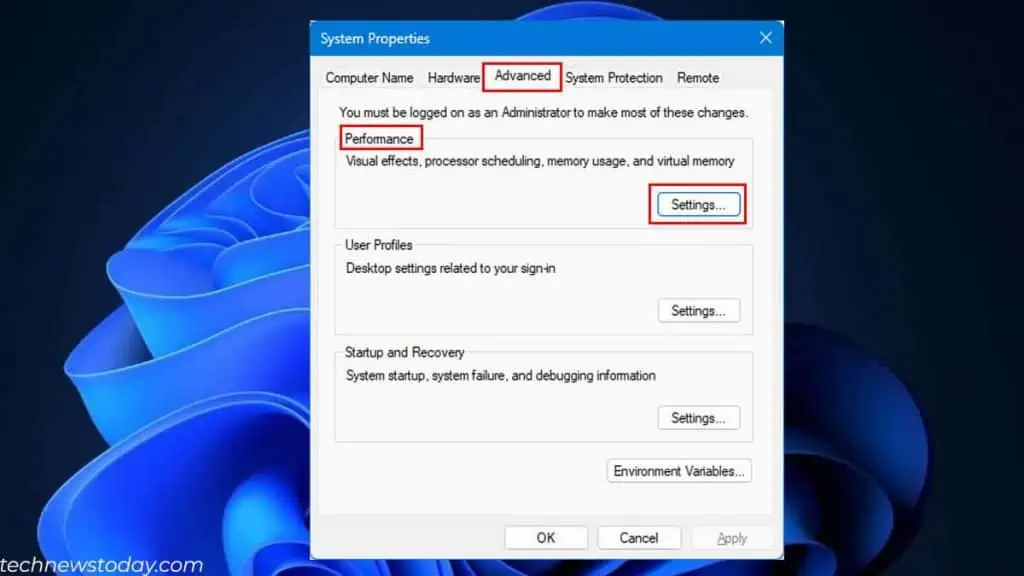
- Press the Windows + R key. Type
sysdm.cpland press Enter. - Click on the Advanced tab.
- Under Performance, select Settings.

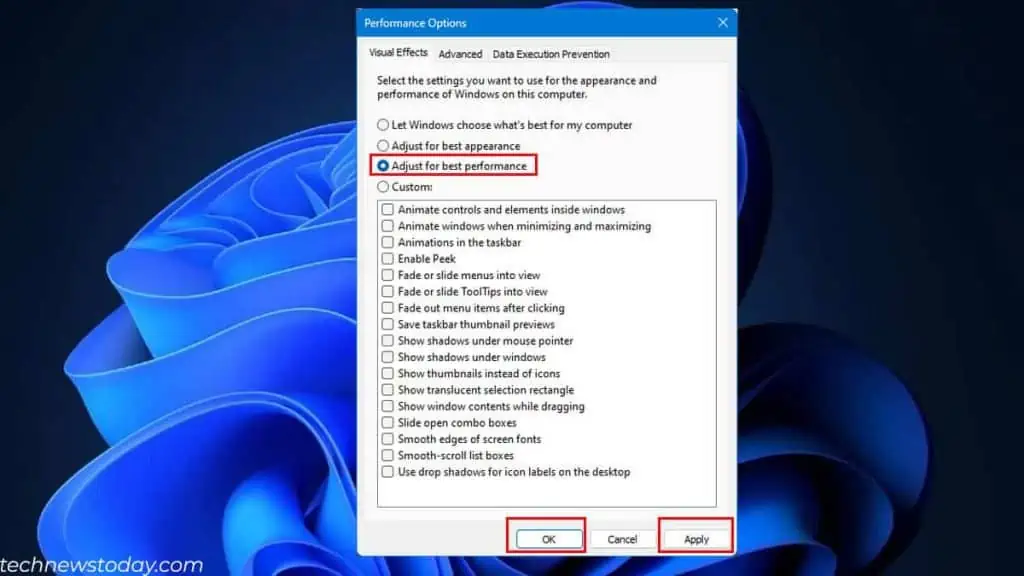
- Here, check Adjust for best performance. This will disable any Windows Animation.

- Alternatively, you can choose your option from the animation list.
- Now click on Apply, then OK.
- Again, select Apply.
Change Background App Permission
Background applications are another aspect that takes up significant system resources without your knowledge.
To disable the app from running in the background, you can change its advanced options.
I recommend changing permission, especially for third-party antivirus applications. These could randomly start in the background and scan your PC for suspicious files.
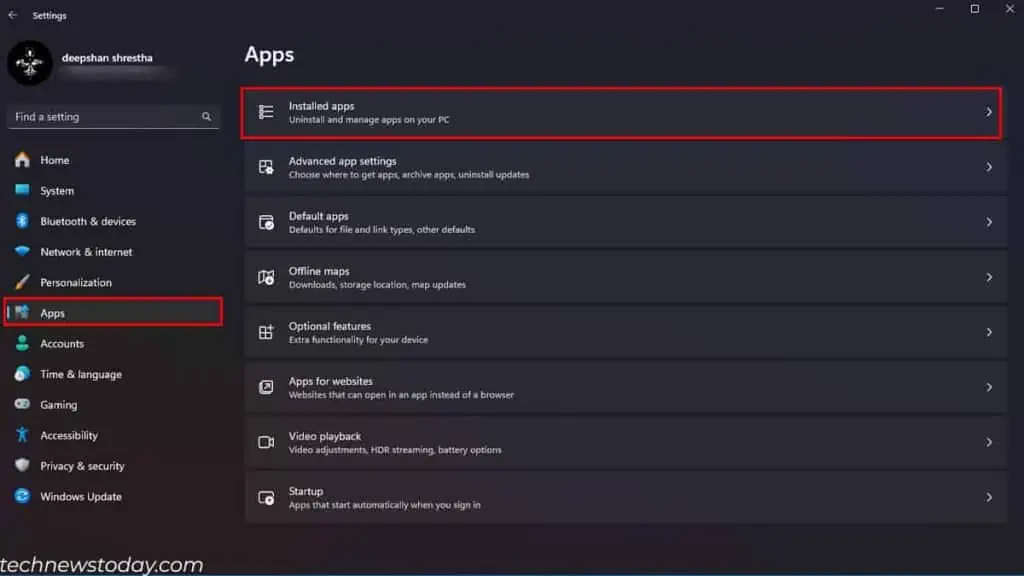
- Press the Windows + I key to open Settings.
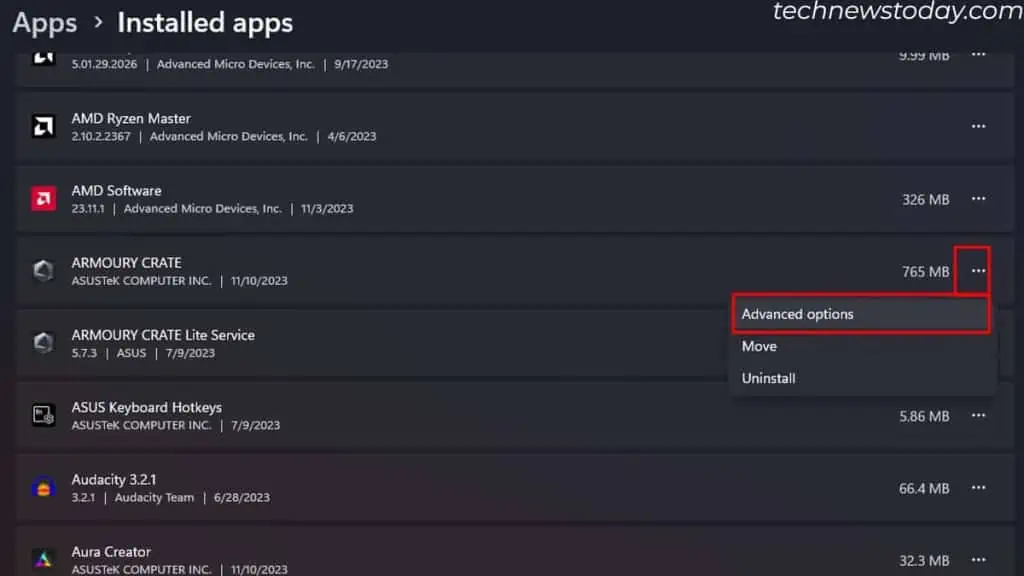
- Go to Apps > Installed Apps.

- From the list of installed applications, click on the three-dotted horizontal icon.
- Click on Advanced Options. Depending on the app, you may or may not see this option.

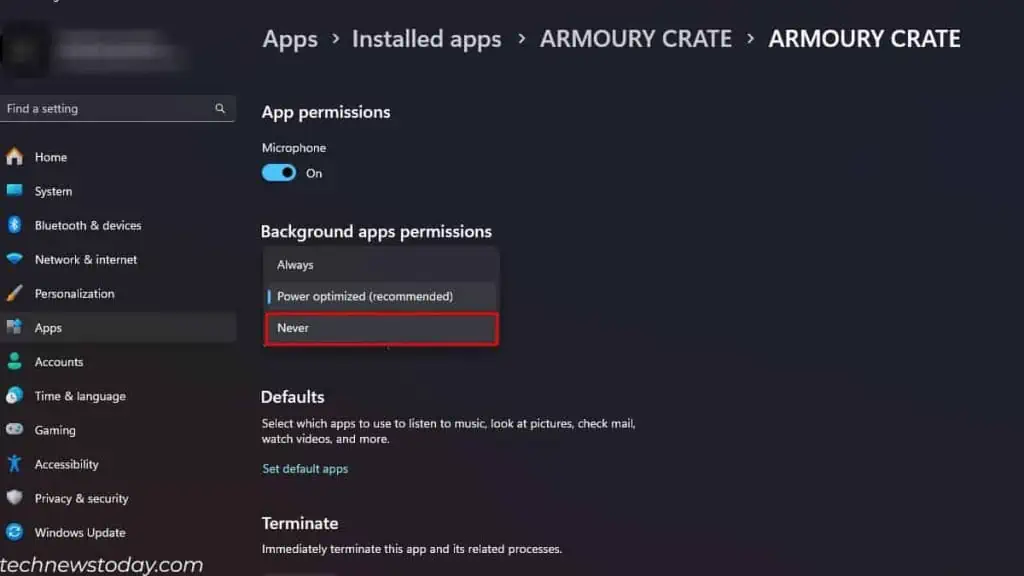
- Under Background apps permission, set Let this app run in the background to Never.

- Repeat the same steps for other applications in the list.
Pause Automatic Windows Update
As crucial as a Windows update is, the CPU usage could increase during the update.
Major Windows update contains numerous files that replace the current system files. Downloading and installing these files can cause high CPU usage.
This will drastically slow down your PC, especially if you have a slow CPU.
To avoid Windows updates from randomly hogging up the CPU resource, you can pause automatic Windows Update.
- Open Windows Settings.
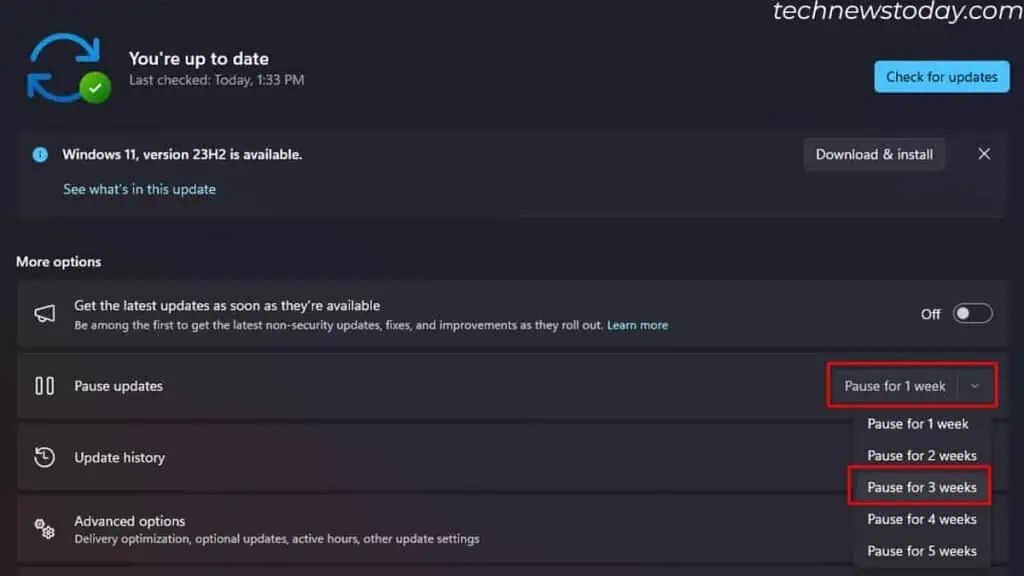
- Go to Windows Update.
- Set Pause Updates to a duration of your preference. I recommend setting it to 2 or 3 weeks.

Lower in-game settings

If your game lags constantly due to high CPU usage, the best option would be to lower in-game settings. In most cases, this should lower your CPU usage.
You can lower settings like draw distance, anti-aliasing, volumetric lighting, NPC (Non-Playable Character) population, physics, etc.
To lower your in-game settings, head over to Graphics, or Advanced display settings.
Scan Using Windows Defender
Malware and suspicious applications could be running in the background which is consuming a lot of CPU resources. This could especially happen if you download malicious files from the internet.
To make sure that this isn’t the case, you can scan your system using Windows Defender.
- Press the Windows + R key. Type
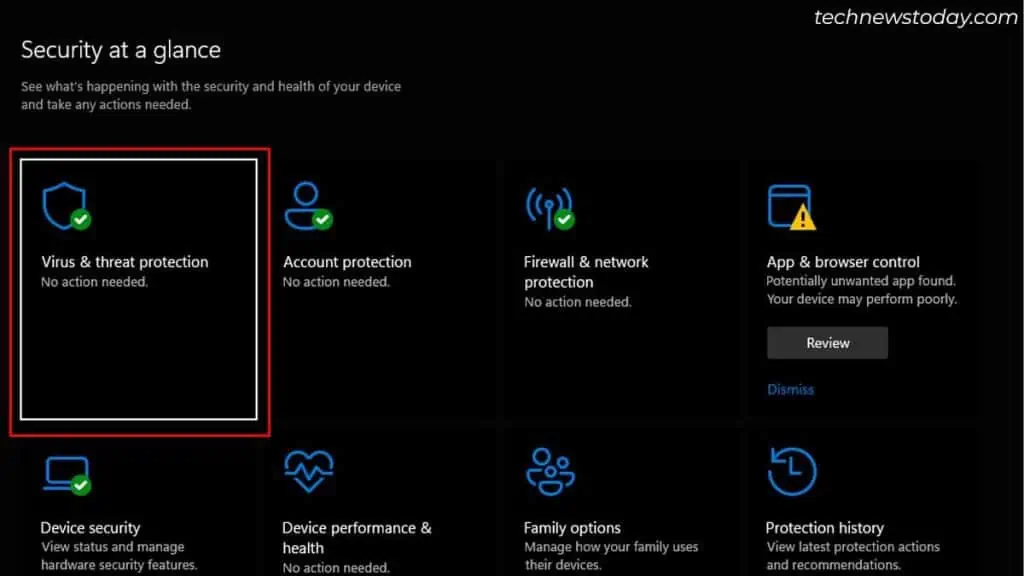
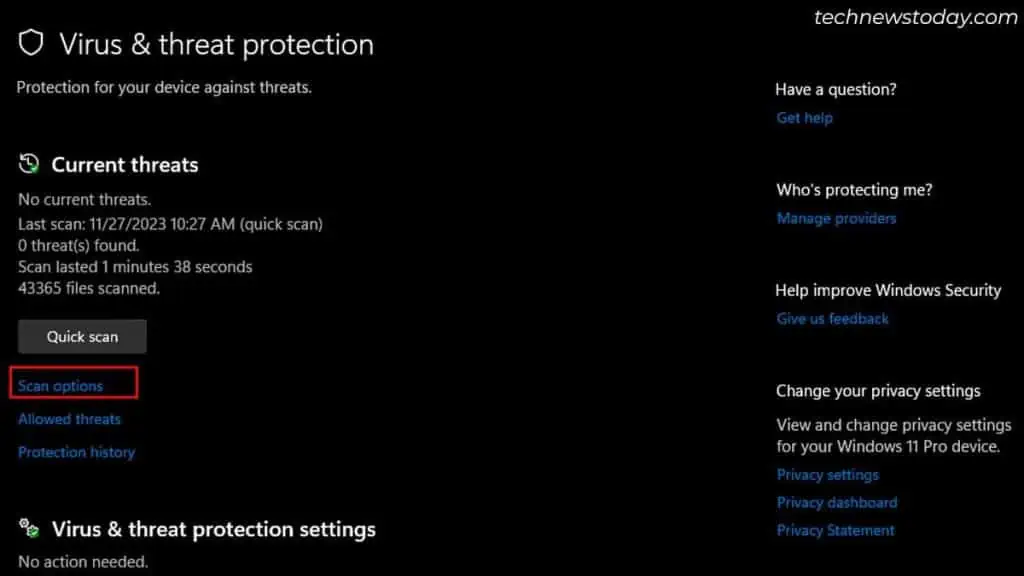
windowsdefender:to open Windows Security. - Click on Virus and Threat Protection.

- Click on Scan options.

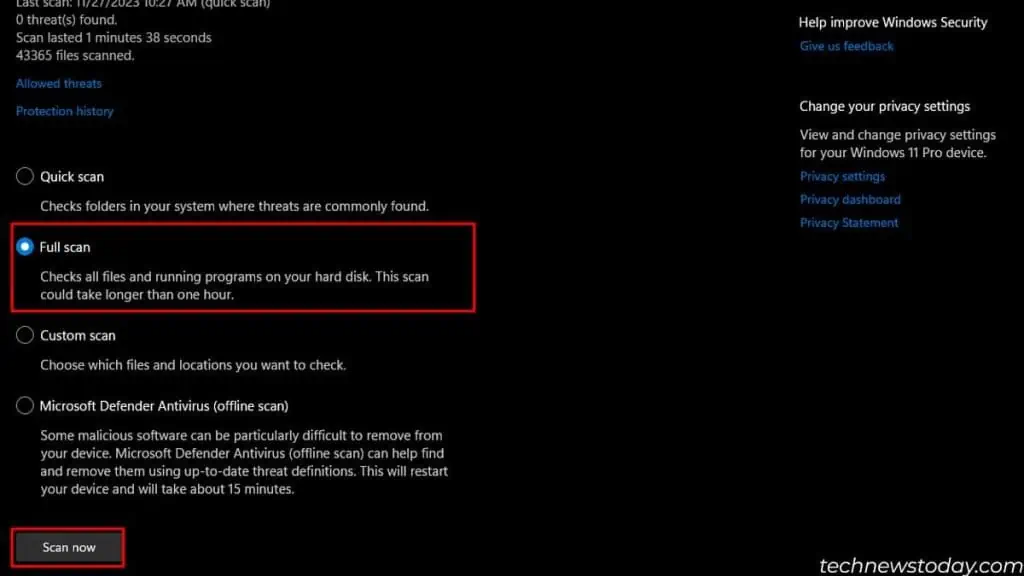
- Select Full Scan, then click on Scan now. The process will take some time.

- CPU usage might increase during the scanning process. Once the scan completes, it will give you a list of infected files.
- If it finds threats, I suggest that you remove them right away. You can also put them in quarantine if the file is important.
Using a Third-Party Application
Third-party applications are another excellent way to limit CPU usage. Some of these applications are BES (Battle Encoder Shirasé), Process Lasso, Process Tamer, etc.
Depending on the one you use, they provide various features like setting priority for I/O and memory, CPU Affinity, etc.
Most importantly, it directly allows you to limit CPU usage for a process.
Personally, I prefer Process Lasso as it provides the most features along with having a great user interface. But some of its features are premium and get disabled after a certain time.
If you’re looking for a free option, BES is also a pretty good option as most professionals recommend it.

