Hardware ID is a unique identifier for your devices that your system uses to match it to its driver. You can use this value to check for a specific device on the internet or official websites if you need to update its driver or troubleshoot any issues with its software.
A hardware ID usually follows the format <BUS>\<VENDOR ID>&<Device ID>&<Additional IDs>. For instance, the ID for Generic USB Hub may show USB\VID_05E3&PID_0608&REV_6090. However, the identity for root devices and the computer doesn’t follow this format.
In this article, we provide the most convenient ways to look up this information on your Windows PC.
How to Look up for Hardware ID on Your PC
You can use the Device Manager or built-in command line tools to look up the hardware Id for individual devices on your PC. But, if you want more options, you can use the Windows Device Console.
Using Device Manager
The Device Manager is the built-in Windows tool that helps you check and control all the devices on your PC. You can also use it to look up the hardware IDs of such devices.
- Open Run by pressing Win + R.
- Type
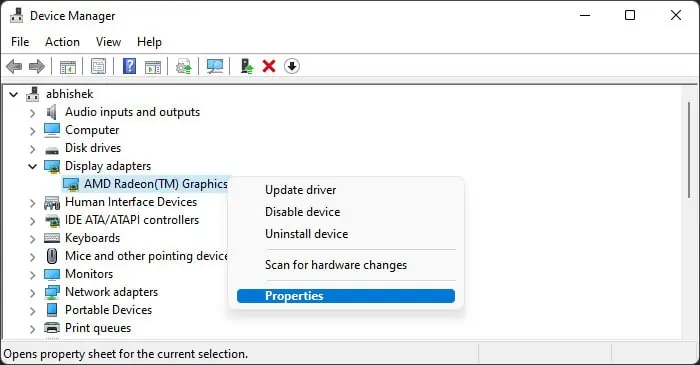
devmgmt.mscand press Enter to launch the Device Manager. - Expand the device category for the device you want to look up.
- Right-click on the device and select Properties.

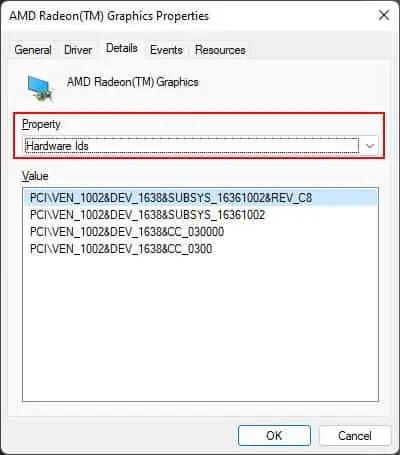
- Go to the Details tab.
- Click on the drop-down box under Property and set it to Hardware Ids.

The Hardware ID will show up under Value.
Also, keep in mind that a device may have more than one ID. However, the top ID is the most specific one.
Using Windows Command Line
You can also use the Command line interfaces such as Command Prompt or Windows PowerShell to look up the hardware ID of your devices.
Command Prompt
Command Prompt is the traditional command line on the Windows system. You can use the DISM utility to check your devices and get their hardware ID.
- Open Run.
- Type
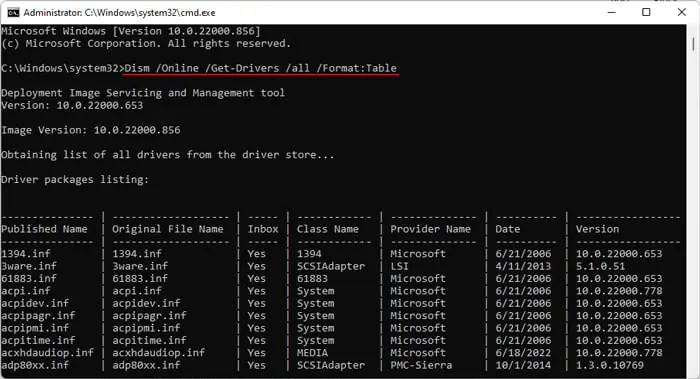
cmdand press Ctrl + Shift + Enter to open the Elevated Command Prompt. - Enter the following command to list out your devices:
Dism /Online /Get-Drivers /all /Format:Table
- Check the class name to get a general idea of your driver. It will list all the possible drivers, so you can add | findstr “search string” on the command to only list the necessary ones.
For example,Dism /Online /Get-Drivers /all /Format:Table | findstr “usb” - The command only lists the Original and Published names, not the general names. Note down or copy the Published Name.
- Then, enter the command
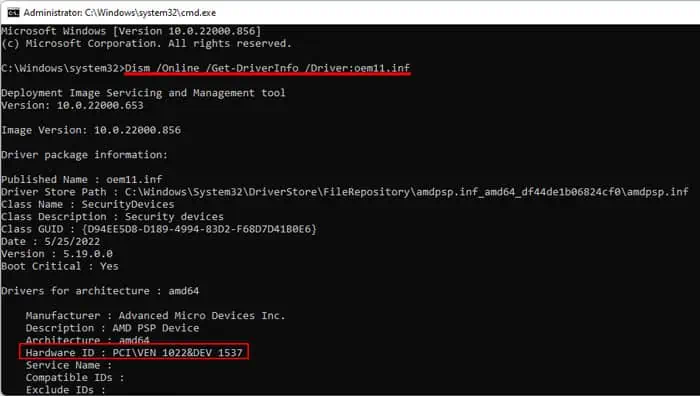
Dism /Online /Get-DriverInfo /Driver:<Published Name>. - This command lists the information on all the devices within the category, not just those active on your PC. So, you need to search carefully for your device by checking the Description column.
- After determining the device, look at its Hardware ID value.

Windows PowerShell
Windows PowerShell is a powerful Command Line tool that you can use to control all your system activities. You also have various options for customizing the commands, so it’s an effective way to get the necessary information.
- Open Run.
- Type
powershelland press Ctrl + Shift + Enter to open the Elevated PowerShell. - Enter the following command to list your devices:
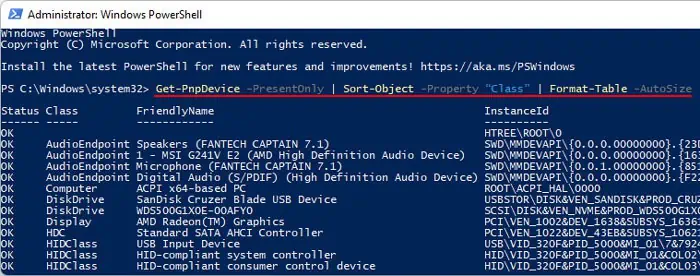
Get-PnpDevice -PresentOnly | Sort-Object -Property “Class” | Format-Table -AutoSize
- Then, search for your device using the Class and FriendlyName columns and copy or note down its InstanceId.
- Then, enter the following command while replacing the Instance ID with the value you copied or noted:
Get-PnpDeviceProperty -InstanceId "Instance Id" | Format-Table -AutoSize - Here, search for DEVPKEY_Device_HardwareIds and check its Data to get this information.

Using Windows Device Console
It is easy to check the Hardware ID of a device using the Device Manager or the built-in Command line. However, you can only look up this information for one or a few devices at a time. If you want to look up the ID for all your devices or the devices within a specific category, you need to use the Windows Device Console (Devcon).
Microsoft does not provide this utility in the default Windows OS but includes it in its Windows Driver Kit. So you need to install this package before you can use the Device Console.
- Download and install Windows Drivers Kit from Microsoft’s platform. You only need to download the WDK and not the SDK or Visual Studio.
- Then, you need to set the location of the console on the system path so that you can access it from anywhere on the Command line. To do so,
- Open Run and enter
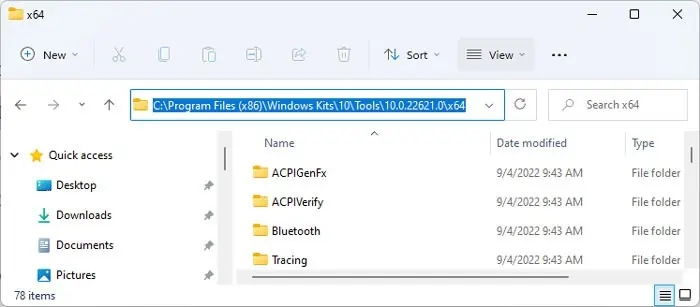
%ProgramFiles(x86)%\Windows Kits\10\Tools. - Go inside the folder with the version number (e.g.,10.0.22621.0).
- Head inside the folder according to your system architecture (x64 for 64-bit, x86 for 32-bit, and so on.)
- Click on the address bar and copy the path.

- Open Run and enter
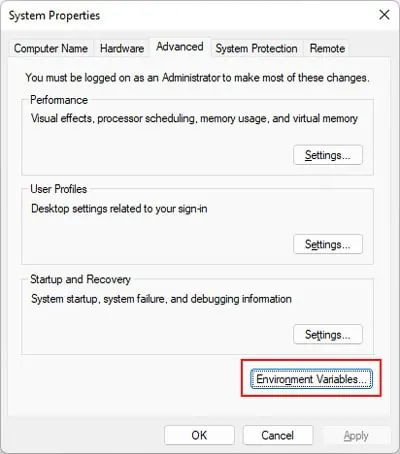
systempropertiesadvanced. It loads the Advanced tab of System Properties. - Click on Environment Variables.

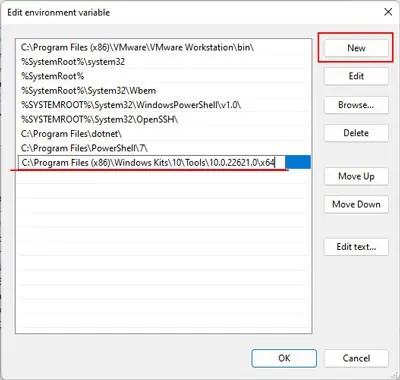
- Under System variables, double-click on Path.
- Select New and enter the path you copied earlier.

- Click OK thrice to save the changes and get out of the properties.
- Open Run and enter
- Now, open Run.
- Type
cmdand press Enter to open the Command Prompt. - Enter the commands below to look up the hardware ID according to the corresponding scenario:
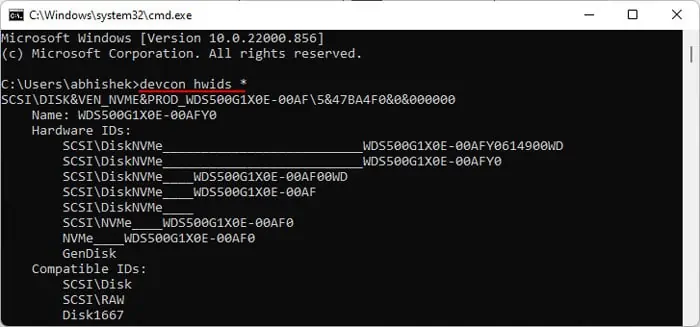
devcon hwids *: List out all devices with their hardware Ids
devcon hwids =<class>: List out the hardware IDs for all devices in a particular class. You can look for the available classes using the commanddevcon listclassdevcon hwids * > “D:\HardwareId.txt”: Create aHardwareId.txtfile inD:\which lists all devices with their hardware IDs. You can use any location you want or create a text file that displays the output of the other command.
If you want to know more about using Devcon to check and manage your devices, we recommend you visit its documentation on Microsoft.
