Mail merge combines a document with a data file to send personalized messages to different people at once. The data file may include names, addresses, or other information for several receivers.
If you want to avoid taking too much time writing the same email for many people, you can set up a mail merge.
This article explains how you can set it up in Microsoft Outlook. In general, you use MS Outlook, MS Word, and other programs that store structured data.
Setting up Mail Merge
The most convenient method of setting up a mail merge is through Word. You can get the mailing addresses from Outlook or enter them into a list for this process.
You can find the step-by-step procedure for this method in this guide.
Compose your Email
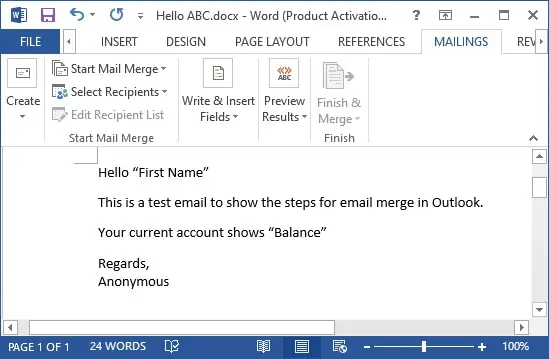
The first task is to compose the mail you want. You can directly type the message in a word document. The initial step is also to start the mail merge. Follow the steps below:
- Open MS Word on your PC. Type the body of the email message in the blank document.
- You can leave placeholders for parts you would like to personalize in the message. You can add them later.

- Save the file to your local drive.
- Click on the Mailings tab from the ribbon.
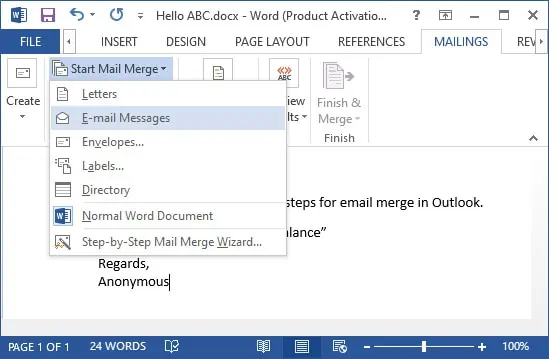
- Click Start Mail Merge and select Email Messages.

Create a Mailing List
Skip this step if you have a contact list you can use in Outlook. Word allows you to create a new list or use an existing list. This list can be an excel spreadsheet, a database, or any document with structured entries.
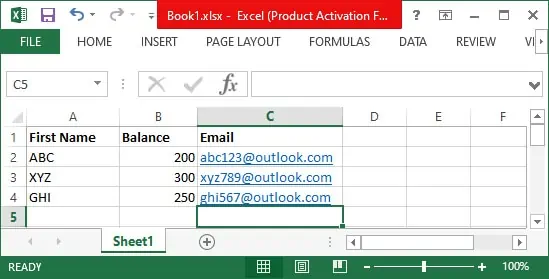
Here, we will list out steps to create an excel spreadsheet for the list.
- Open a blank workbook in MS Excel.
- Add separate columns with headers and contents for data you want to personalize. Don’t forget to add Email as a field.
- Enter the data for the fields.

- Also, make sure to use only one sheet for the entries.
- Save the spreadsheet as a new file.
Select Recipients for your Email
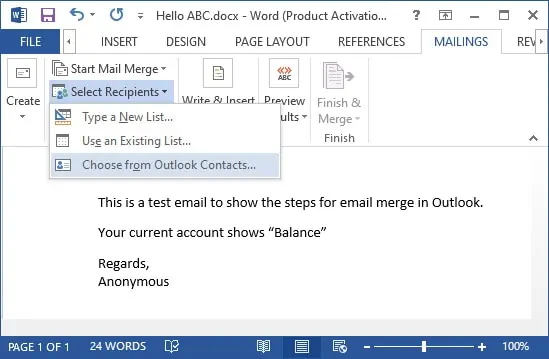
It is the step where you link the mail merge with its receivers. There are three options to choose from. You can create a new list, use an existing one, or pick from outlook contacts.
If you have an Outlook contact list of the recipients, follow the instructions below:
- Go to the Word document with the message body.
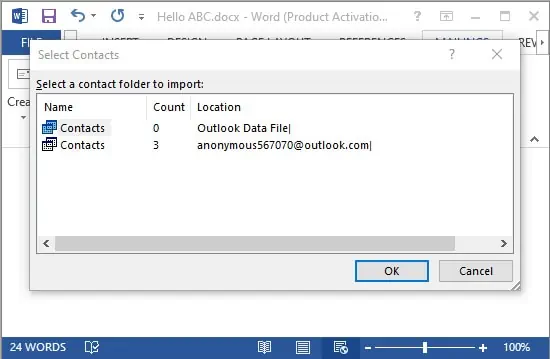
- Click on Select Recipients from the Mailings tab. Then select Choose from Outlook Contacts. Choose a Profile Name if you have to and hit Ok.

- Log in to your account if prompted.
- You may have many contact lists. Select the one you want and click Ok.

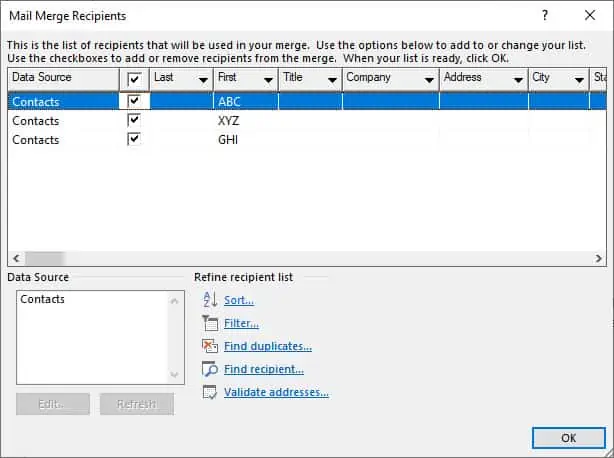
- Use each checkbox from the new window to choose the recipients for your mailing list. Then select Ok.

In case you want to create a new list, follow these directions:
- Click on Select Recipients from the Mailings tab. Then select Type a New List.
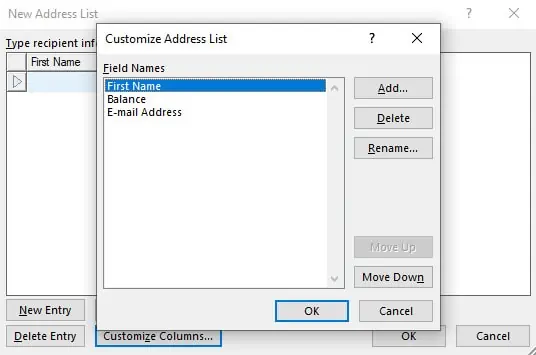
- First, click on Customize Columns. Only set the field names you want by using Add, Delete, and Rename buttons. Then click on Ok.

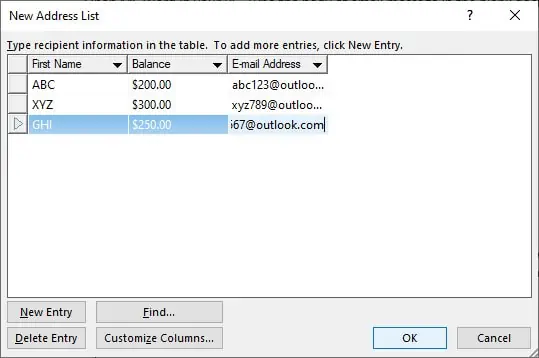
- Enter the data you need. Use New Entry and Delete Entry buttons to manipulate the entries. Then hit Ok.

If you have created a list using a different source, follow the steps below to select from the list:
- Click on Select Recipients from the Mailings tab. Then select Use an Existing List.
- Navigate to the location you saved your list. Then open it.
- Select the sheet containing the list and choose Ok. You should only have one option if you have been following this guide. Make sure the First row of data contains column headers option is checked.
You can check and edit your list by selecting Edit Recipient List from the Start Mail Merge group.
Insert Mail Merge Fields
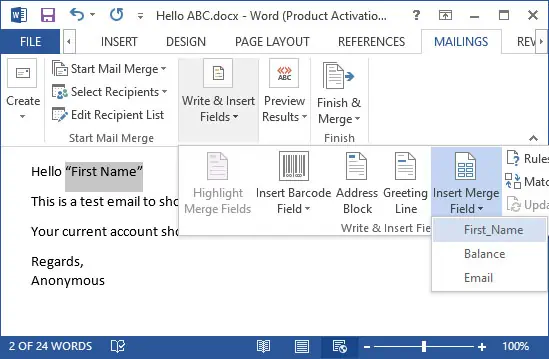
In this step, you can fill the placeholders you have used in the message. You can also add personalized greeting. To do so, follow the instructions below:
- Select a placeholder in your message, then click on Insert Merge Field. It is present in the Write & Insert Fields group.
- Choose the matching field and select Insert.

- You can’t change the insertion point in your document. You have to select the placeholder and individually insert the merge field for each one.
- Follow these steps for all the placeholders.
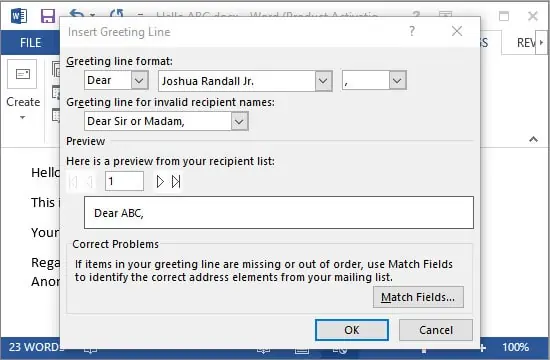
- If you don’t have a greeting line in your message, you may want to add one. Click on Greeting Line. In the new window, format the options according to your need and select Ok.

Preview your Email
Before sending an email, it is essential to preview it to check for inaccuracies. Here’s how you can preview your mail merge:
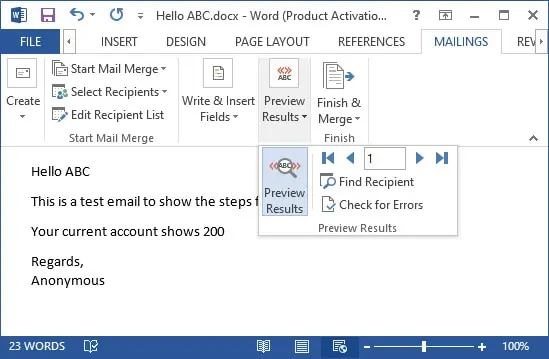
- Click on Preview Results from the Mailings tab.
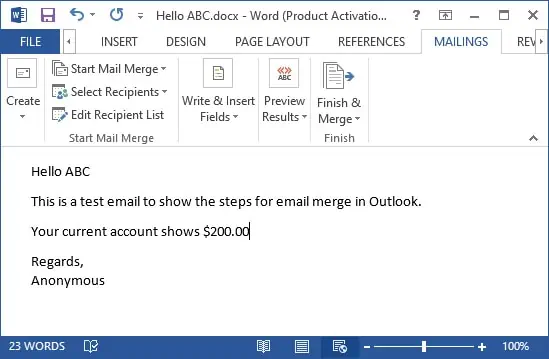
- Now you can see an example of how the mail would look to a recipient.

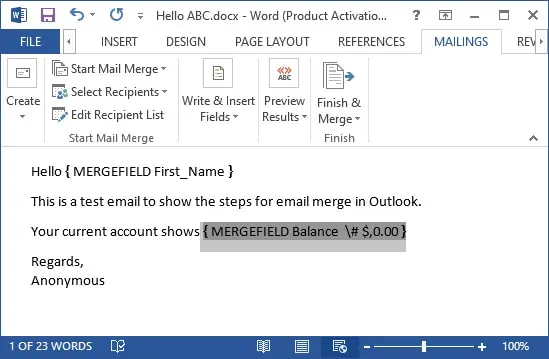
- The format of values may not be what you require. For instance, currency value can appear as a whole number.
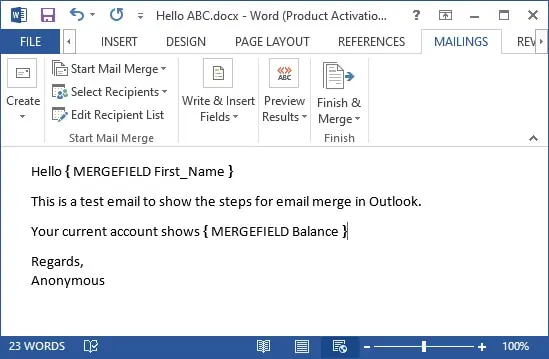
- In this case, press Alt + F9. Some may need to press Alt + Fn + F9. Now, you can see the field codes for the Merge Fields.

- You need to edit the field code. Different types of values have varying codes. You can search for their syntax on the internet.
- For example, you need to add \# $,0.00 in the code to change to currency value.

- Press Alt + F9 again and click on Preview Results to see the changes.

Finish and Save
The final step is to finish up, enter the subject line and send the email. You can also mail merge to another document or print the message document if you need. To finish up, follow these instructions:
- Click on Finish & Merge from the Mailings tab.
- You can select Edit Individual Documents to preview all documents and edit them. You don’t need to do so if you don’t want any changes.
- After making the changes, close the new window. Choose Save to apply the modifications.
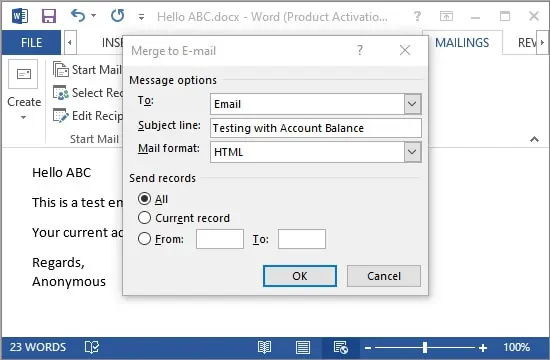
- Click on Finish & Merge again. This time, select Send Email Messages.
- Type in the subject for your email in the subject line. Click on Ok to send the emails.

- If you have to send emails to a large number of receivers, it is better to send to fewer recipients at a time. You can do it with the From ___ To ___ option in the Finish & Merge window.
- It is a good idea to save the Word file for future use. This document retains the connection to the source file for the mailing list.
Also take a look at our article on how to send a secure email in outlook.

