Viewing the source code of any HTML page is a good way to learn HTML for beginners as well as intermediate programmers. Also, if you need to extract data from sites that don’t restrict such actions for your web scraping projects, you must understand the code blocks and tags on the source code.
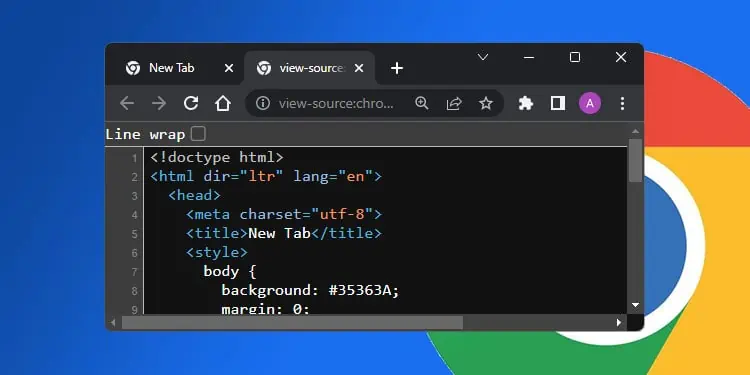
Google Chrome allows you to check the source code of any webpage in two ways. One way is to view the source HTML code directly from the web server. It usually opens as a single “View Source” tab.
Another way is to check the code after the web browser has optimized the real source code and added any Javascript manipulation. Chrome shows this as the Inspect Elements tool, and this utility is actually there for the benefit of any developer.
Using Shortcuts
The easiest way to open a webpage’s source code in Chrome is through the keyboard shortcut.
To open the View Source tab, press Ctrl + U on Windows. On Mac, this shortcut is ⌘-Option-U.
If you need to open the Inspect Elements tool, you need to press Ctrl + Shift + C. You can also press F12 or Ctrl + Shift + I to open the Developers tool and then go to the Elements tab.
Using Context Menu
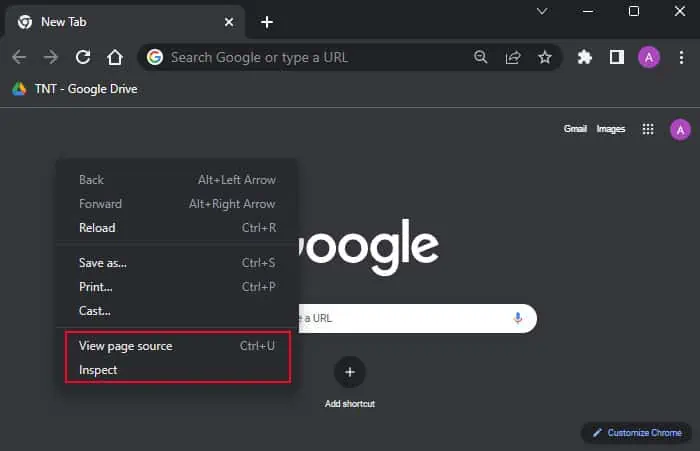
The context menu (right-click menu) on Google Chrome’s web pages also includes the options to open the source code. You can choose to view the unaltered source code or the code after optimization by the browser.
- Right-click anywhere when you are inside the webpage.
- Select View page source or Inspect as per your need. Inspect will bring you to the exact code block corresponding to the graphical element where you right-clicked.

By Editing URL
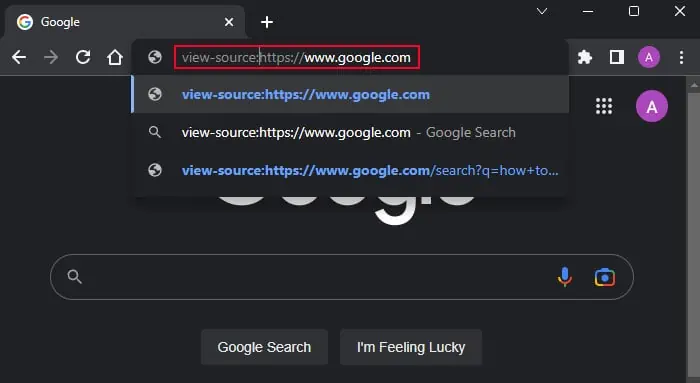
Another way to view the source code is by adding a code snippet to the URL. If you use the above options to view the page source, you might have seen view-source: in the source code’s URL address. You can actually enter this code manually to perform the same task.
This method is also useful if you want to view the source code on mobile devices as they usually don’t offer other methods.
- Click on the Address bar.
- Press Home or keep holding the left key till the keyboard cursor gets in front of the URL, even before
https:// - Type view-source: and press Enter. So, if the URL was
https://www.google.com, it should now becomeview-source:https://www.google.com
Through Chrome Menu
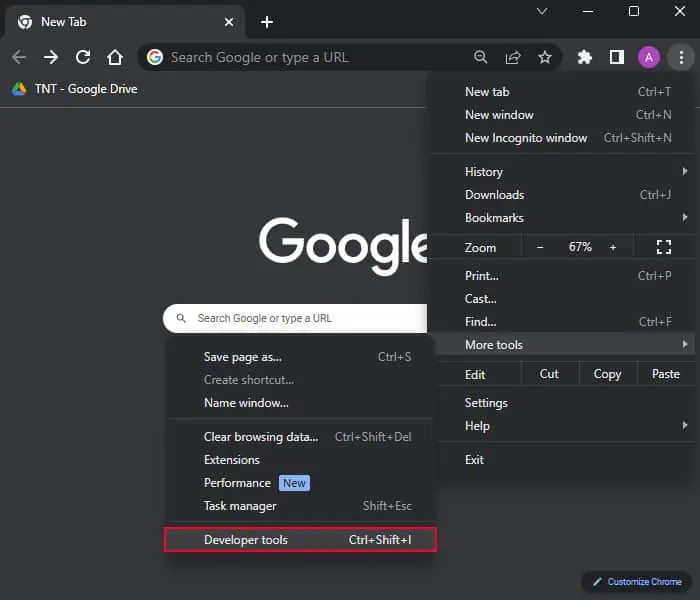
It is also possible to open the Inspect Elements tool from within Chrome’s control menu. Here, you can open the Developers tool which includes Elements along with other tools such as the Chrome Console.
- Click on the triple-dot icon inside the Chrome window.
- Go to More tools and select Developer tools.

Understanding Source Codes
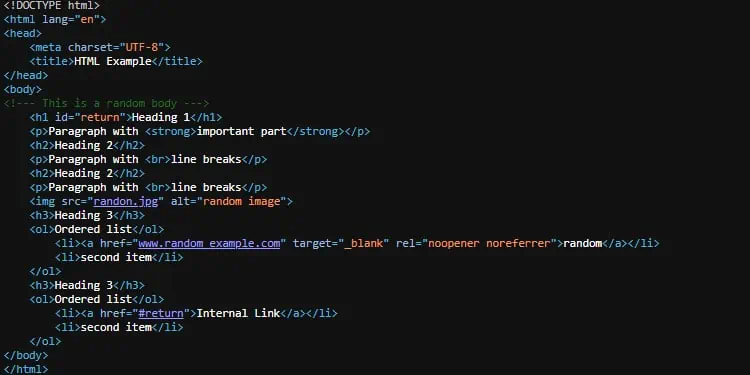
After viewing the source code, you need to know Hypertext Markup Language (HTML) to be able to analyze and read the source code. If you are not that familiar with this programming language, here are a few things about the code to help you get started.
Tags or Elements
These are the main keywords in an HTML code. They are closed by ‘<>’ and represent the type of content. An element usually consists of the opening and the closing tag to show the start and the end of the element’s content respectively. But some elements only use a single tag.
For instance: <p>Here’s a paragraph</p>
“Here’s a paragraph” is a paragraph element enclosed by the tags <p> and </p> that specify this content as a paragraph.
Tags are not case-sensitive.
Attributes
These are the keywords that determine the additional properties of the HTML elements. They are also present inside the angle brackets but after the opening tag’s keyword. Some common attributes include class, title, style, id, etc.
For instance: <p id=“para”>Here’s a paragraph</p>
The paragraph has the attribute “para” as an identity (id).
Some specific attributes are case-sensitive, and the rest are case-insensitive.
Important Elements of the Source Code
- Head (<head>…</head>) – It provides the webpage’s information.
- Title (<title>…</title>) – It shows the webpage’s title. Search engines like Google Search index the contents of the title so that it can find these webpages when someone searches for them.
- Body (<body>…</body>) – It specifies all the contents of the webpage.
- Headings – Different tiers of headings come with separate tags such as <h1>…</h1>, <h2>…</h2>, and so on. These also provide automatic margins before and after the heading.
- Paragraphs <p>…</p> – Contains all the text inside or outside a heading.
- Lists – The ordered lists that use alphabets or numbers to order the list use the tags <ol>…</ol> and the unordered ones that use bullets use the tags <ul>…</ul>. Inside these root tags, all list elements come inside <li>…</li>.
- Images (<img>) – It doesn’t need any content and uses the attribute src to specify the image source. The alt attribute specifies the alternative text that describes the image.
- Hyperlinks (<a>…</a>) – It uses the attribute href to specify the referral link. Usually, it’s best to add the attribute rel=”noopener noreferrer” to external links.
If the href attribute contains a hashtag and then some text, such as <a href=“#link”>link</a>, it shows an internal linking to the element with the id link. - Comments – All the texts inside ‘<!– ’ and ‘ –>’ are comments and can be ignored. They usually provide additional information about the successive elements.
