MSI Afterburner lets you monitor and manage your GPU clock, memory clock, core voltage, fan speed, and more, all from a single intuitive interface. It’s no fluke that it’s the preferred GPU overclocking tool for most users.
To overclock your GPU with MSI Afterburner, you start by raising the core clock by a small amount (e.g., 10 MHz). You test this overclock and keep making small increments until you encounter visual artifacts or crashes. At that point, you dial down the overclock by a step or two.
You repeat this same process to find the max stable memory clock for your GPU. Then, you put this overclock through stress tests and your typical workload to verify it’ll work well for you.
While this is a decent overview, you’ll deal with a lot more variables during the actual overclocking process (voltage, temperatures, benchmarks, and so on).
So, I’ll overclock my own GTX 1060 and RX 570 cards and will walk you through the entire process in this article.
Prerequisites for Overclocking GPU
Before you begin, you’ll want to download and install the necessary tools first. I’ve used the following programs for this guide:
- OC Software: MSI Afterburner
- Monitoring: GPU-Z
- Stress-test/Benchmarks: Superposition
When you’re ready, you can use the OC Scanner tool in MSI Afterburner to find a good starting point. Remember to max out the power and temp limits for this.
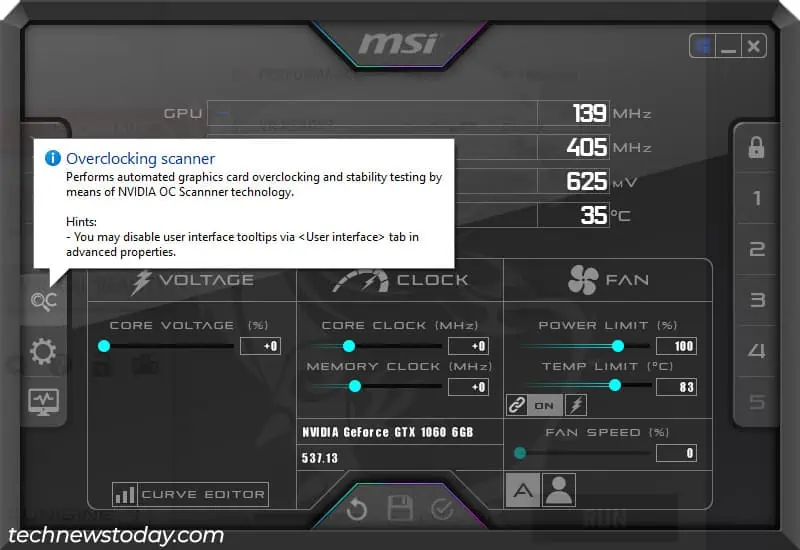
For reference, it suggested a 113 MHz core overclock and 200 MHz memory overclock for my GTX 1060. Compared to starting from zero, this helped me find my max overclock of 150 MHz/550 MHz much quicker.
The tool does take a while to run, though (usually 20-30 minutes). If you don’t want to wait, another alternative is to look up overclocks for your exact card online. You’ll get an idea of the average OC for your card. You can then start testing with values slightly lower than average.
Now, launch the 3 programs I mentioned earlier to get started.
Finding the Max Core Clock
We’ll deal with the core clock first, as it has the biggest impact on GPU performance.
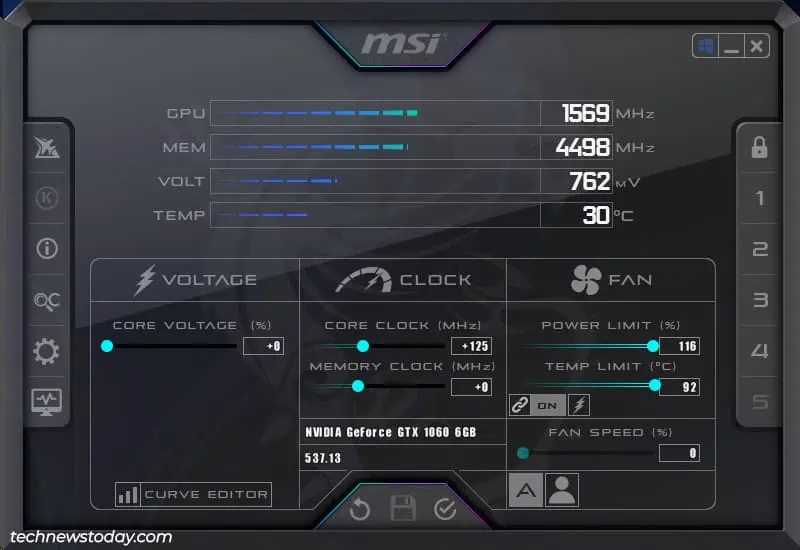
Set Core Clock In Afterburner
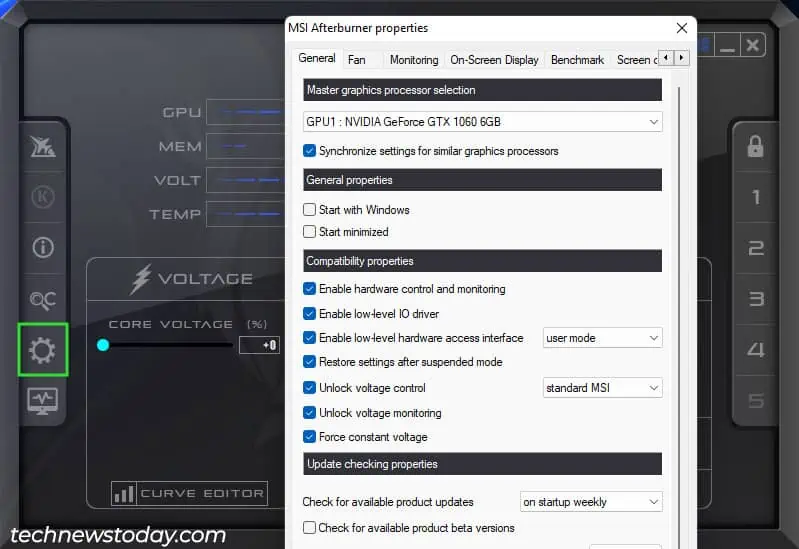
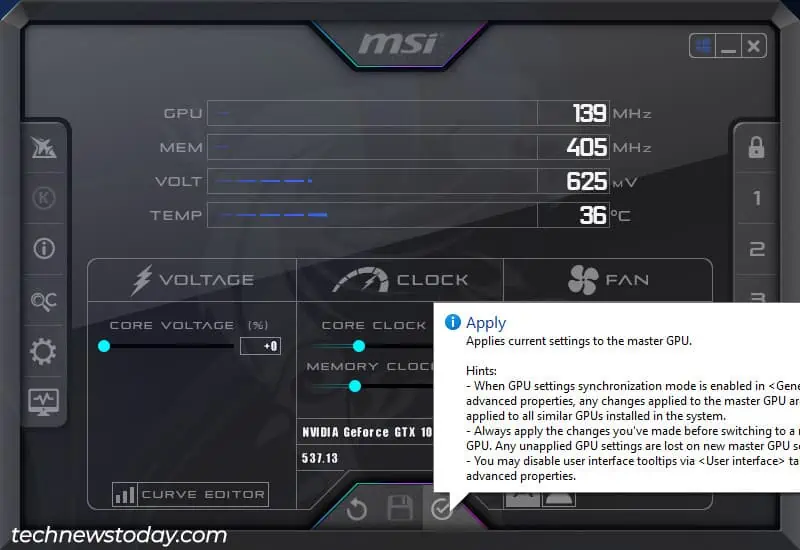
- In Afterburner, click on the Settings cog. Enable the voltage options and press OK to apply the changes and restart the app.

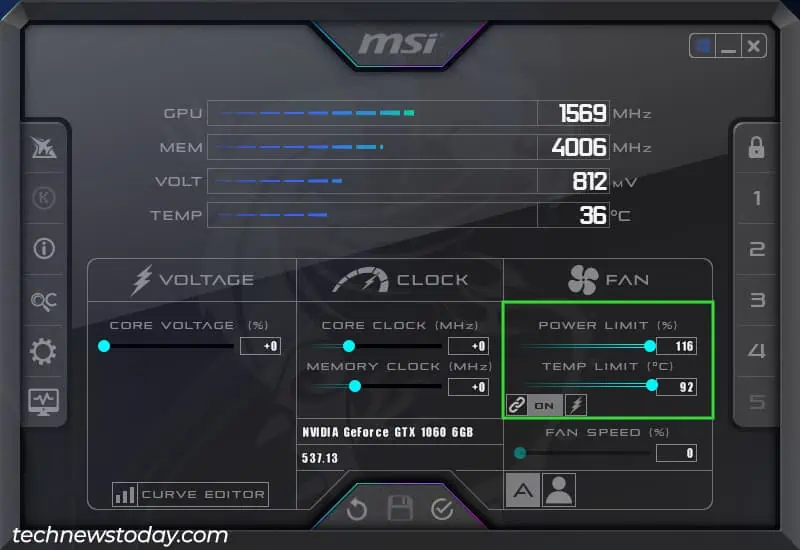
- Max out the Power and Temp limits.

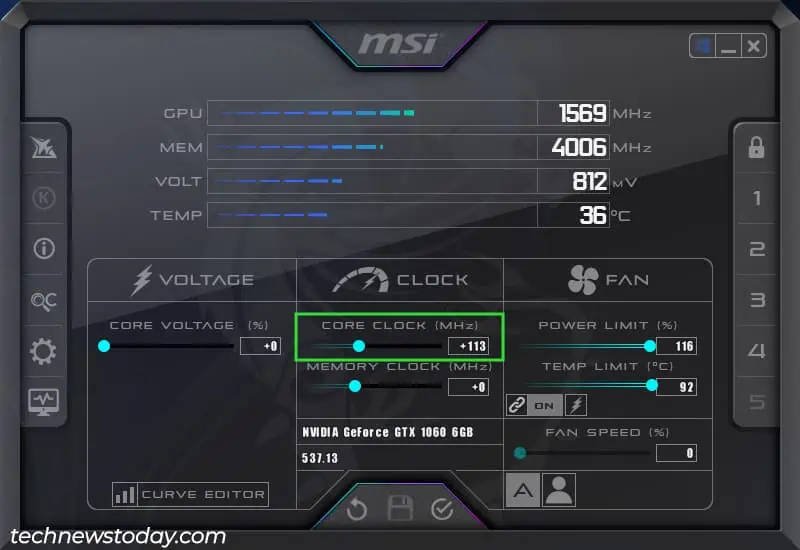
- Then, set the Core Clock to the starting value that you determined earlier. For my GTX 1060, this was 113 MHz.

- Press the Apply button to save this new config. The change should be visible in GPU-Z.

Test New Core Clock
We’ll use Unigine’s Superposition for the benchmark test. If you prefer any other programs like Unigine Heaven, MSI Kombustor, Furmark, 3DMark, etc., feel free to use those.
I just prefer Superposition as most other options are either outdated or don’t match my needs well.
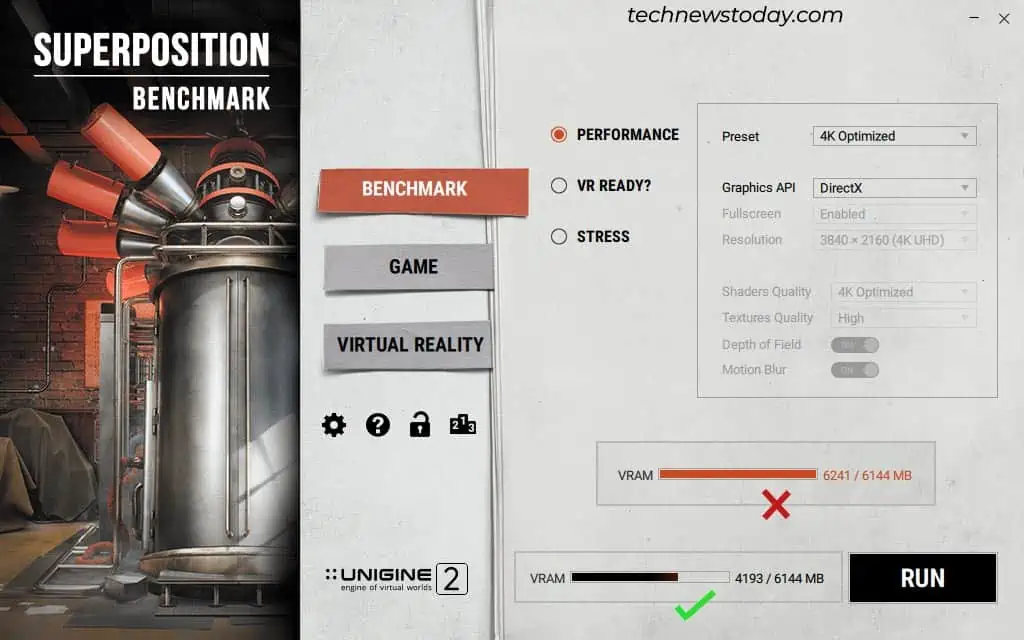
- In Superposition, Benchmark > Performance should be selected. Set the preset to the highest setting without overloading your VRAM. My GTX 1060 has 6 GB VRAM, so 4K Optimized is correct for me. 8K Optimized requires 6.2 GB VRAM, which my card can’t handle.

- Click on Run to start the benchmark.
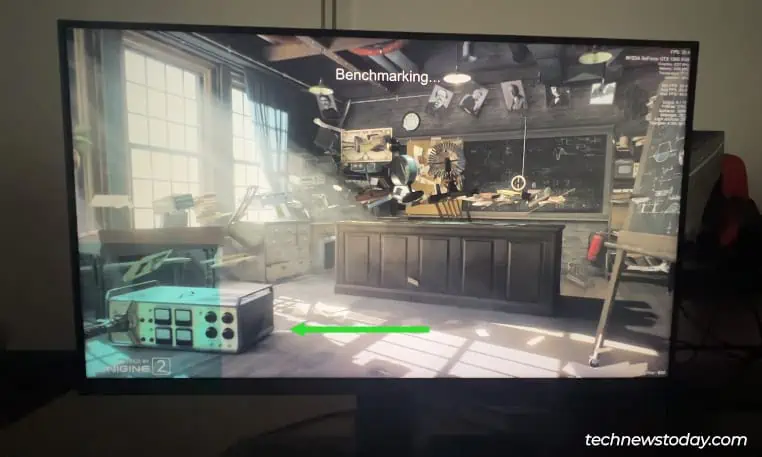
- Confirm that there are no visual artifacts during the test. It should finish in a little under 5 minutes.

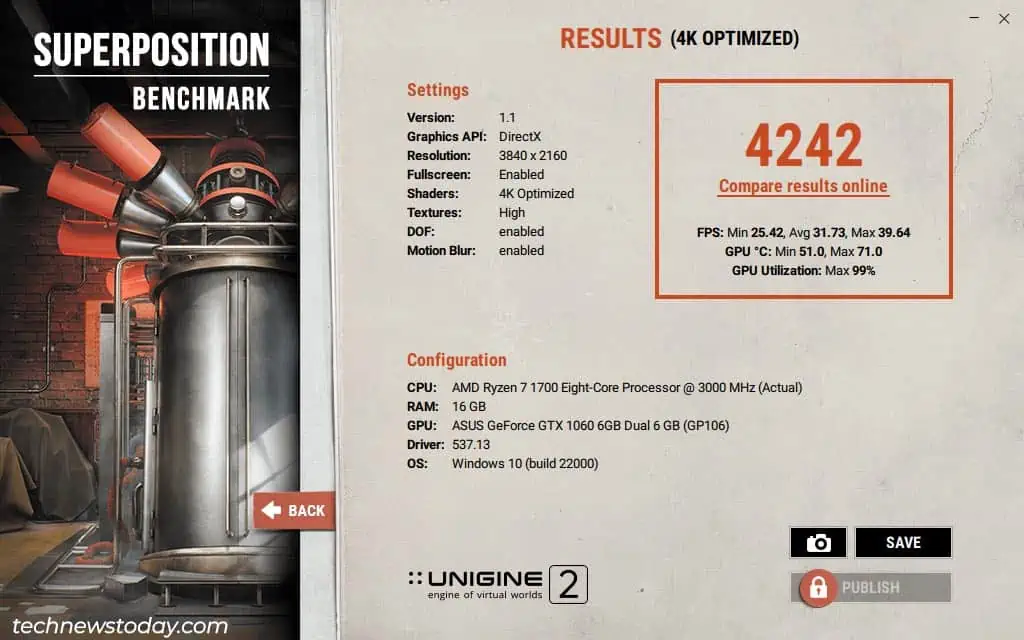
- After the test, note the average/max FPS, max GPU temperature, and the benchmark score. You can screenshot or save the results as you prefer.

Increase Core Clock
- In Afterburner, add the appropriate increment to the core clock:
AMD GPUs - 10 MHzNVIDIA 1000 series and older - 12.5 MHz/ 13 MHzNVIDIA 2000 series and newer - 15 MHz
- So, my GTX 1060 which started out at 113 MHz is now set to 125 MHz.

- Save this core clock and run the benchmark in superposition.
- Note the FPS, temps, and score as mentioned earlier, and keep repeating steps 1 – 4 until you encounter artifacts or crashes.
- My 1060 was stable until 138 MHz. I saw some artifacts at 150 MHz, so I dropped back down to 138 MHz.
Finding the Max Memory Clock
Now, we’ll use the same process for the most part to find our max memory clock. You can use increments of 50 MHz for this one.
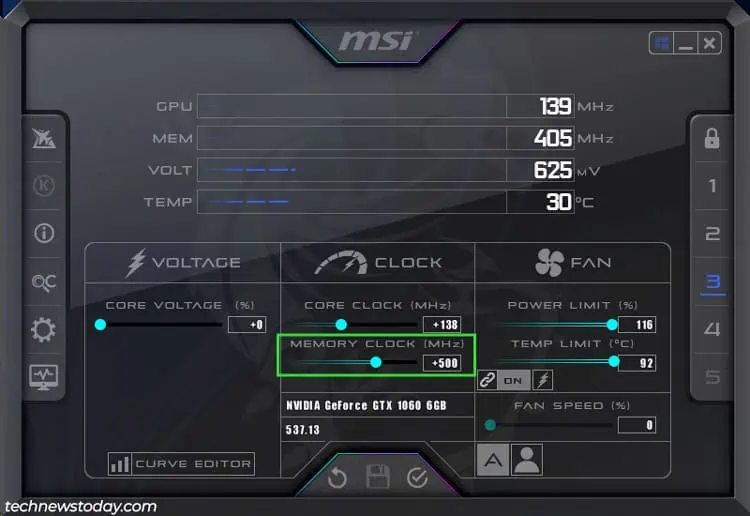
For my GTX 1060, I started at 200 MHz and tested 250 MHz, 300 MHz, 350 MHz, and so on. My GPU crashed at 550 MHz, so I reverted back to 500 MHz, retested it for good measure, and it was stable.
Plotting a Fan Curve
Depending on how good your cooling setup is, your GPU probably ran between 60-80°C when benchmarking. The fans should be fairly quiet at the lower end of this range. In this case, you can skip ahead to the next section if you want.
But on some systems, Auto fan control tends to max out the fan speed pretty quickly at higher temps. If you don’t care about noise and want to push for max performance, Auto is once again fine.
But I like quieter systems and don’t want my GPU sounding like it’s about to take off. For anyone in a similar spot, creating a custom fan curve can help.
- To start, check the fan speeds between 50-90% to see what speed/noise level you’re comfortable with. For instance, I don’t like my fans going over 70% speed unless necessary.

- Track the average GPU temperature during your typical usage. I mainly use my PC for browsing, working, and playing games like League of Legends and RDR2. So, my GPU temp is usually between 55-60°C.
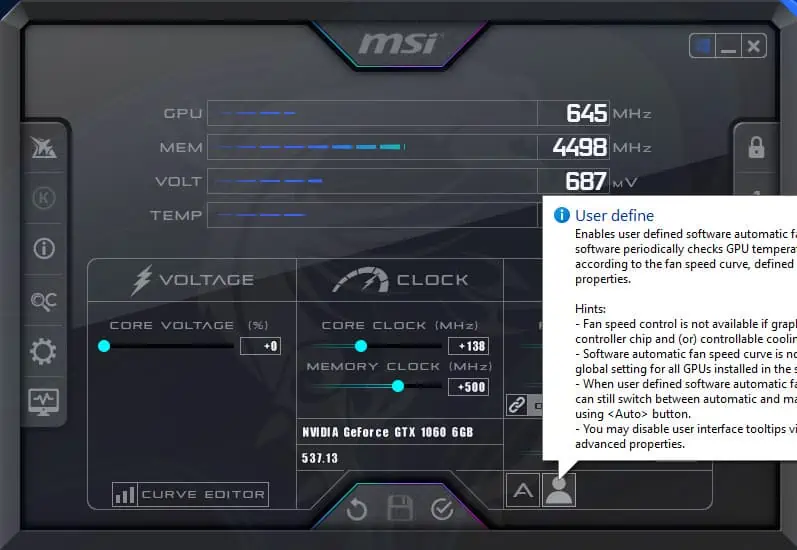
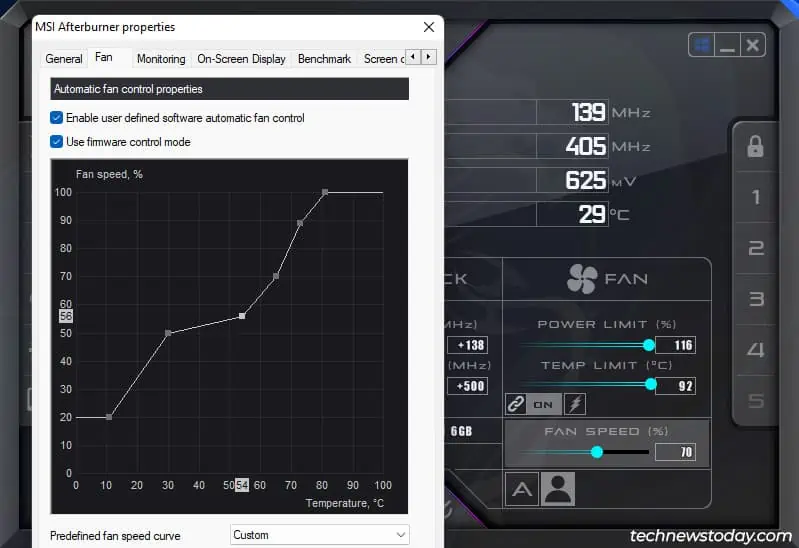
- Now, click on the User-defined fan control button. You can also access the fan curve from Settings > Fan.

- I’ve set my main fan curve node to 70% at 65°C and set the others accordingly. This ensures the fans remain under 70% during normal usage and only go higher if required. You can create a fan curve for yourself in a similar manner.

Adjusting the Core Voltage
Remember how we unlocked the voltage modifiers at the start? These let you monitor and adjust the core voltage (typically by around 100-200 mV). Once again, your cooling is an important factor here.
A full 100 mV (i.e. 0.1V) increase will let you run an overlock 1-2 tiers higher. But the temperature bump will also be significant. In my case, maxing out the core voltage offset let me run my GTX 1060 at +150MHz/550MHz. But the GPU temp also rose from 70°C to 75°C.
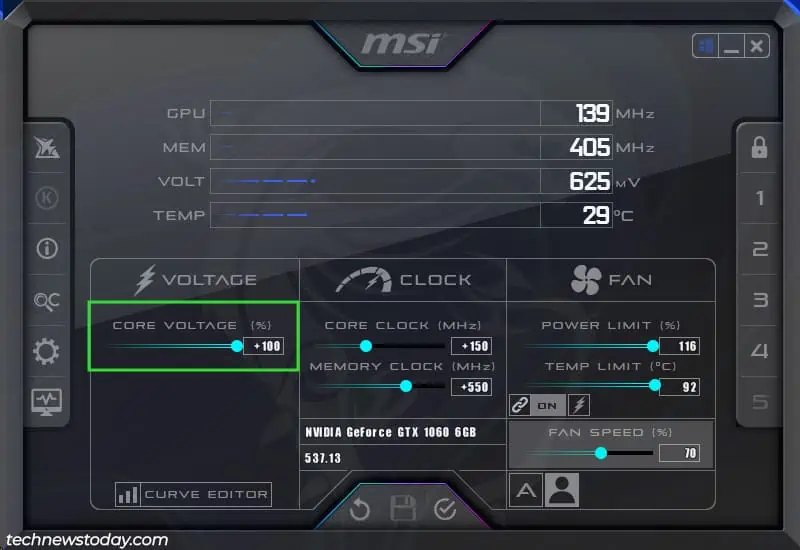
So, I reset the voltage offset to 0 and used the +138MHz/500MHz overclock instead. I preferred this as I wanted a cooler and quieter system. Someone else might’ve gone for the other option in this situation if performance was the priority.
Basically, if the temperature and power supply requirements are fulfilled, you can (optionally) increase the core voltage. This will let you get a slightly higher overclock at the cost of slightly higher temps. I recommend trying increments of 35 mV (0.035V) in this case.
On the other hand, you can look into undervolting your GPU if you’re facing heating issues. You’ll maintain the default clock speed but use lower voltages, which’ll lead to lower temps.
Temps above 80°C are not good for your GPU in the long term (the lower the better). So, from a longevity perspective, undervolting is quite useful and popular.
Testing Your Best Overclock
At this point, you should have a stable overclock that you’re happy with. In my case, I took performance, cooling, noise, and longevity into account and settled on a +138 MHz core overlock and +500 MHz memory overclock for my GTX 1060. You’ll have a similar value for your card.
The final step is to take this overclock and put it through other stress-testing tools as well as your usual workload (editing, games, and whatnot). If the system remains stable, then you’ve successfully overclocked your GPU!
- Click on the Save icon to save these settings to a profile. You may need to press the lock to unlock the profiles.

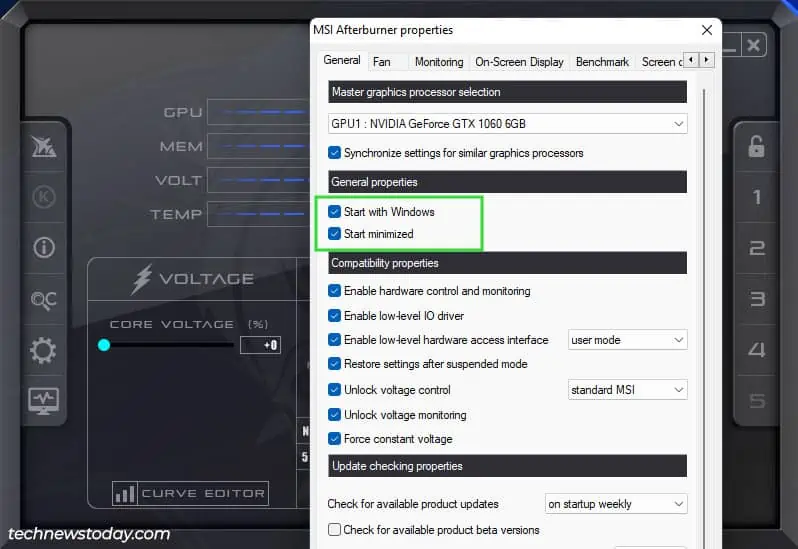
- You can also enable Start with Windows and Start Minimized from the Settings tab to automatically apply the overclock at startup.

If you’re ever locked out after enabling these due to constant crashes, you can hold Ctrl while Windows is loading to skip starting Afterburner at startup. Alternatively, you can boot to safe mode.
Note: If you follow the process I described, you shouldn’t experience any artifacts, glitches, or crashes. But I’ve seen cases where the GPU will face these issues with certain games only.
In such scenarios, you can downgrade the overclock by a tier. Or, even better, you can make use of the MSI profiles. Save the lower overclock to the second profile and switch between the profiles as required.
My Overclocking Results
I’ve mostly talked about the GTX 1060 so far, but I mentioned at the start that I also overclocked my RX 570. I’ll summarize my results for both cards now.
GTX 1060
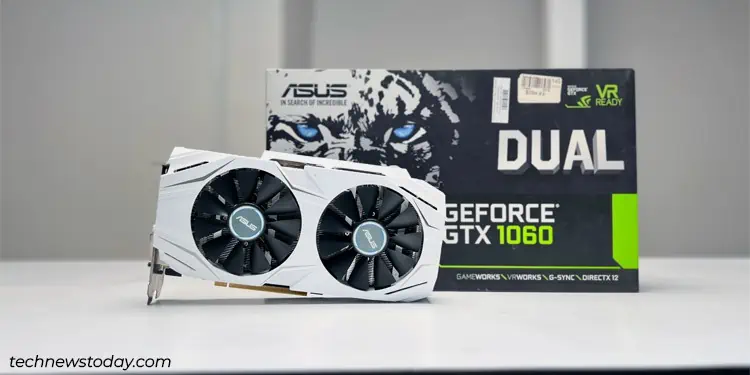
So, here are the stats for my ASUS GeForce GTX 1060 6GB Dual OC:
| Stock | Overclocked | Gain (MHz) | |
| Core Clock | 1569 MHz | 1707 MHz | +138 MHz |
| Boost Clock | 1785 MHz | 1923 MHz | +138 MHz |
| Memory Clock | 2002 MHz | 2252 MHz | +500 MHz |
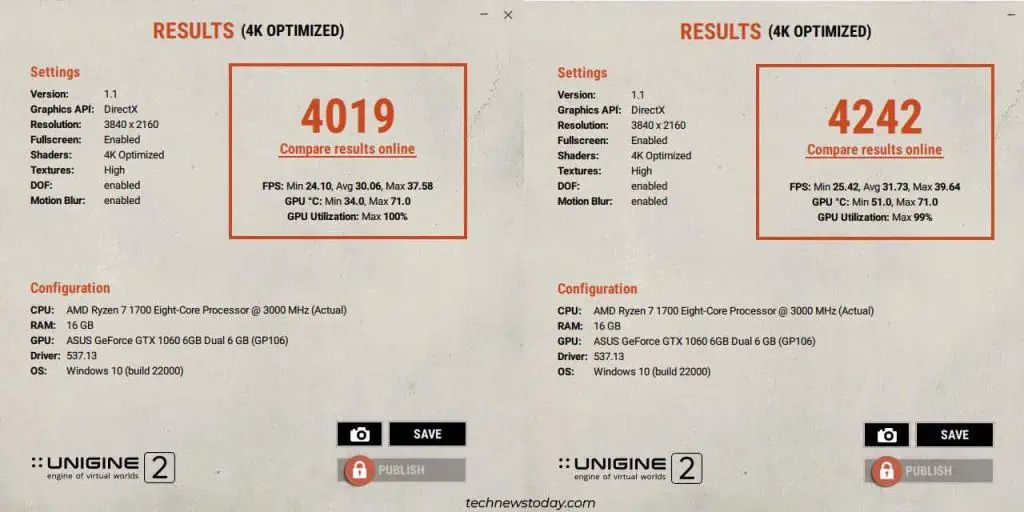
My Superposition benchmark score for the 4K Optimized test improved from 4019 to 4242 after overclocking. The average FPS increased from 30.06 to 31.73.
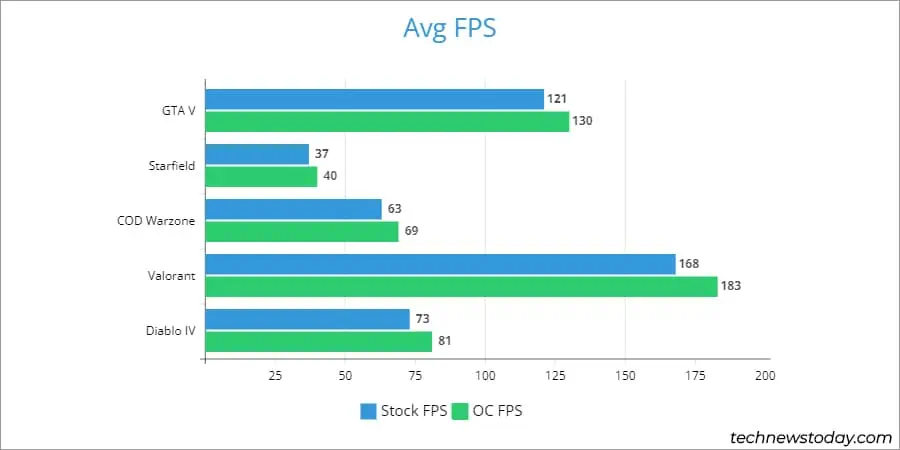
And here are the FPS stats from some of the games that I tested. Keep in mind that some of the games like Valorant were set to the highest settings while others like Starfield were set to low based on my own playstyle:
RX 570
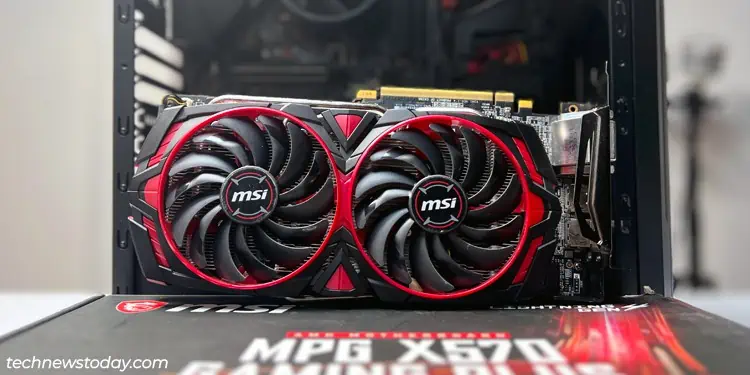
Here are the stats for the MSI Radeon RX 570 ARMOR MK2 8G OC:
| Stock | Overclocked | Gain (MHz) | |
| Core Clock | 1268 MHz | 1418 MHz | +150 MHz |
| Memory Clock | 1750 MHz | 2150 MHz | +400 MHz |
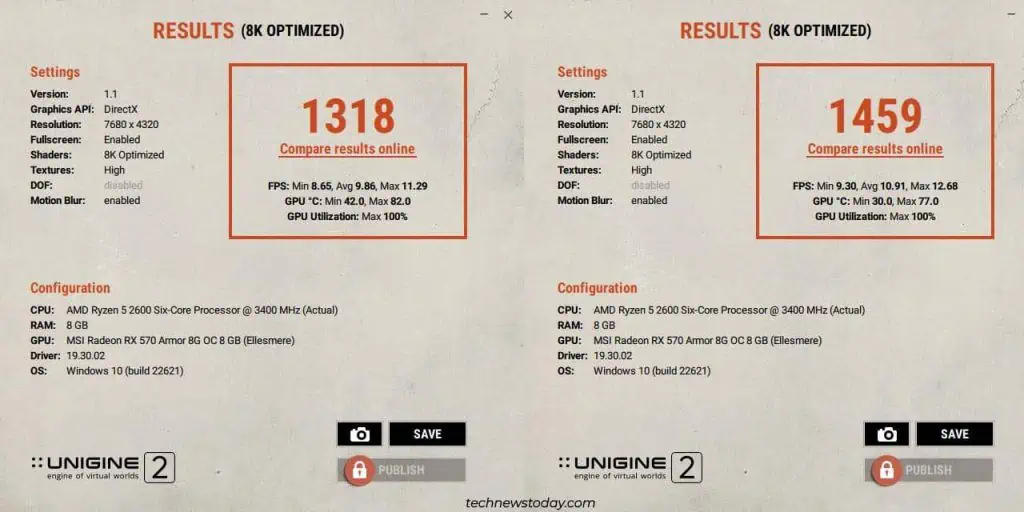
For the 8K Optimized benchmark test, my score improved from 1318 to 1459 with the final overclock. The average FPS improved from 9.86 to 10.91.
Finally, here are the gaming FPS stats for the RX 570:
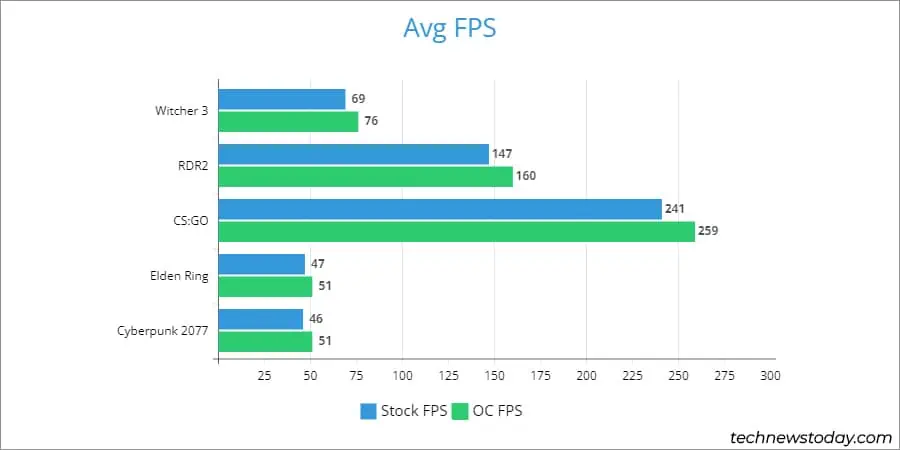
I’m out to enjoy my sweet 3 FPS gainz on Starfield now. Happy overclocking!

