To protect your files and avoid unauthorized access to your hard drives, it’s important to set a strong protective barrier. Maintaining strong passwords can be one such barrier.
Passwords can be used on your hard drive to provide a certain level of security for your data. When password protection and data encryption work together, the files on your hard drive can become more secure.
Thus today, we shall discuss how you can use password protection on your external hard drive and safeguard the files inside it with data encryption.
Password Protect External Hard Drive on Windows, Mac, and Linux
It is well-known that a password alone can’t protect your drive. Hackers can easily break the protocol that has set the password.
This is where encryption comes in handy. Encryption converts your data into an unreadable form known as the cipher text and also assigns it a key. The key is required when the user or receiver wants to decrypt the data again. Bypassing the password will not give the recipient any access to the files. As a result, it adds a new layer of security to the data.
There are various GUI and command line utilities that can be used to encrypt and password-protect the hard drive. You can even use third-party applications for this purpose. However, in this article, we will just recommend pre-installed encryptors on Windows, Mac, and Linux operating systems.
On Windows
There are multiple third-party options on Windows to protect your External Hard drive. However, Bitlocker is the most trusted among all, which comes pre-installed on Windows.
Using BitLocker to Encrypt External Hard Drive
Bitlocker is a useful utility on Windows that can be used to encrypt the drives on the device and protect the files in the drives from unauthorized access.
BitLocker uses AES Encryption with a block size of 128 or 256-bit key algorithm to protect your data. This algorithm converts the blocks of files and combines them as a ciphertext. AES makes use of a single key to encrypt and decrypt the data. This makes the encryption so strong that it can sustain any attacks on your data and protect it.
Here’s how to use this to password-protect the external hard drive.
- Plug the external HDD to your Windows device.
- Press Windows Key + I to open the Windows Settings.
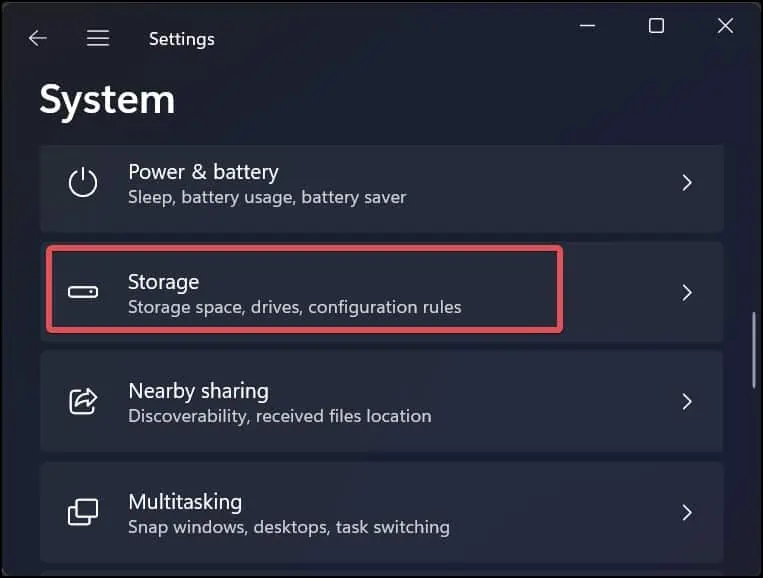
- Go to System > Storage.

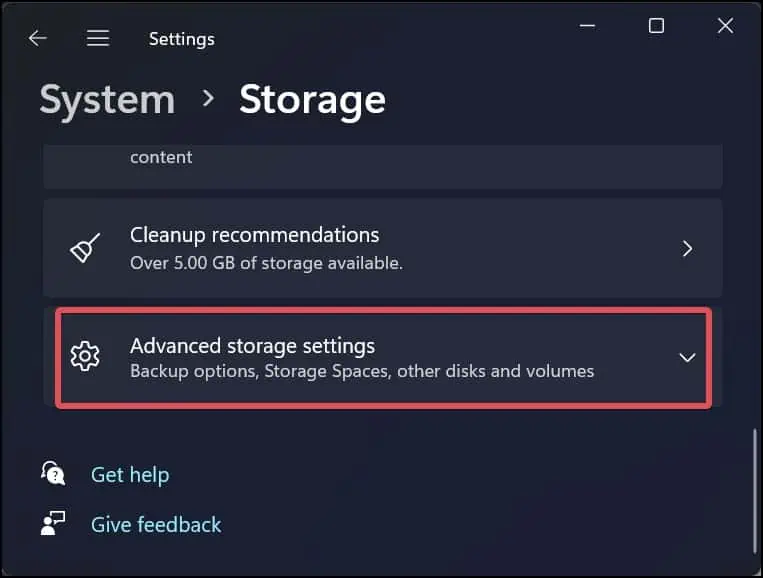
- Click on Advanced storage settings.

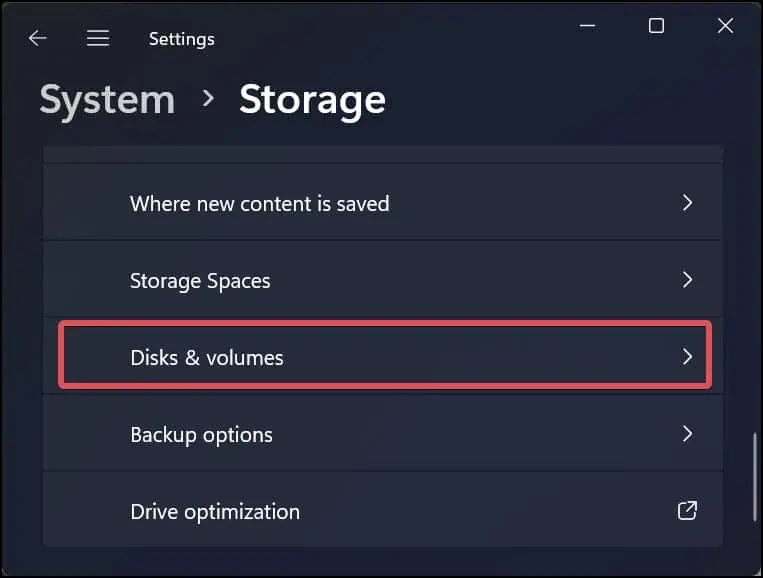
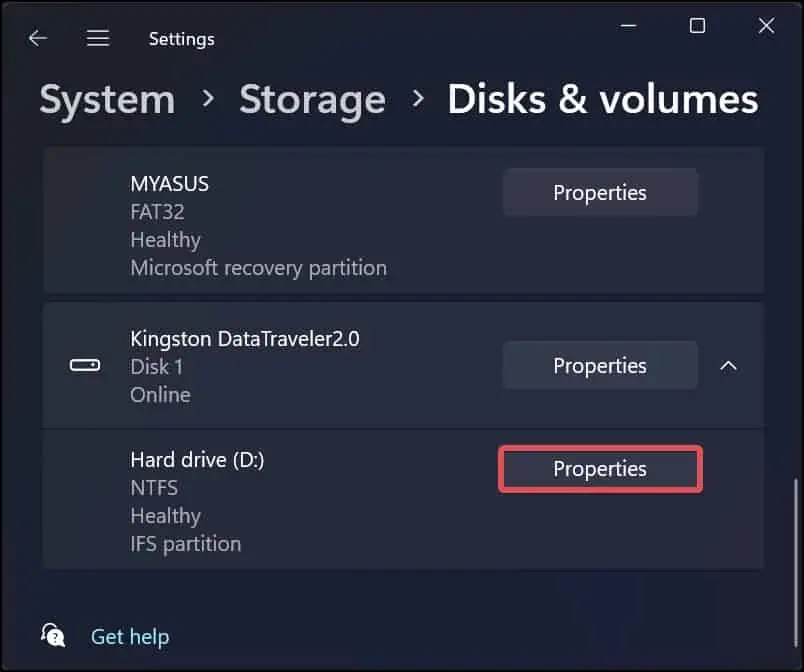
- Select Disk and Volumes.

- Find the Drive you want to encrypt and click on its Properties button.

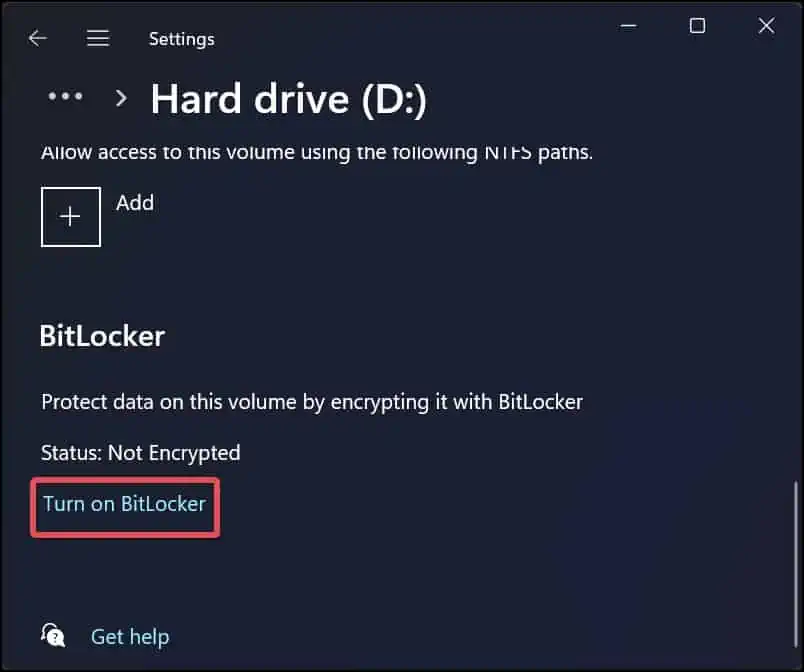
- Click on Turn on BitLocker.

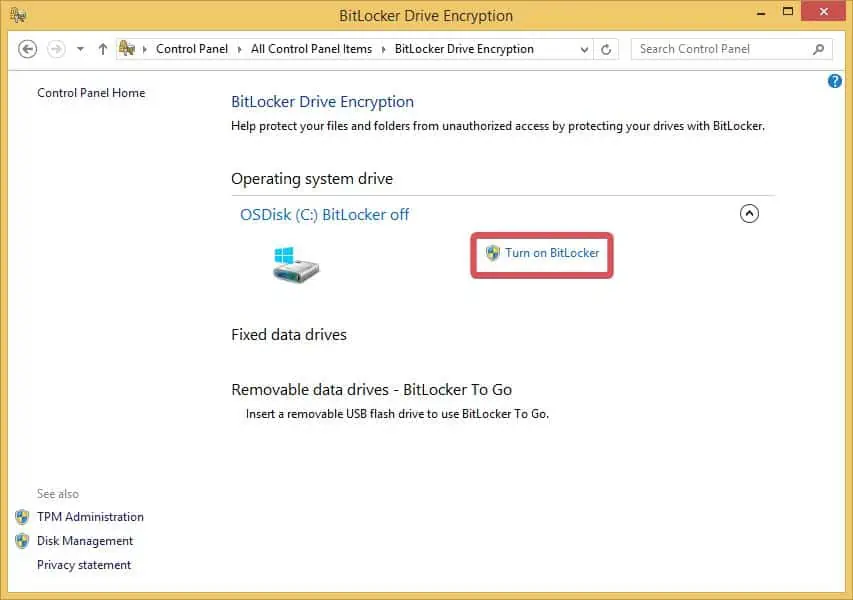
- Again, click on Turn on Bitlocker.

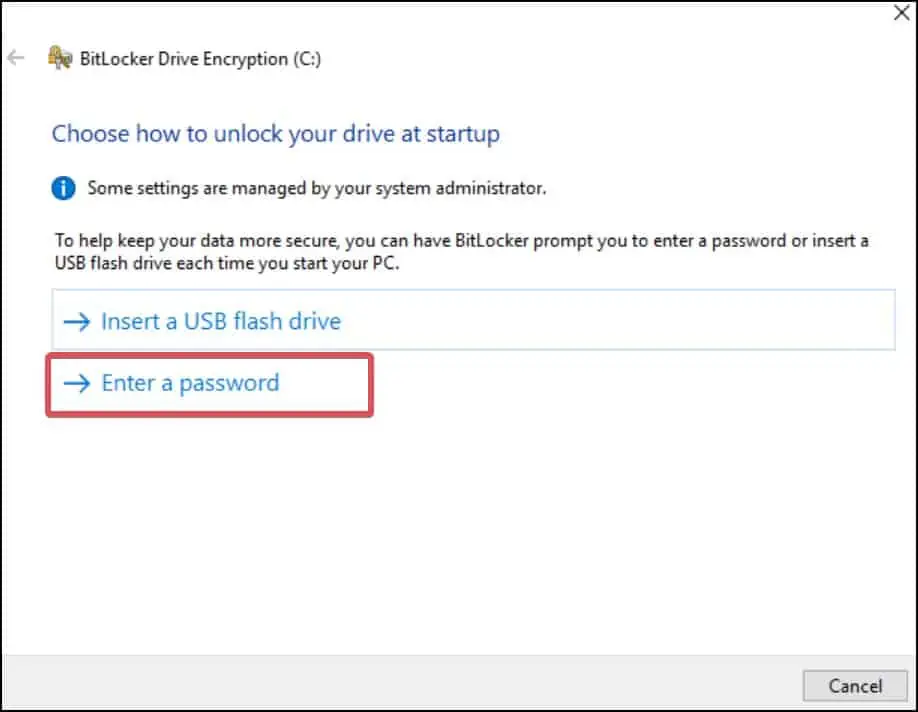
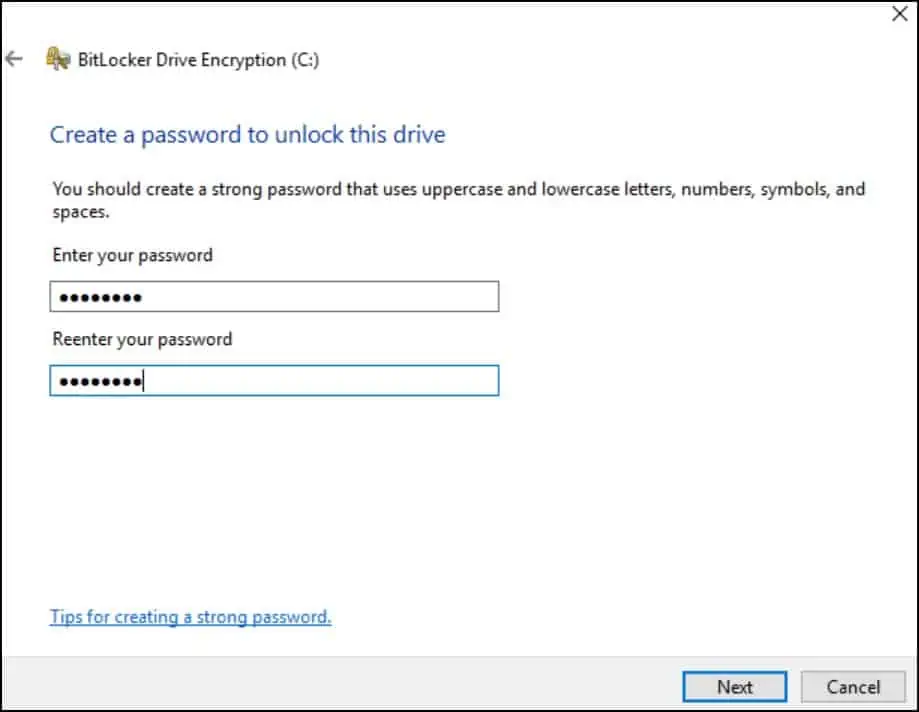
- Check the option Enter a password.

- Set a password for the drive and click on Next.

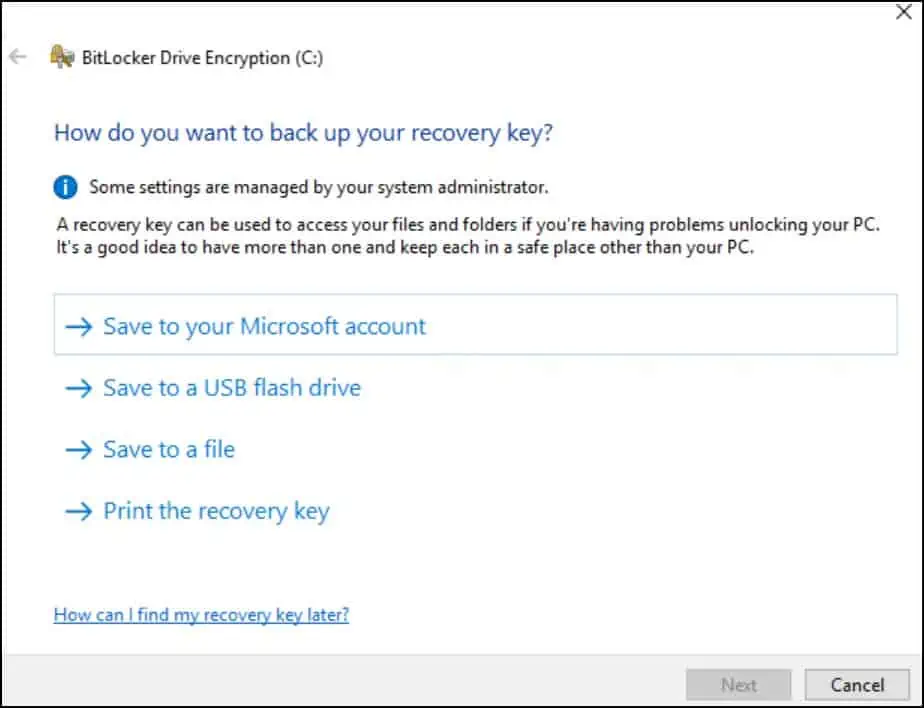
- You will be asked for a location to back up the recovery key. Choose the backup medium and click on Next.

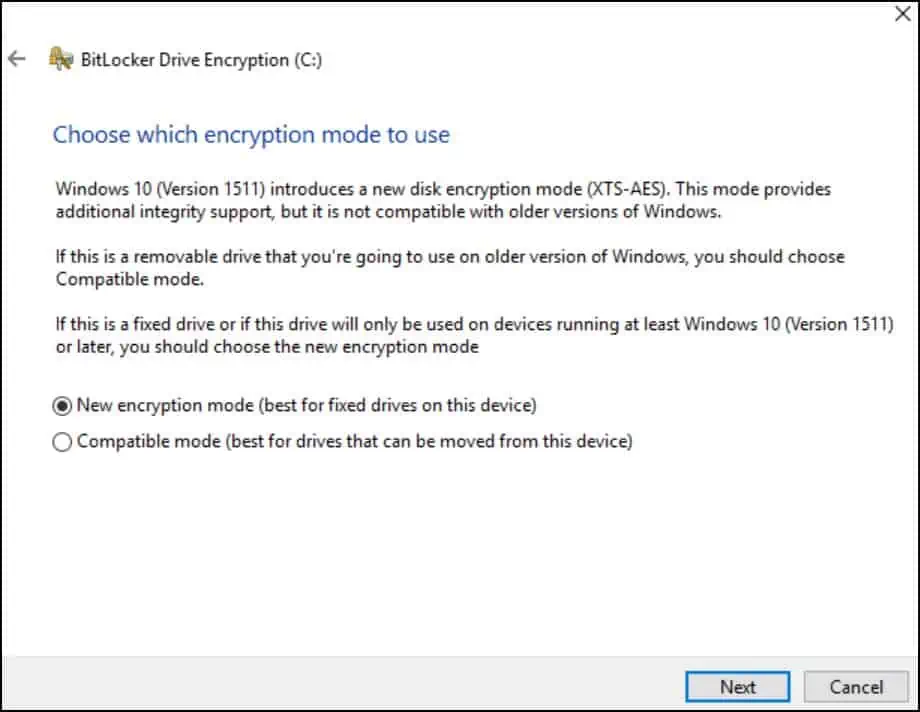
- Choose the Encryption mode. It is recommended that you choose the Compatible mode for the external drive.

- Click on the Start Encryption button.
Once the encryption is done, The BitLocker will lock the drive, and any user accessing the protected drive must enter the previously set password.
Note: BitLocker encryption is only available on Windows 10 & 11 pro and enterprise edition. You wont find it on the Home edition.
Disable BitLocker Encryption
If you do not require password protection for the drive, you can also disable the bitlocker encryption. Here’s how to do it.
- Plugin the external drive into the Windows device.
- Press Windows key + X and open Terminal (Admin) to launch the command prompt with administrative privileges.
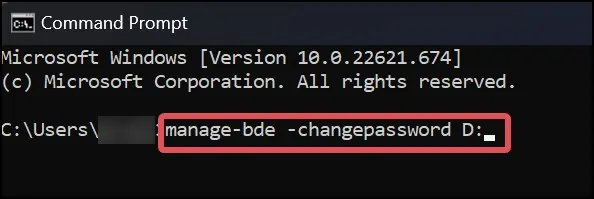
- Now execute this command.
manage-bde -off <Drive letter>
- This command will decrypt the external drive.
- On PowerShell, you can use this command to do the same thing.
Disable-BitLocker -MountPoint "<Drive Letter>"
On Mac
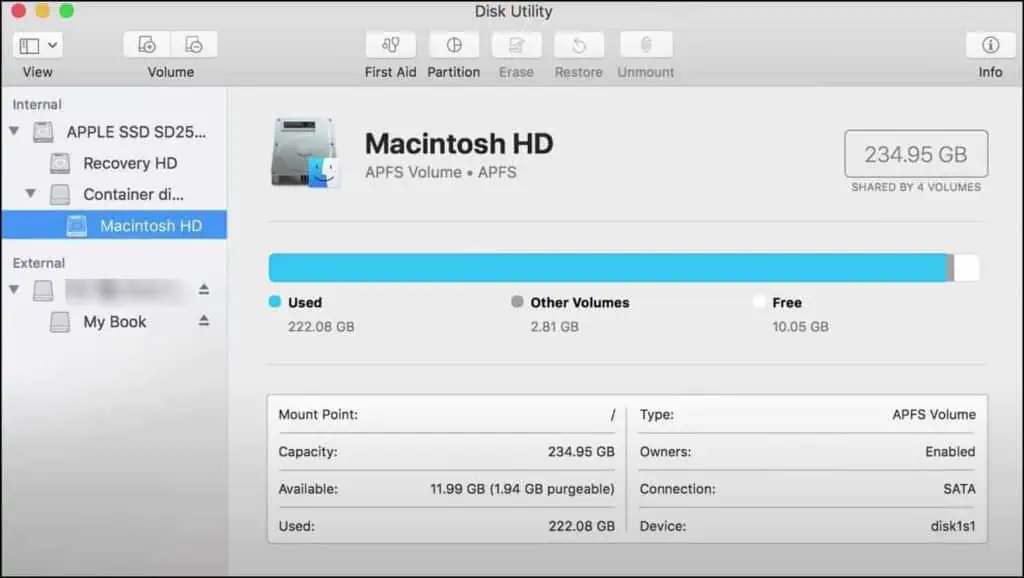
You can use the Disk Utility app to encrypt the external drive on Mac. The downside of this app is that it erases the data inside the drive before encrypting it. Therefore, it is advised to back up the data before performing encryption.
- Connect the external drive to the Computer.
- Click on the launchpad icon and search for Disk Utility.
- Launch the app.

- Select the external drive from the list of volumes.
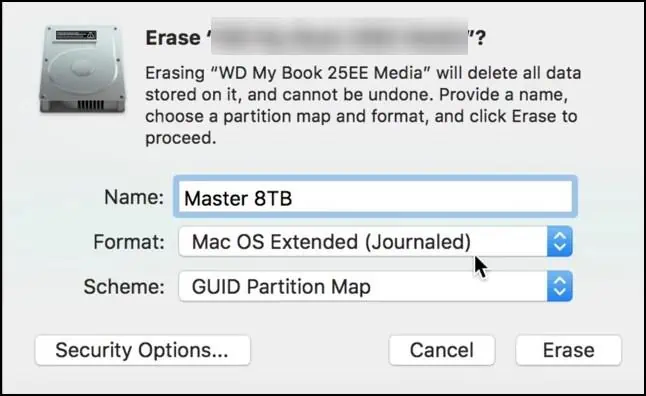
- Click on Erase button and name the Drive.

- Click on the Scheme pop-up menu and select GUID Partition Map.
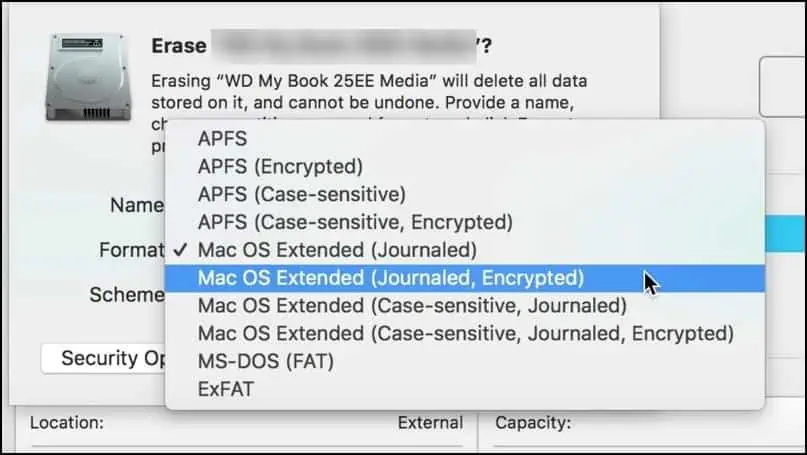
- Now, click on the Format pop-up menu and select choose an encrypted file system.

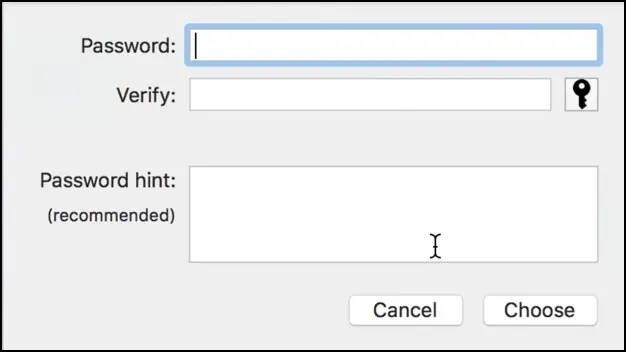
- Set a password for the drive and then click on Choose.

- At last, Click on Erase.
On Linux
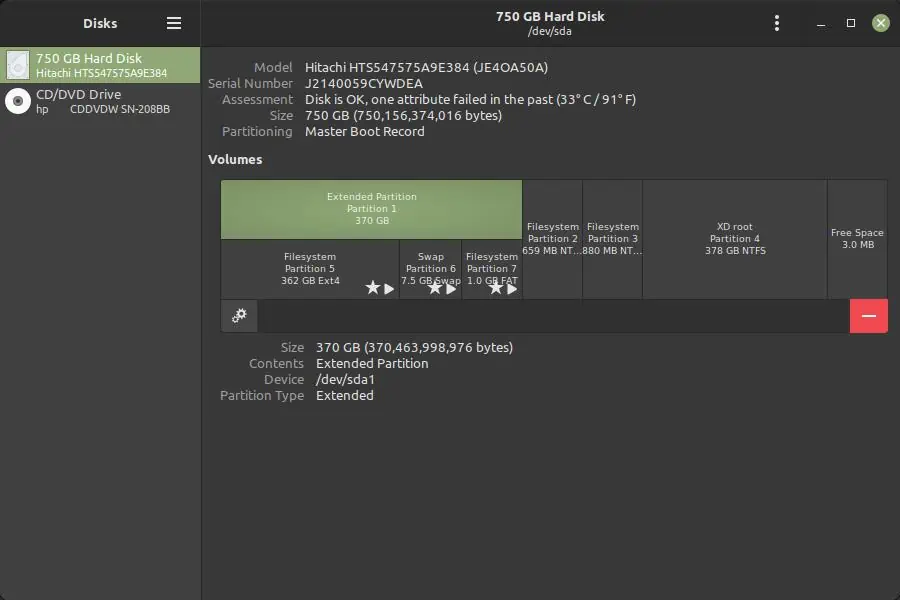
On Linux, there are multiple tools you can use to password-protect an external drive. However, the GNOME disk utility provides the most convenient way to do it with its easy GUI-based interface. This utility comes pre-installed on Ubuntu.
Here’s how to encrypt the external Hard drive and add a password to it on Linux. We have used the Ubuntu distro for this. The process for drive encryption is similar for all other Linux distros.
- Go to the Application menu, search for Disks and open it.

- On the left panel of the application window, you will see a list of your Drives.
- Select the External Drive.
- Click on the Settings button.
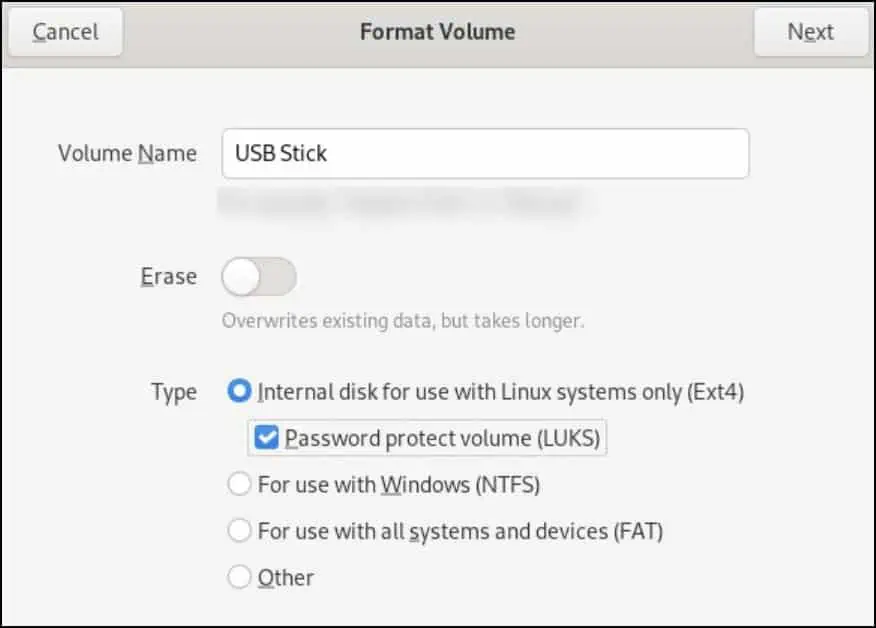
- Name the Volume.
- Select the Internal disk for use with Linux systems only (Ext4) and then click on Password protect volume (LUKS).

- Click on Next.
- Now, set a password and Click on Next.
- Finally, Click on Format.
- This process will erase the external drive and encrypt it for you.
- When you go to the File Manager to open the drive, it will ask you for a password to access it.
Note: Before encrypting the external hard drive, ensure the files are backed up. Also, the drive encrypted by the Gnome Disk utility will only run on Linux devices and cannot be accessed from other operating system platforms.

