Over time, your Chromebook may start to slow down or lag, or the ChromeOS may even run into boot issues. One easy solution to all these problems is performing a simple powerwash.
Powerwashing a Chromebook resets the device back to its default factory settings—reverting it to an out-of-box state. It removes installed applications, linked accounts, and, most importantly—personal files and folders.
Although resetting a Chromebook is a simple process, there are a few things you need to consider before you start.
- Connect your Chromebook to a charger before you begin the reset process.
- Make sure that your Chromebook does not run into any interruption during the powerwash process.
- Resetting your Chromebook removes everything from the system. Back up necessary files and folders to a cloud-based storage system like Google Drive or an external storage device.
Powerwash Personal Chromebook
Resetting a personal Chromebook is simple. Unlike an enterprise-enrolled Chromebook, where several ChromeOS settings are inaccessible, you can access almost all settings on your personal Chromebook.
To powerwash this type of Chromebook, follow these steps.
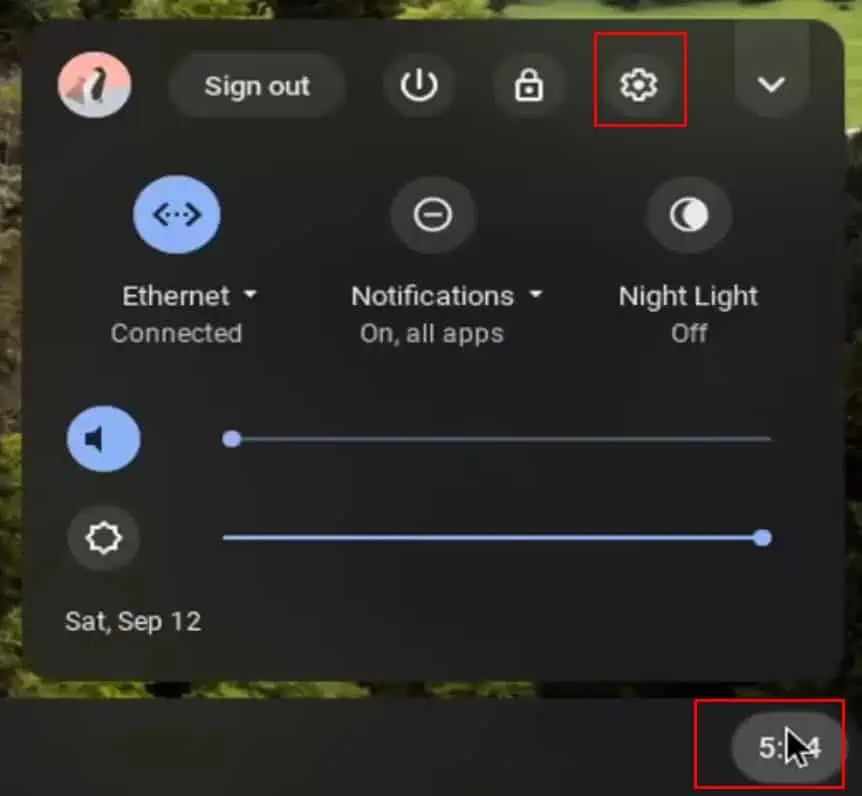
- Click on the tray menu and click on the gear icon to open Settings.

- On the left panel, expand Advanced and click on Privacy & Security or Reset Setting.
- Now, on the right panel, under Reset settings, click on Reset.

- Now, follow the reset process.
Alternatively, you can powerwash your Chromebook without logging in to your user account. This method can be useful especially if you have difficulty logging into your user account.
- Click on the tray menu on the bottom-right of the screen and click on Sign out.

- Press Ctrl + Alt + Shift + R simultaneously. This will open a Reset this Chrome device window.
- Click on Powerwash or Reset to proceed.

- Select Continue when it asks for powerwash confirmation. The Chromebook will now restart and display a powerwash-in-progress screen.
Powerwash Enterprise Enrolled Chromebook
The option to powerwash is not easily accessible on an Enterprise Enrolled Chromebook. If you cannot powerwash the Chromebook from settings or the Ctrl+Alt+Shift+R shortcut key, you will need to enable developer mode to reset it.
- Turn off your Chromebook.
- Press the Esc key, Refresh key, and the power button simultaneously until you get to an insert-recovery-USB screen.

- Press Ctrl + D. This will ask for a confirmation message to enable developer mode.
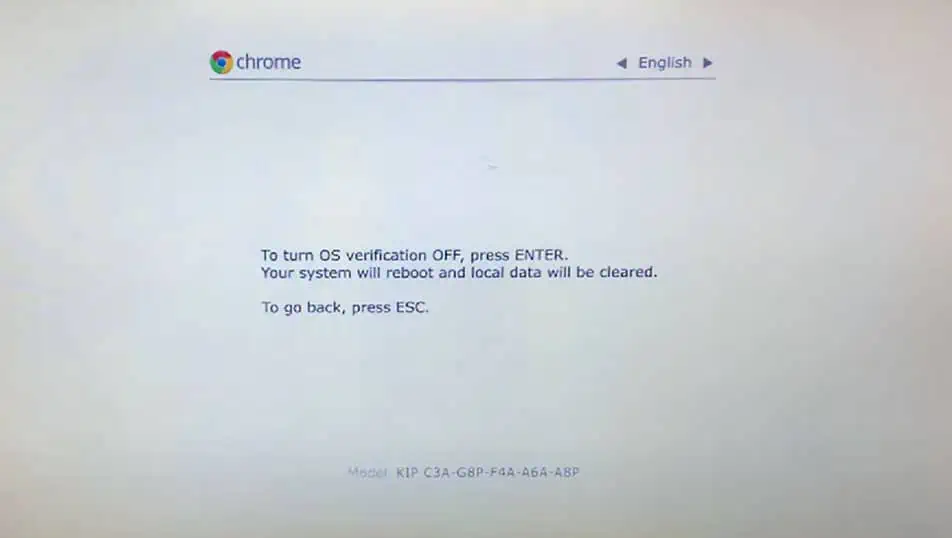
- Now, press Enter or Space depending on what the prompt says to turn off OS verification. This means you are now in developer mode. The system will now reboot.

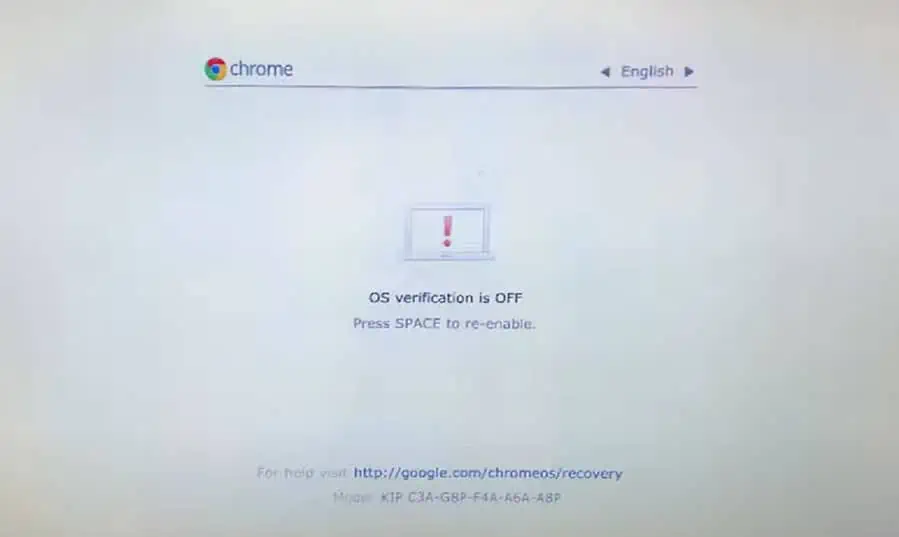
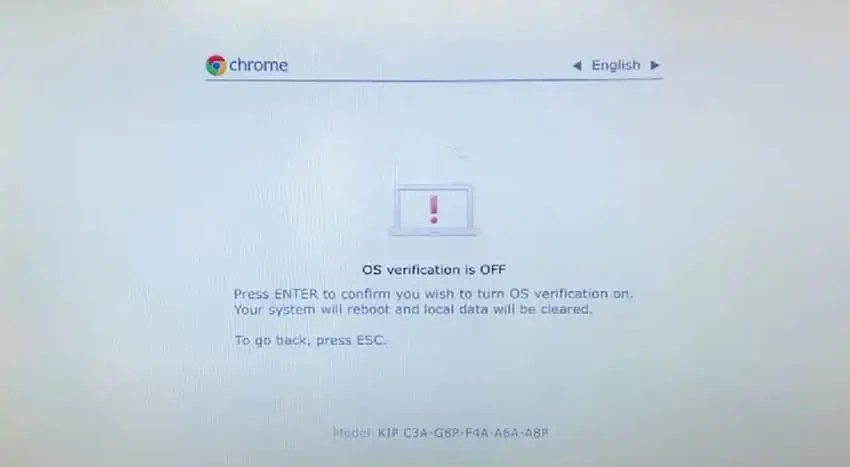
- Once you get to the OS-verification-is-OFF screen, press Space to re-enable it.

- Now, press Enter to re-enable OS Verification. The system will reset and will reboot again.

- You will now be prompted to a welcome screen. Click on Let’s Go and choose a Wi-Fi network.
- Once the system connects to a network, the Enterprise Enrollment process will begin.
- Click on Done once the Enterprise enrollment process is complete.
Finishing Up the Powerwash
Once the process is completed, you will need to sign in to your Google account or enroll if you are using an Enterprise Chromebook.
After the reset, ChromeOS will boot into a Welcome to Chrome screen.
- If you want to revert to previous version of ChromeOS, press Ctrl + Alt + Shift + R twice. Now, you will get a Power and Revert option. You can ignore this step if you are simply resetting the device.
- Click on Let’s Go or Get Started.
- Connect to a network. Once you connect to a network, the Chromebook might check for updates.

- Accept Google Chrome OS terms and conditions.
- Sign in to your Chromebook. If you have an Enterprise Enrolled Chromebook, it will automatically start to enroll the device.
- Finally, sign in to your Chromebook.

