Dish remotes are designed to work with the Dish network receivers like ViP receivers or Joey, Wally, and Hopper. However, the same remote can be used to control your TV so that you don’t need to use different remotes for each of them.
There are two variants of the dish remote – the older variant from the 20.0 series and the newer variant from the 40.0 series. While programming the newer remotes is comparatively easy, you can have a hard time programming the older remote variants. So, in this article, we will be discussing different methods you can use to program an old dish remote with your TV.
How to Program Old Dish Remote to TV?
The process of programming your older dish remote to a TV can be pretty extensive than programming the newer remotes. However, you should not find it difficult with our step-by-step guide.
You can either program it using a specific code or rely on the remote itself to guess a code.
Programming an Old Dish Remote Without Code
The first method of programming an old dish remote to a TV is without using a code. Here, you should rely on a hit-and-trial method and your remote tries to pair with the TV. It tries a new code every time during the pairing session. Once it finds the correct code, the TV will turn off, and programming will complete.
- Grab your Dish remote control and face it toward the TV.
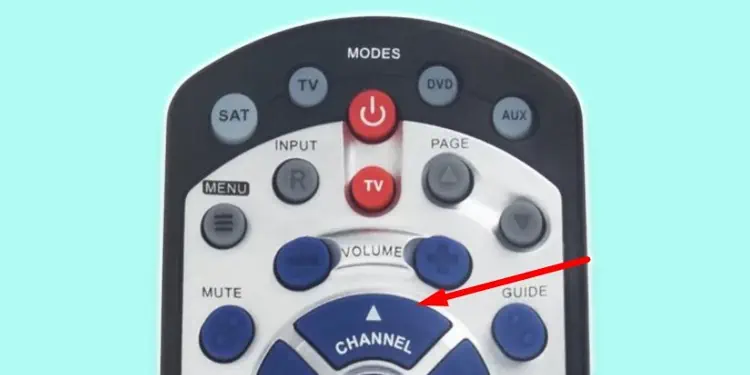
- Locate the TV button on the remote. It is generally located at the uppermost part of your remote in the modes section, along with the SAT, DVD, and AUX buttons.

- Press TV button and keep it holding for about 10 seconds.
- After 10 seconds, lights in all four buttons will glow.
- Then release the TV button. You will see the TV button start blinking.
- Press the Power button on your remote once.

- Now the light on TV button will glow constantly. It indicates that you can now start programming the remote since the scanning process has started.
- Tap the Up button on the directional pad once.

- Wait about 3-4 seconds and see if the TV turns off.
- If the TV turns off, the remote has found the correct code. Else again, press the Up button and wait.
- Repeat the steps till your TV turns off.
- Once the TV powers off, press (#) button. It is located in the numeric keypad of your remote. The TV mode button on your remote will start blinking again.

- Power on the TV, and you are all set to use the remote with your TV.
Programming an Old Dish Remote With Code
You can next try pairing the remote using TV specific code. The above-discussed method should work most of the time. However, it might not work on every TV brand, and you should try programming with a code.
- Point the remote towards your TV.
- Keep pressing the TV button until all mode buttons like SAT, DVD, and AUX start glowing.

- Remove your finger from TV button. Now the button starts flashing.
- It’s time to enter the TV-specific code, then.
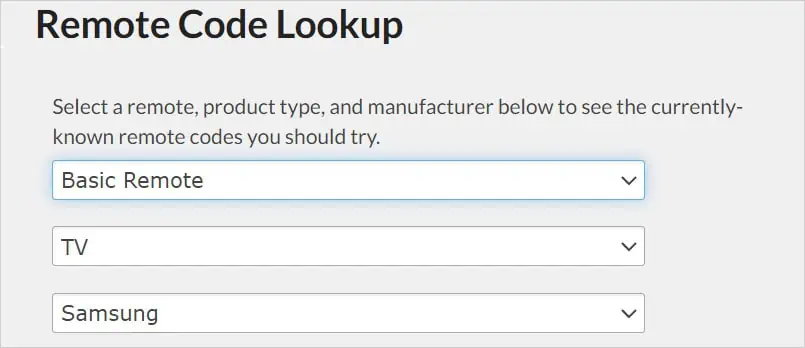
- Please refer to the official website of Dish Network to get the code for your TV. You can find the code for every TV manufacturer and remote model there.
- Click the remote code lookup hyperlink on the website.

- Choose your remote type and TV manufacturer from the drop-down. It will show a list of codes for your TV. Note them down.

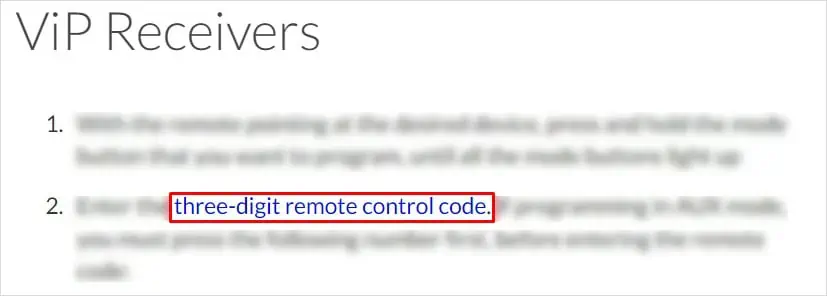
- First, press zero (0), then enter the three-digit code.

- After entering the code, press (#) button located at the numeric pad of your remote.

- Tap the power button on the remote. If the code works, the TV will turn off. Else, repeat the steps with another code.

Programming an Old Dish Remote With Joey, Wally, and Hopper
There can also be cases when the Dish remote goes out of sync with the Dish network signal receivers. In such cases, you can easily reprogram them back. After programming the remote with the receivers, you can use the same steps discussed above to program it with the TV.
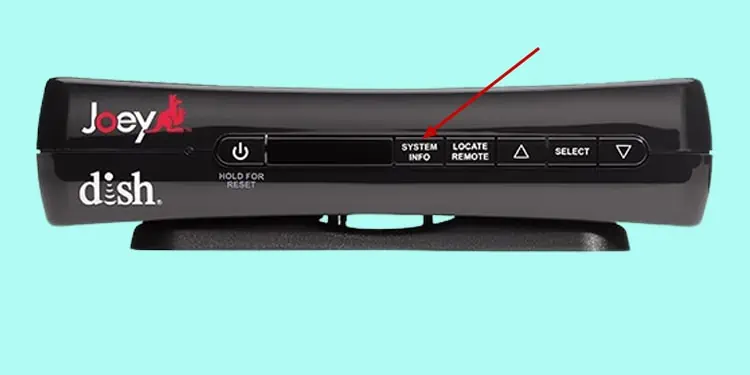
- Go to the button panel of your Joey, Wally, or Hopper and locate the System Info button. Press it once. It will show the System Info window on the TV screen.

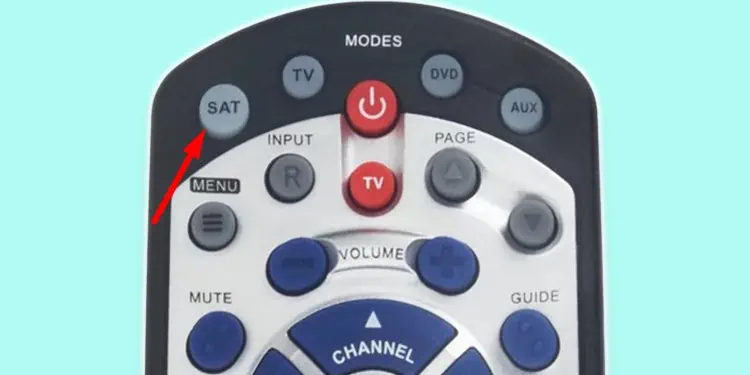
- Then grab your remote and tap SAT button.

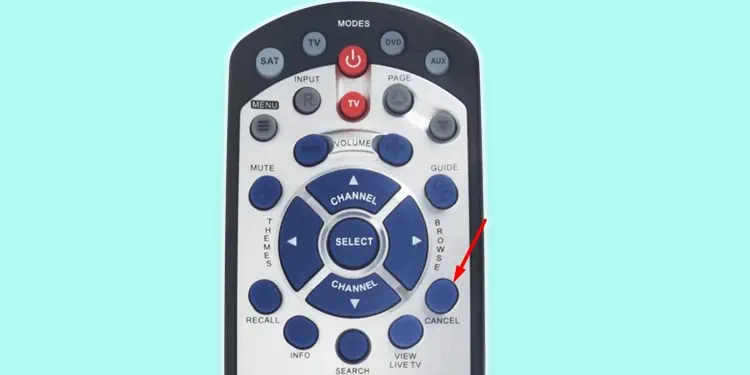
- Then tap Back or Cancel, depending upon which button your remote has. If it has both, press them one by one. Now the System Info window should disappear from the TV screen. It indicates that the remote is now paired with the receiver.

How to Program a New Dish Remote?
If you cannot program your old dish remote with any of the methods mentioned in this post, it’s probably time to get a new model of remote. Programming new remotes from Dish Network is relatively easy. Remote models after 40.0 are marked as new remotes by Dish Network, and you don’t need to rummage through a code list to pair these remotes. Neither is there a lengthy process to program them.
Whether you have a Joey, Hopper, or Wally remote, you can program the remote from the receiver’s settings on your TV.
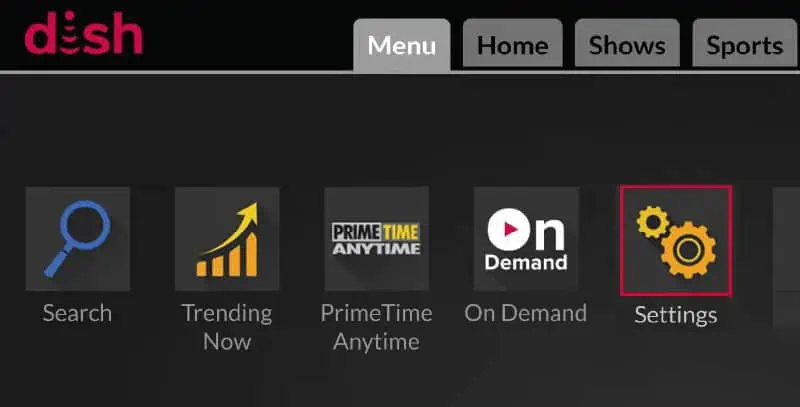
- Open Menu on your Dish receiver and select Settings.

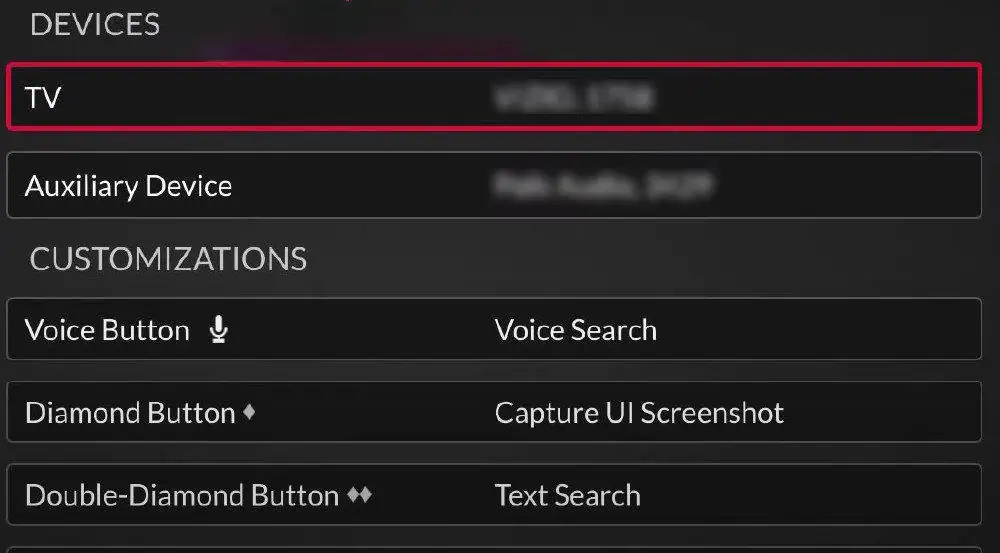
- On the settings window, move to the right and choose Remote Control.

- Under the DEVICES section, choose your TV.

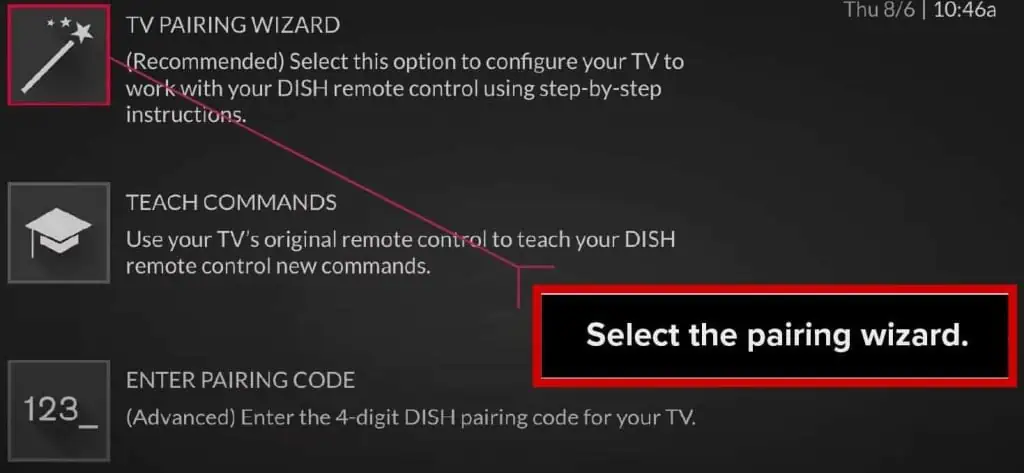
- Tap TV Pairing Wizard on the next screen.

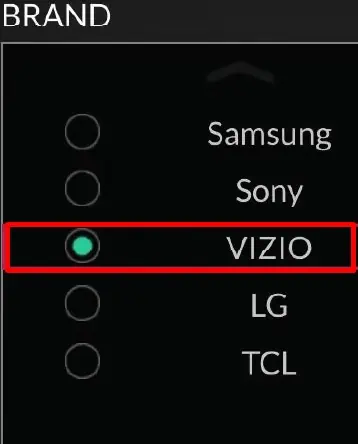
- Select your TV manufacturer from the list.

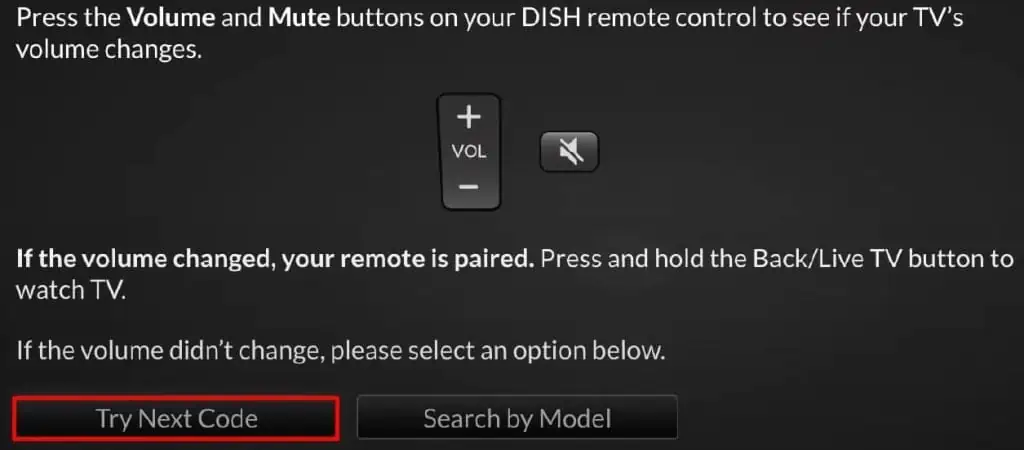
- The remote will start testing the codes one by one.
- You can check if the code worked by pressing the Volume or Mute button. If the controls worked, congratulations! The remote is successfully paired with the TV.
- If not, select the Try Next Code button and repeat the process.

- Tap the Finished button once the pairing is complete.

