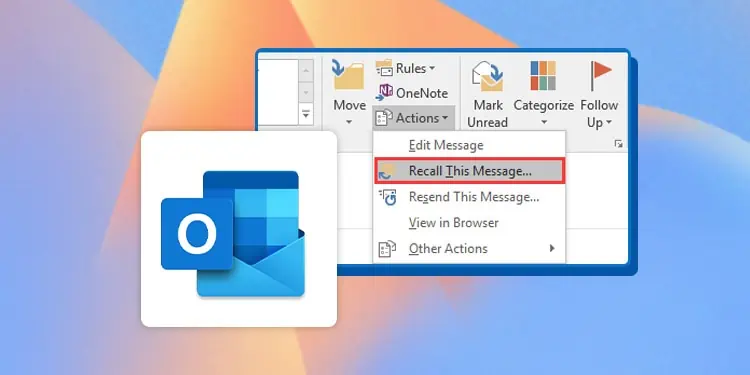
If you’re often caught up with emails, it’s natural to make a few mistakes. For instance, we might have grammatical errors, missed a few attachments, or such. In cases like these, a life savior is Microsoft Outlook’s Recall feature.
What’s special about the feature is that you can recall your previously sent email and also make further new changes to it before resending it. So, this feature is popular since not a lot of other email platforms provide this handy option. But there are certain limitations and methods to recall or re-edit your email on Outlook successfully.
Before You Recall Email
Before you proceed to recall your email on Outlook, there are a few necessary requirements.
- The recipient has not read the original email, and it is still present in the inbox.
- You and the recipient must have an Exchange server email account or a Microsoft 365 account, along with Outlook being the email client. This is relevant even if you’re using Outlook on your phone.
- The recipient’s inbox must be open while you recall the email.
- The original email must not be in the Spam folder or have interaction with spam filters, rules, or add-ons.
- You can’t recall Outlook emails on the web version.
- You and the recipient must be from the same organization or workspace.
- Your Outlook account must not be a MAPI or POP account.
How to Recall or Reedit Email on Outlook?
The methods to recall and re-edit your email on Outlook are fairly easy. Here’s how you can do it:
On PC
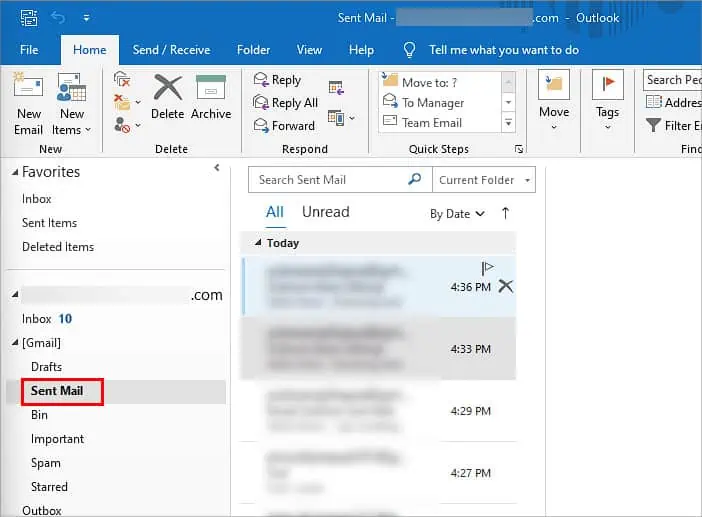
- Open Outlook and go to the folder on the left panel. There, click on the Sent Mail folder.

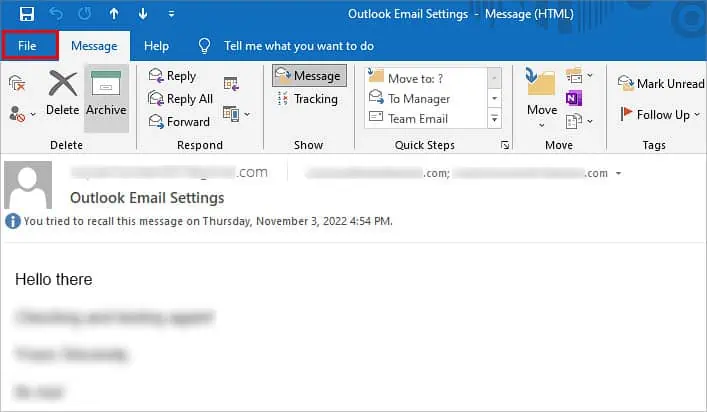
- Double-click on the email you want to recall. Doing so will open it in another window.
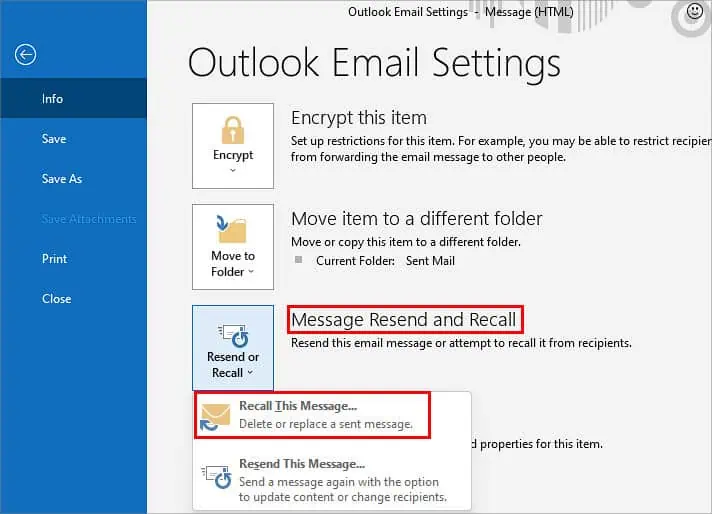
- Go to File menu and then Info.

- Click on Message Resend and Recall.
- Click on Recall This Message.

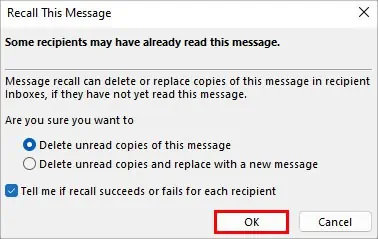
- You’ll now see two options:
- Select Delete Unread Copies of this message to recall the sent message
- Select Delete Unread Copies and replace with a new message to replace the sent message with a new message. You can now make changes as per your liking and click on Send. The previous email sent to the recipient will be deleted and replaced with the new one you just edited.
- Check the box that says Tell me if recall succeeds or fails. Enabling this option will notify you if the recall email option was successful or not.

- Click on OK.
On Mobile
- Tap on the Outlook logo from the top-left corner of the screen.
- Then, select the Sent option.
- Double-tap on the last email you want to recall. Then, go to the Message tab.
- Go to Actions.
- From the list of options, tap on Recall This Message.
- Either tap on Delete unread copies of this message or Delete unread copies and replace with a new message.
- If you want to edit the email, tap on the latter option and proceed.
- Tap on the box that says Tell me if recall succeeds or fails for each recipient.
- Tap on Okay.
How to Recall Outlook Email on Mac?
Unfortunately, Outlook doesn’t currently allow macOS users to follow the same steps to recall and edit emails. You can, however, opt for the Undo Send command that lets you unsend your recent emails for several seconds after being sent. Here are the exact steps for it:
- Right after sending the email, you’ll notice a small prompt at the bottom of your screen as Undo. The duration of this prompt depends upon the time you had previously allocated.
- Click on Undo. You can now open the email draft.

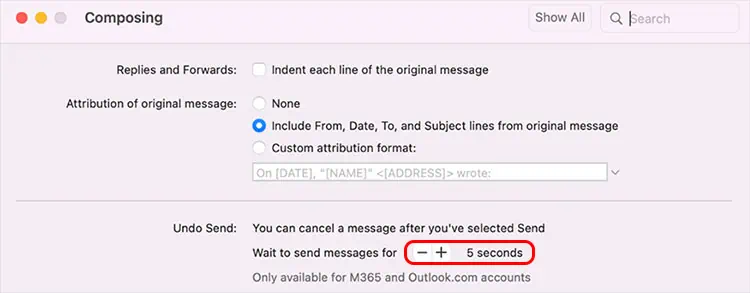
To allocate a certain duration for the Undo Send option, you can do it through settings. Here’s how:
- Open Outlook and go to Preferences.
- Then, click on Composing.
- From the Composing window, you can select your desired time, from 5 to 20 seconds.

The above steps are available only on the latest version of Outlook for Mac.
How to Check Recall Eligibility?
Outlook has additional settings that allow you to check if your recipient’s email address is eligible for the Recall option. Here’s what you’ll need to do:
On Windows
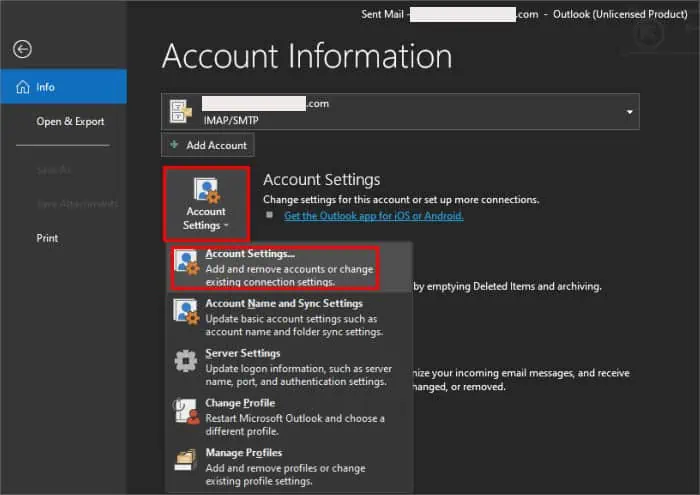
- Click on File from the header menu.
- Go to Account Settings. Again, tap on Account Settings from the additional menu.

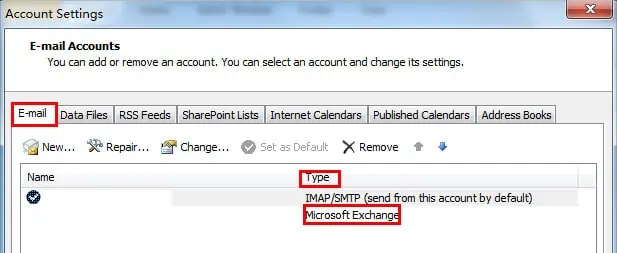
- From the pop-up menu, click on Email.
- Find the particular recipient in the Name column. Along with that, you can view the email type in the Type column.

- The Type must display Microsoft Exchange.
On Mac
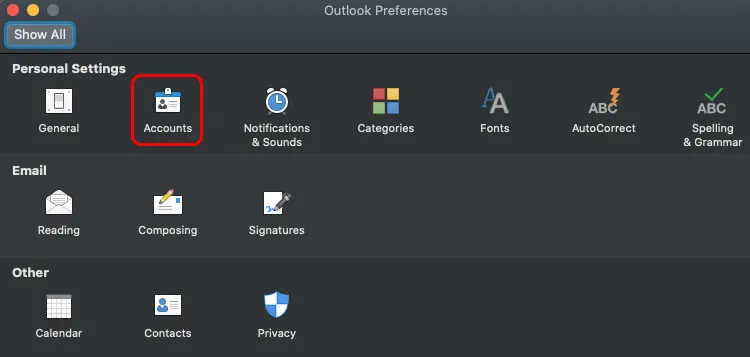
- Click on Outlook from the menu bar and then go to Preferences.
- Go to Accounts.

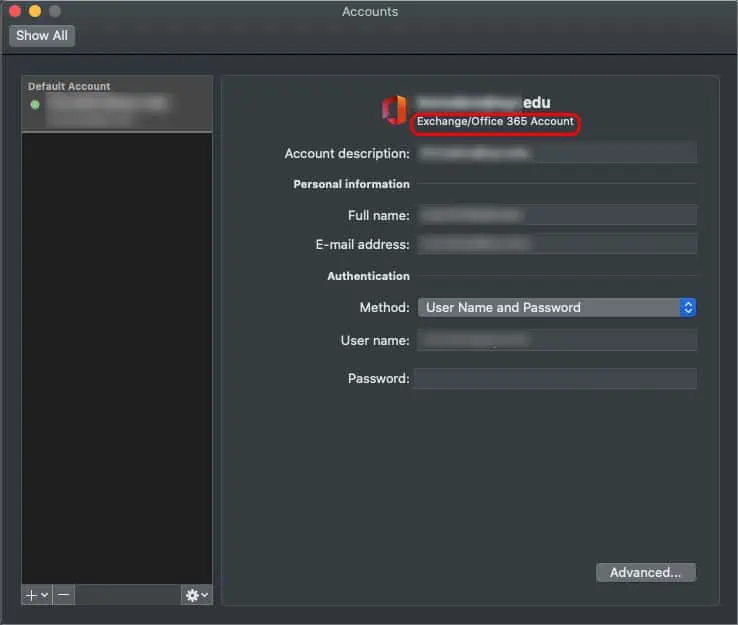
- Locate the designated account and select it.
- You can view the email type below the account name.


