We all have faced a situation where we deleted an important file and tried different methods to get it back. But did you know whatever items we remove are not actually wiped from the storage drive?
Whether you’ve performed a temporary or permanent deletion, you can opt for simple Windows techniques to retrieve them. It’s also possible to get them back from any online storage or using a preferable third-party program.
Undo Delete
Let’s begin with the quickest method in this list. Undoing the delete can bring back the temporarily deleted files within seconds.
This technique is possible using two methods:
- Right-click and select the Undo Delete option.
- Press the Ctrl + Z hotkey.
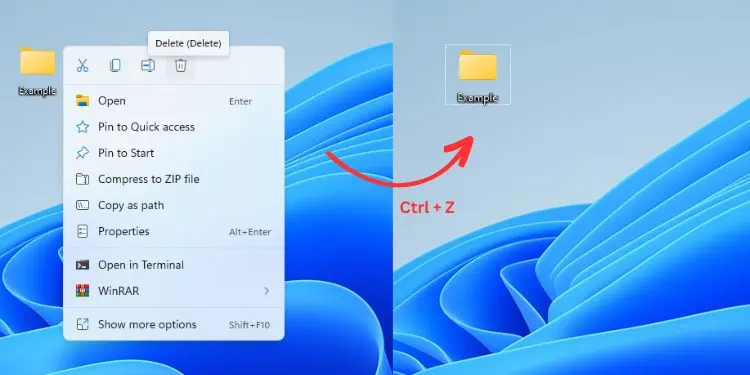
For example, I am going to temporarily delete the Example folder from my Desktop. To get it back quickly, I press the Ctrl and Z keys together, and it gets restored in no time.
However, if you have performed multiple actions, you’re required to undo the delete multiple times to get back the same file you want.
Restore From Recycle Bin
While undoing the delete is just an immediate method to get back the temporarily deleted file, Recycle Bin always remains the top choice among Windows users. Maybe, you’re probably aware of this utility.
Basically, any file you delete is stored in the Recycle Bin until the maximum size limit is met or you empty it yourself. So, you can navigate to this dedicated directory and restore one, multiple, or all the files at once.
- First of all, navigate to your Desktop.
- Look for the Recycle Bin icon and double-click to open it.

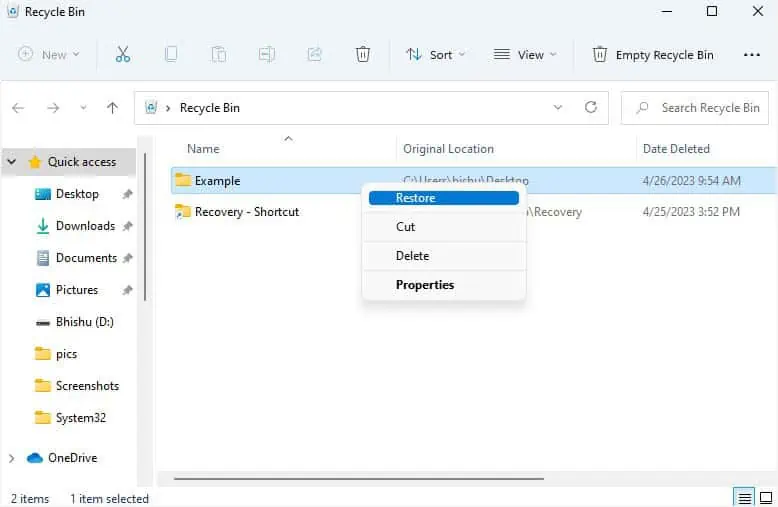
- Now, find your item, right-click on it, and pick Restore.

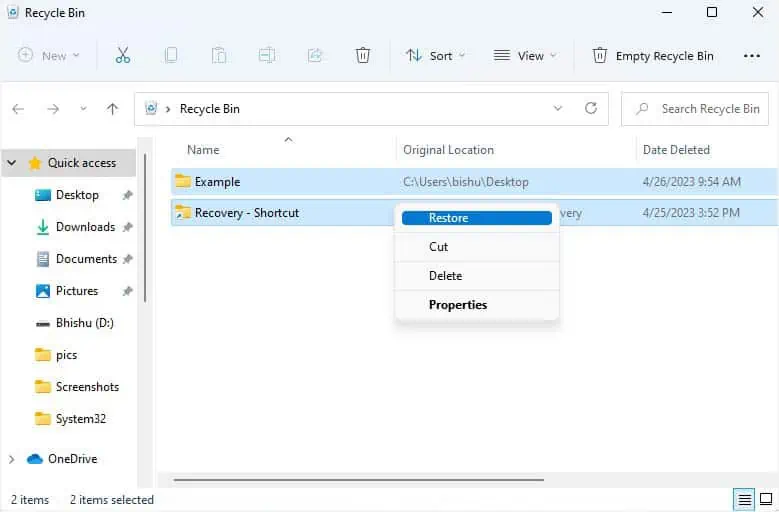
- For recovering multiple files, select those you want to, right-click on any of them, and choose Restore.

- Navigate back to the directory from where the item was deleted from. You should see it there to confirm successful recovery.
Try Windows File Recovery CLI
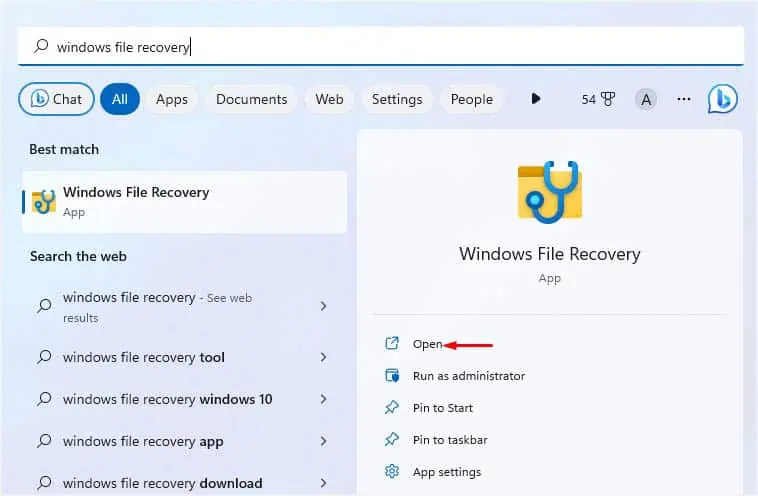
Microsoft offers Windows File Recovery, which is a free command-line utility to recover all your deleted files. You can download the tool from Microsoft Store.
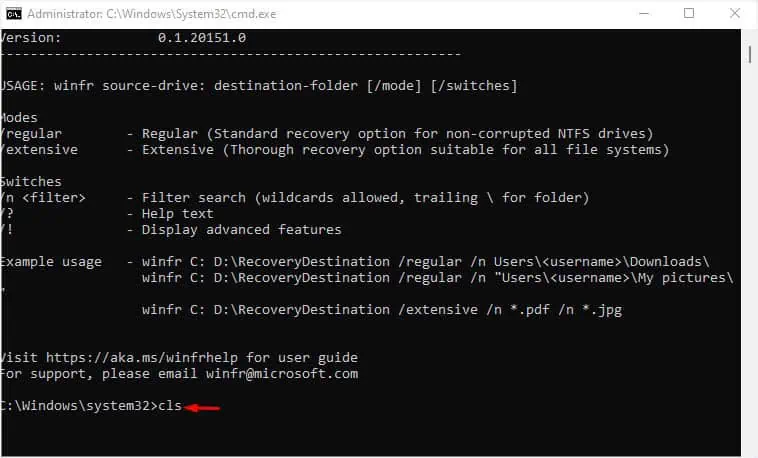
Once you launch the tool, the help information should be displayed by default. It showcases the different modes and switches. Additionally, you can check out a few examples for your understanding. As mentioned, here’s the syntax you should use:
winfr source-drive: destination-folder </mode> </switches>
If you’re finding this hard to understand, do not worry! In the below steps, I’ll be guiding you with a simple example of how this CLI works to recover your deleted items and explain its working mechanism:
- Launch the Windows File Recovery utility and hit Yes to provide administrative privilege. This will simply open the Command Prompt window.

- If you want to clear the screen, type
clsand hit enter. I usually prefer doing this. You may skip this step.
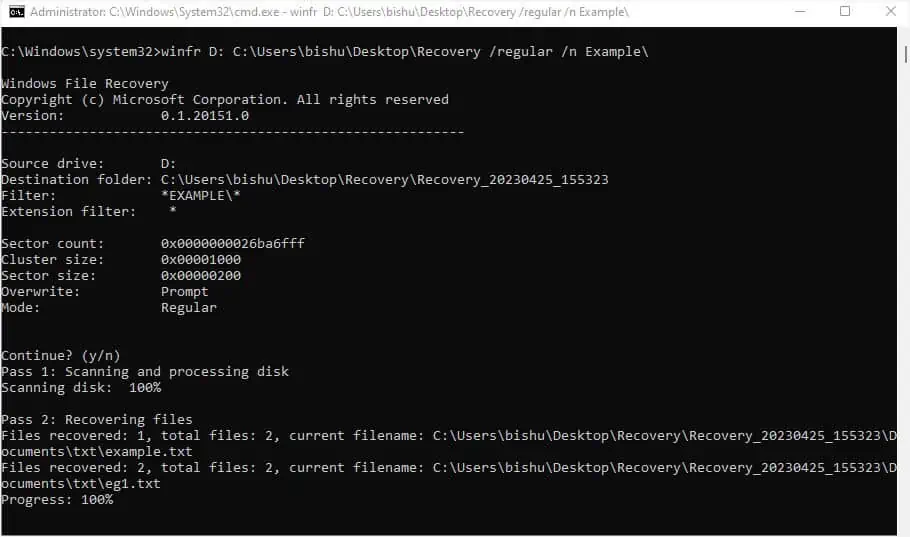
- As per the above syntax, here’s the command I’ll use to recover all the deleted items from an Example folder in D drive and store them in the Recovery folder in C drive:
winfr D: C:\Users\bishu\Desktop\Recovery /regular /n Example\
Here,winfr= Windows File RecoveryD:= Source DriveC:\Users\bishu\Desktop\Recovery= Destination Path where the recovered items will be stored/regular= mode that will only scan for non-corrupted NTFS drives (in my case, it’s scanning the D drive)/n= wildcard (this allows me to specify the exact path in the source drive from where I wish to recover the files)Example\= Path of the source from where files were deleted and I wish to recover
- After executing the command, a confirmation message should pop up. Simply press
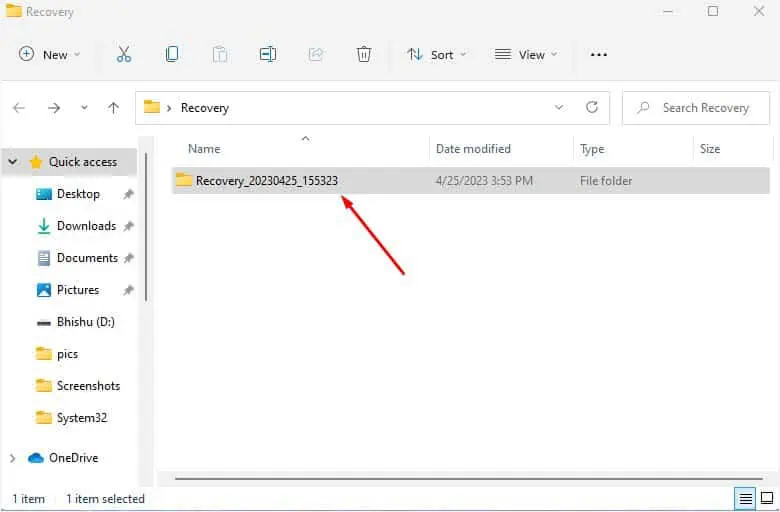
yto continue. - Wait for the files to be recovered. Once this is completed, you should get another confirmation message asking you to view them. So, press
yand this should open up the File Explorer consisting of the recovered items.
Note: You cannot specify the destination drive/partition the same as the source drive/partition.
Using File History
If you’re not a big fan of the command line interface, there are plenty of Windows GUI options as well. However, it’s important to note that you should have a prior backup.
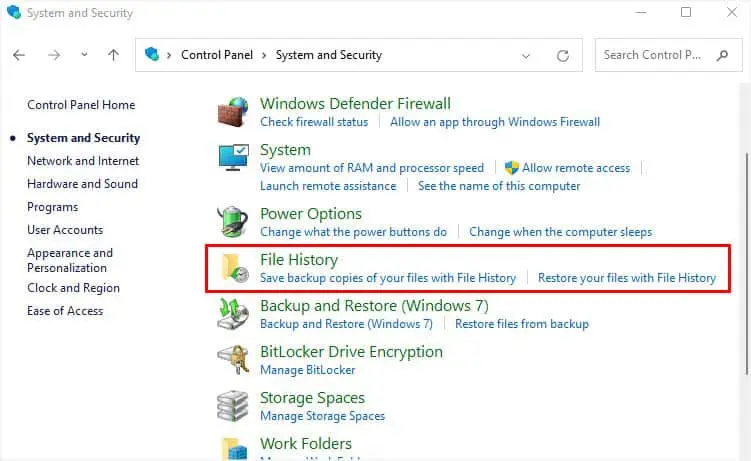
The first one we will discuss is the File History feature in Control Panel. If you’ve already turned on this option, you do not have to worry about the permanent deletion of any files. It keeps a continuous backup of all your data so that you can retrieve them later.
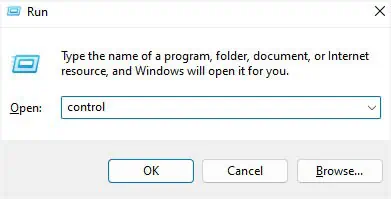
- Use Windows + R to open the Run utility, and execute the
controlcommand to launch Control Panel.
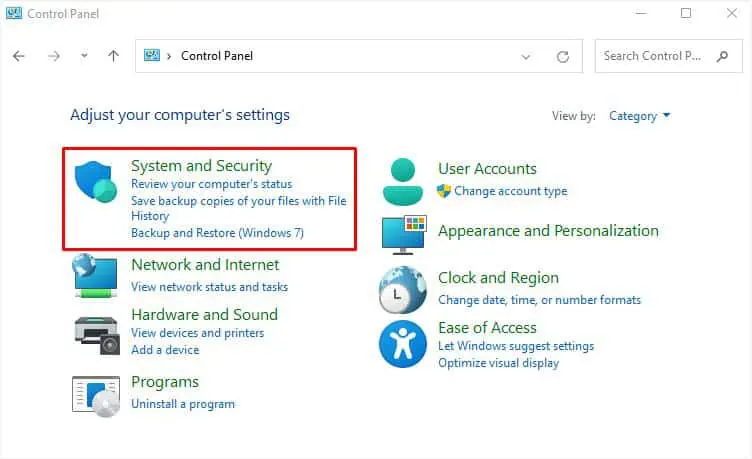
- Choose System and Security.

- Find and select File History.

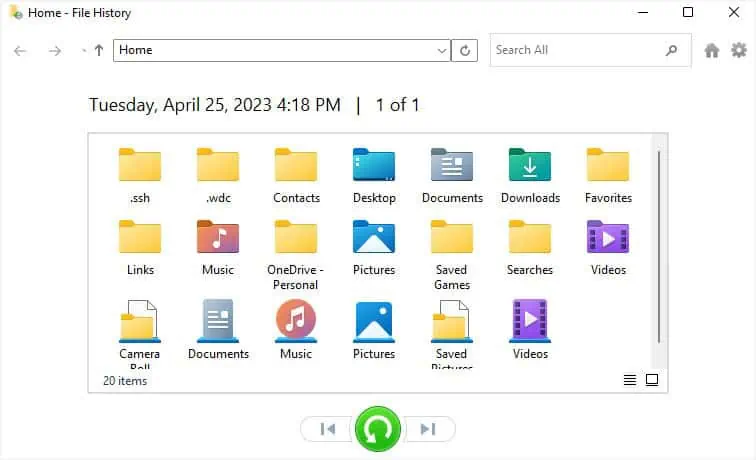
- From the left pane, pick Restore Personal Files.

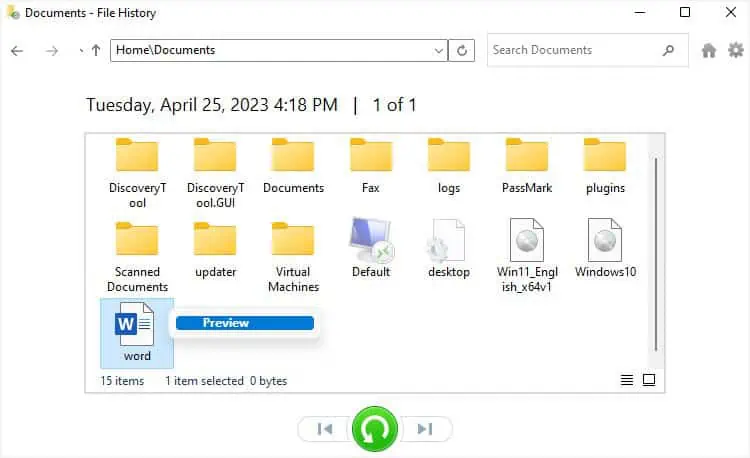
- Once the File History window opens, navigate to the location from where your file was deleted.

- Find and select your item. You may right-click and preview it if needed.

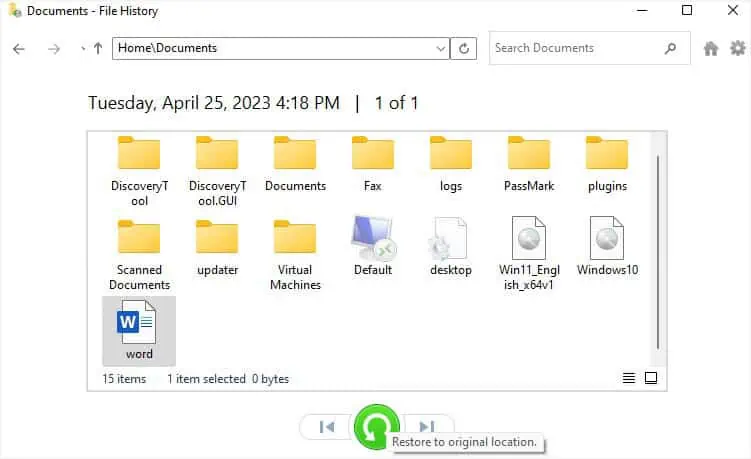
- Now, press the restore icon to complete the recovery. Once done, you’ll be navigated to the location where you can confirm the file has been recovered to the original destination.

From Previous Versions in File Properties
The Previous Versions option in any directory’s Properties is just an instance of the File History. This means you need to have the feature turned on in order to restore your deleted items.
Also, it will work if you’re using Volume Shadow Copy or have enabled System Protection (created restore points).
In case you haven’t opted for any of these options, this method will not work out for you even if you’re able to view the previous versions.
- Navigate to the target folder or drive and right-click on it.
- Pick Restore previous versions. Alternatively, you can pick Properties and once the dialogue box pops up, switch to the Previous Versions tab.

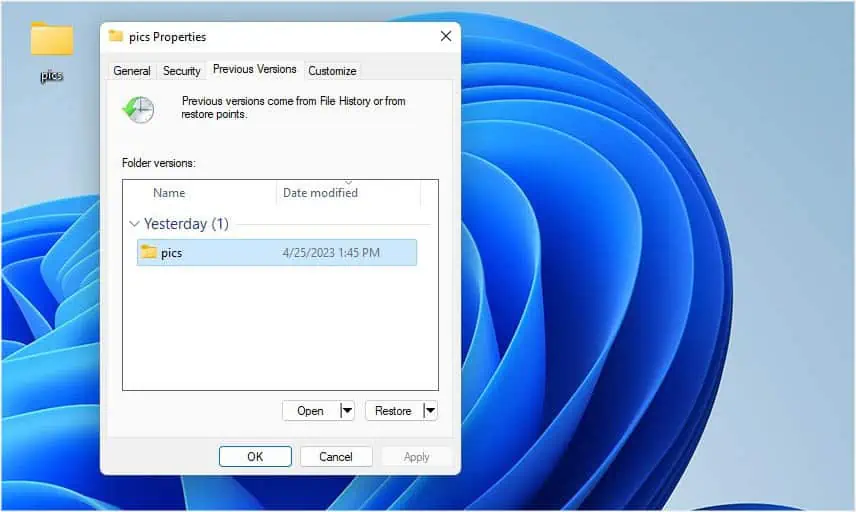
- Check the Date modified column to identify the appropriate version. As per the above example, I’ll choose yesterday’s version of my ‘pics’ folder.
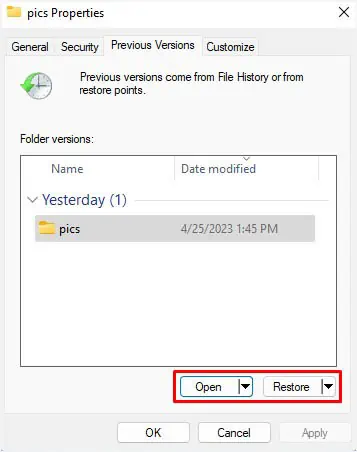
- Now, you can restore to the previous location or a selected one. Also, there’s an option to either open the folder normally or in file history.

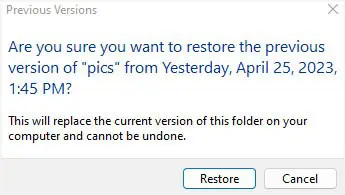
- Finally, hit the Restore button and check whether your previous files are recovered.

- Once the restoration is complete, hit the Ok button in the final dialogue box.

Using Backup and Restore
This is an older feature on Windows that works similarly to File History. That being said, it’s essential to have a prior backup in a recovery drive if you wish to use this feature.
If you don’t have a backup on the recovery drive, move on with the next method.
- Open Control Panel and navigate to System and Security.
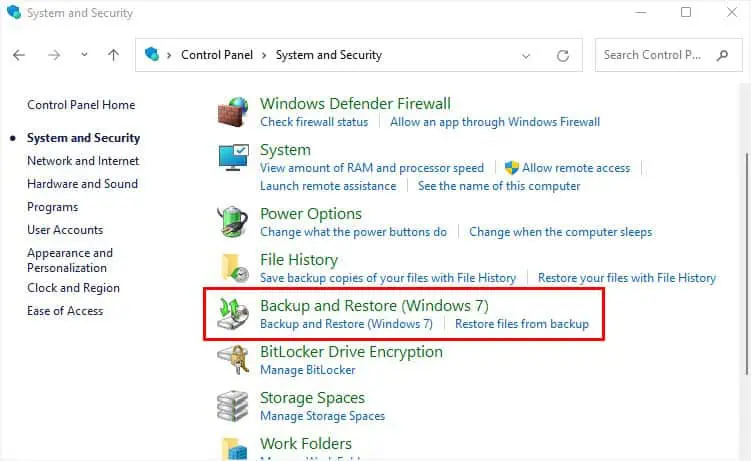
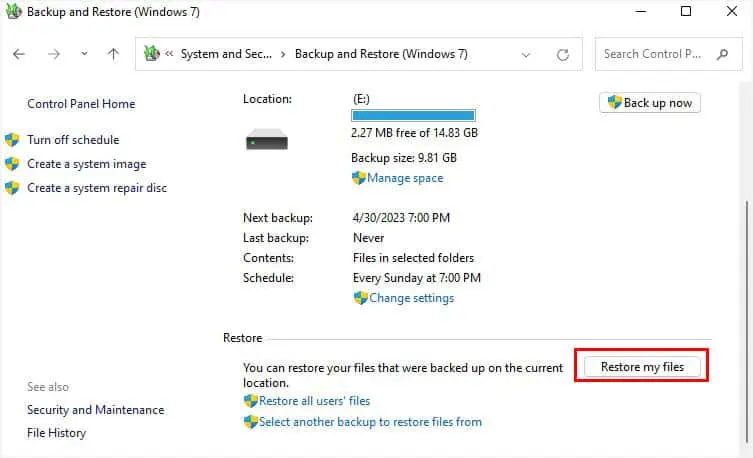
- Select Backup and Restore (Windows 7).

- Under the Restore section, click on the Restore my files button.

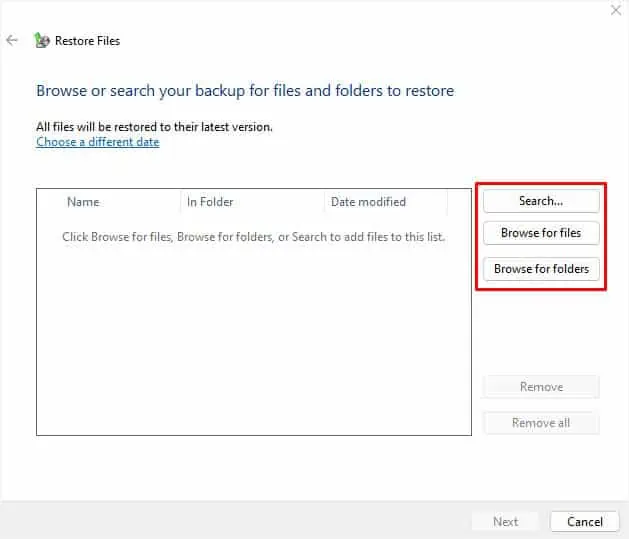
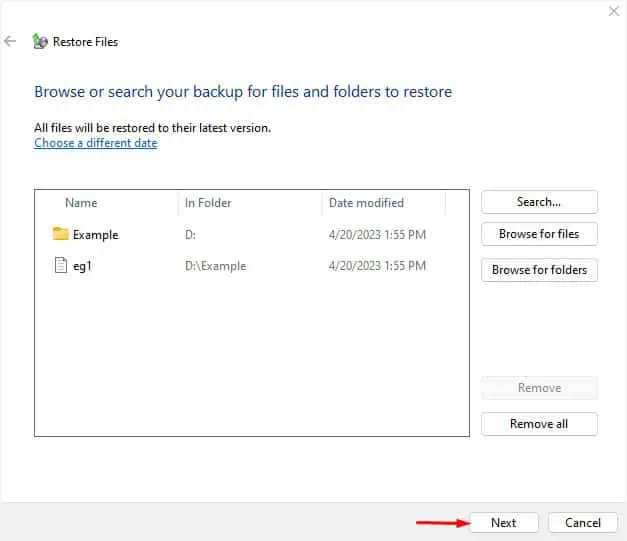
- Once the Restore Files dialogue box pops up, click on any one of these options based on your preference–Search, Browse for files, or Browse for folders.

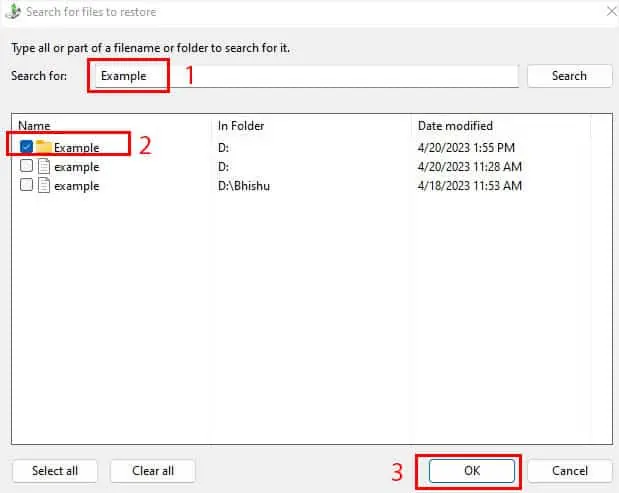
- If you’ve chosen Search, input any keyword in the field and hit Enter. You should find your deleted file (only if it was backed up). Make sure it is checked and hit Ok.

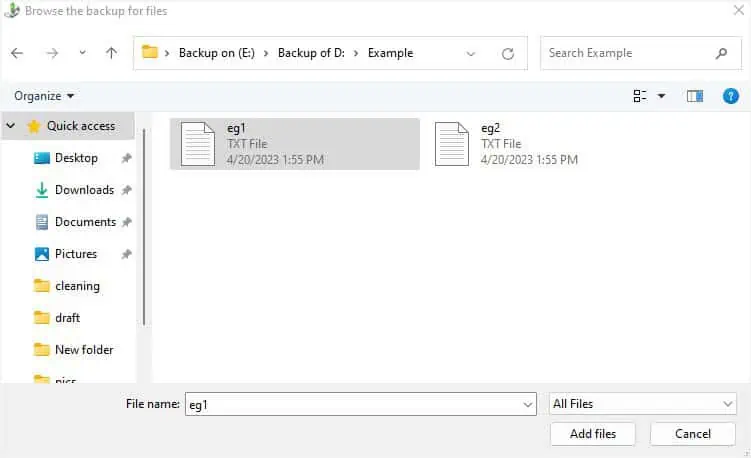
Similarly, for Browse for files/folders, you may look for the deleted item manually and hit the Add files button.
- The selected items should now be shown in the Restore files dialogue box. Once you confirm this, press the Next button.

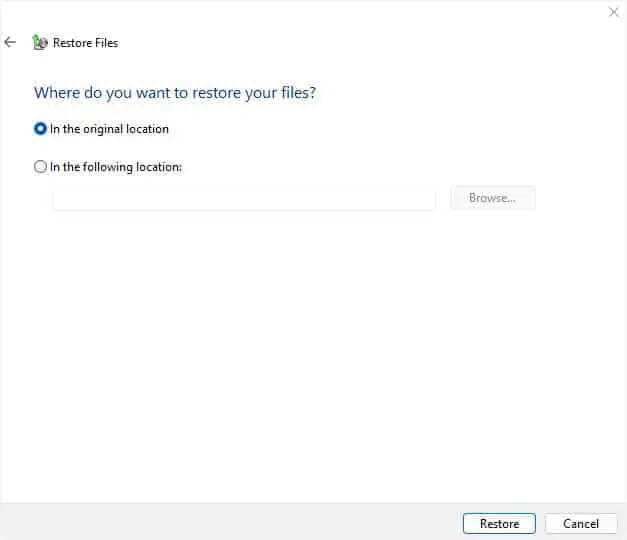
- Now, choose where you wish the files to be restored. If it’s the same location as earlier, leave the ‘In the original’ marked and click the Restore button.

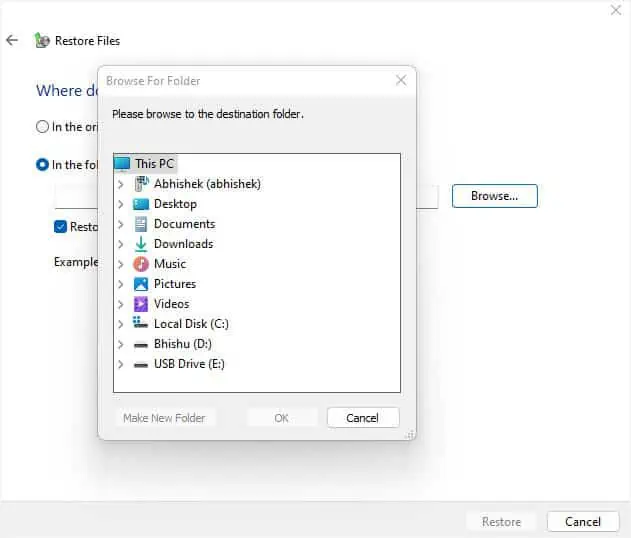
Also, you may opt for the ‘In the following location’ option, press Browse, and select where you wish to save your file. Then, hit Restore.
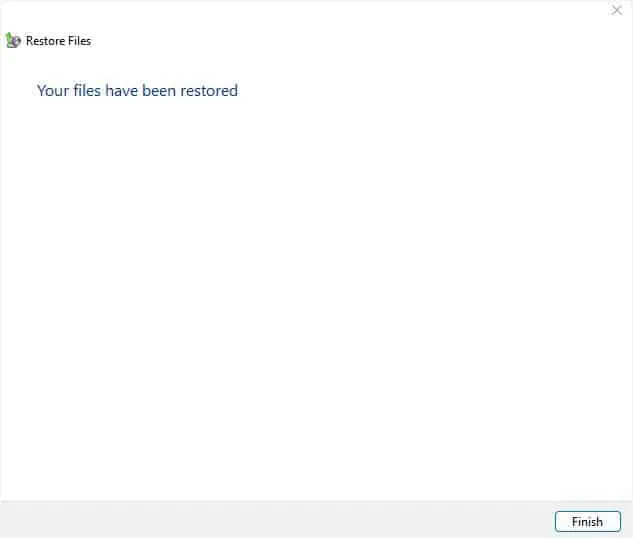
- On the final screen, hit Finish to close the window and manually check whether your files have now been restored.

Through Cloud Storage
Undoubtedly, online storage is one of the easiest ways to retrieve your deleted files.
In Windows, you’re probably aware of OneDrive which syncs all your work files and lets you retrieve them whenever required. If you’re using OneDrive or any other cloud storage provider (Google Drive, Dropbox, etc.), you may sign in to your account and recover the deleted items quite easily (but only if they have been backed up in the first place).
Here’s a quick demonstration of how to recover your deleted files from Microsoft OneDrive:
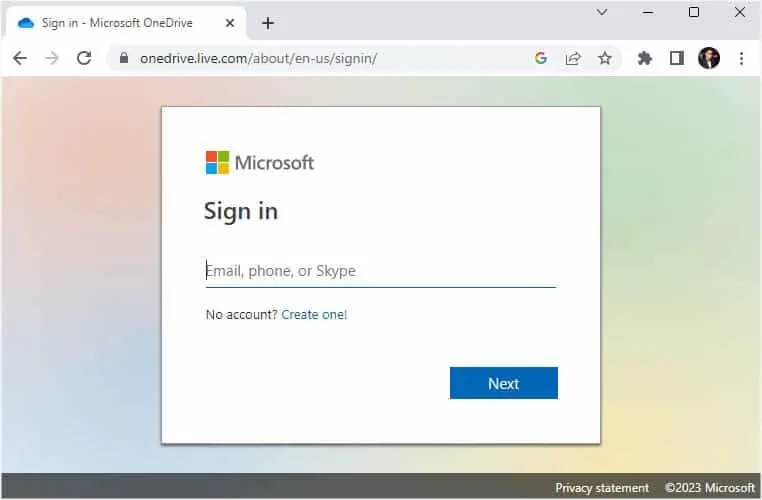
- Open the application or navigate to the official website, and complete the sign-in.

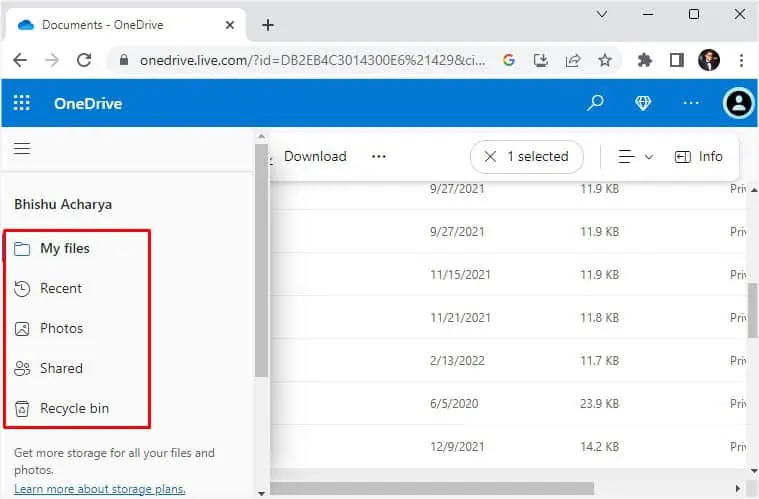
- Get to the appropriate section and search for your deleted item. Note that if the file wasn’t synced, it will not show.

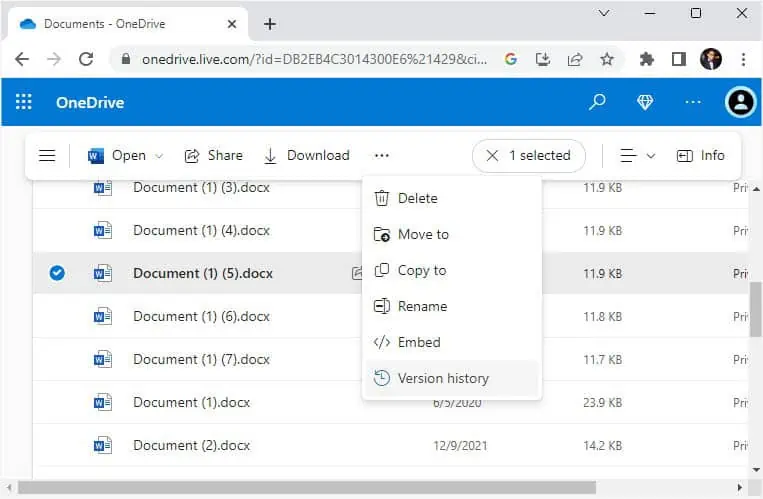
- If you wish to check the version history, select the file and press the Version History button from the view options.

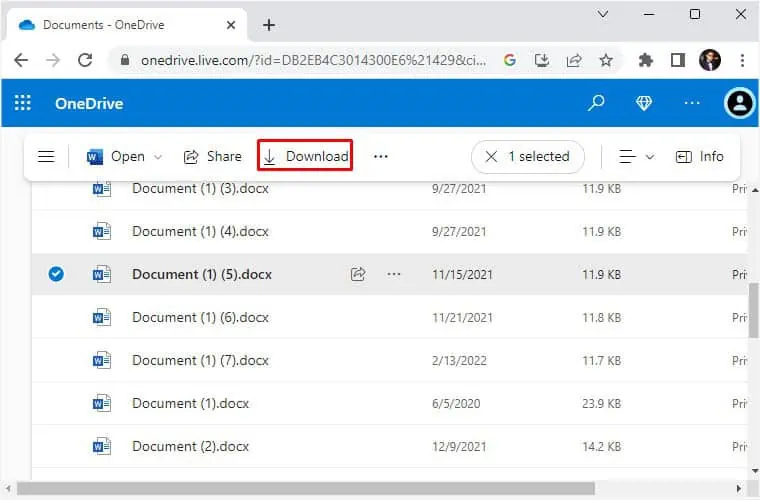
- To recover it, hit the Download button. Wait for it to get downloaded and your file should be restored.

Revert Your Computer to Previous Restore Point
If you have accidentally deleted system files that are triggering some kinds of issues, the only possible way to fix this is to perform a system restore. This will take Windows to its previous state based on the created restore point.
However, this technique is not going to recover personal files.
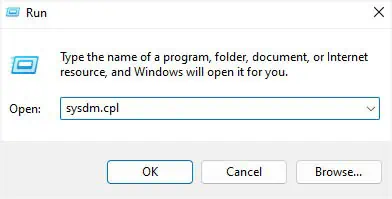
- Open the Run utility and execute the
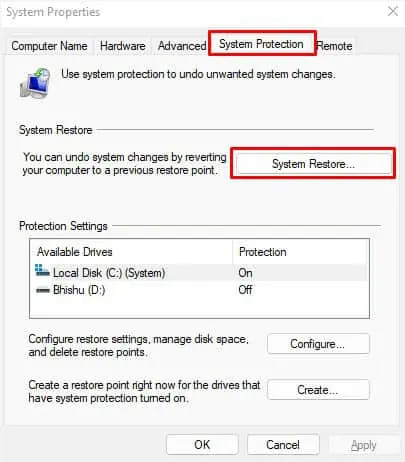
sysdm.cplto launch the System Properties dialogue box.
- Navigate to the System Protection tab and click on System Restore.

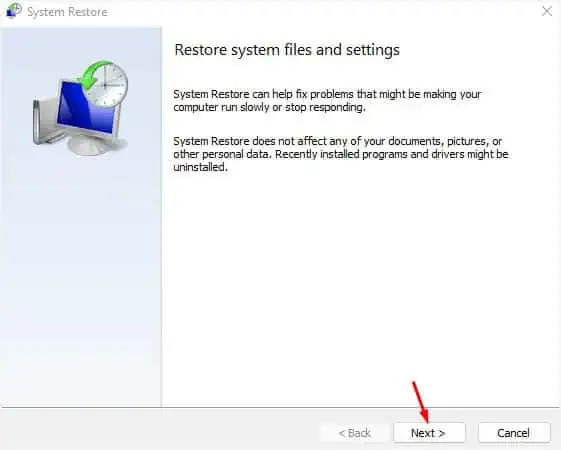
- Once the System Restore window opens up, press Next.

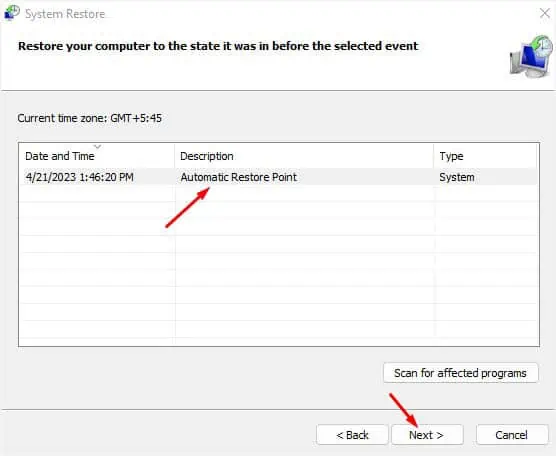
- Select the Automatic Restore Point or a custom restore point if you had created one earlier. Then, hit Next.

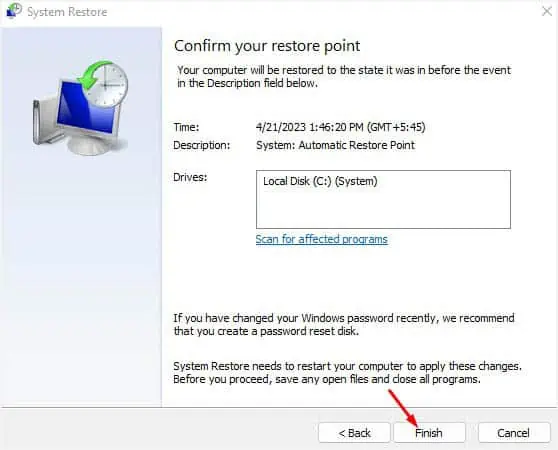
- Finally, click on Finish and follow the on-screen instructions.

- Once your computer restarts, your system files should be restored.
Note: If you’re facing problems during Windows boot due to corrupted or missing system files, I recommend performing a system restore from the Windows Recovery Environment.
Third-Party Tools
If you do not have the backup or if the hard drive is corrupted, the final and probably the best option would be to use an appropriate data recovery program. Recuva, Disk Drill, Stellar, and Recoverit are some popular ones. If you have any other reliable in your mind, you may opt for that as well.
Adding third-party tools to computers is a potential risk. Nonetheless, the advanced features that you get are totally worth it.
Some of these programs do not just help you recover deleted and lost files but can even retrieve data from a completely wiped hard drive.

