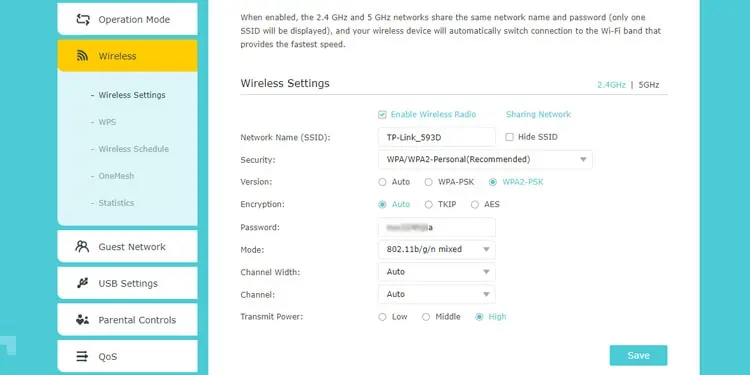
One way to troubleshoot an unstable internet is by analyzing your network traffic. You can check what devices are connected to the router, and see if there is any an unauthorized user. Maybe they are someone you gave Wi-Fi access in the past but would like to kick them off now.
Changing the Wi-Fi passcode or resetting the router is all that’s needed to remove devices from the Wi-Fi and make them re-authenticate. However, if these methods don’t appeal to you, we’ve also listed various other ways to accomplish the same goal in this article.
How to Remove Devices From Wi-Fi
After removing the unwanted device, we also recommend taking additional steps to secure the Wi-Fi, such as disabling vulnerabilities like WPS or setting up guest networks. However, for this article, let’s focus on different ways to restrict network access.
MAC Address Filtering
All network interface controllers (NICs) are assigned a unique hardware ID or physical ID known as the MAC Address. This means everything from your router, PC, and phone has a unique MAC Address. MAC Filtering refers to the process of using these unique identifiers to blacklist or whitelist certain devices from a network.
It can be bypassed through methods like MAC Spoofing, so it’s not completely secure, but it’s still a good enough security measure in most general cases. Things like IP-MAC Binding help in this regard as well.
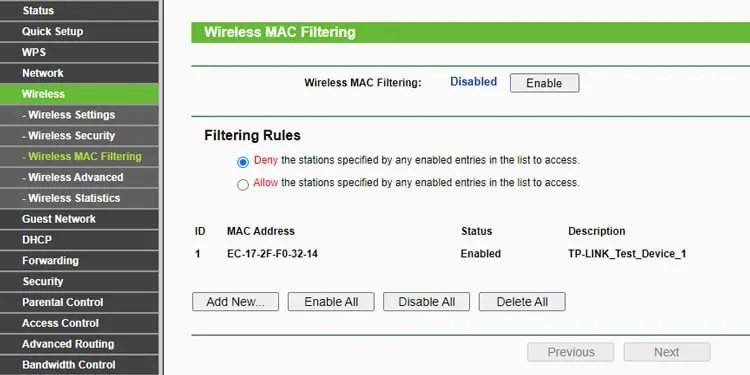
Finally, when using MAC Filtering, the first method is to set it up so that certain devices are blacklisted and can’t access the network. Or alternatively, you can allow only specified devices to access the network through whitelisting. With all that in mind, here’s how you can set up MAC Filtering on your router:
- Log in to the router setup page as done earlier.
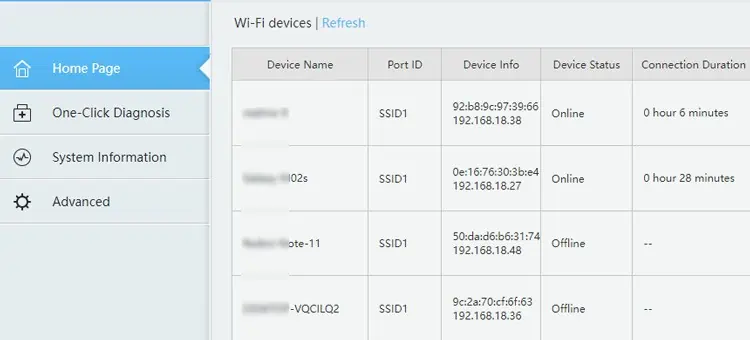
- All the connected devices should be listed on the default tab. If not, look for tabs like Status, Connected Devices, or Network Map. Check the DHCP Clients list in the LAN or DHCP section if you still can’t find it.

- Note the MAC Address of the device you want to blacklist or whitelist.
- The MAC Filtering section may be located under tabs like Wireless, Advanced, Security, Access Control, etc. Go through such tabs until you find it.

- Enter the MAC Address of the device you want to blacklist or whitelist in the appropriate section. On some routers, you may have to set the rule to allow or deny first, then add the devices. In either case, save the changes afterward.
Access Control
MAC Filtering typically prevents a wireless device from connecting to the network. In some routers, Access Control does the same for wired and wireless devices. However, on others, Access Control allows the device to connect to the network but specifically restricts internet access.
This may not explicitly remove a device from the Wi-Fi, but it more or less serves the same purpose in most cases. The process of using it is very similar to that of MAC Filtering. Here are the necessary steps::
- Access the router settings page as done earlier.
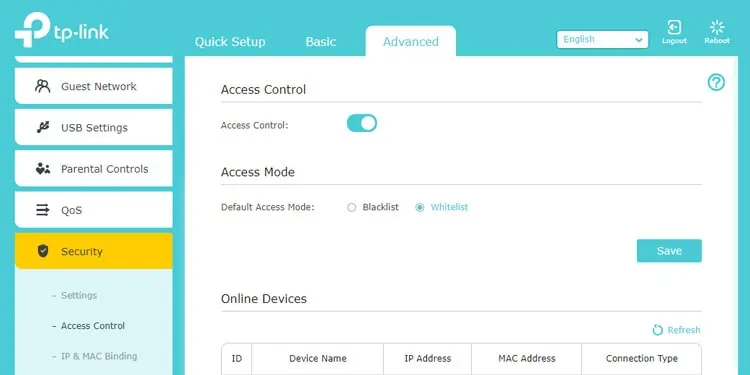
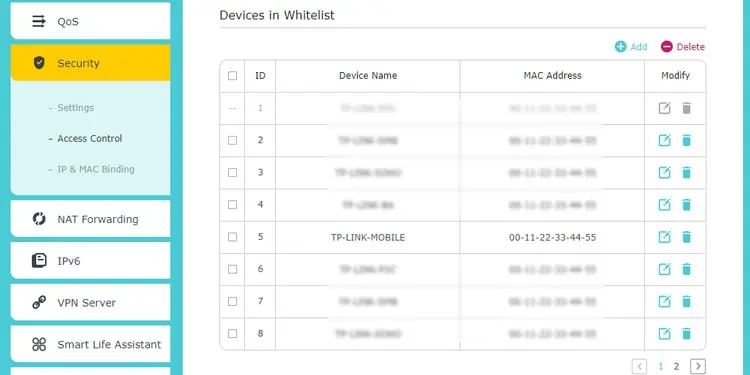
- Go to the Advanced or Security tab and look for the Access Control section.
- Select Blacklist or Whitelist as the Default Access Mode. This lets you select certain devices and specify whether their network access should be blocked or only those devices should have network access.

- Check the devices’ Device Name and MAC Address from the Online Devices list.
- Go to the Blacklist or Whitelist section and add devices there as appropriate. Save the changes afterward.

Parental Controls
Parental Controls isn’t supported on all routers, but on those that do, it offers a number of useful functionalities. This includes checking a device’s internet history, blocking specific content, restricting internet access, setting time limits, etc. Here’s how you can use this feature:
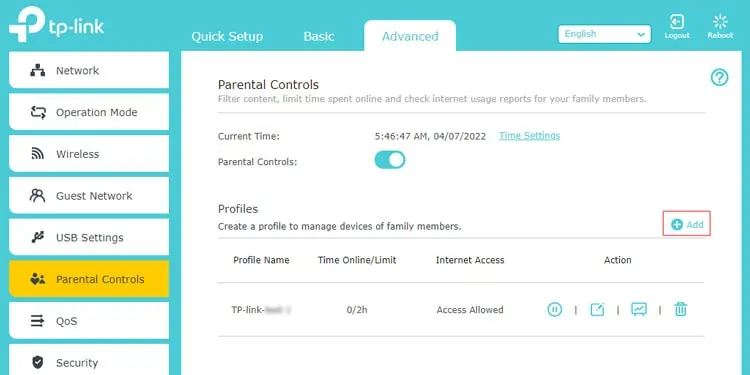
- Login to the router dashboard and go to the Parental Controls tab.
- Click on Add New Profile or modify an existing profile as you prefer.

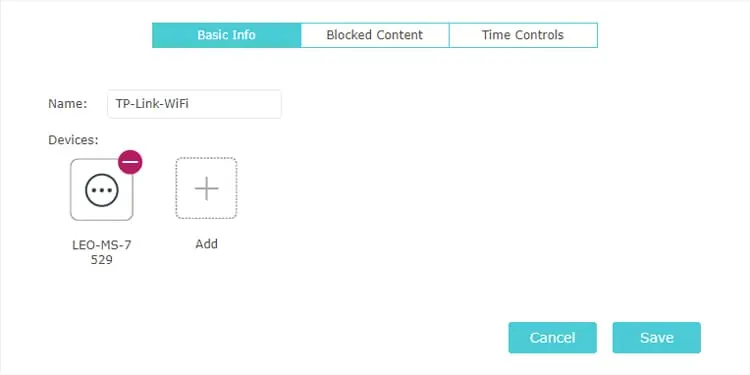
- In the case of a new profile, name it first.
- Click on Add Devices and select the devices to which you want to apply the restrictions. Save the changes if prompted.

- You can manually restrict Internet Access by pressing the pause icon here.
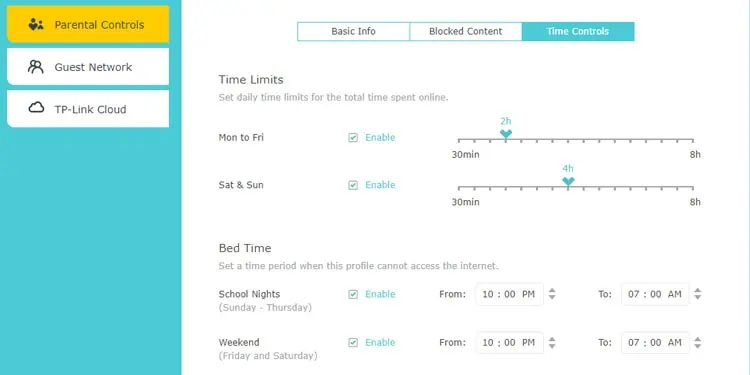
- If you want to set auto-routines, go to the Time Controls or a similar section.
- Set the daily online time limit. You can also set time periods where internet access is restricted. Once again, save the changes when you’re satisfied.

Set Up QoS
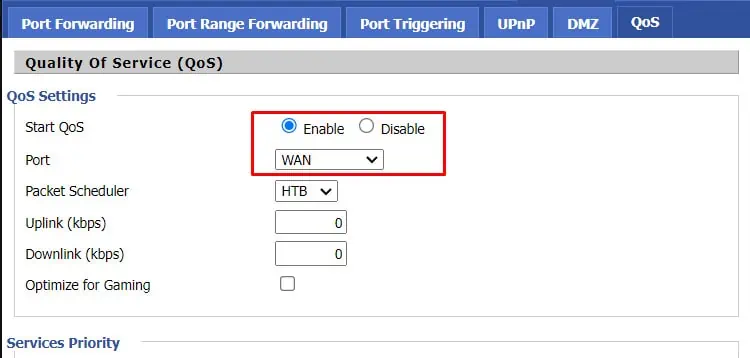
Quality of Service (QoS) allows you to prioritize which services or devices receive how much bandwidth. This method doesn’t actually remove the device from the Wi-Fi either, but you can use it to limit the bandwidth and restrict internet access, which is ultimately what most users want. With that said, here are the steps to set up QoS:
- Login to the router dashboard and switch to the QoS tab.
- Enable the QoS option and select WAN as the port.

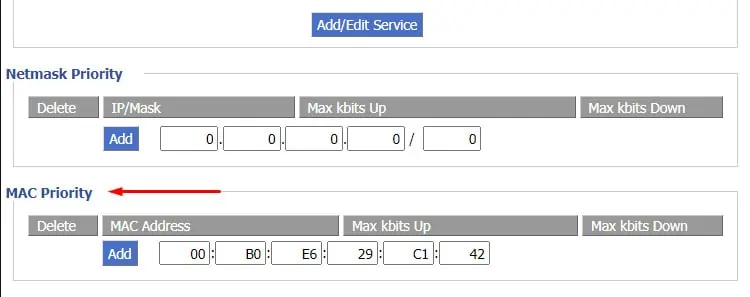
- Now, go to the MAC Priority or Device section.
- Enter the device’s MAC Address. Then, enter a low value like 1 Kbps into the max uplink (upload) and downlink (download) fields.

- Finally, press Add to create this QoS rule and save the changes.
Disable Specific Wi-Fi Band
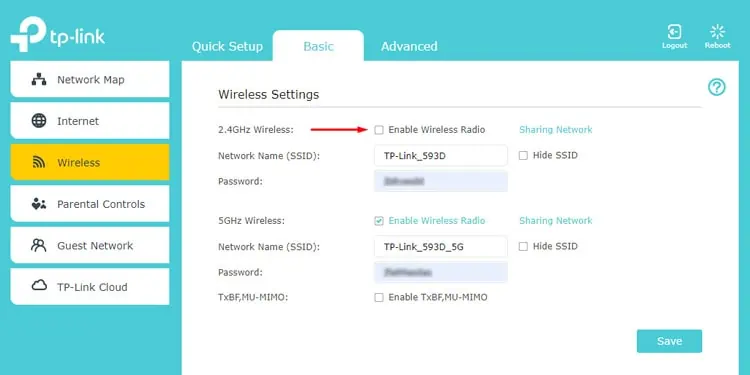
Older mobiles and computers, as well as most smart home devices and electronic appliances, can only connect to 2.4 GHz Wi-Fi. While this is a bit niche, disabling the 2.4 GHz band can remove unwanted devices from the Wi-Fi in such cases. Here’s how you can do this:
- Access the router settings page as done earlier.
- Go to the Wireless Settings, Wi-Fi, or similar tab.
- Toggle off the Wireless Radio checkbox for the 2.4 GHz band and save the changes.

From Wi-Fi / ISP Apps
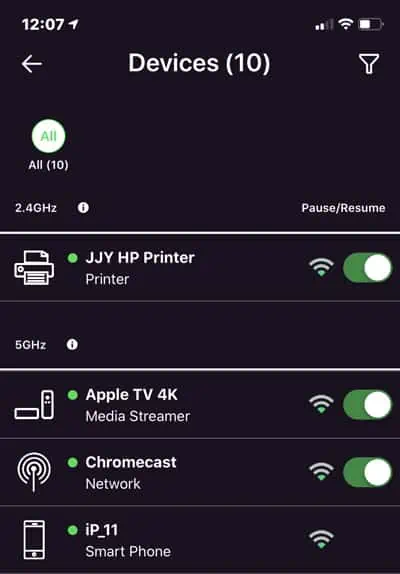
Certain router vendors and ISPs have mobile apps that allow you to manage internet access. If this is applicable in your case, removing certain devices from the Wi-Fi should be pretty simple:
- First, launch the app and sign in to your account if prompted.
- Look for the Manage Internet, Manage Devices, or similar option.
- Remove the unwanted devices from the list and save the changes.

While we’re on this topic, we should also mention that third-party Wi-Fi Jamming tools capable of restricting internet access on certain devices do exist. They identify the device through their MAC Address and repeatedly send dissociate packets to do this. However, we recommend exercising caution if you plan to use such tools, as they’re generally not reliable.
Change Password
When you change your Wi-Fi password, all devices are required to reauthenticate using the new password. Because of this, any unauthorized devices should no longer be able to connect to your Wi-Fi unless you give out the new password. Here’s how you can change your Wi-Fi password:
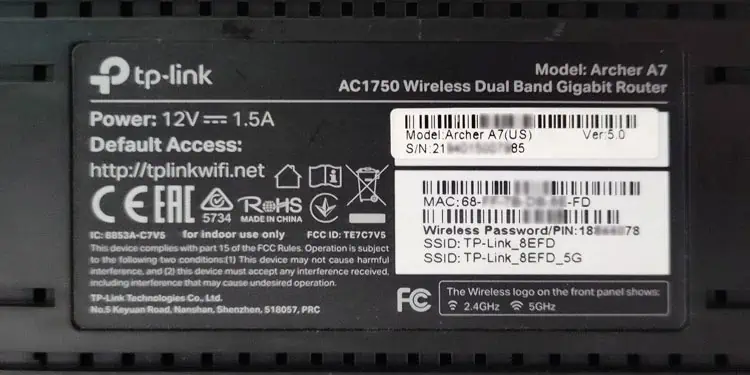
- Check the back of your router for the router IP address and login credentials.

- Launch any browser and enter the IP address into the URL bar.
- Use the credentials from earlier to log in. If you changed these credentials in the past but have forgotten now, you can reset the router to restore them to the defaults.
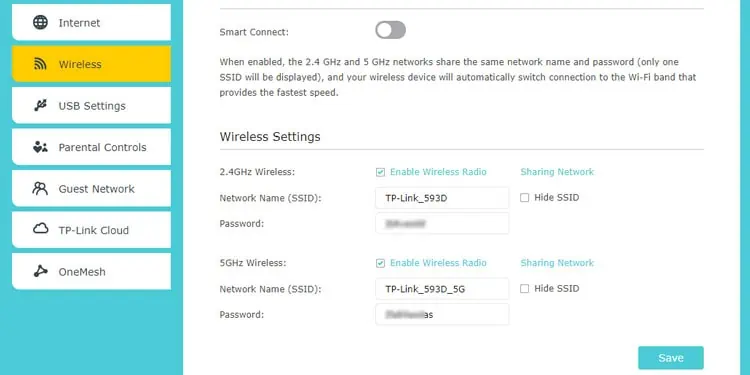
- In the Router dashboard, go to the Wireless, Wi-Fi Settings, or similar section.

- Change the Wi-Fi password here and save the changes.
Reset Router
Resetting a router wipes all the customized settings and restores the router to factory defaults. This includes your Wi-Fi settings as well. After resetting the router, it’s essential to reconfigure the router and Wi-Fi so that they’re secure. Here’s how you can do this:
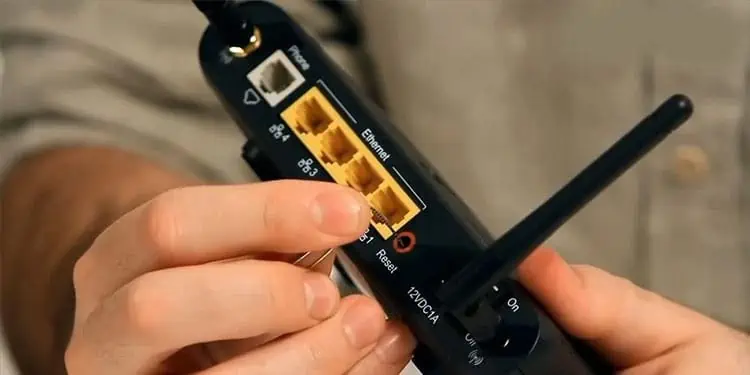
- Grab a paperclip or a similar object and press the Reset pinhole on the router for 10-15 seconds.

- After the router resets, use the IP and login details from the back of the router to access the router setup page.
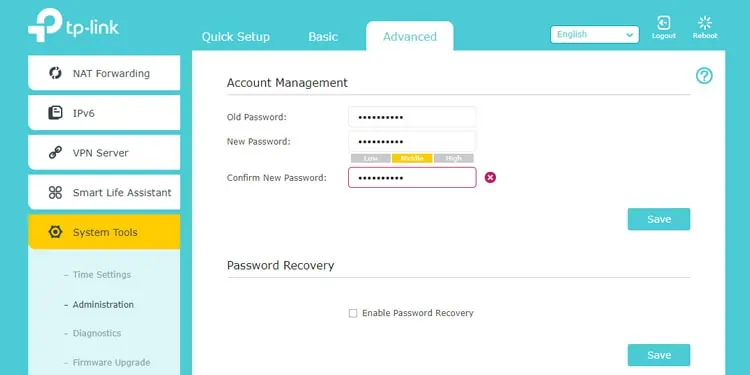
- Switch to the Administration, Systems Tools, or similar tab.

- Change the router username and password here and save the changes.
- Next, go to the Wi-Fi or Wireless section and set up the Wi-Fi. Set the SSID, password, encryption type, and other settings and save the changes afterward.


