If your USB isn’t working or is not storing data properly, it’s possible that your file system and partition tables are corrupt. This problem is easily resolved by resetting your USB drive.
Resetting your USB drive will revert the bootable USB to its default state. To reset your USB, you need to use native utilities like Disk Management (Windows) and Disk Utility (Mac).
The easiest way to reset a USB Drive on Windows is with file explorer. But if that doesn’t work or if you want an alternative method, you can use Disk Management or CMD.
Format via File Explorer
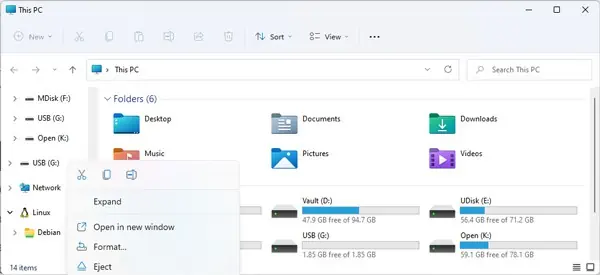
- Press Windows + E to launch Windows Explorer.
- From the left pane, right-click your USB drive and press Format.

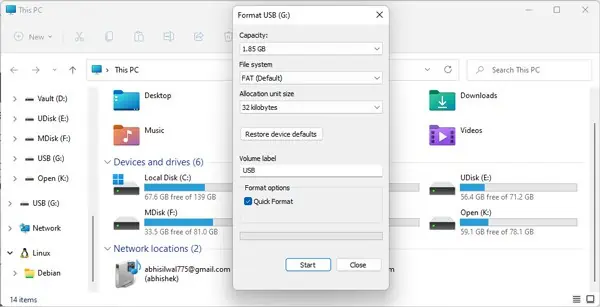
- Optional: Uncheck Quick Format to do a Full format instead. This scans for bad sectors but takes a lot longer to complete.
- Select the File System and Press OK.

Format via Disk Management
- Press Windows + R to launch Run.
- Type
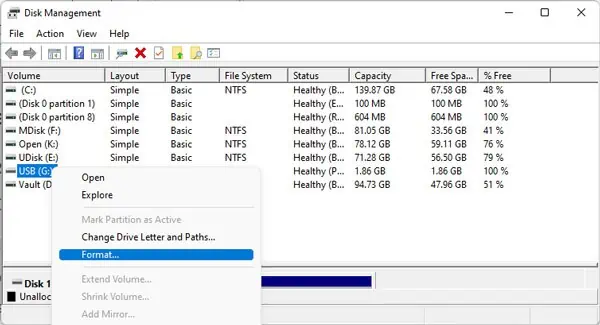
diskmgmt.mscto open Disk Management. - Right-click your USB drive and press Format.

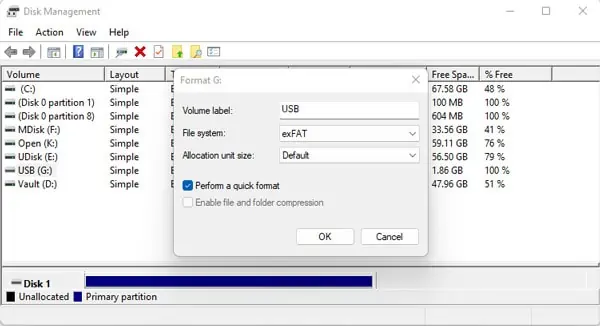
- Optional: Uncheck Perform a Quick Format to do a Full format instead. This scans for bad sectors but takes a lot longer to complete.
- Select the file system and Press OK.

Use diskpart Command in CMD
- Press Windows + R to launch Run.
- Type and Enter cmd to launch Command Prompt.
- Then, Type
diskpartand press Enter. Accept the prompt as well. - Type and Enter
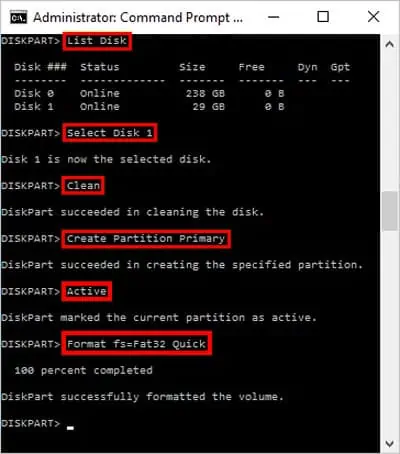
list disk. - Check the Size section, then note your USB’s Disk #. Replace # with your USB’s disk number in the next step.
Make sure you get this right as you could easily format the wrong drive. - Type
select Disk #and press Enter. - Now, type the following commands and press Enter after each one. Change fat32 to your preferred file system if necessary.
clean
create partition primary
format fs=fat32 quick
- Once you receive the completion message, type
assign letter = kand press Enter. You can replace k with something else if you want to change the drive letter. - Finally, type
exitand press Enter.
How to Reset a USB Drive on Mac
USB drives on mac can be reset using a GUI approach and also via the terminal. Sometimes, due to permission or file system issues, we cannot perform the task using the GUI approach.
Here is how you can reset a USB disk on Mac using both approaches.
Disk Utility
- Press Command + Shift + U to open the Utilities folder.
- Launch Disk Utility.
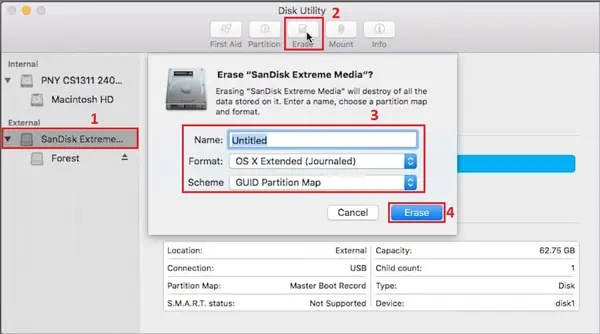
- Select the USB storage device from the left pane.
- Now, Press the Erase button at the top.
- Set the Drive’s Name.
- Select GUID Partition Map as the scheme.
- Choose the preferred file system from the drop-down menu for Format.
- Click on Erase.

Reset via Terminal
We recommend resetting your USB Drive via the Disk Utility if possible. If you mess up in the terminal, you can easily format the wrong drive and lose valuable data.
Method 1
- Press Command + Shift + U to open the Utilities Folder.
- Open the Terminal.
- Type
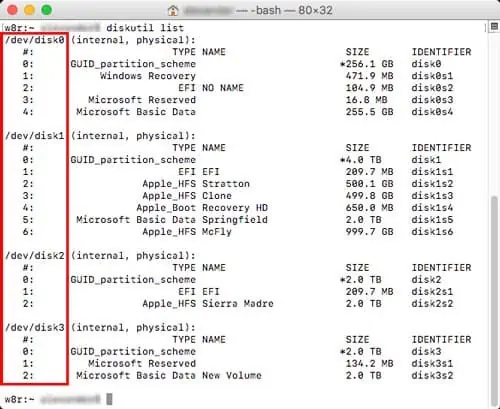
diskutil listand press Enter. - Note your USB’s Mount Point. Replace
/dev/disk1with your USB’s Mount Point in the steps below.
- Type
diskutil unmountDisk /dev/disk1and press Enter. - Type
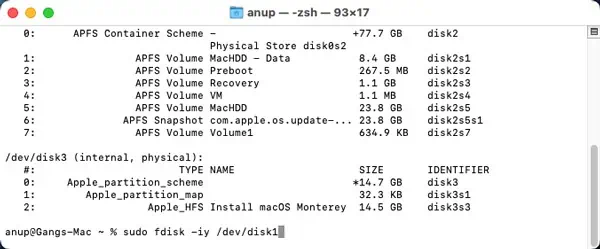
sudo fdisk -iy /dev/disk1and press Enter.
Method 2
- Press Command + Space to open Spotlight search.
- Type terminal and press Enter.
- In the terminal, type
diskutil listand press Enter to list all the connected drives to your Mac. - Note your USB’s Mount Point. Replace
/dev/disk1with your USB’s Mount Point in the next step. - Type
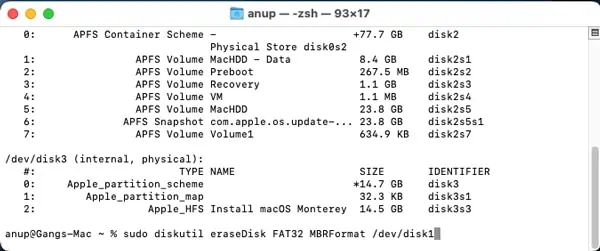
sudo diskutil eraseDisk FAT32 MBRFormat /dev/disk1and press Enter. This will format your USB Drive to the FAT32 file system.

