“Update the drivers.” We’ve all heard this advice a million times. And generally, it does help resolve whatever the issue is. But what if the updated driver itself is the problem?
Whether it’s due to an unstable update or incompatibility, updating NVIDIA drivers can sometimes lead to a downgrade in performance. And although this is rare, some users have even reported facing BSOD errors like nvlddmkm.sys, and DRIVER_IRQL_NOT_LESS_OR_EQUAL.
In cases like these, reverting to the previous stable version is the best option. As such, we’ve detailed how to rollback NVIDIA drivers and other related queries in this article.
How to Rollback NVIDIA Drivers in Windows 10/11
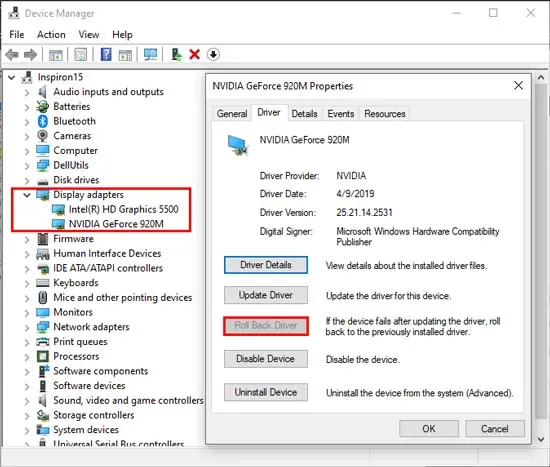
You can easily roll back NVIDIA Drivers, as well as any other device drivers, via the Device Manager utility. Here are the steps to do so:
- Press Win + R, type
devmgmt.msc, and press Enter. - Expand Display Adapters and double-click the NVIDIA GPU.
- Switch to the Driver Tab and press Roll Back Driver.

- Select a reason for rolling back and press Yes to confirm.
How to Fix if Roll Back NVIDIA Driver Greyed Out?
The Roll Back Driver option can be inaccessible if the driver files for any previous versions are not present on the computer. In such cases, you’ll have to uninstall, then manually install the NVIDIA Driver with the following steps:
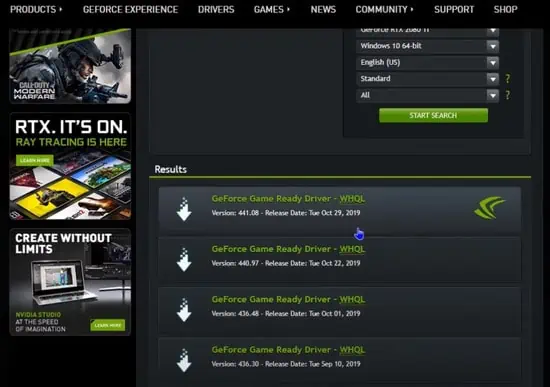
- Visit the GeForce Drivers Download page.
- Search for and download the Driver Version you want to install.

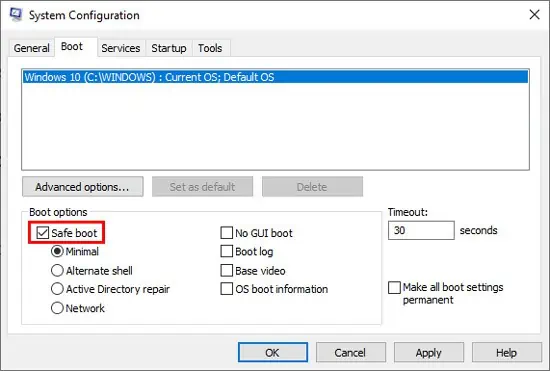
- Press Win + R, type msconfig, and press Enter.
- In the boot tab, select Safe Boot and press OK.

- Restart the PC, and it’ll boot into safe mode.
- In safe mode, press Win + R, type
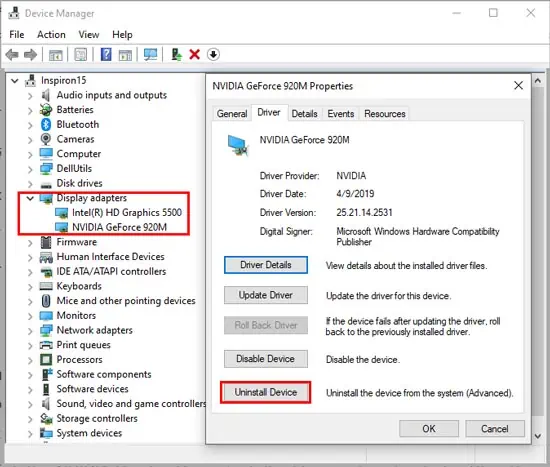
devmgmt.msc, and press Enter. - Expand Display Adapters, double-click the NVIDIA GPU and select Uninstall Device.

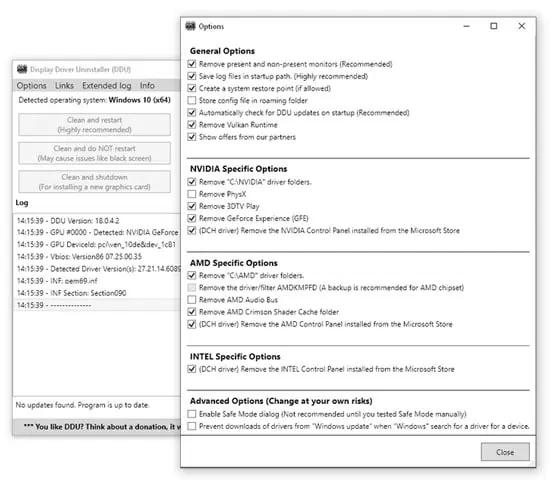
- Optional: You can also use Display Driver Uninstaller if you want to remove all traces of the previous driver. But keep in mind that while it’s a reputable app, it’s still third-party.

- Right-click the NVIDIA Display Driver Installer file you downloaded in Step 2, select Run as administrator, and accept the prompt.
- In the setup wizard, accept the license agreement and specify the file path. The default path will do just fine as well.
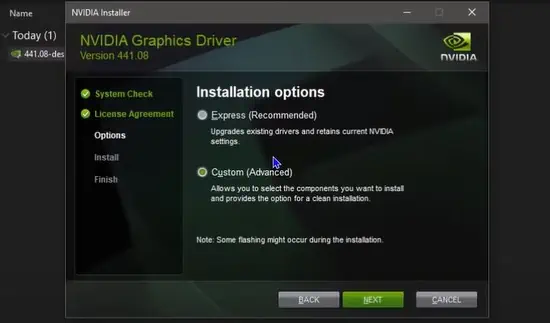
- Select NVIDIA Graphics Driver > Custom (Advanced).

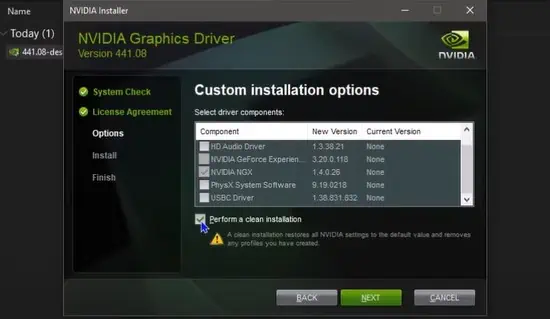
- Enable the Perform a clean installation option and press Next.

- Once the installation is complete, repeat steps 3-4 and disable Safe Boot to boot your PC normally.
You can check the driver version and verify that the rollback was successful via the Device Manager, DirectX Diagnostic Tool, or NVIDIA System Information. You can find the full steps to do this in the NVIDIA GPU Details section below.
How to Install Old NVIDIA Drivers?
You can use the roll-back driver option via Device Manager to revert to the previous version of the driver. If you want to install a specific version, you should uninstall the current driver, download the driver version from Official Drivers | NVIDIA and install it manually.

