Unlike many other browsers, Firefox has a built-in feature to take screenshots of web pages. Furthermore, it offers three different modes for doing so. You can either screenshot the full webpage, the visible webpage only or you can even snap custom dimensions.
You can pretty easily take a screenshot on your Firefox browser using the context menu or through the toolbar. If you’re more of an advanced user and would like finer control over the area you capture, you can use the Firefox console.
I specifically utilize this feature when I need to capture long screenshots of whole web pages in Firefox. This prevents me from the hassle of scrolling the web page and individually taking screenshots.
Taking a Screenshot on Firefox
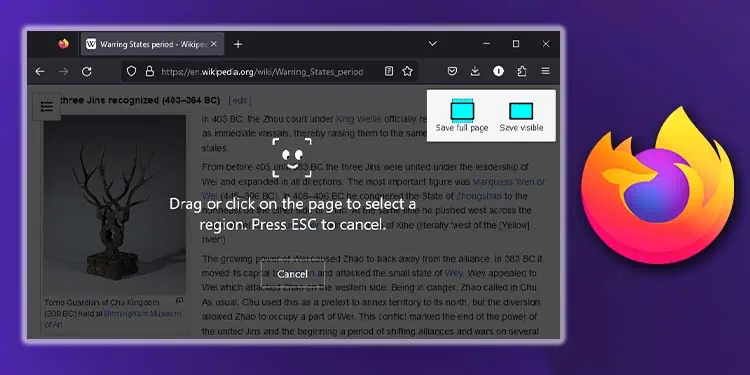
To take a screenshot on Firefox, you can right-click on the web page and select Take screenshot. This will open the selection tool, and you can highlight the area that you want to capture.
If you want to take a screenshot with custom dimensions, hold and drag the mouse to highlight the area you want to save. If you instead want to capture the webpage that is visible to you, click on the Save visible option at the top right.
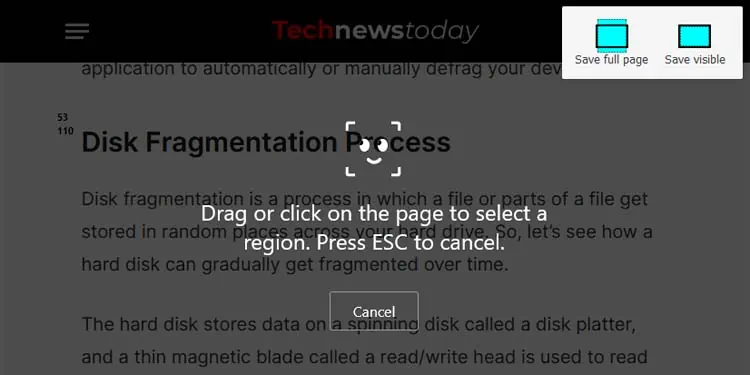
To screenshot your entire webpage, even the portion that is not visible to you, click on the Save full page option at the top right.
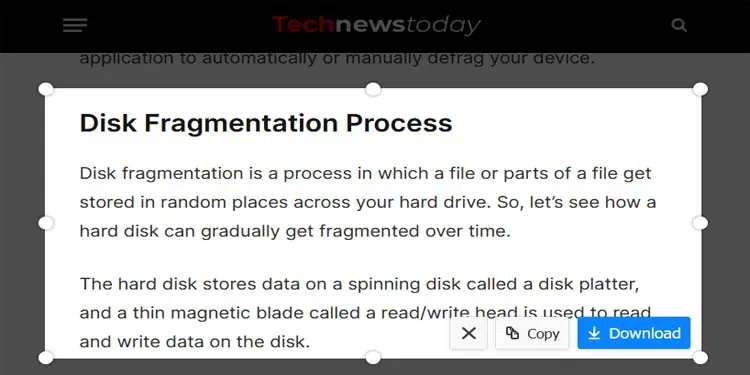
After making a selection, you can either choose to Download or Copy the image to your clipboard. Choosing to download the image will save it in the default Downloads folder.
This is pretty much all the basics of taking a screenshot on Firefox. However, sometimes you may be unable to take a screenshot because a website has disabled right-clicking.
In such cases, you can either enable the disabled right-click or set the screenshot option on your toolbar. I’ll show you how you can do the latter.
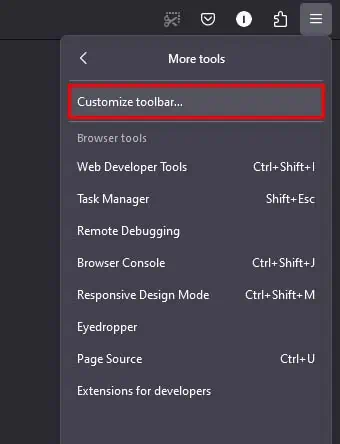
- Go to the hamburger menu at the top right of your browser.
- Click on the More tools and select Customize toolbar.

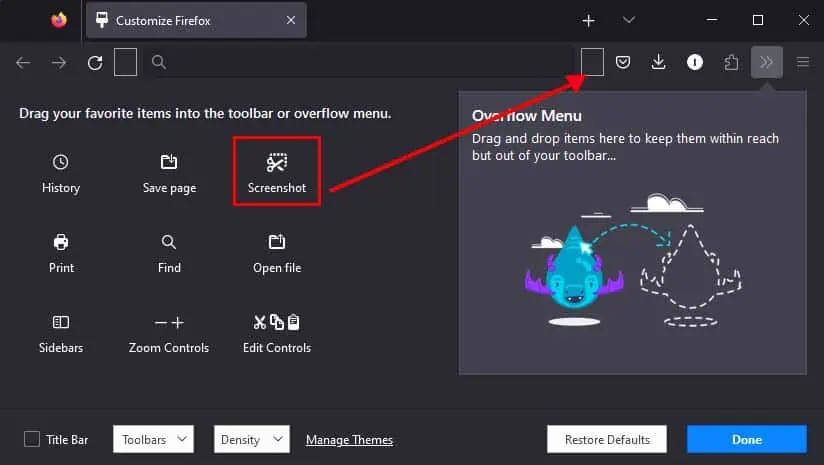
- Locate the Screenshot icon and drag and drop it into the toolbar. (You can set it in either the left or right side of your toolbar according to your preference.)

- Click on Done.
- Now, you can capture any web page using the Screenshot icon from the toolbar. (This will also open the selection tool.)
Take a Screenshot Using Firefox Console
Another more advanced method you can use to take a screenshot on Firefox is from the console. You can enter commands on the Firefox console to take a screen capture of your web pages.
Furthermore, you can add various parameters to the command to control the timing and mode of the screenshot. You can also change where the screenshot will be saved using commands. Anyway, let’s see how you can do so:
- Go to the web page you want to capture.
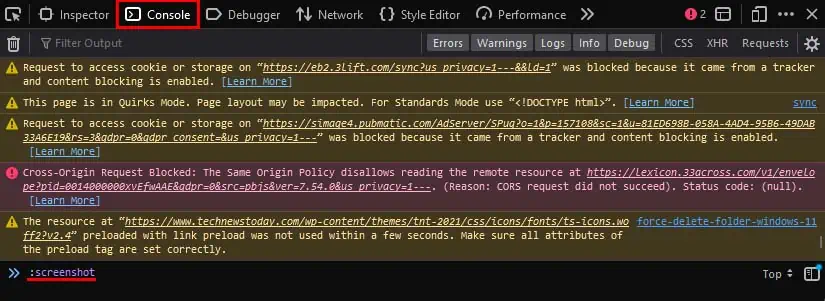
- Press the F12 button to open the Developer Tools on Firefox.
- Make sure you have the Console tab selected.
- Enter the command
:screenshotto take a normal screenshot of the visible web page. (This will also directly save the image on your Downloads folder.)
- If you want to instead capture the whole web page, add the parameter
–fullpage. The command would be:screenshot –fullpage. - If you want to save it on your clipboard instead, add the parameter
–clipboard. The full command would be:screenshot –clipboard. - If you want to introduce a delay when your screen will be captured, enter the parameter
–delay. For instance, the:screenshot –delay 10will take a screenshot of your web page after 10 seconds.
These are the common parameters you can add to customize the screenshot you take on Firefox. If you would like to know more about other parameters you can use, here’s a brief description of them.
| Parameter | Description |
| –file | This parameter saves your image on the Downloads folder even if the –clipboard parameter is included. |
| –filename | This parameter is used to specify the filename for your downloaded image. Its syntax is :screenshot –filename “yourfilename.png”. (Replace yourfilename with the file name you want to set.) |
| –selector | When this parameter is added, it captures only the supplied CSS element and its descendant. |
| –dpr | This parameter can be used to configure the device pixel ratio to use when taking a screenshot. |
How to Take a Screenshot From Your Device?
The built-in screenshot feature in Firefox has a limitation that only allows it to capture web pages. So, if you want a screenshot that extends beyond just the web page, you will need to screen capture from your device. Here’s how you can do so on different devices.
Windows
You can pretty easily take a screenshot on Windows by using the Windows + Prnt Scrn shortcut key. This will take a capture your entire screen and save it in the C:\Users\Username\Pictures\Screenshots folder.
Mac
To take a screenshot on Mac, you can press the Shift, Command, and 3 buttons together. This will capture your entire screen and save it to your desktop.
Android
The method to take screen capture on Android is usually a combination of one of the volume keys and the power button. This will differ depending on your Android version and device manufacturer. You can access the images from the Screenshots folder in your Gallery app.
iOS
To take a screenshot on an iOS device, press the volume up and power buttons together, then quickly release both of them. Your screenshot can be accessed from the Photos app.

