Taking a screenshot is pretty simple, you just press the Windows + PrintScreen key in Windows or Command + Shift + 3 in macOS. And voila, the system will save the screenshot in a specified folder. Although simple, there are several complications you may run into when taking a screenshot.
The same is the case if you use Logitech keyboards. Some Logitech keyboards either do not have a dedicated PrintScreen button, have a different PrintScreen button icon. Some even need a different button configuration to take a screenshot.
Besides this, there are other problems you may run into when taking a screenshot using Logitech keyboards. Below we have discussed how you can take a screenshot on a Logitech keyboard and some alternatives to taking a screenshot.
How to Screenshot on Logitech Keyboard in Windows?
In some Logitech keyboards, the Windows and PrintScreen keys may be indicated with a different key icon. Therefore, let us start by locating the dedicated buttons for the Windows and PrintScreen keys.
Locate Windows key
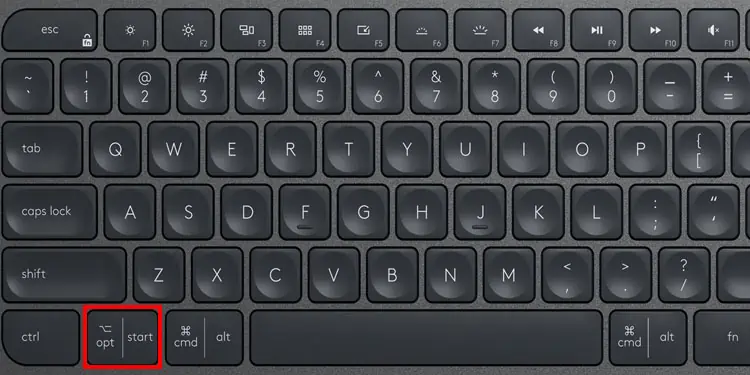
The Windows key, by default, has a Windows icon. However, in some Logitech keyboards, the Windows key is indicated as Start. This Windows, or the Start key, is usually located on the bottom of the keyboard near the Space key.
If you use a keyboard that supports both Windows and macOS, you can press the left Option key as the Windows/Start key.
Once you find the Windows/Start key, you now need to locate the Print Screen key.
Locate PrintScreen key
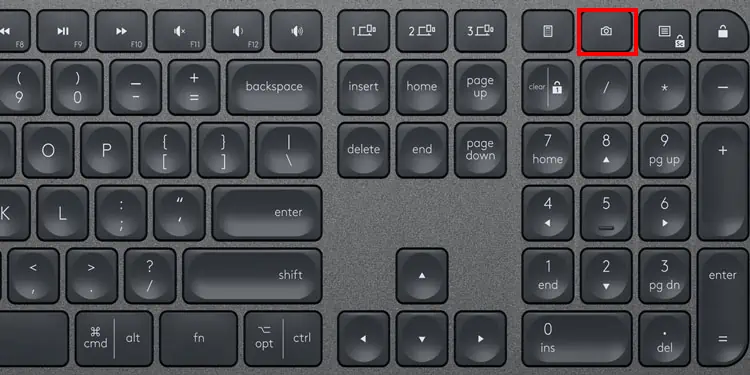
Depending on the Logitech keyboard, the print screen key can be anywhere on the keyboard. If you are using a full-sized or a TenKeyLess Logitech keyboard, you can usually find the Print Screen button on the top-right area of the keyboard. It is generally indicated by words like PrintScreen, PrtSc, or PrtSc SysRq.
If you cannot find the Print Screen key, search for a key with a camera icon on the keyboard. In the Logitech keyboard, the key with the camera icon represents the PrintScreen key.
The key with the camera icon can also be anywhere on your Logitech keyboard. However, the most common area is on the function keys, back (backspace) key, tab key, or around the right side of the keyboard.
Take Screenshot
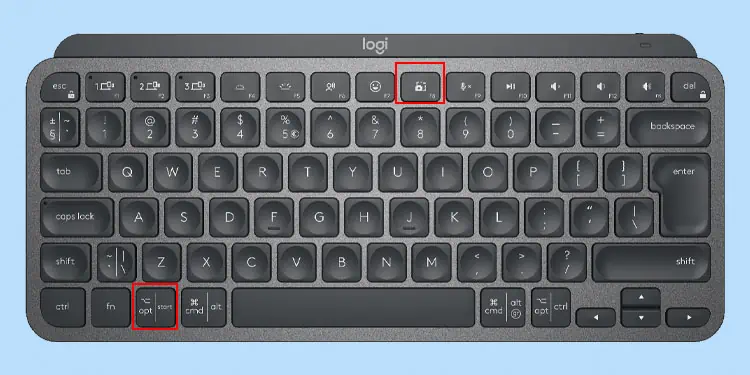
- To take a screenshot, press the Windows/Start key and the PrintScreen key simultaneously.
- If the Print Screen is not a separate key but is combined with another key, for instance, a function key, you will need to press the FN key as well.
For example, if the PrintScreen icon is on the F8 key, you must simultaneously press Fn + Windows/Start + F8. However, in some cases, just Windows/Start + F8 will work if the Fn lock/media key is activated.
By default, Windows will save the screenshot image in C:\Users\*userprofile*\Pictures\Screenshots. *userprofile* is the Windows account in which you are currently logged in.
If taking a screenshot using Windows + PrtScn does not work, you can use Logitech’s Companion application (Logitech G Hub) to assign a shortcut key to take a screenshot.
Screenshot Using Logitech G Hub
Logitech G Hub is an official companion application for most Logitech keyboard. However, not all Logitech’s keyboard support Logitech G Hub. You can refer the internet to check Logitech G Hub supported device list to see if G Hub supports your keyboard.
- Download Logitech G Hub and install the application.

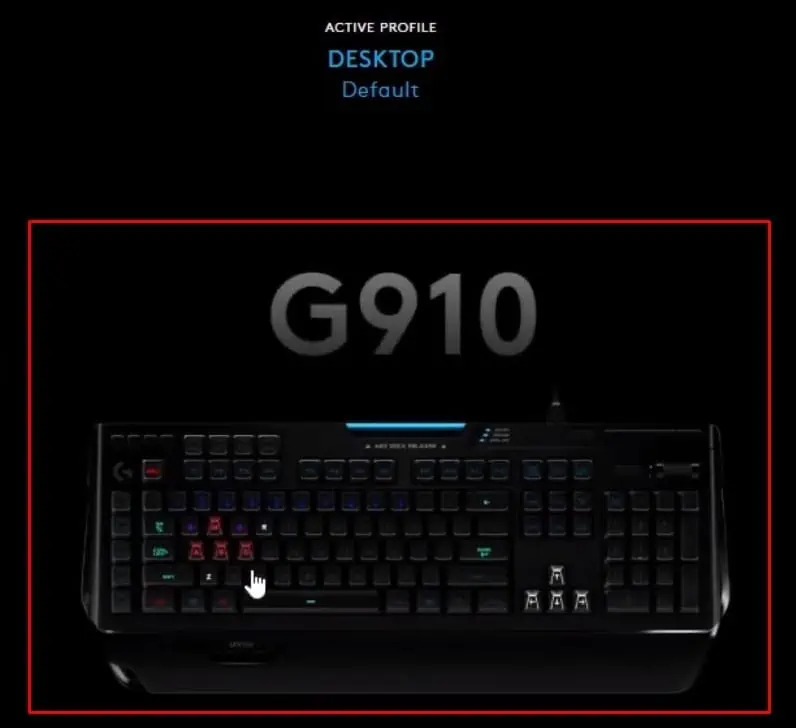
- Connect Logitech keyboard and run Logitech G Hub.
- Select your keyboard.

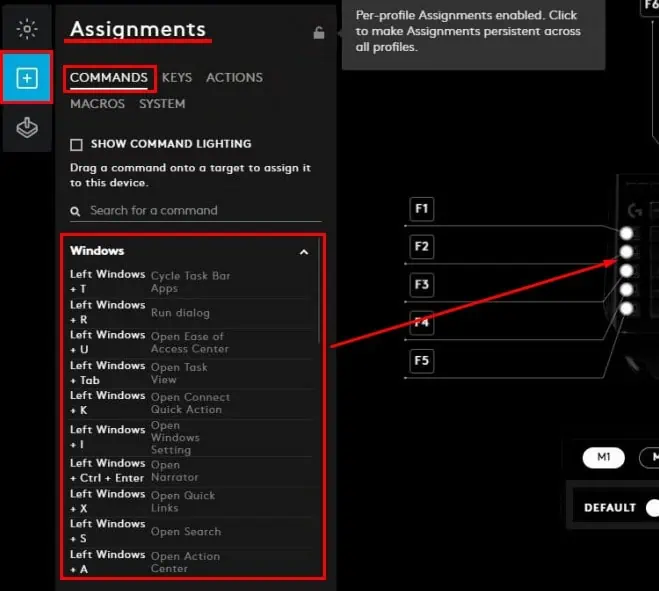
- Go to the Assignment tab, indicated by a plus (+) icon.
- Click on Commands.
- Under Windows, search for Left Windows + Print Screen shortcut key.
- Drag this command and place it above any available button on the keyboard located on the right side of the screen. The selected button will now take a screenshot when you press it.

- Close the application and press the new screenshot button to take a screenshot.
How to Screenshot on Logitech Keyboard in MacOS?
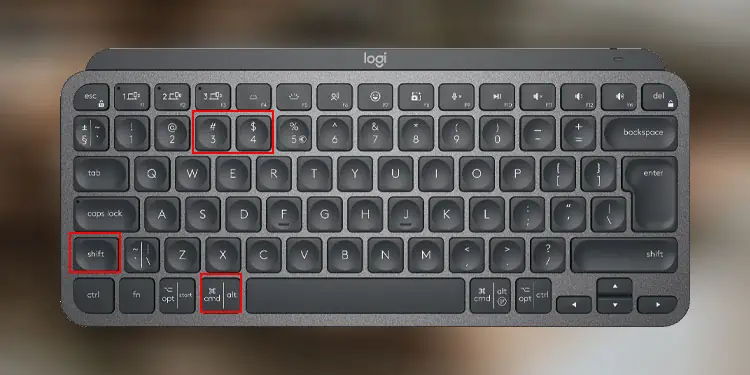
Taking a screenshot on macOS using the Logitech keyboard is relatively simple, as you do not need a Print Screen key. Press Command + Shift + 3 to take a snapshot of the entire screen and Command + Shift + 4 to take a picture of a dedicated area.
Alternatives to Taking a Screenshot
There are some alternatives if you cannot take a screenshot on your Logitech keyboard. Let us look at a few of them.
Snipping Tool
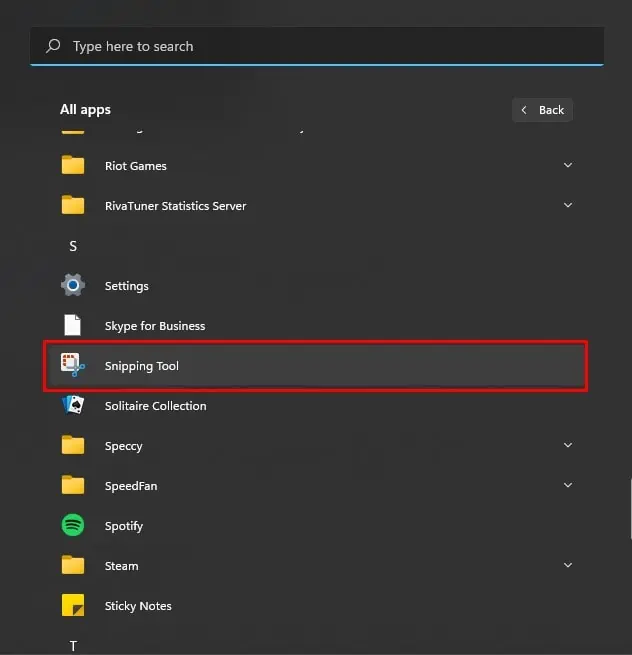
Windows has a default screenshot application named the Snipping Tool. Using this tool, you can either take a snapshot of the entire screen or a particular portion of the screen.
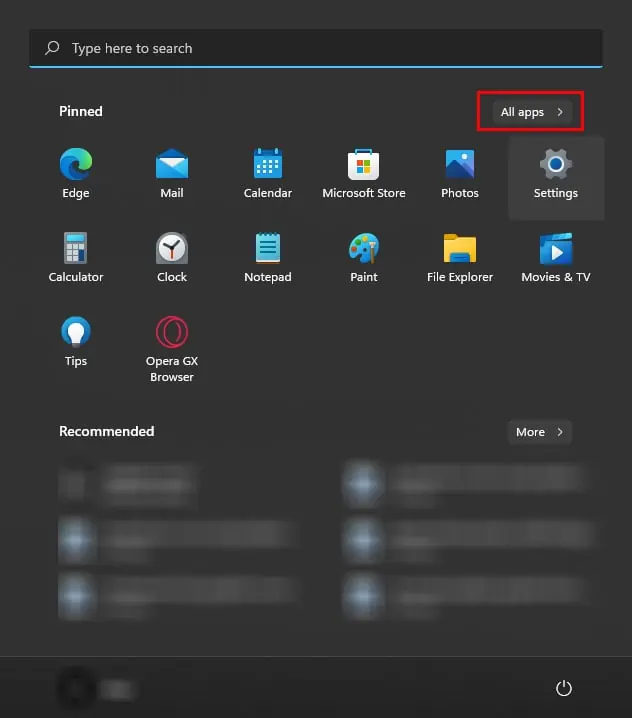
- Press the Windows key and click on All Apps.

- Select the Snipping tool.

- Click on New and select the area you want to capture.

Alternately, you can also press Windows + Shift + S key to directly take a screenshot using Snipping tool.
On-screen keyboard
Using the on-screen keyboard on both Windows and macOS is also an excellent workaround to taking a screenshot. However, the on-screen keyboard will also be visible in the screenshot image.
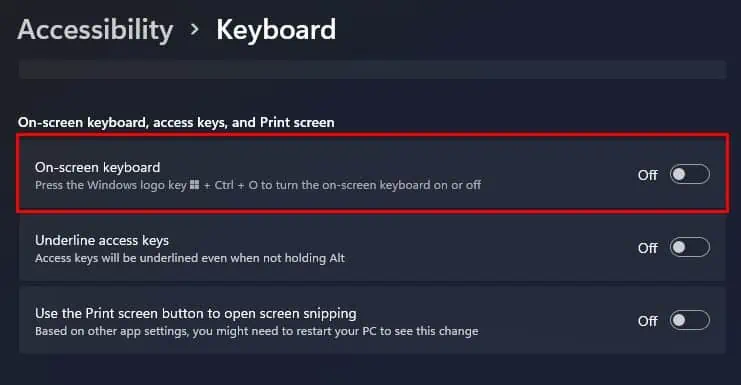
- Press the Windows + I key to open Settings.
- Go to Accessibility > Keyboard.
- Here Enable On-screen Keyboard.

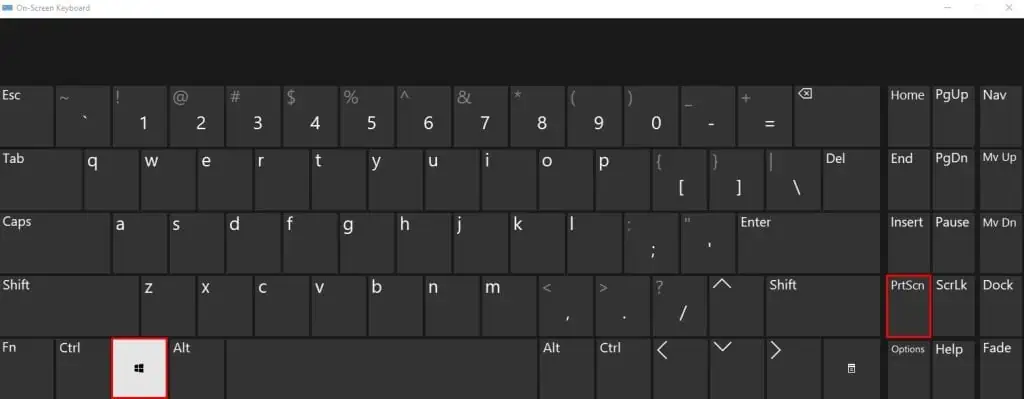
- Now, click on the Windows key and then the PrtScn key to take a screenshot.

Using Third-Party Application
Another simple method to take a screenshot is using a third-party application. Depending on the application you use, they may provide extra features like taking a screenshot of a specific area on the screen or even editing the image on the go.
Applications like Lightshot, ShareX, or Greenshot are great for taking a screenshot if you cannot take a snapshot on the Logitech keyboard.

