Windows computers automatically choose the most recently used printer as a default printer. However, if you have multiple printers connected to your computer, setting a default printer ensures that the print commands are sent to the correct printer.
Once you’ve set the default printer, you won’t need to select the printer each time you print the documents as Windows will automatically send the print job to the default printer.
Using Windows Settings
Windows Settings is the easiest way to access different printer settings like managing the printing preferences, checking the print queue, printing a test page, and many more. You can also set your printer to default using Windows settings.
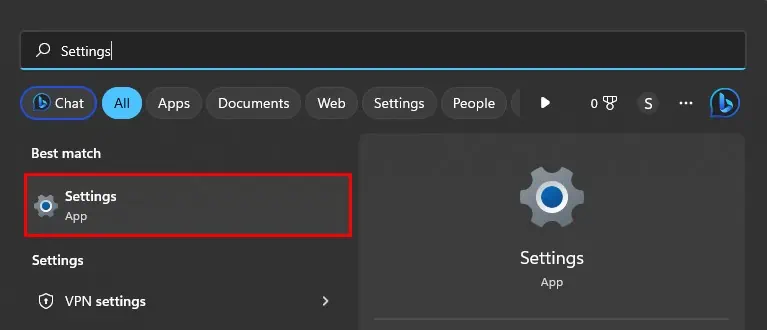
- Open Settings on your computer.

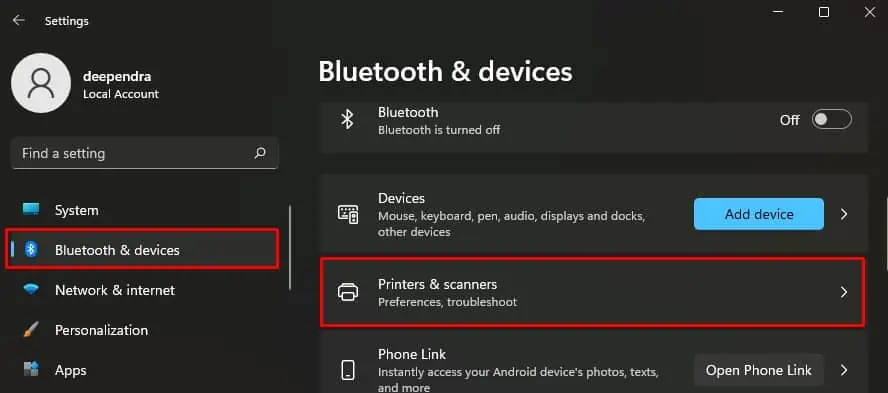
- Click the Bluetooth & devices menu on the left pane.
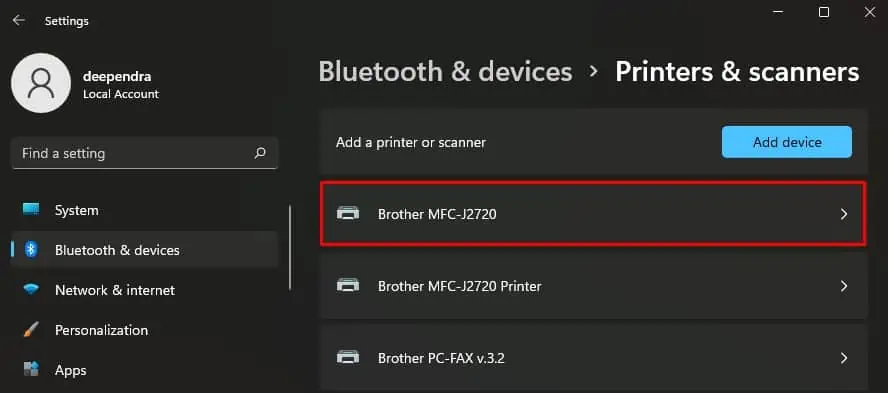
- Click Printers & scanners.

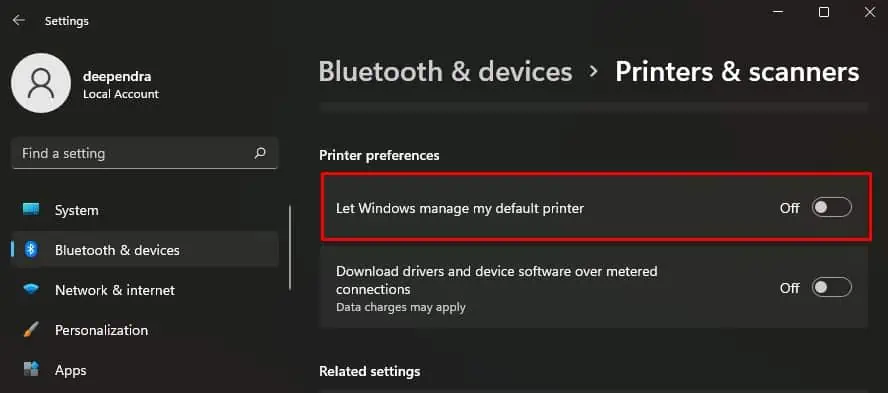
- Go under the Printer preferences section and toggle off Let Windows manage my default printer.

- Now click the printer name that you want to set to default.

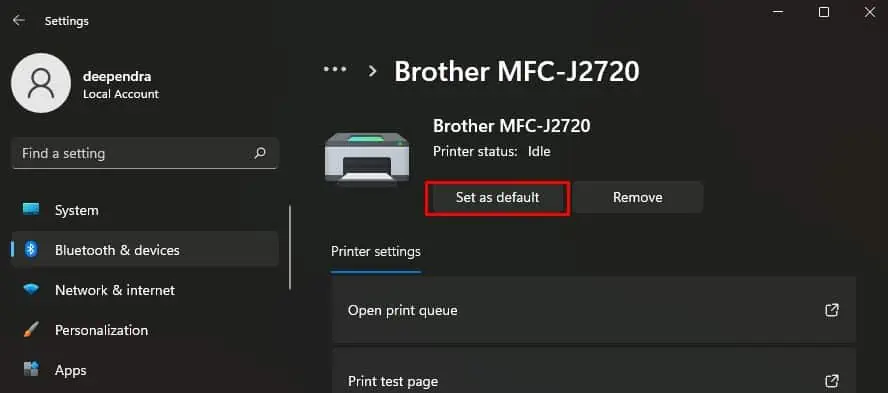
- Click the Set as Default button.

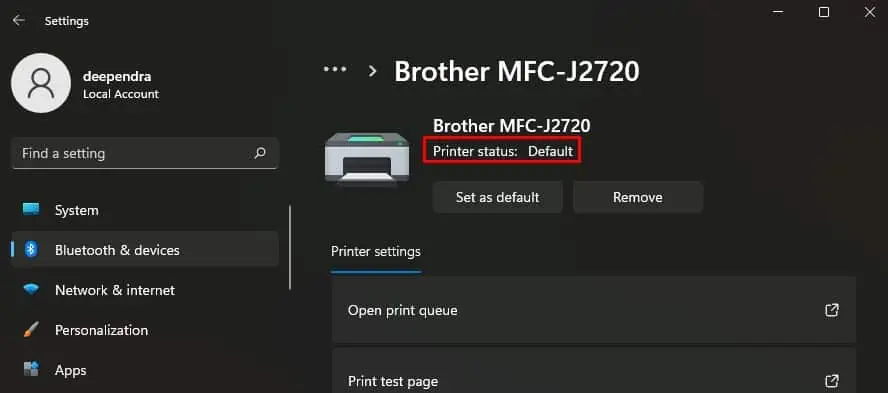
- Once set to default, you will see Default beside Printer status.

Using Control Panel
Here’re the steps to set your desired printer to default using the control panel.
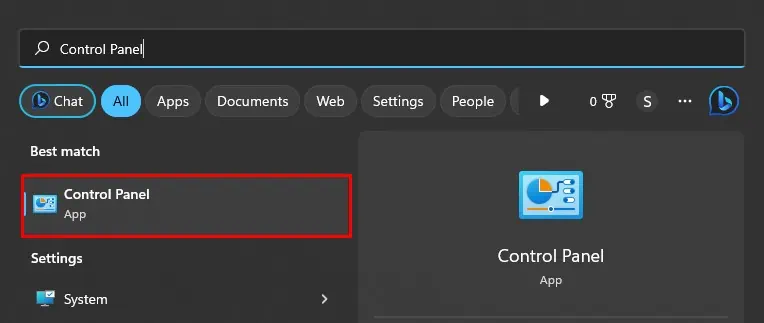
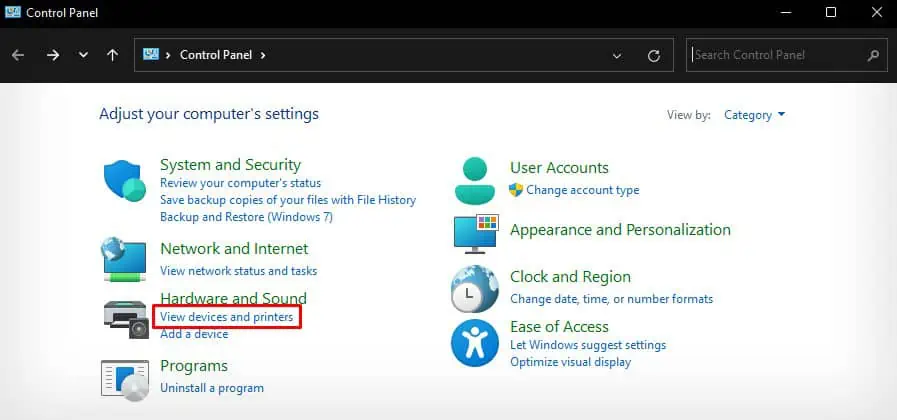
- Launch Control Panel.

- On the Control Panel window, click View devices and printers.

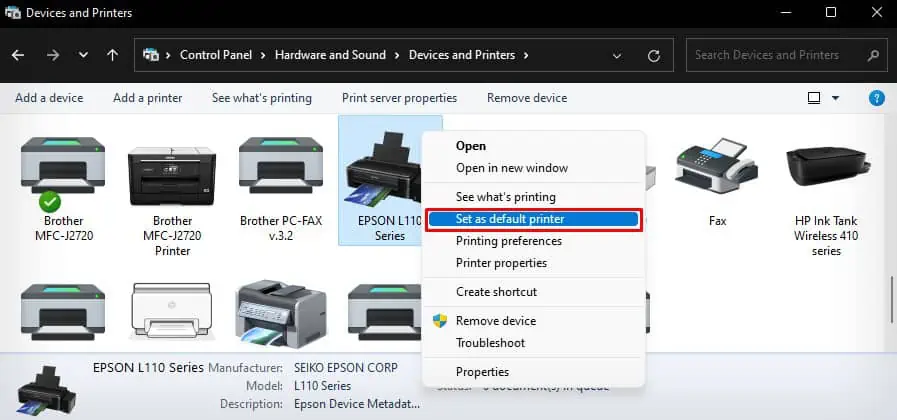
- Look after the printer’s name you want to make default.
- Right-click over it.
- Choose the Set as default printer option.

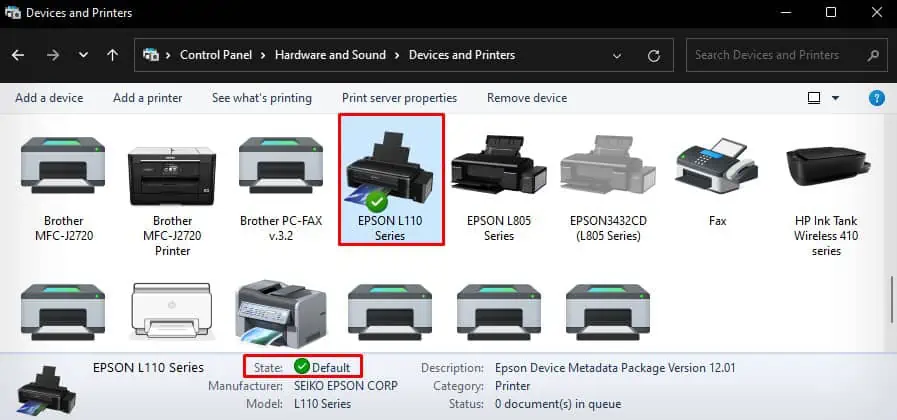
- You will see a green check mark once the printer is set to default and the State would be shown as Default.

Using Command Prompt
Here’re the steps to set your printer to default using the command line interface.
- First, go to Settings > Bluetooth & devices > Printers & scanners and toggle off Let Windows manage my default printer.

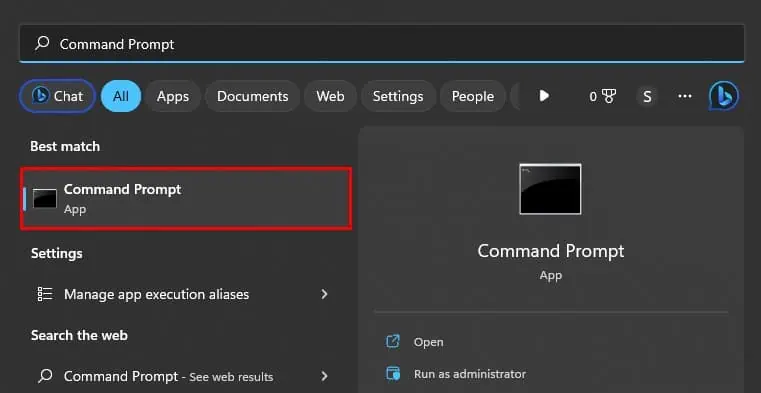
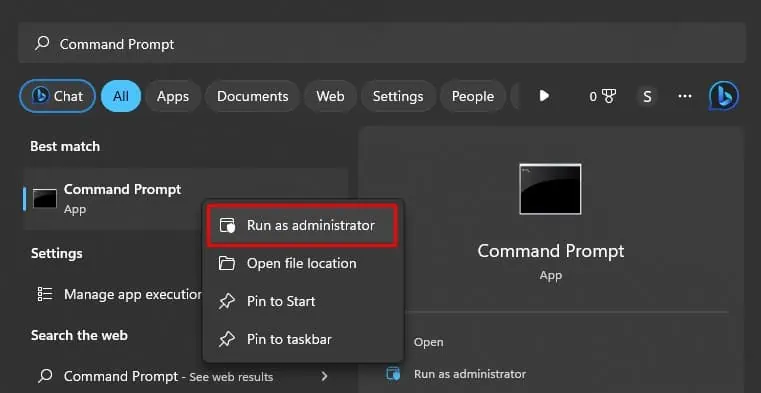
- Now, search Command Prompt in the Windows search box.

- Right-click over the application name and choose Run as administrator.

- Click Yes in the popup.
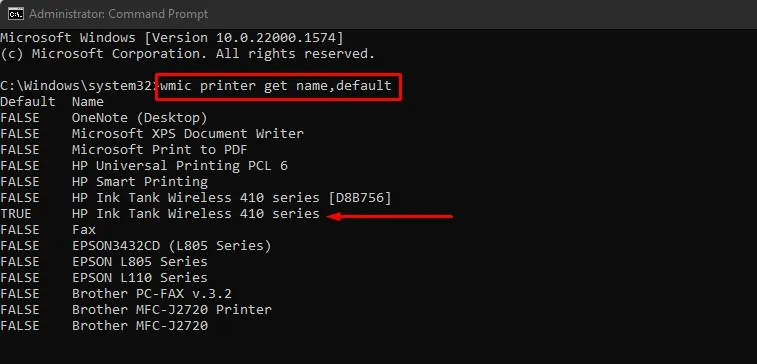
- On the command window, first, copy and paste this command
wmic printer get name,default. Press the Enter key.
- It will show a list of printer profiles installed on your PC. You will also see TRUE before the name of the printer that is currently set to default.
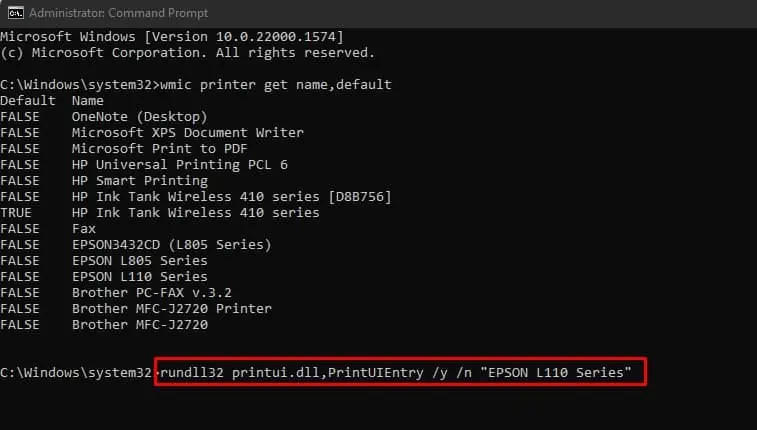
- Then copy and paste this command
rundll32 printui.dll,PrintUIEntry /y /n "printer name". - Replace the “printer name” field with the name of the printer that you want to set to default.

- Press the Enter key. It will change the default printer.
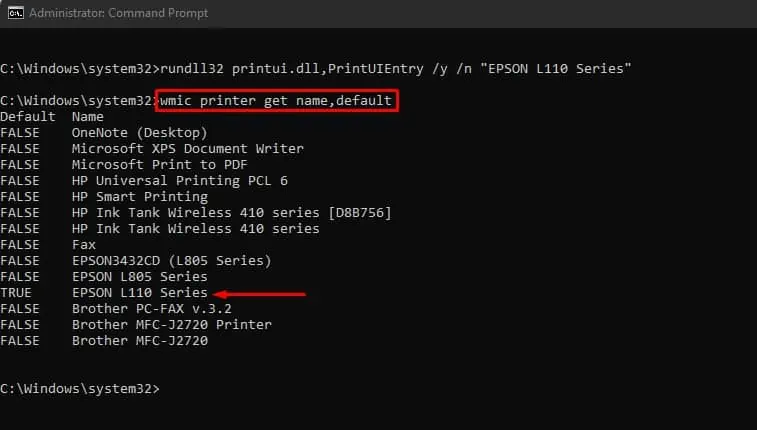
- You may again copy and paste this command and press Enter key to see the new default printer:
wmic printer get name,default.
Using the In-app Print Window
You can also change the default printer from the print window of text editors like Notepad or word processing applications like WordPad.
- Open the document you want to print.
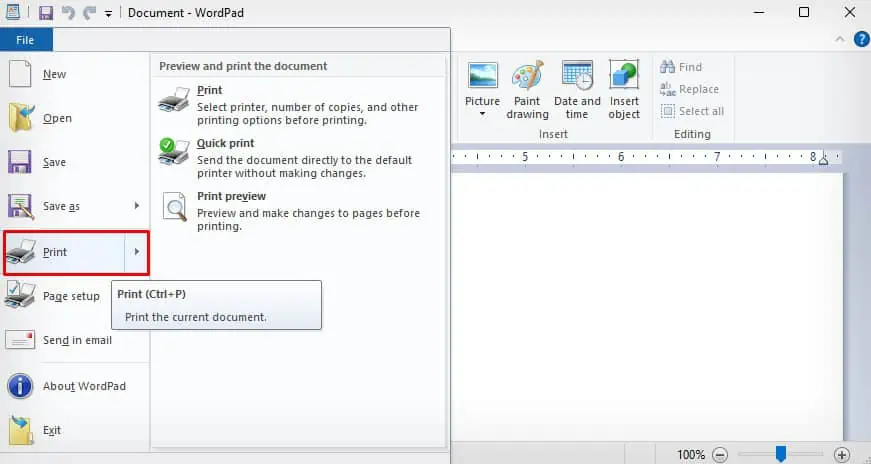
- Go to the Print option from the menu bar or hit the Ctrl + P shortcut keys on your keyboard.

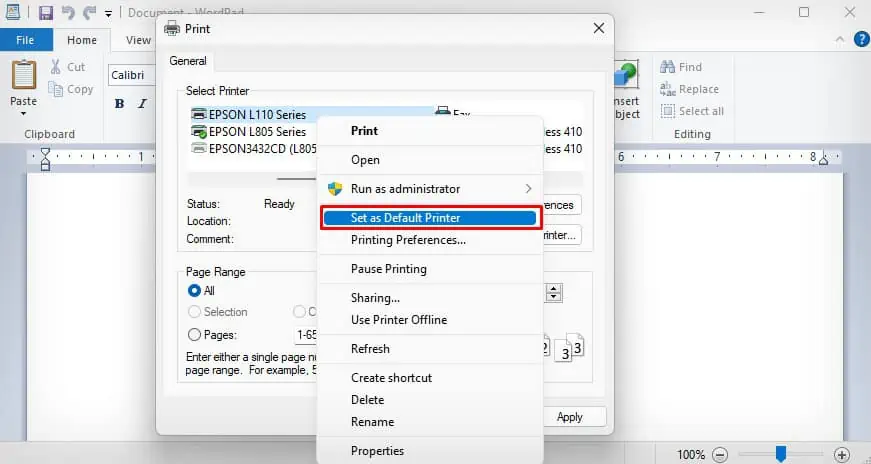
- It will open a small Print window.
- Under the Select Printer section, right-click the printer you want to set to default.
- Choose Set as Default Printer.

How to Set Default Printer on Mac?
If you are willing to set the default printer on your Mac, you can go through the steps below.
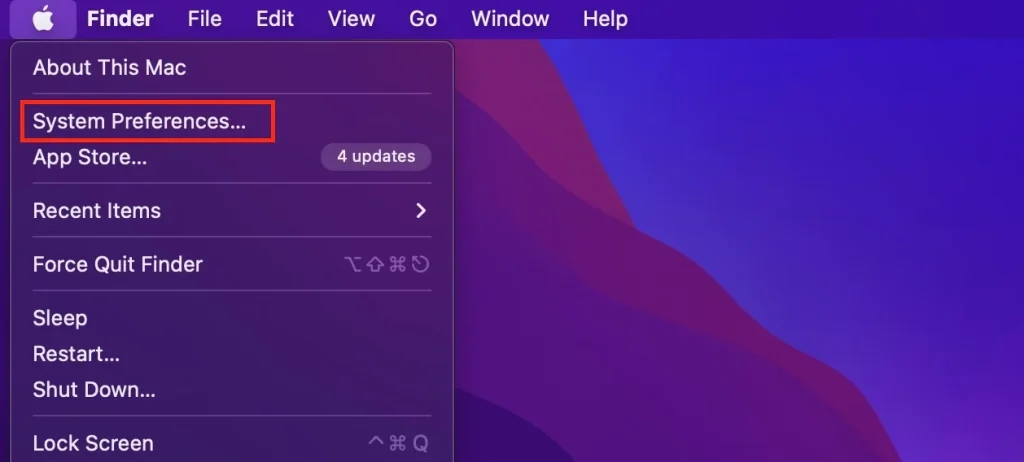
- Go to the top left of your Mac screen and click the Apple icon.
- Choose System Preferences.

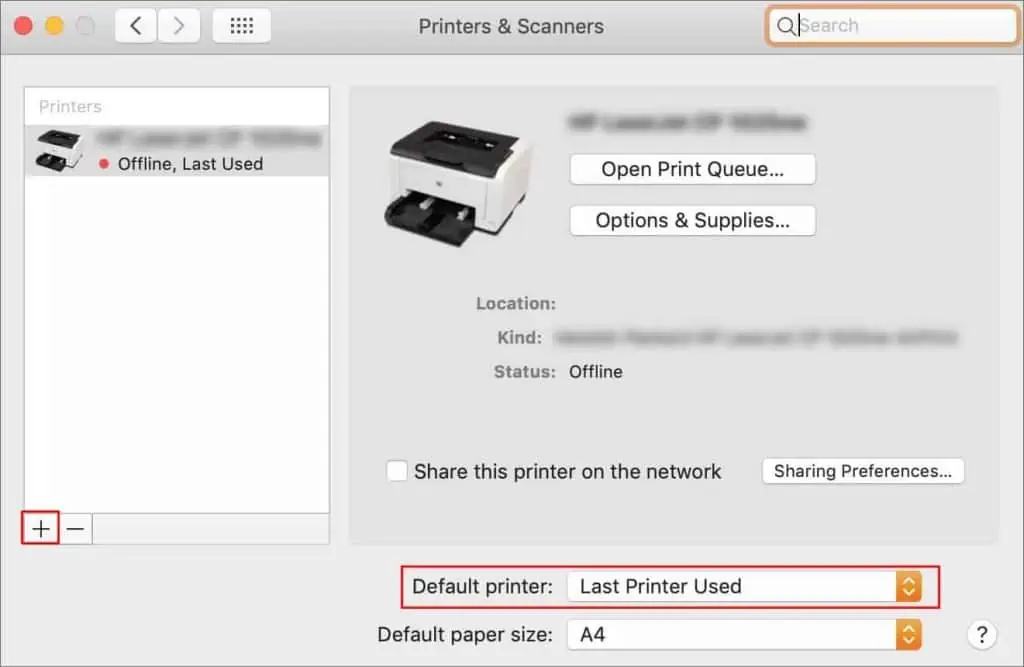
- From the new window, open Printers & Scanners.
- Click the drop-down beside Default printer and choose the printer that you want to set to default.

- Exit from the Printers & Scanners window.

