Setting up a TP-Link Router is very straightforward, thanks to the Quick Setup wizard, which pretty much automates most of the process.
Depending on the exact router in question, you might see the old green UI, the new blue UI, or the red gaming UI. However, even if the user interface differs, the process of setting up the router remains the same. This is true for the most part, even if you use the Tether app instead of the web interface.
And finally, even after the basic setup is complete and your internet is up and running, you might want to try additional configurations like MAC Filtering or using multiple routers. We’ve covered all of this and more in this article.
How to Setup TP-Link Router via Web UI?
The entire process of setting up a TP-Link router involves connecting the cables and powering on the router/modem, accessing the router dashboard, configuring internet access, and finally, the wireless settings.
Step 1: Connect Network Cables
Before you start, if you’re trying to reconfigure an old TP-Link router, we recommend resetting it. Additionally, unplug and power off all the devices before following the steps shown below:
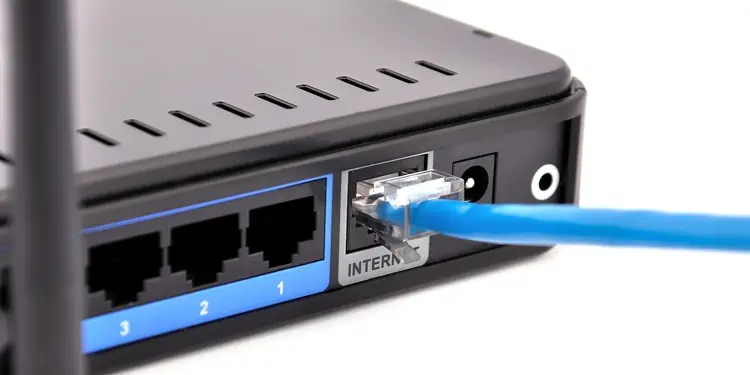
- Most wireless routers these days are router/modem combos. With such devices, you should take the Internet cable from your ISP and plug it into the router’s WAN port.

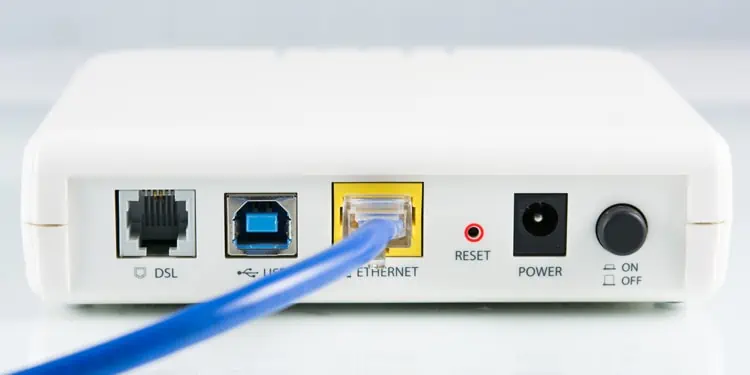
- If you have separate routers and modems, you should plug the internet cable into the Internet port on the modem. Then, you should use an Ethernet cable to connect the modem’s Ethernet port to a LAN port on the router.

- Needless to say, don’t forget to plug in the power adapter and power on the device/s.
- Finally, this is optional, but if doable, plug another Ethernet cable into a LAN port on the router and connect it to a PC. We’ll use this PC for the rest of the steps, but if you’re setting up via a smartphone, simply connecting to the router’s network should work fine as well.
Step 2: Log in to Router Dashboard
You can access the setup page for TP-Link routers at tplinkwifi.net. Sometimes, this address may not work, though. Here’s how you can log in to the router setup page in such cases:
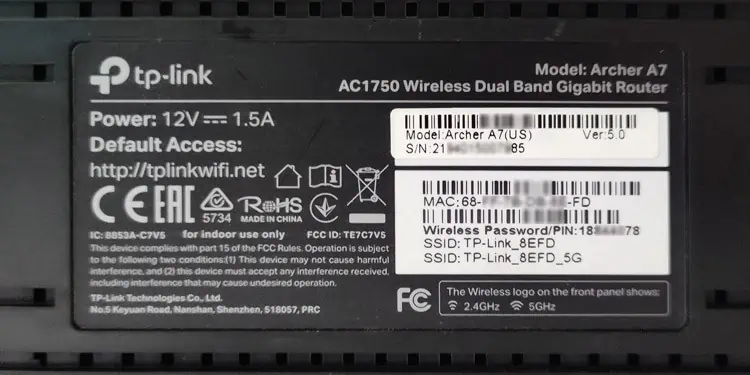
- Check the back of the router for the default IP Address and login details. Assuming you’re setting up a new router or have reset the router as instructed earlier, these credentials will work.

- Launch any web browser and enter the IP from Step 1. Then, enter the username and password to log in.
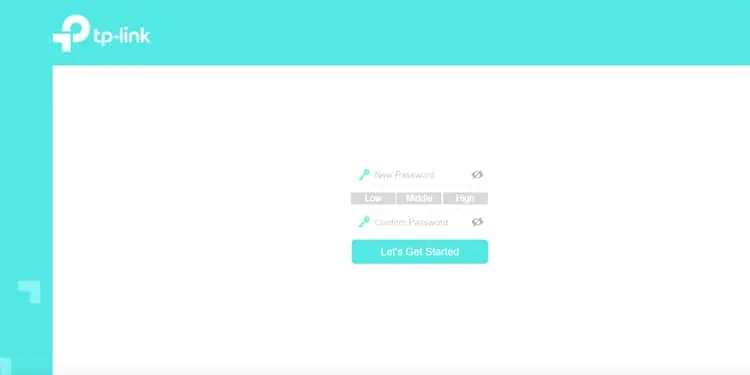
- With some TP-Link routers, you may be prompted to set a new username and password at the first login. This is done to dissuade users from using the default creds, which are known to be vulnerable.

Step 3: Internet Configuration
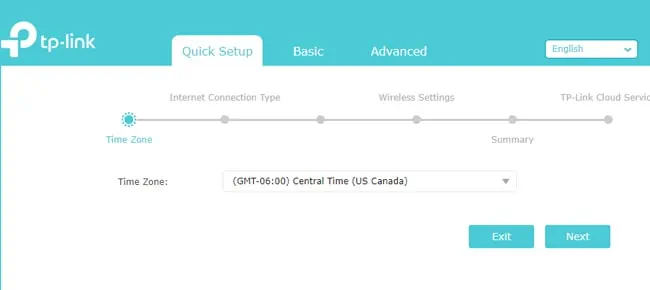
After logging into the router dashboard, you should land directly on the quick setup page. If not, manually go to the setup tab and follow the steps listed below:
- If prompted, set the time zone for the router. This is important for certain settings like Wireless Scheduling or Restricted Time Periods.

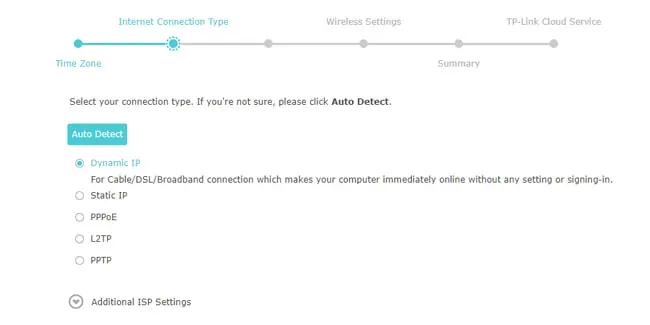
- Next, select the Connection Type. If you’re unsure, you can select Auto Detect. However, you also have some other options:

- Dynamic IP is where the DHCP server automatically assigns your modem the IP address. This is the most common connection type these days.
- Select Static IP if you’ve been provided a Static IP Address by your ISP. You’ll also need other details like the Subnet Mask, Gateway, and DNS.
- Pick PPPoE if you have a broadband connection with encryption like ADSL. As before, you’ll need to get the connection details, like the username and password, from your ISP.
- Depending on the router, you may also have options like PPTP or L2TP. Select these if your ISP has provided you with the credentials for a VPN server.
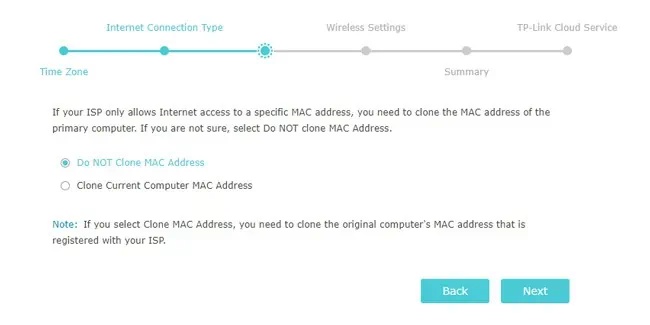
- On the next screen, you can pick whether or not to clone MAC Address. You’ll have to clone the MAC address of the computer registered with your ISP if the ISP only allows internet access to certain MAC addresses. However, this is a niche scenario. In most cases, you should opt to NOT Clone MAC Address and proceed.

Step 4: Wireless Configuration
After the previous steps, your router should already have internet access for wired connections. The next step is to configure the wireless settings, i.e., the Wi-Fi. Here are the necessary steps:
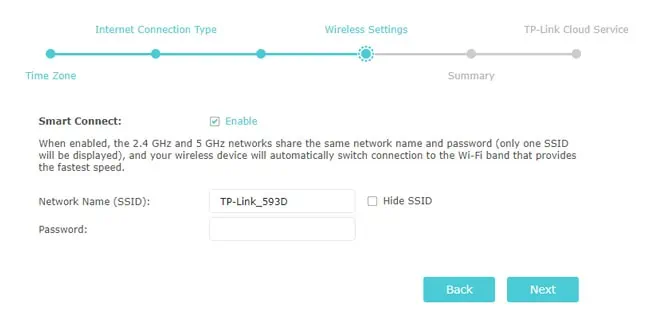
- First, enable or disable the Smart Connect option according to your preference. If used, it basically combines the 2.4 GHz and 5 GHz bands under the same SSID so that your device automatically uses the ideal band at any given time.

- Next, enter the Network Name (SSID) and password.
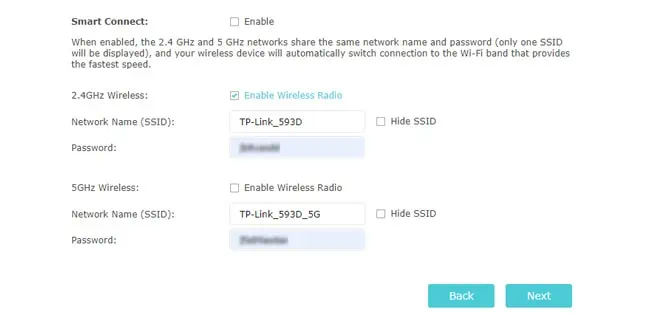
- If using multiple bands, repeat the same for the other bands as well.

- Finally, you can also choose not to broadcast the SSID for certain bands or disable those bands entirely.
Step 5: Additional Configurations
Once you’ve completed the steps shown so far, the basic setup process is complete. However, some additional configurations still remain. Some, like securing the router and Wi-Fi, are very important, while others are optional. Either way, here’s what we recommend:
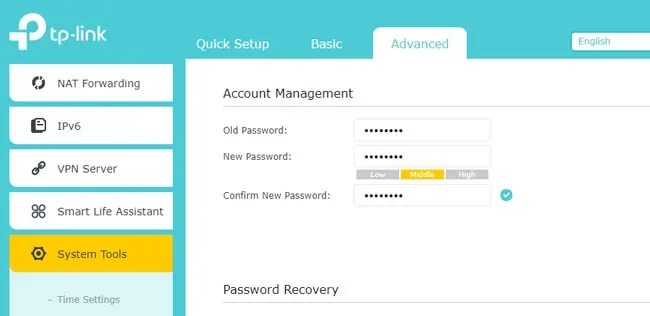
- First, switch to Advanced mode and go to the Administration, System Tools, or similar tab.
- Change the router username and password here. The default values are easily guessable, so using them is a bad idea.

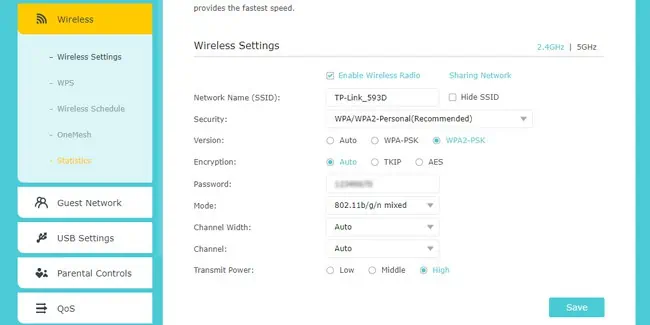
- Next, go to the Wi-Fi, Wireless Settings, or similar tab.
- Ensure you’re using a strong password and a reliable security mode like WPA2.
- You can also manually set things like Wi-Fi channel and Transmit Power, but these are generally best left to defaults. Finally, repeat the same things on the next band as well, if required.

Aside from these, some further customizations are available if you’re interested.
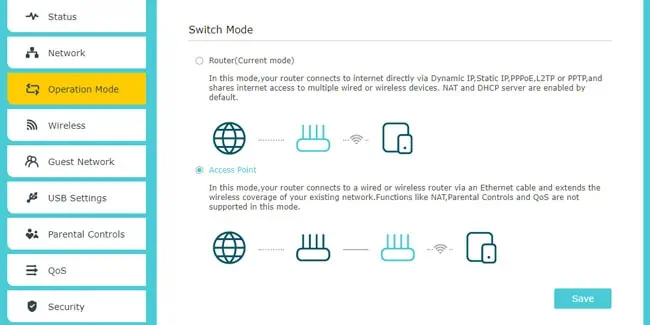
- First, the Operation Mode tab allows you to configure the router to operate in other modes like Access Point or Repeater. This is useful if you’re trying to use multiple routers and extend your network coverage.

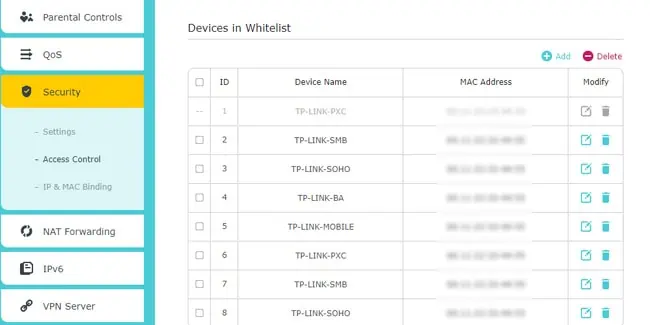
- The MAC Filtering or Access Control tab allows you to manage which devices have network access. You can blacklist or whitelist devices using their MAC Address.

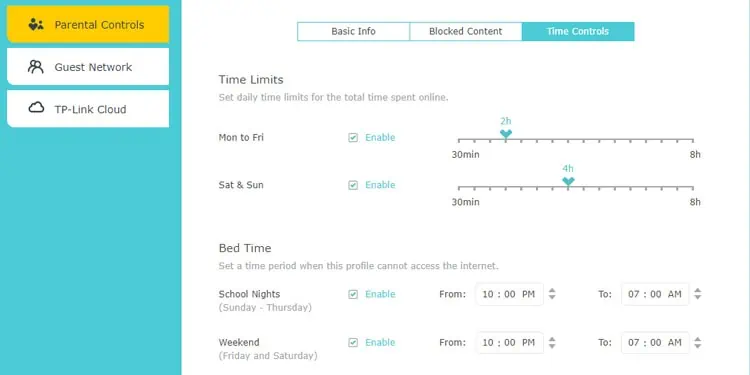
- Parental Controls serve a similar purpose but with a different approach. You can set daily time limits for certain devices or restrict internet access at certain times from this tab.

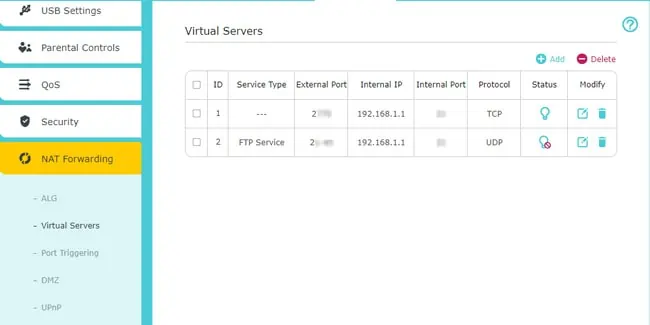
- You can set up Port Forwarding through the NAT/Port Forwarding tabs. This is useful for hosting public services on your local network, like media or game servers.

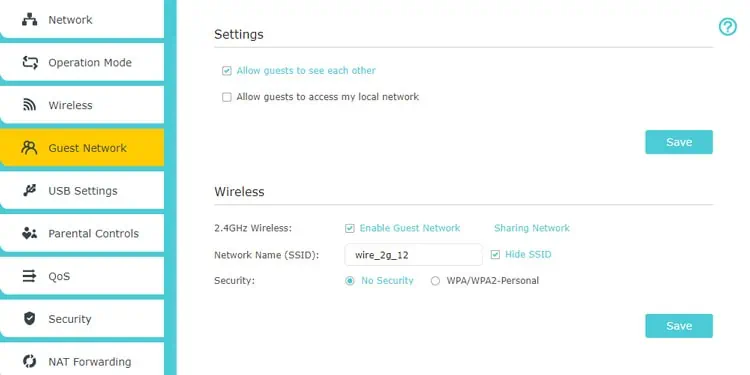
- Setting up a Guest Network allows you to give Wi-Fi access to people while keeping them isolated from your main network.

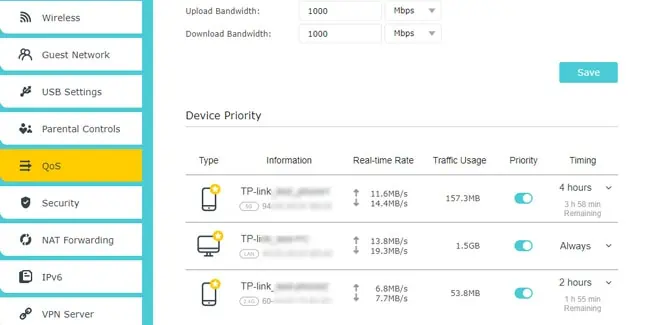
- Setting up Quality of Service (QoS) lets you prioritize bandwidth for certain types of traffic, devices, or services over others.

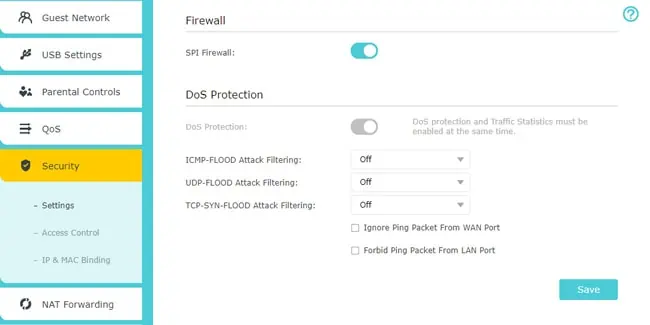
- The Security tab is self-explanatory. It lets you configure the router firewall and beef up the network security through means like DoS protection and IP Mac Binding.

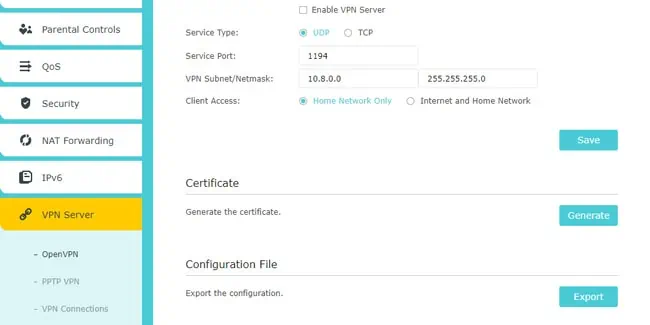
- The VPN tab lets you host VPN servers via the router.

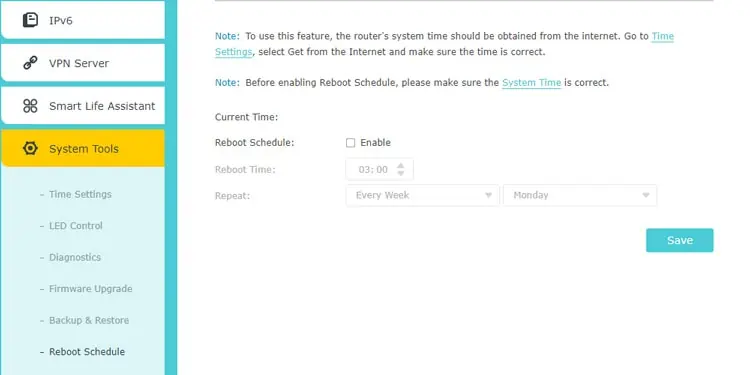
- The System Tools tab gives you access to a bunch of useful features like Reboot Schedules, Network Traffic Monitoring, or Firmware Upgrades.

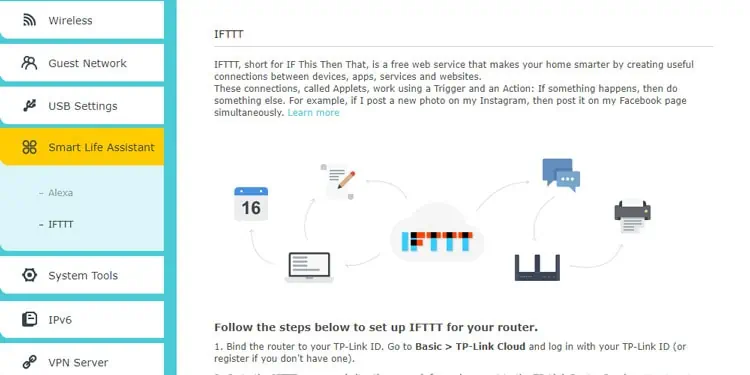
- Finally, the Smart Life Assistant feature is only seen on newer TP-Link routers, but it’s a fun feature to play around with. The Alexa tab lets you set up the TP-Link Router Skill on Amazon Alexa. This lets you perform a bunch of actions, like restarting the router or announcing the password out loud, all through voice control. If you’re familiar with IFTTT, then you’ll have even more possibilities.

How to Setup with TP-Link Tether?
You can also use TP-Link’s Tether app to set up compatible routers without using the web interface. To start, please check the Step 1 heading if you need help setting up the router cables. After the router is powered on and running, follow the steps listed below:
- Connect your Android or iOS device to the router’s Wi-Fi network. The default wireless password, if applicable, can be found at the back of the router.
- After connecting to the Wi-Fi, launch the Tether app on your phone.
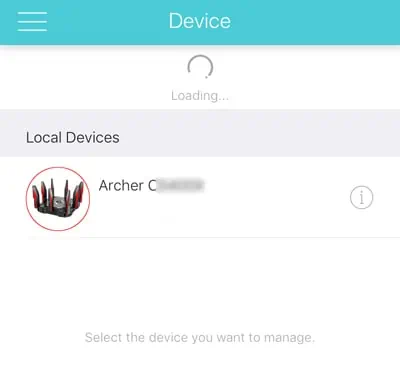
- Select the router from the Devices list and set a new login password for the router.

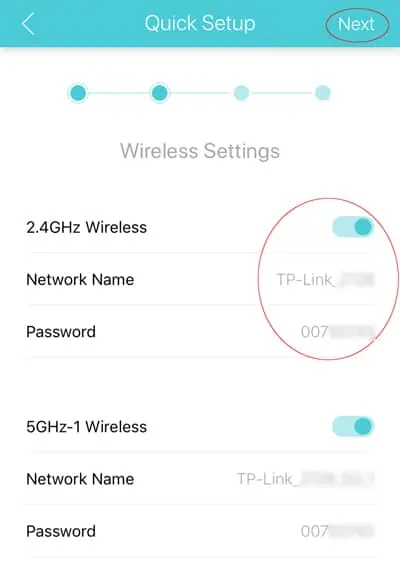
- On the next few screens, configure the Connection Type, MAC Cloning, and Wireless Settings.

- Apply the changes to finish the setup.
As you can see, Tether’s UI may be different, but the setup process is the same as that of the web interface. If you need further help with Step 4, we recommend checking the steps from the web interface section for reference.
Troubleshooting Problems After Setup
Problems like invalid WAN parameters or no internet access are fairly common after setting up a router. Power cycling the router and modem is generally helpful in such situations. More specifically, though, we’ve listed some common scenarios like these as well as the most effective fixes below:
Invalid WAN Parameters
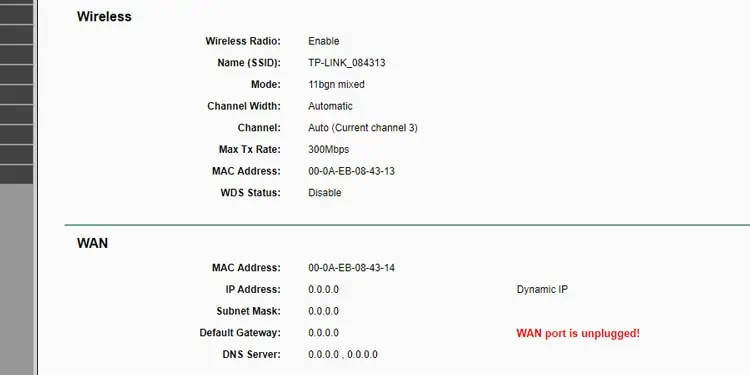
- Connect your PC directly to the modem. If there’s still no internet connection, contact your ISP. But if the internet works like this, try the fixes listed below.
- In case you get the WAN Port is unplugged error, ensure the internet cable is properly plugged into the WAN port of the router. If using a separate modem, also check the connection between the router and modem.
- Clone the MAC address of your PC.
- Ensure the WAN connection type is correct.
Valid WAN IP But No Internet Access
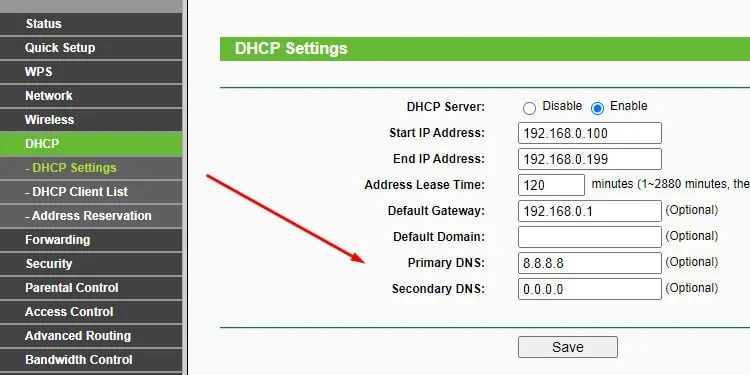
- Configure DNS servers for the router manually via DHCP settings.
- Reset and reconfigure the router.
Can’t Find Wi-Fi Network
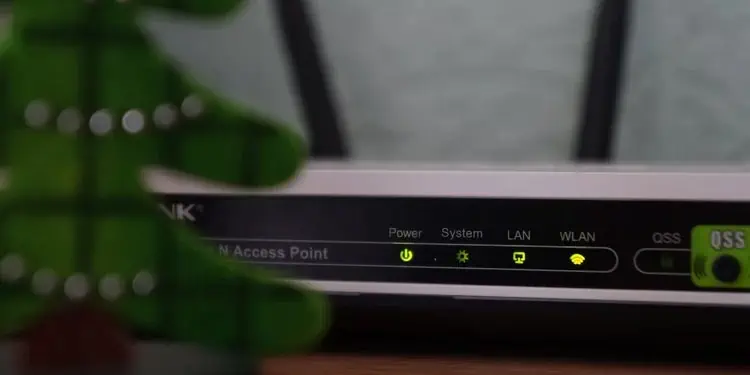
- Confirm that the router’s Wi-Fi/Wireless/WLAN indicator is on or blinking.
- Make sure SSID Broadcast isn’t disabled via Router Settings.
- If your device can’t find any Wi-Fi networks at all, the wireless adapter on the device is likely the problem.
- If you’re facing this problem with Wi-Fi 6 products only, it’s likely because your device’s wireless adapter isn’t compatible with Wi-Fi 6. Updating the wireless adapter’s drivers may help with this.
Can’t Connect to Wi-Fi
- First, double-check that you entered the correct password.
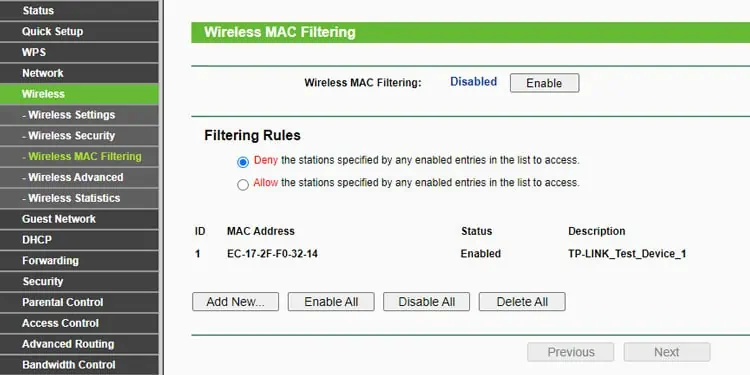
- This specific device may be blocked from the network due to settings like MAC Filtering, Access Control, etc.
- Troubleshooting for signal strength and interference can also help.

