The environment variables are the key-value pairs that act as information containers for all the programs running on Windows. Simply put, they are the string variables an OS uses to manage all the apps and services.
Every application has its own set of environment variables, and it helps them determine where to install and store files. These variables contain names and values that help control the operational environment. Further, they have a significant effect and enable your computer’s active processes.
Without environment variables, you’ll need to inform your scripts every time to find the same path to a specific file. But if you set a dedicated variable, the information becomes available everywhere.
- Helps secure sensitive information
- No need to worry about scheduled tasks and production mistakes
- Provides better development experience
- Easy navigation and configuration
How to Set Windows Environment Variables
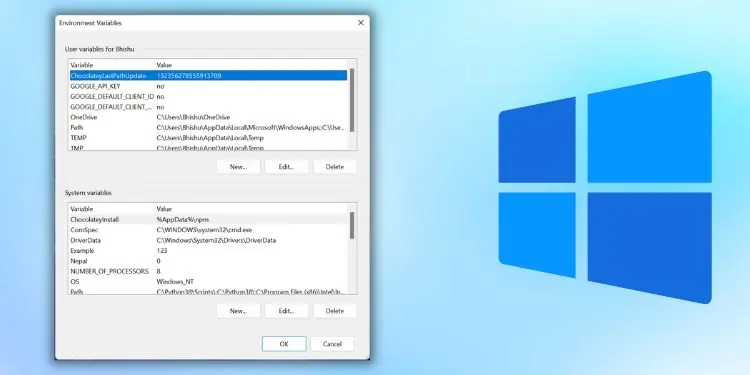
In Windows, the environment variables are categorized into two – User and System. While the former deals with user-defined settings (user profiles, files, etc.), the latter contains the values used by the operating system.
In this section, you will learn how to set Windows environment variables via the graphical user interface, command line interface (Command Prompt and Windows Powershell), and Registry Editor. So, without further delay, let’s get right into them in detail.
Using Windows GUI
Before setting up a Windows environment variable in the graphical user interface, you’ll need to navigate to the dedicated window:
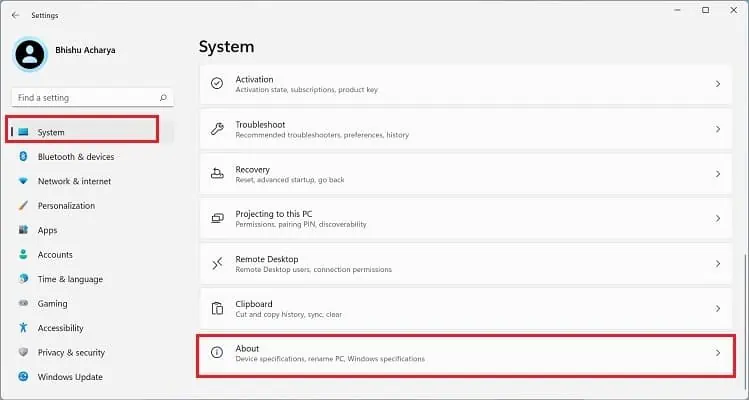
- Use Windows + I to launch Settings on your PC.
- Now, move to System > About.

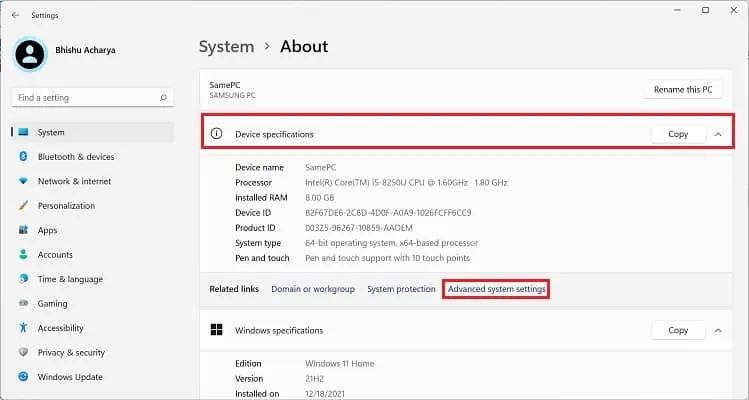
- Here, expand Device Specifications and select Advanced system settings.

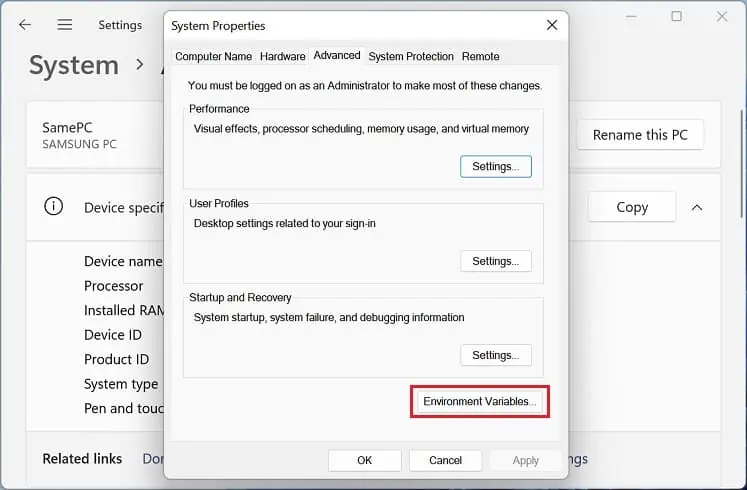
- This will open the Advanced tab in the System Properties dialogue box. Here, find and click on the Environment Variables button.

Another way to open Environment Variables window is from the Control Panel utility. Kindly follow the below instructions on how you can do so:
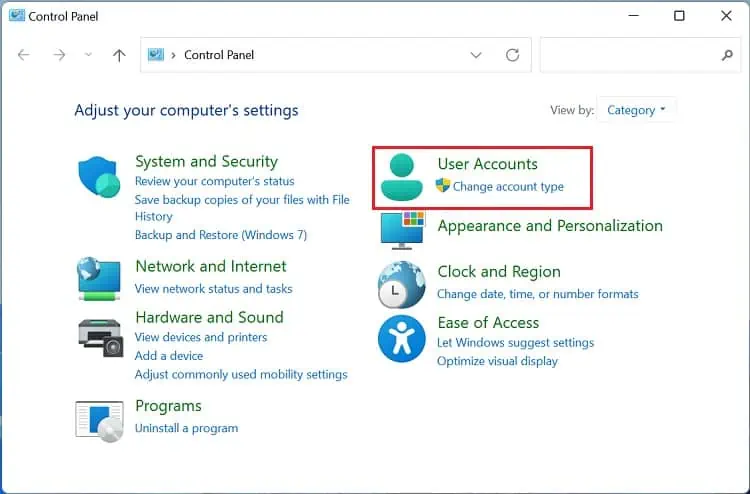
- Press Windows + R and run the
controlCommand to open Control Panel. - Now, navigate to User Accounts.

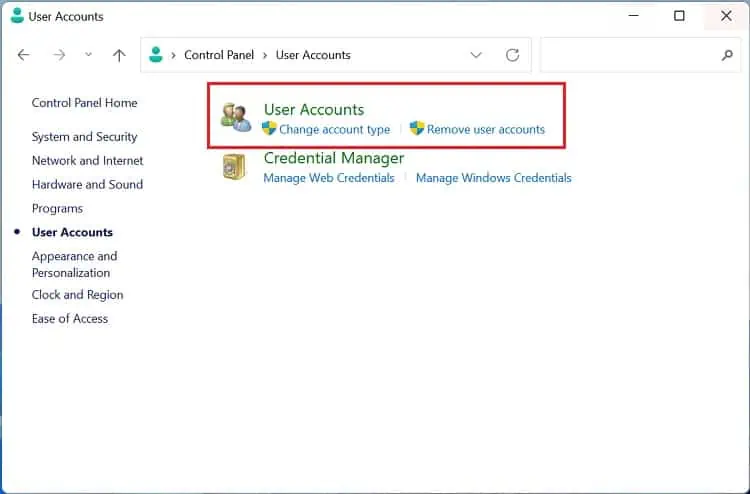
- Again, choose User Accounts.

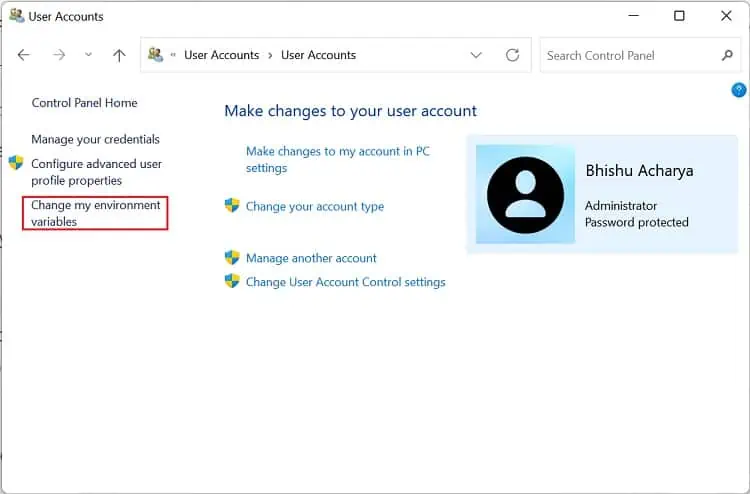
- Then, select Change my environment variables from the left pane.

Alternatively, you can directly launch it from the Run dialogue box by running the following command:rundll32.exe sysdm.cpl,EditEnvironmentVariables
Also, this is possible from the Start menu, where you can search for “Edit the system environment variables” or “Edit environment variables for your account”.
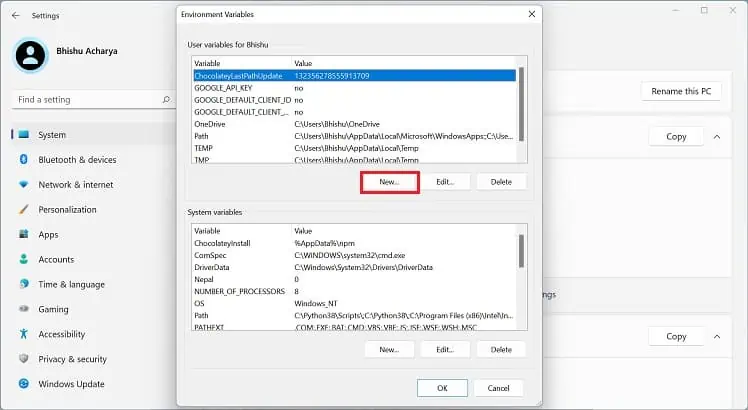
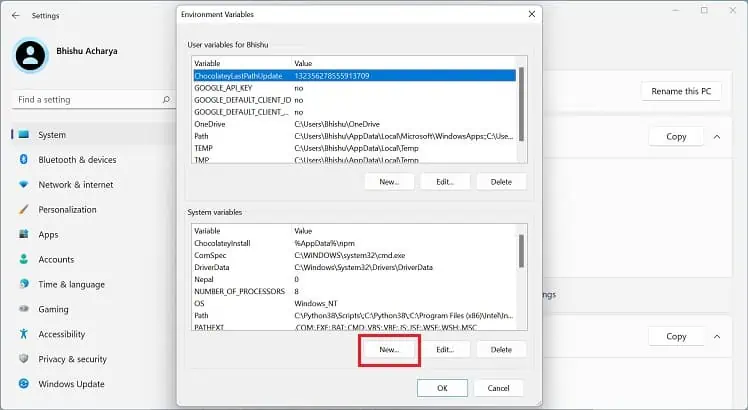
Once the Environment Variables window pops up, go through the following guide to learn how to set the system environment variables on Windows 11:
- Press the New button under ‘User variables for [Your PC Name]’ to add a user variable.

For adding a new system variable, use the New button under the System variables section.
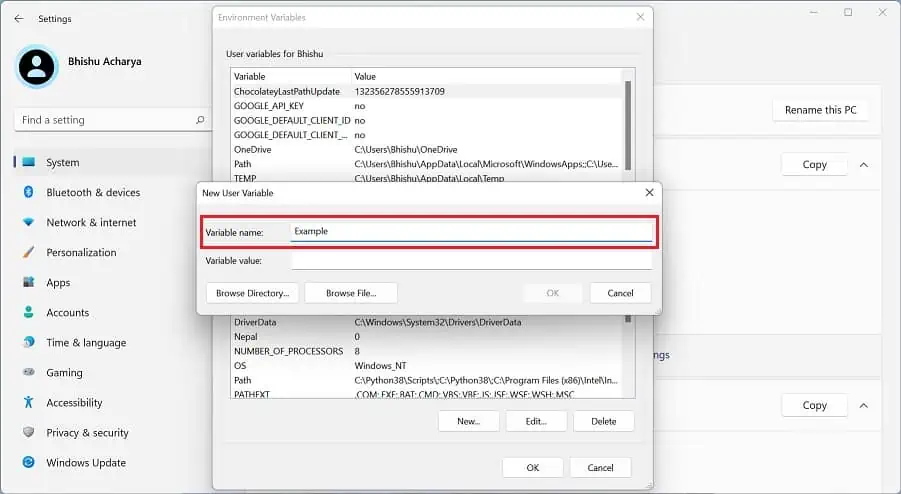
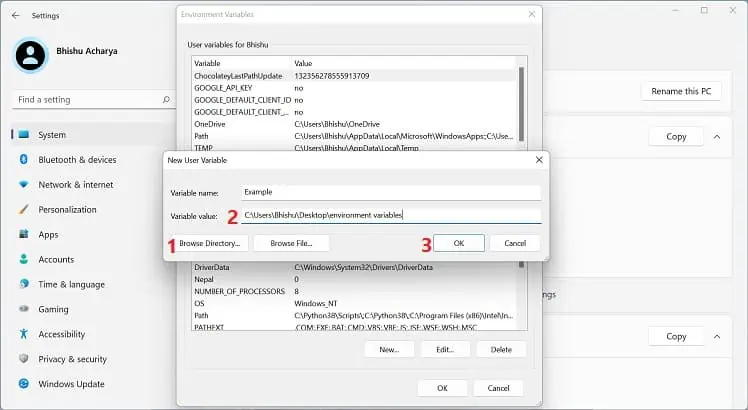
- Next, enter a desired name in the Variable name field.

- To add a path, press Browse Directory or Browse Field. Now, navigate to the path and tap the Open button. If you already know the correct location or want to add different data, you can directly enter it in the Variable value field.
- Finally, click Ok and check the list.

You can select the system or user variable if you want to change its name or value. Then, press the Edit button, and proceed with the same steps as above. Likewise, to delete an existing environment variable, select it and choose Delete.
In Registry Editor
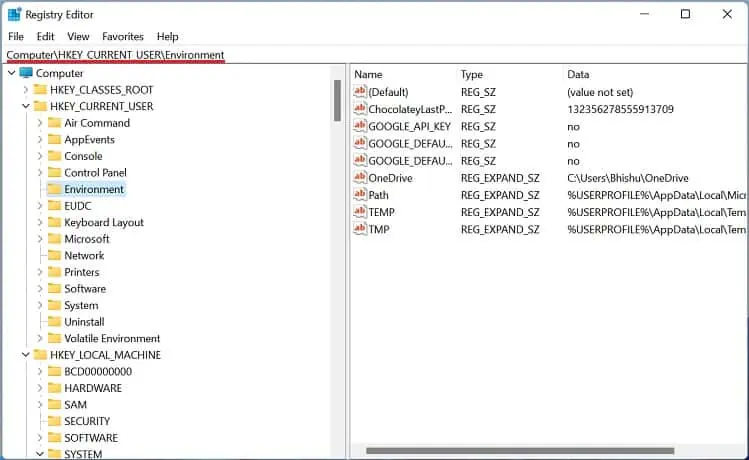
Another way to set Windows environment variables is from the built-in Registry Editor tool. In fact, this is the precise location where all the user and system values are stored. Here’s a quick guide on how to do it the right way:
- Press Windows + R and run the following to open the utility:
regedit.exe - Now, copy and paste one of the below paths to view all the user or system variables on your computer:
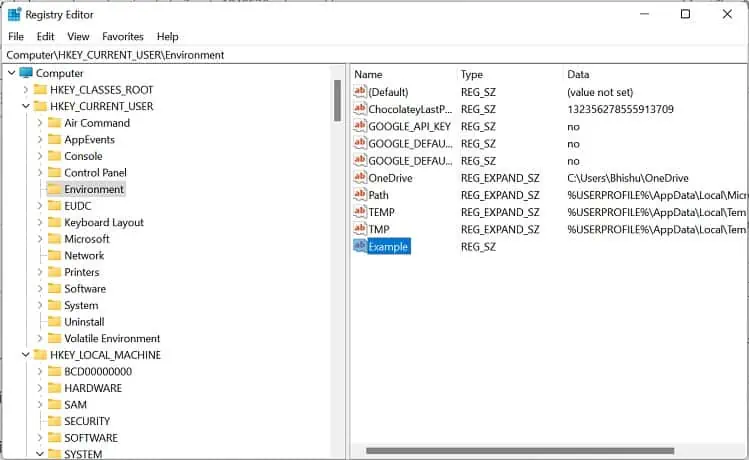
Computer\HKEY_CURRENT_USER\Environment(for user)
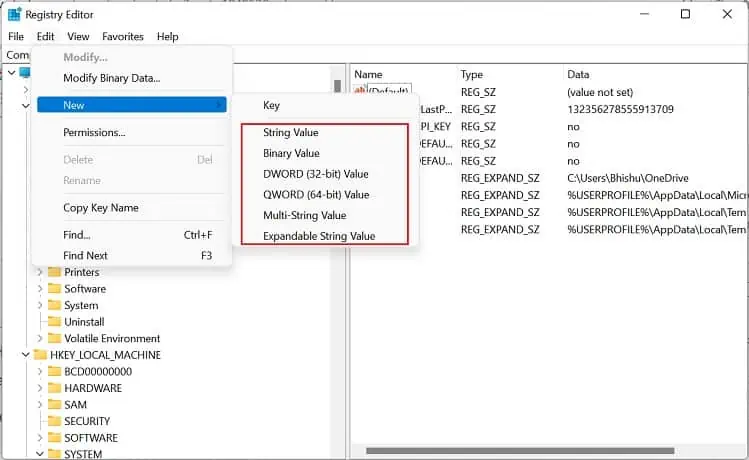
HKEY_LOCAL_MACHINE\System\CurrentControlSet\Control\Session Manager\Environment(for system) - Next, go to Edit > New.
- Here, select any of the following value options – String, Binary, DWORD, QWORD, Multi-string, Expandable String.

- Move to the right pane and name the variable.

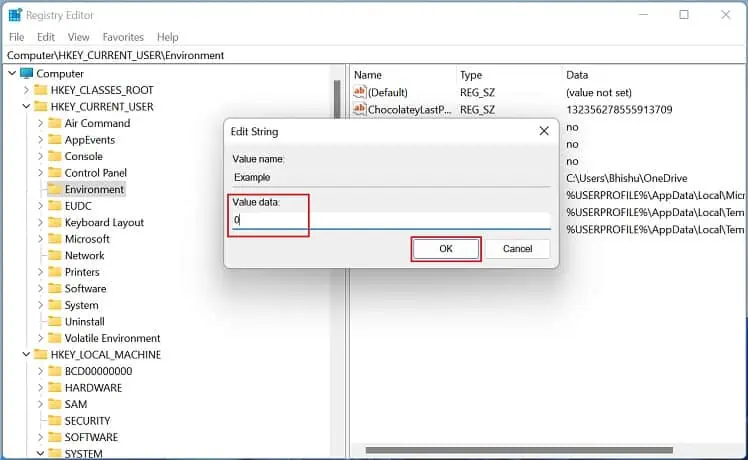
- Then, double-click on it and enter an appropriate value in the Value data field.
- Hit Ok, which should set the Windows environment variable.

To edit the value, simply double-click the variable and change it to an appropriate one. Furthermore, you can right-click and pick Delete to remove the environment variable permanently.
In Command Prompt
If you prefer CLI (Command Line Interface) over GUI, the good news is that you can use simple commands to set Windows environment variables. Although you can create both user and system variables, there’s no individual section to display each of them.
Follow the below steps to view, set, edit, and delete Windows environment variables using Command Prompt:
- Firstly, press the Windows key to open the start menu. Then, search and launch Command Prompt.
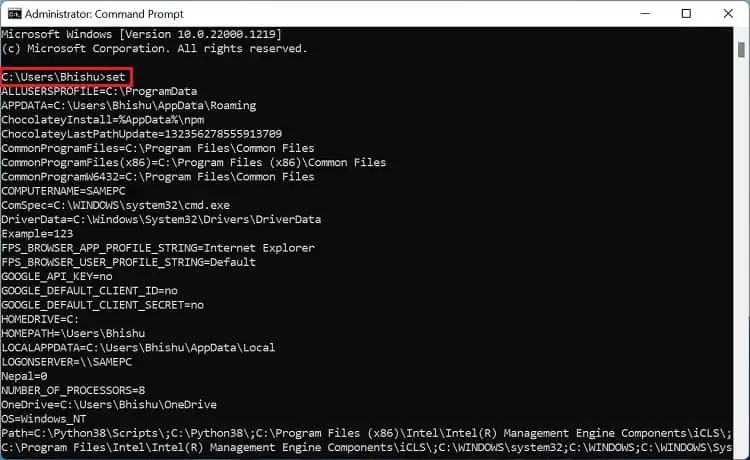
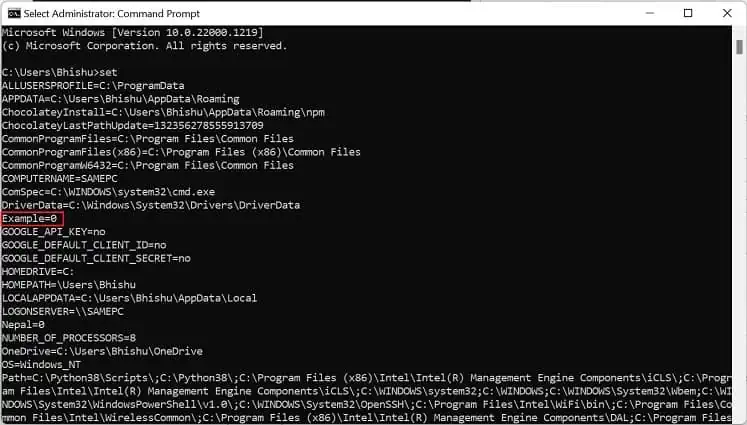
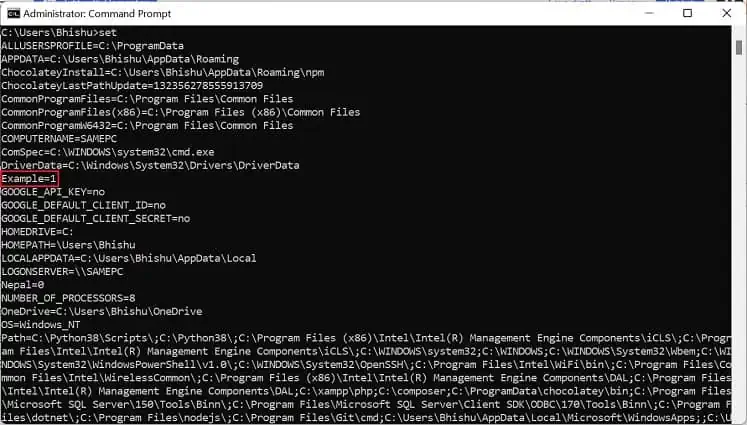
- Use the below command to view all the environment variables (for both user and system):
set
- Next, you can use the below syntax to create a user variable of your own:
setx variable_name “variable_value”
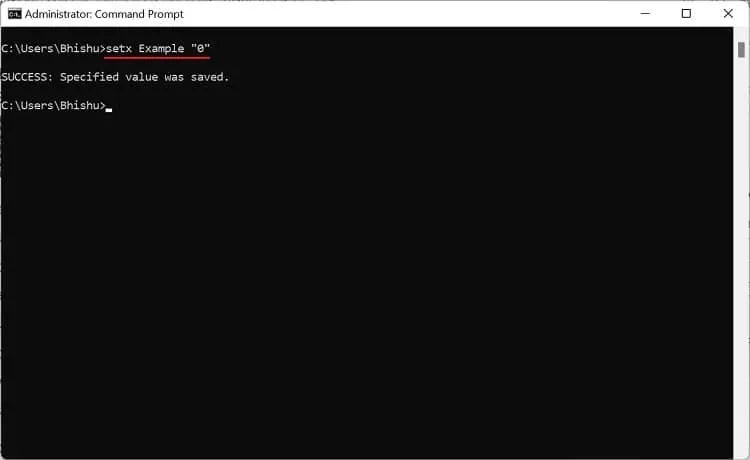
For demonstration, we have used the following command to create a user variable named “Example” and set its value to “0”:setx Example “0”
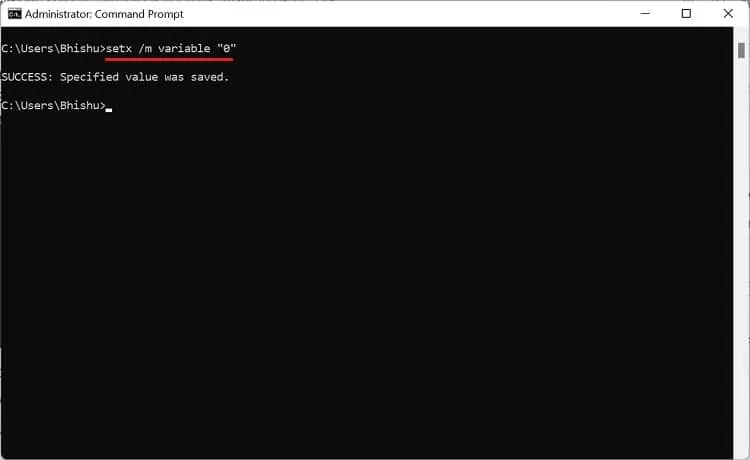
To create a system environment variable, you’ll need to use a slightly different syntax:setx /m variable_name “value”
- Now, restart the Command Prompt and use the
setcommand again to confirm that the environment variable is created successfully.
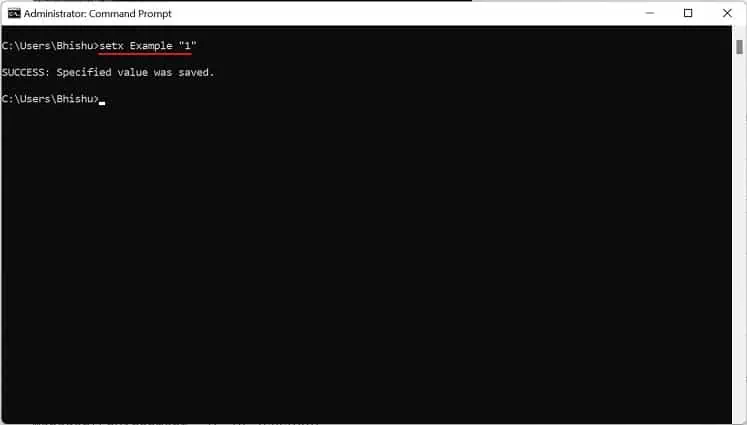
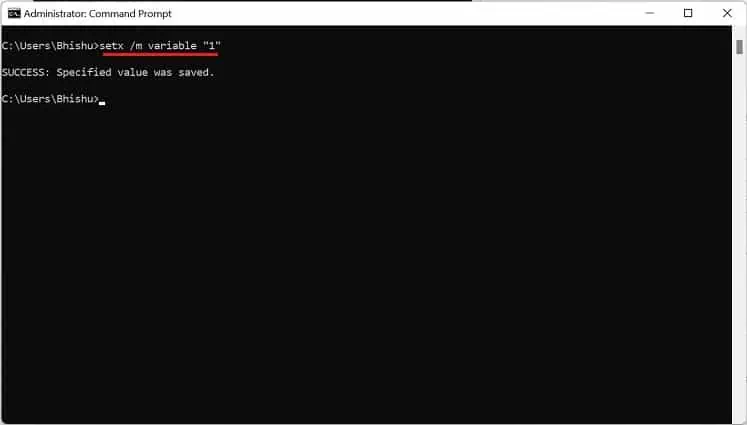
- To edit the value, you can use the same syntax used to create the environment variable. Here’s a simple example that should clear your doubt:
setx Example “1”(for user)
setx /m variable “1”(for system)
- Restart CMD and use the
setcommand again to check the edited value.
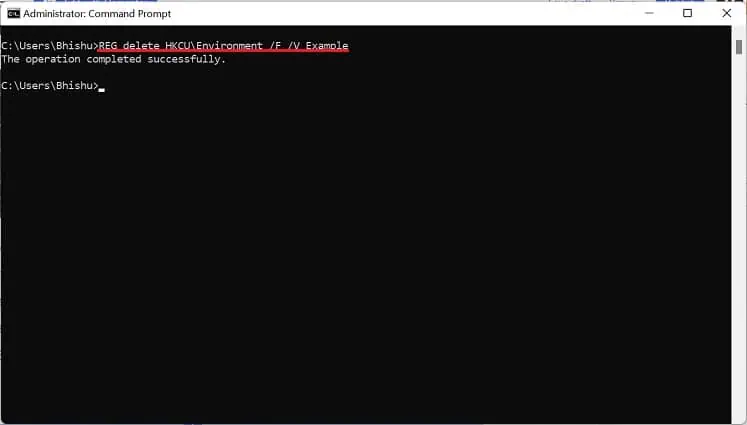
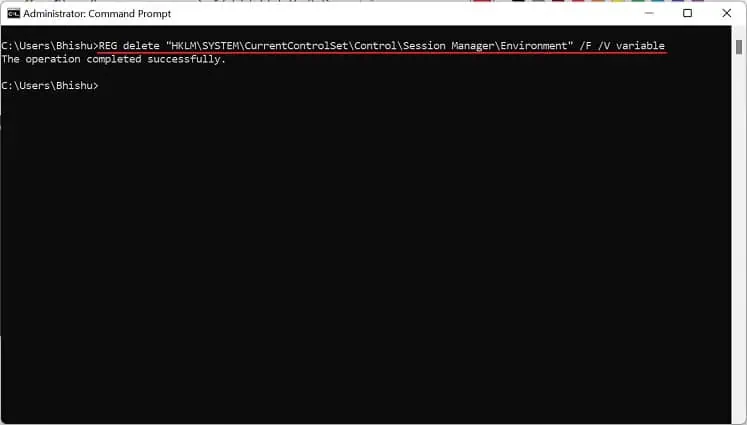
- In case you wish to delete an environment variable, you’ll need to use the following registry commands:
REG delete HKCU\Environment /F /V variable_name(user)
REG delete "HKLM\SYSTEM\CurrentControlSet\Control\Session Manager\Environment" /F /V variable_name(system)
In Windows Powershell
Although Command Prompt is quite popular, most advanced Windows users prefer Powershell due to its extensibility. If you fall into this category, follow our guide to view, set, edit, and delete Windows environment variables via Powershell:
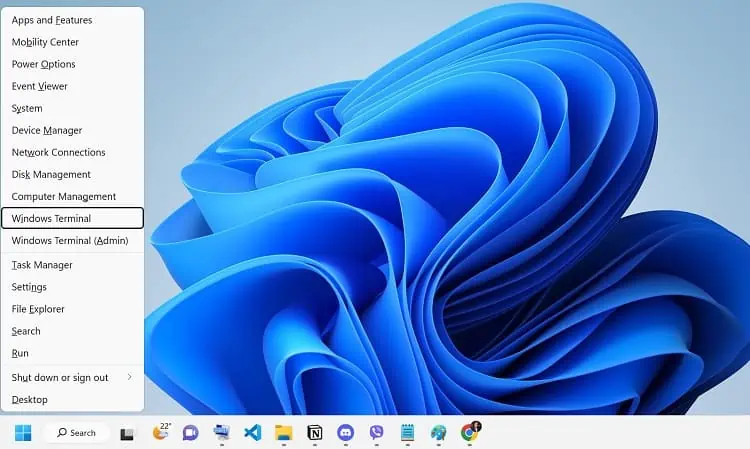
- Press Windows + X and select Windows Terminal to enter the Powershell interface.

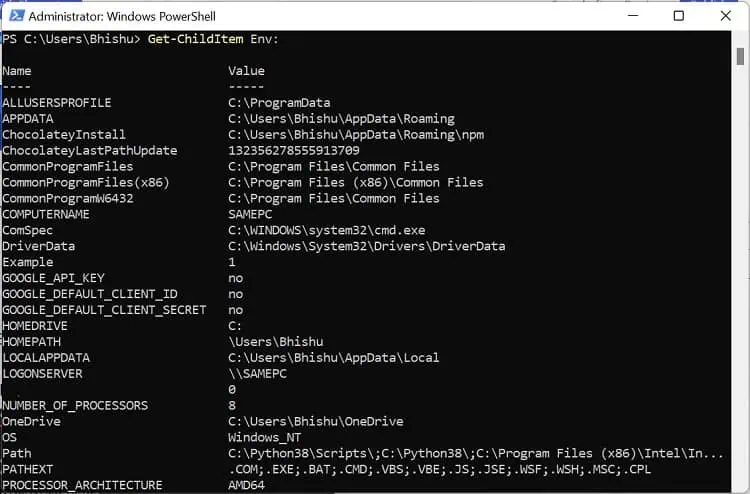
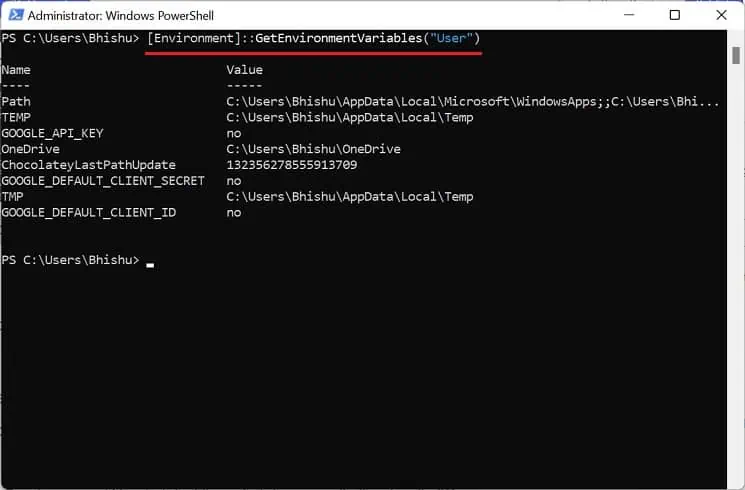
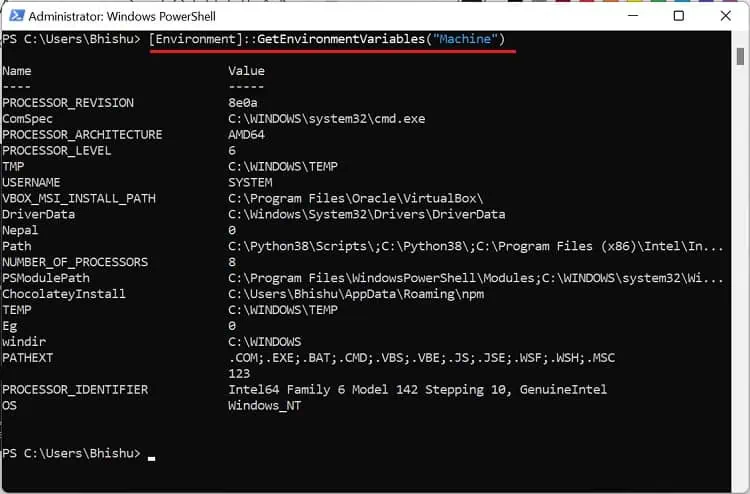
- Here, use the below cmdlets to view the present environment variables on your PC:
Get-ChildItem Env:(view all environment variables)
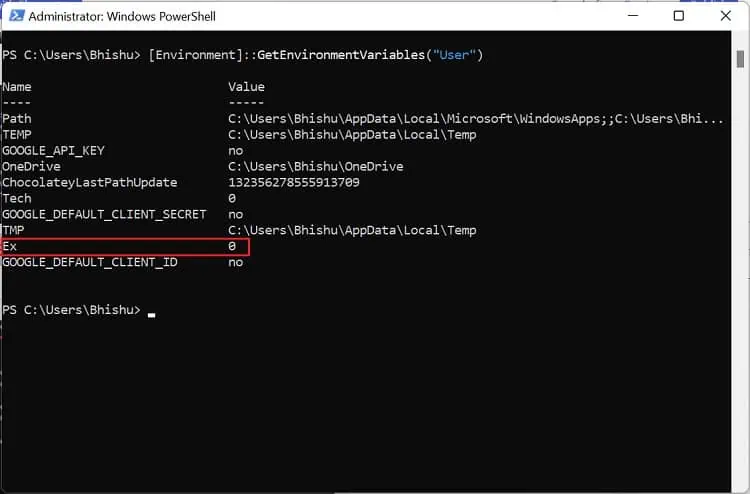
[Environment]::GetEnvironmentVariables("User")(view the user variables)
[Environment]::GetEnvironmentVariables("Machine")(view the system variables)
- To add a new variable, kindly use the appropriate syntax from below:
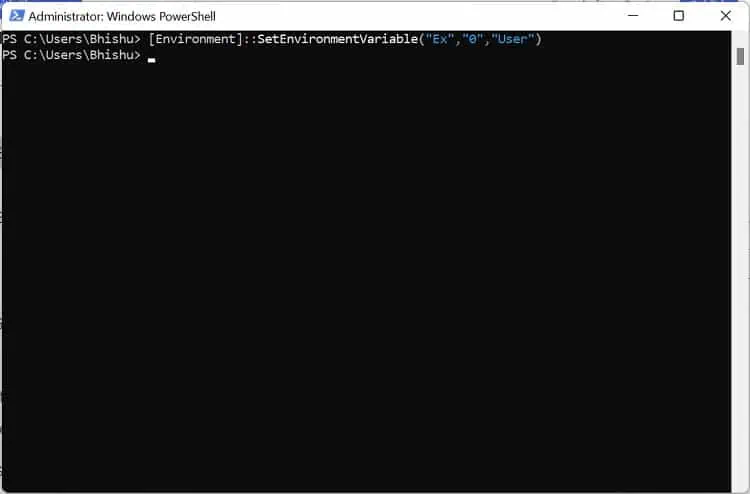
[Environment]::SetEnvironmentVariable("variable_name","value","User")(for user)
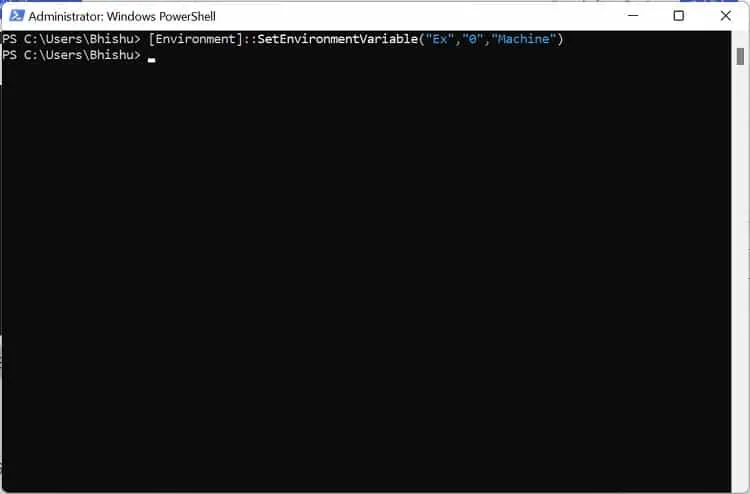
[Environment]::SetEnvironmentVariable("Ex","0","Machine")(for system)
- Now, simply use the view cmdlet to confirm that the variable was created.

- If you’re unsatisfied with the value, you can quickly change it using the same commands used for creating the environment variable.
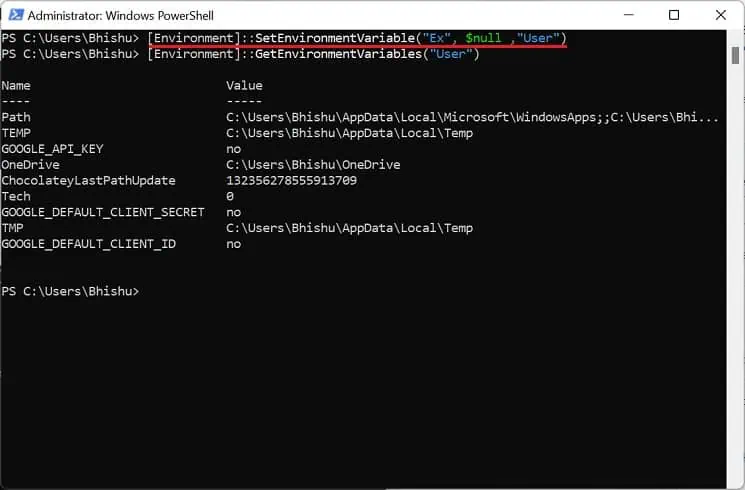
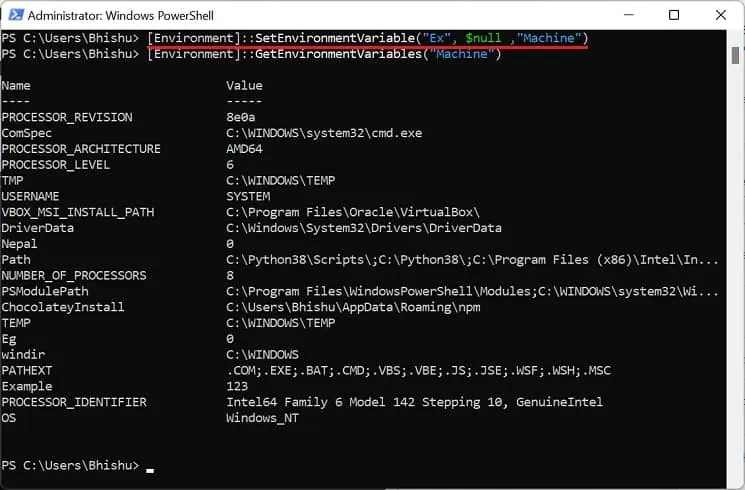
- To delete the Windows environment variable, kindly have a look at the below command lines:
[Environment]::SetEnvironmentVariable("variable_name", $null ,"User")(user)
[Environment]::SetEnvironmentVariable("variable_name", $null ,"Machine")(system)

