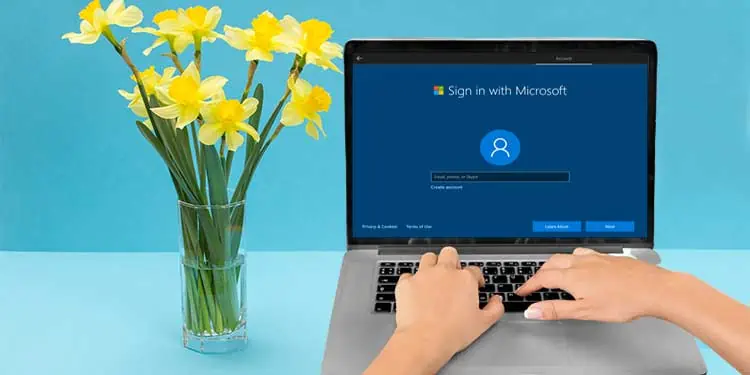
Microsoft has always insisted on using a Microsoft account while setting up Windows.
Until Windows 8, users could skip signing in with a Microsoft account and set up their Windows using a local user account.
Even In earlier versions of Windows 10, there was a way to skip signing in with a Microsoft account. But with the recent updates of Windows 10 and all-new Windows 11, Microsoft has completely removed the skip option.
Why Do We Need to Use a Microsoft Account on Setup?
Using a Microsoft account lets you manage everything related to it in one place. It allows unified access to all of their products and services, including Onedrive, Outlook, Office, etc. All while allowing them to collect essential user data that they can utilize to make further improvements.
Microsoft wants its users to have a seamless experience throughout various devices. They utilize the user data collected through countless accounts to ensure this.
Microsoft account helps to secure & back up your files, and settings and allows you to access it from any device. So it is recommended to use a Microsoft account while setting up Windows.
Setup Windows Without Microsoft Account
If you don’t have a Microsoft account, you can create one yourself.
But if you don’t want to use a Microsoft account at all, then there’s a hidden trick that allows you to skip the sign-in with your Microsoft account option.
Here’s how to set up your windows without using a Microsoft account.
Disconnect the Internet
You might not know it, but Windows only asks you to sign up using a Microsoft account if you’re connected to the internet. Hence disconnecting the device from wi-fi or ethernet can allow you to set up Windows without the account.
For Windows 10
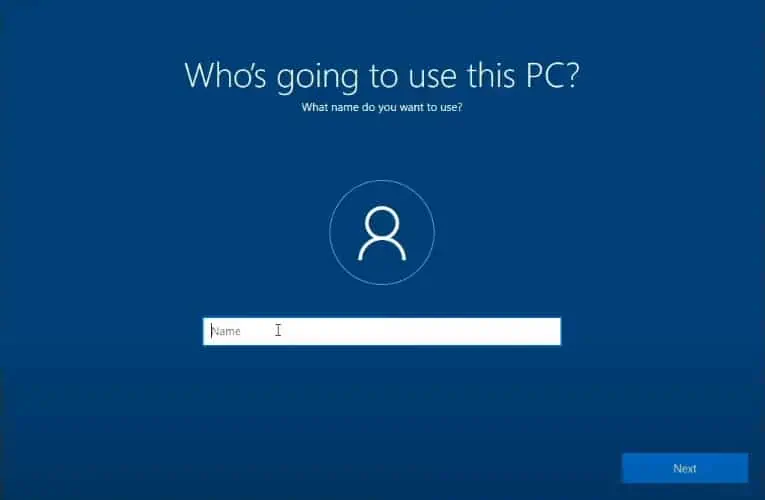
First, remove the ethernet cable or press the airplane button to disconnect the device from an internet connection. Avoid any warning or prompts. Then a new window will appear asking who’s going to use this PC? Then proceed with these steps:
- Enter the name you want to give the account and click Next

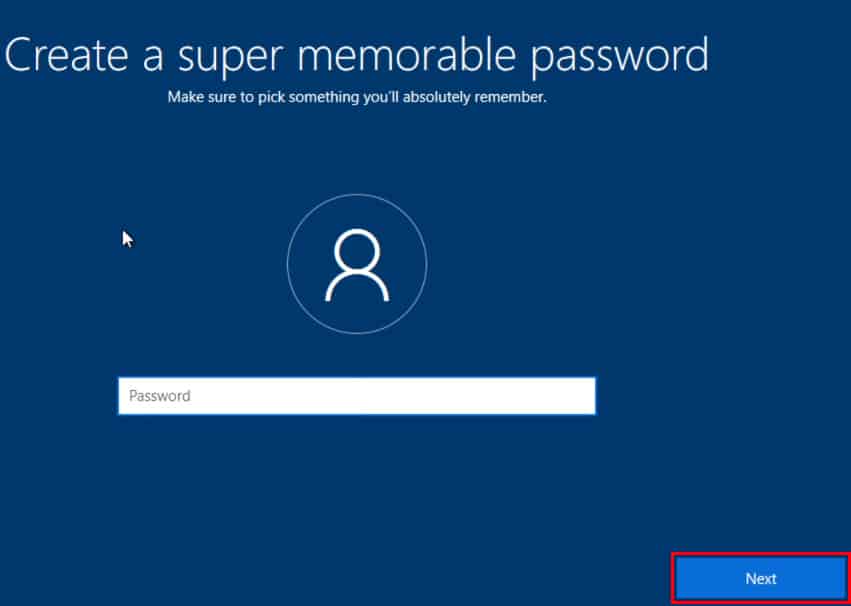
- Set the password for the account and click Next

This will create a local user account. Now you can finish the setup and use the local account to use your PC.
For Windows 11
Setting up Windows 11 without a Microsoft account is a bit different.
When you disconnect the Ethernet or wi-fi connection, unlike Windows 10, Windows 11 won’t open a new window. It will stay on the same window and requires you to connect to the internet to proceed further.
But! Now you can press the back button and it will take you to a new window where you can create a local user account. Enter the details and proceed to complete the setup accordingly.
If this trick does not work, here are some other methods you can use to skip the sign-in using a Microsoft account on Windows 11.
Bypass the Sign-in Window
Here’s another trick you can use if closing the Network Connection Flow doesn’t work. When you are on the account sign-in window, follow these steps:
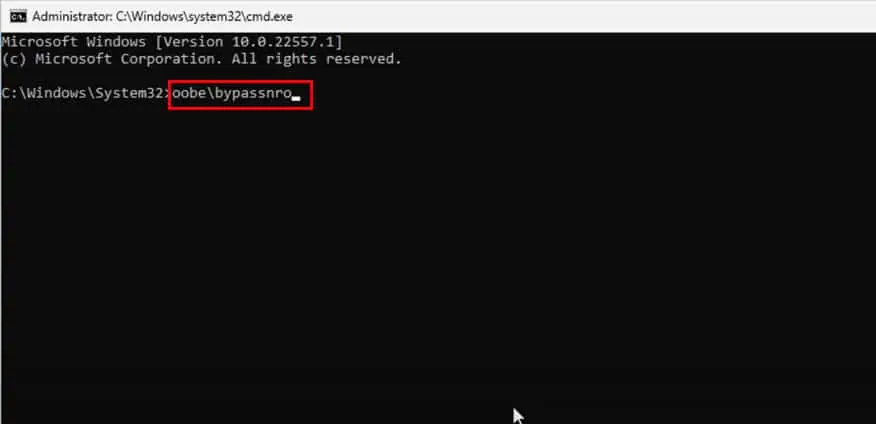
- Press Shift + F10 to open the command prompt
- Enter the following command:
oobe\bypassnro
- After the reboot is complete, it will display a message. You can ignore it and click Next.
- After that, you need to go through the process of adding the region, keyboard layout, etc., as you did before. But this time, the system will bypass the account sign-in window.
Now you can finish the setup without any hassle.
Close the Network Connection Flow
But if you don’t want to go through the hassle of restarting your PC, you can use this method.
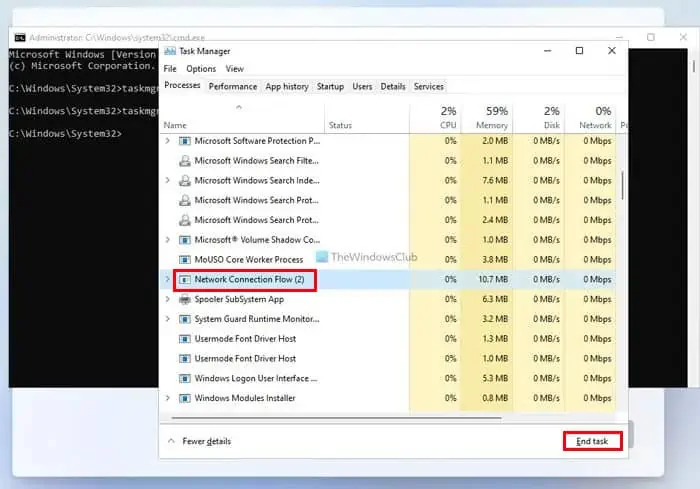
This method requires you to close the Network Connection Flow. To do so, follow the steps mentioned below carefully.
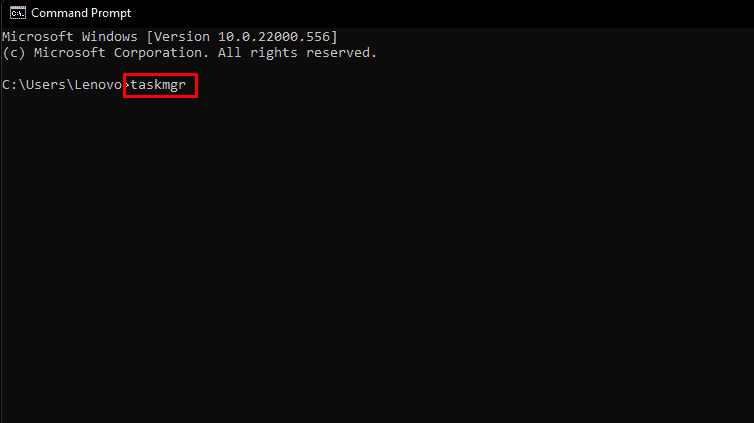
- Press Shift + F10 to open the command prompt
- Now type “taskmgr” and press enter to open Task Manager

- Click more details to expand the window
- Locate Network Connection Flow and select it
- Click on the End task button on the bottom-right corner to close it

Now you can close all the windows and proceed with the installation.
Can We Create a New Microsoft Account During Windows Setup?
If you don’t already have a Microsoft account, you can create it while setting up Windows on your device or through other devices.
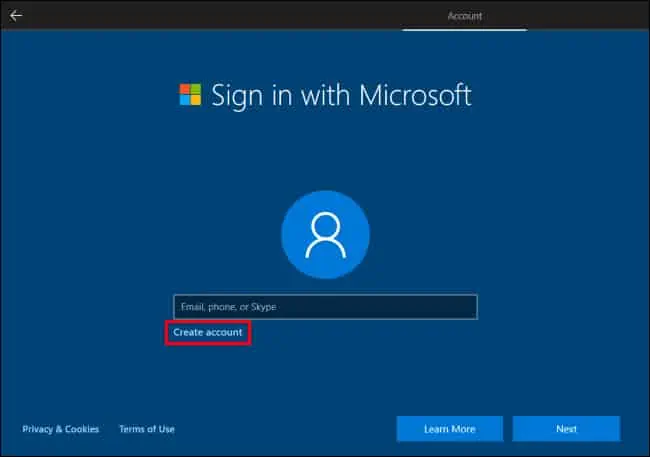
Insert the bootable drive and follow the instructions until you reach the “sign in with Microsoft” window. And follow the steps below to create a new Microsoft account.
- Click on create account.
- Fill in your email address and click Next.

If you don’t have an email address or don’t want to use your existing one, click on “Get a new email address” to create a new one.
- Click on “use a phone number instead.”
- Enter your phone number and click Next.
- Create a password for your new account and click Next
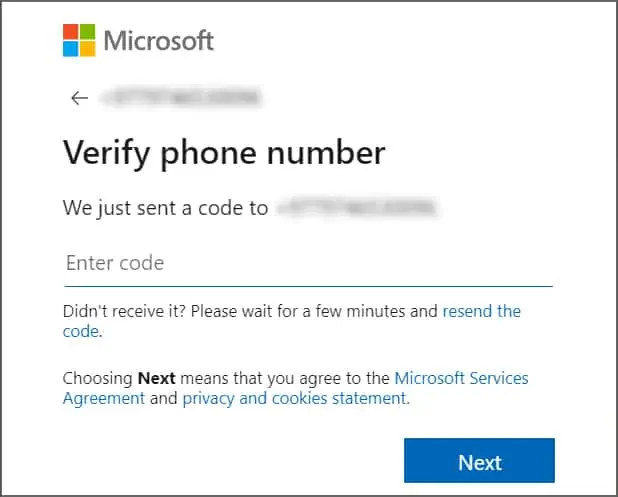
- Check your email or phone for the verification code.
- Enter the code and click Next to create a new Microsoft account.

Now you can use this newly created account to finish setting up your Windows.
Can I Add Multiple Microsoft Accounts on the Same PC?
You can add as many accounts as you want on Windows. Each account will create a different user profile, which can be secured using a password.
Here’s how you can add other Microsoft accounts on the same PC.
- Press Windows key + I to open settings.
- Select Accounts
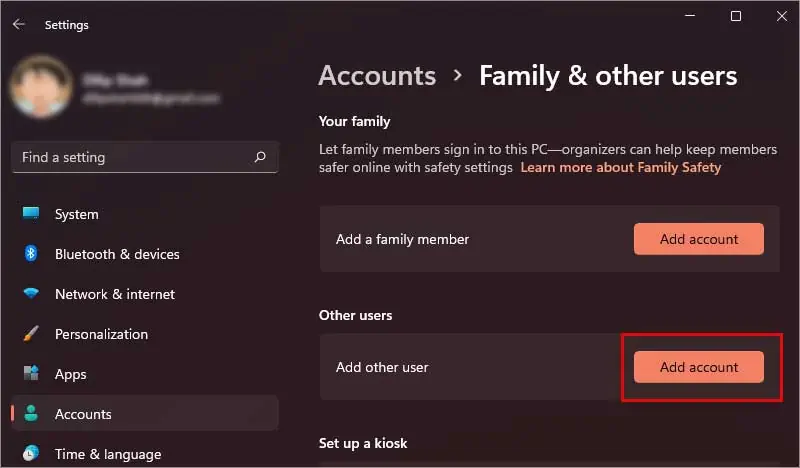
- Go to Family & other users
- Under Other users, click on Add account

- Enter the Microsoft account you want to add and click Next
- Enter the password and click Next
Therefore, you’ve successfully added another Microsoft account to your device.
To allow the new account to install third-party applications or make changes to the system, you need to change it to the administrator account. To do so
- Go to Settings > Accounts > Family & other users
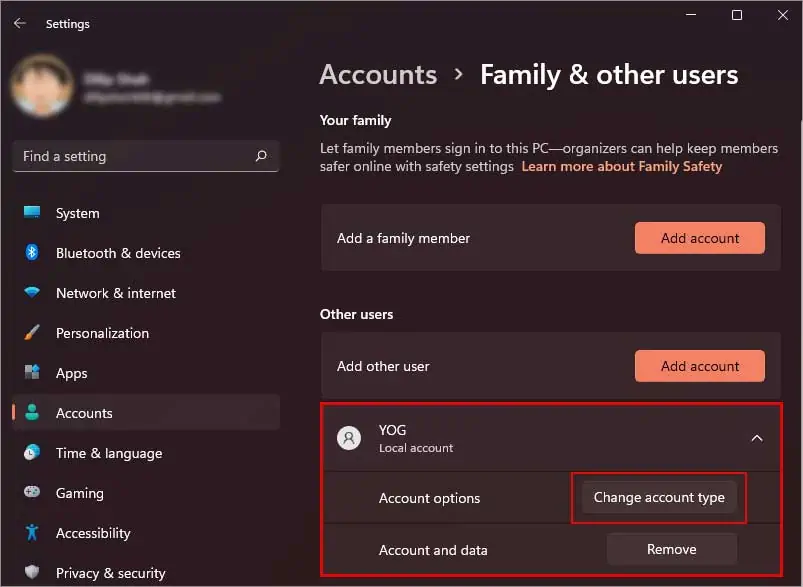
- Click on the new account to expand it
- Select Change account type

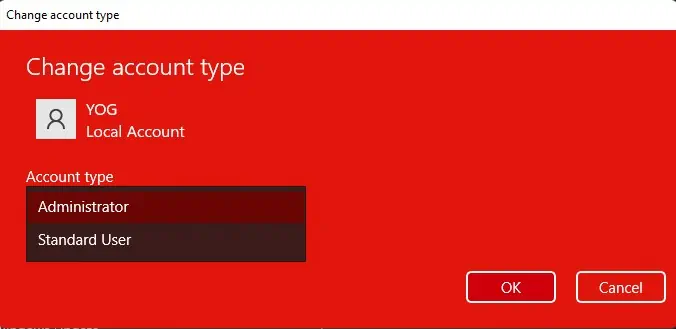
- Now switch from the Standard account to Administrator and click Ok

How Can I Create a Microsoft Account for My Child?
Creating a Microsoft account for your child can help you control and monitor their activities on the internet. It can be very helpful if you don’t want your kids to be influenced by the bad aspects of the internet.
Follow the steps below to add a Microsoft account for your child:
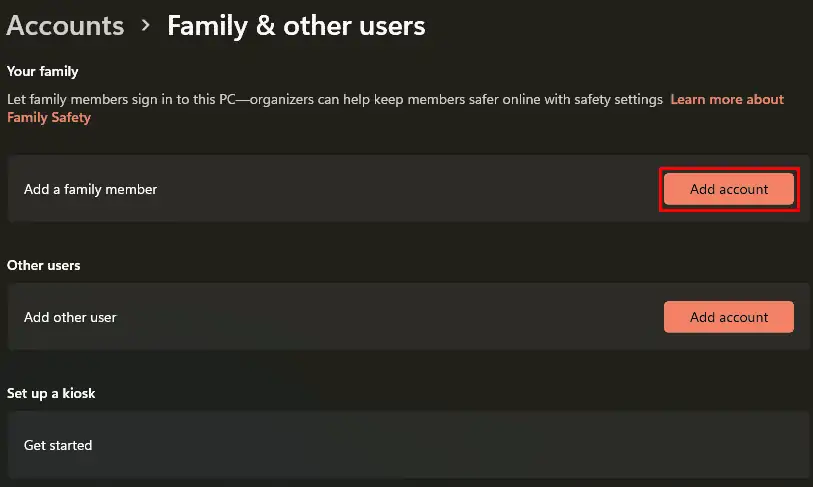
- Go to Settings > Accounts > Family & other users
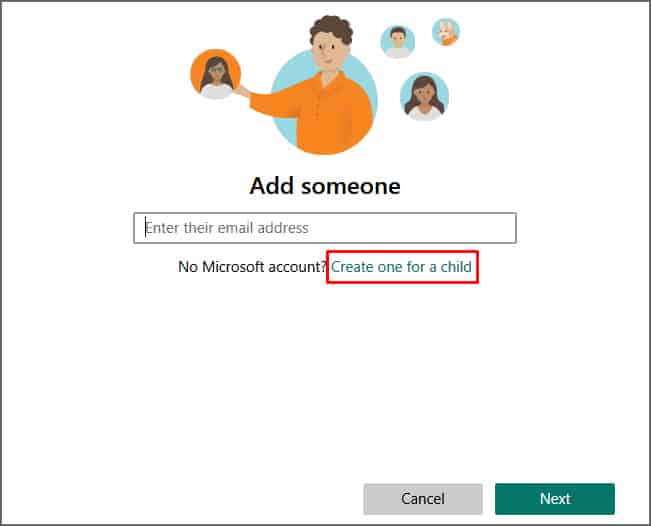
- On Add, a family member, click the Add account button

- Click on “Create one for a child”

- Enter the new email address and click Next
- Set a password and click on Next
- Fill out the Name, Region, and Birthdate
Now a new Microsoft account is created for your child.

