Undoubtedly, one of the main benefits of any network is the ability to share resources among the nodes. While the process of sharing files and folders over a network is generally very simple, it can still be intimidating if you’ve never tried it before. This holds even truer if you’re trying to share resources between different platforms (e.g., Windows and macOS).
In some cases, file sharing may not work, even though you’ve seemingly done everything as you’re supposed to. Thus, in this article, we’ll cover the proper steps to share files and folders between different platforms, as well as the troubleshooting steps you can take in case things don’t work out.
How to Network Share Folder?
Sharing a folder over a network involves managing the necessary permissions and then actually sharing the folder. We’ve done this in the first section (Step 1). The second section (Step 2) explains how to access the shared folders.
Step 1: Network Discovery/File Sharing Permissions
You’ll want to start by configuring network discovery and file-sharing permissions on the system where the file or folder you want to share is stored. This section covers how to do this on various platforms such as Windows, Mac, and Linux.
On Windows
On Windows systems, you’ll first want to enable the necessary network discovery and file-sharing settings. Here’s how you can do this:
- Press Win + R, paste the following, and hit Enter:
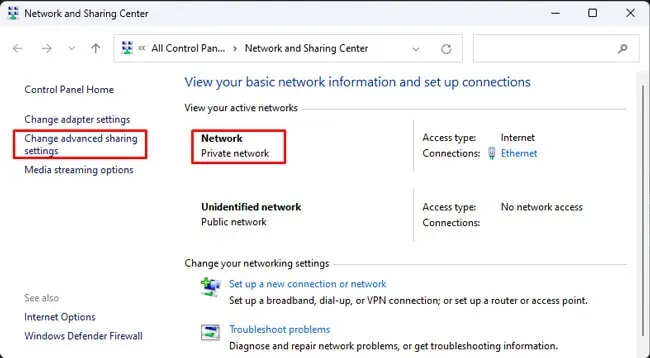
control /name Microsoft.NetworkAndSharingCenter - Note the current network profile type here and click on Change advanced sharing settings.

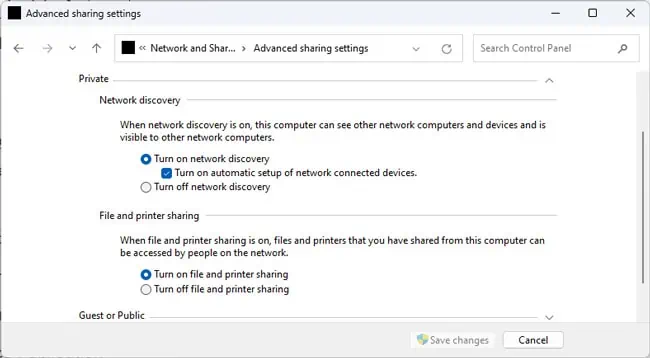
- Under your current profile, enable the Network Discovery and File Sharing options and save the changes.

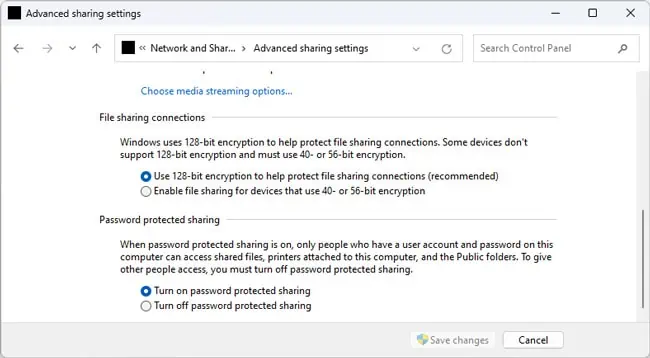
- In the All networks section, enable the Turn on password protected sharing option and save the changes.

- Turning on Media streaming is generally not necessary. But in cases where the device doesn’t become accessible on the network, you can always come back and enable this option.
- Now, press Win + R, type
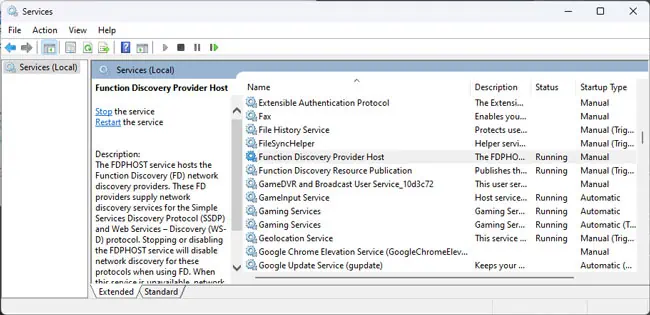
services.msc, and press Enter. - Ensure the following services are running:
- Function Discovery Provider Host
- Function Discovery Resource Publication
- SSDP Discovery
- UPnP Device Host

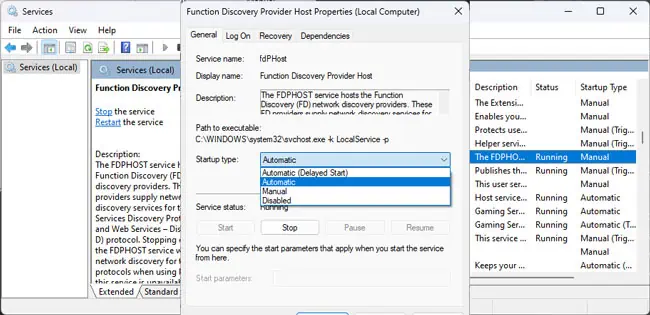
- If they’re not, double-click the service. Start the service, change the Startup type to Automatic and save the changes.

At this point, we’ve taken care of the necessary permissions. Now, here’s how you can share a folder over a network:
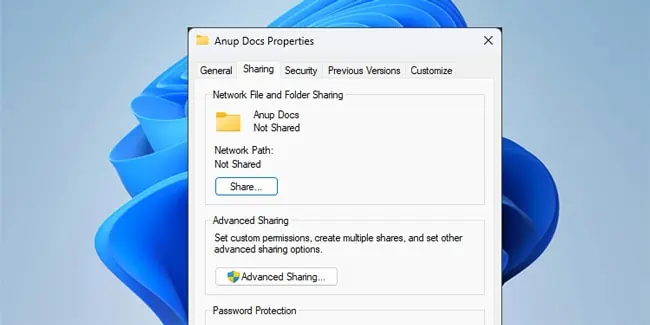
- Right-click the folder and select Properties.
- In the Sharing tab, click on Advanced Sharing.

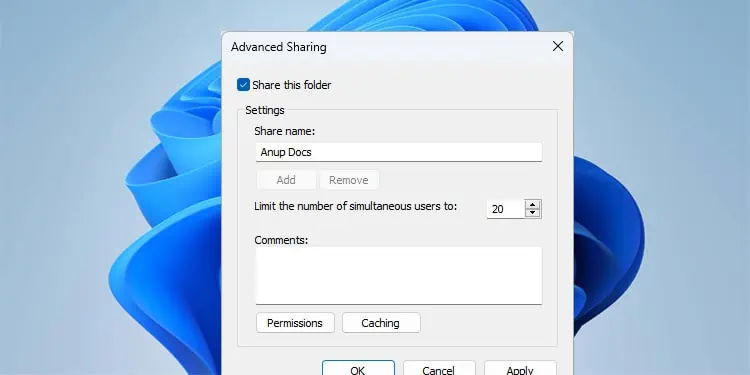
- Enable the Share this folder option.

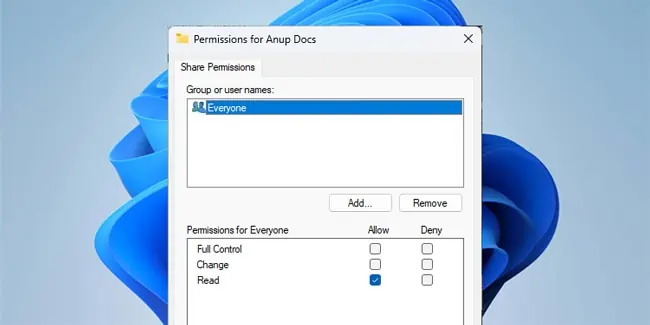
- (Optional) Click on Permissions and set the access level for the shared folder to Read-only, Change, or Full Control as you prefer.

- Press Ok > Ok to apply the changes.
- The folder is shared, and the network path should be displayed now. You can also use this path to map a network drive, among other things.
These were the steps to network share a folder. If you’re wondering how to share specific files from a folder, the short answer is that it’s not possible. The recommended workaround in such situations is to organize the files you want to share in one folder and share that folder specifically.
On macOS
Here are the necessary steps to share a folder on macOS:
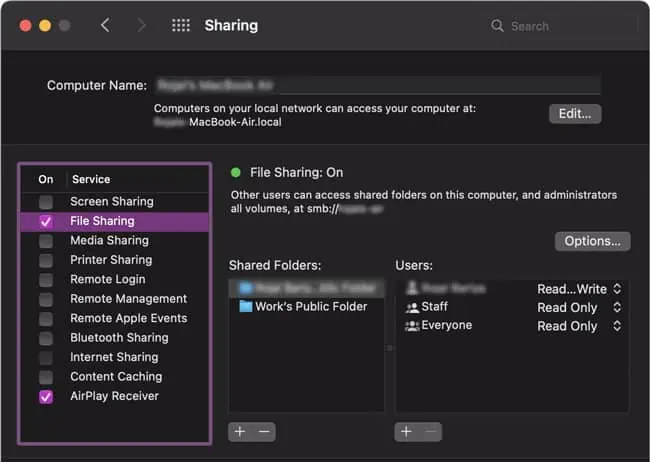
- Click on the Apple menu and select System Preferences > Sharing.
- First, toggle on the File Sharing option.

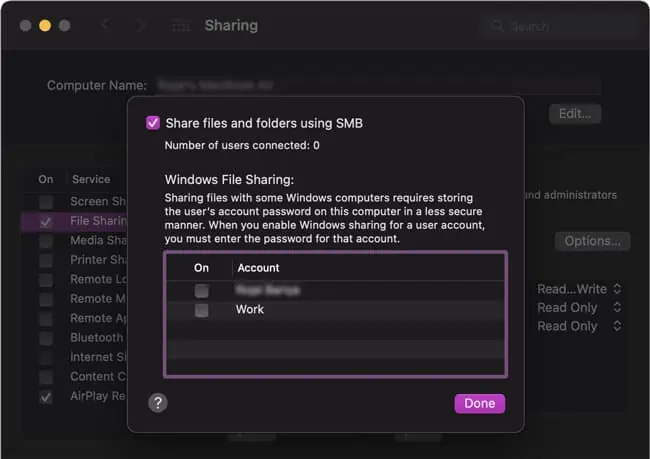
- Note the Mac’s IP here and click on the Options button.
- Select the Share files and folders using SMB option.

- Select the Mac account that users will log into when trying to access the shared folder.
- Press the Add (+) button under Shared Folders.
- Locate and select the folders to share and press Add.
On Linux
Much like Windows and Mac, most Linux distros also allow you to share files using the SMB protocol. We’ve used Ubuntu for reference here, but the steps will be similar on other distros as well. Here’s what you need to do:
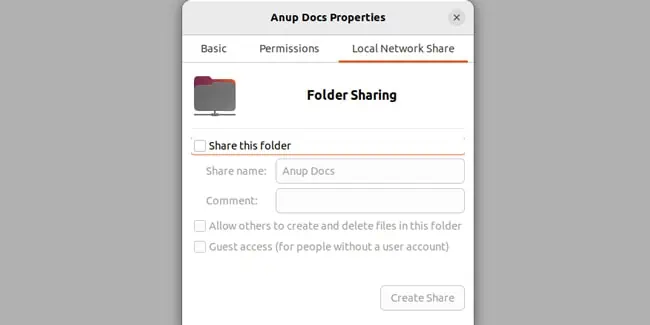
- Locate the folder you want to share, right-click it and select Properties > Sharing. This tab may also be called Local Network Share.
- Enable the Share this folder option and press the Create Share button.

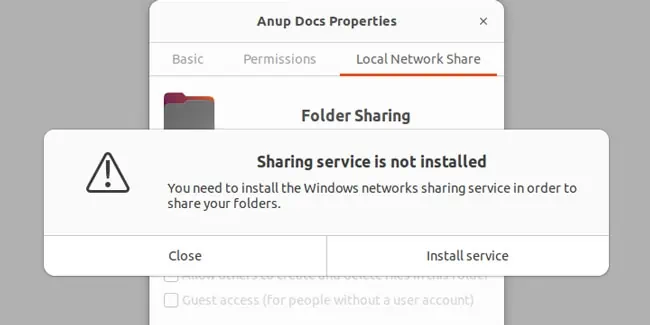
- If prompted, select Install service to install the Windows networks sharing service.

- After installing the Samba package, Select the Add the permissions automatically option when prompted to finish sharing the folder.
Step 2: Access Shared Files
On Mac and Linux systems, you’ll need the IP Address of the source system to access the shared files. This IP address can be useful for Windows as well, but generally, you can just access the shared files using File Explorer in Windows.
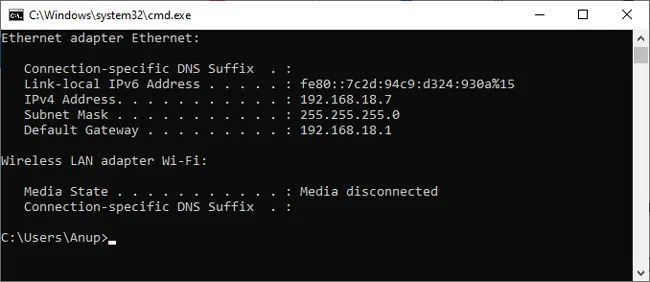
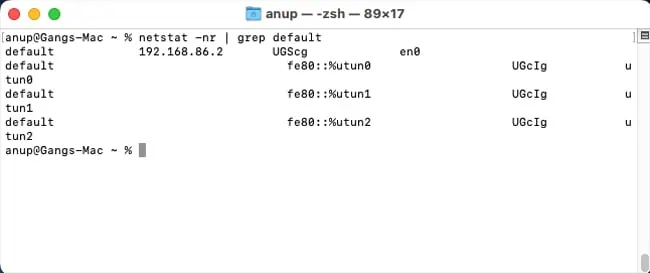
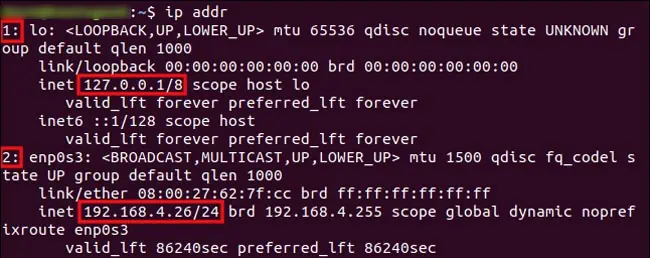
First, use the following commands in the source system’s terminal to get the IP Address:
- Windows:
ipconfig
- Mac:
netstat -nr | grep default
- Linux:
ip addr
On Windows
There are various ways to access shared files on Windows, but here are the two most popular ones:
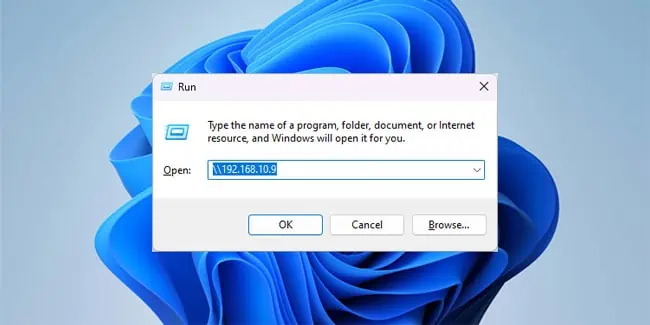
- First, press Win + R to launch Run.
- Type
\\<IP>, replace <IP> with the source system’s IP Address and press Enter.
- Enter the source system’s credentials to login and access the files.
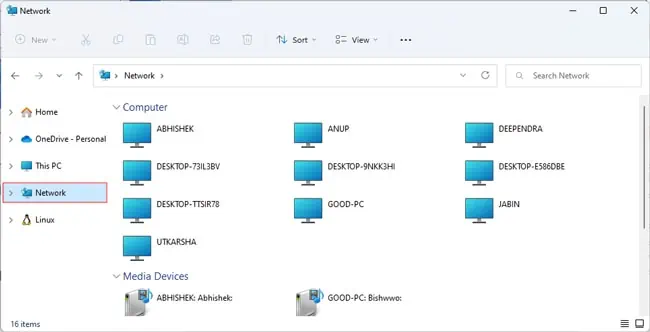
- Alternatively, you can also launch File Explorer (Win + E) and access the shared files from the Network tab in the same manner.

On macOS
Here’s how you can access shared files on macOS:
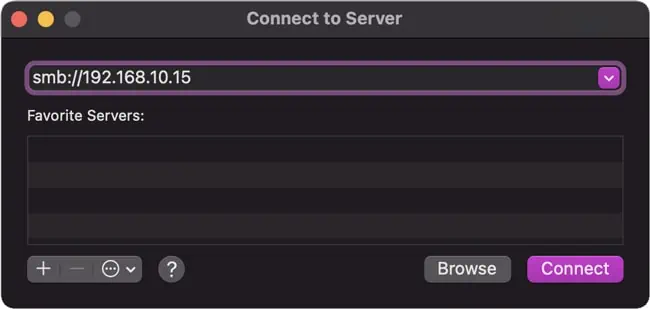
- Select Go > Connect to server.
- Type
smb://<IP>, replace IP with the IP address of the source system and hit Enter.
- Press Connect, enter the source system’s login credentials, and press Connect again.
- Locate and mount the necessary volumes to access the shared folders via the Finder.
On Linux
Here are the steps to access shared files on Ubuntu:
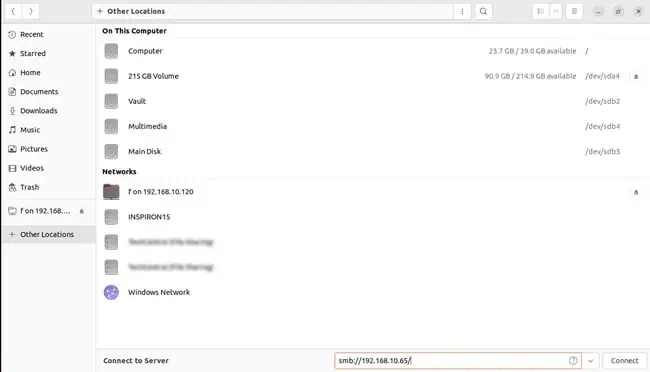
- Launch the File Browser, which in this case is Nautilus.
- Go to the + Other Locations or similar tab.

- Double-click the source system under the Networks section. Enter the login credentials to access the shared files.
- Alternatively, enter the source system’s IP address in the
smb://<ip>field at the bottom.
Troubleshooting Network Sharing Problems
When network sharing doesn’t work, the first step is ensuring both computers are on the same network. Basically, the computers should be connected to the same WiFi network or the same router via Ethernet. Another way to confirm this is by checking the device’s IP address.

We talked about using tools like ipconfig to find out your IP address earlier. As an example, let’s say your device’s local IPv4 address is 192.168.10.7. Here, the network ID portion (the first 3 decimal numbers) will be the same on the second device as well if it’s on the same network.
For instance, 192.168.10.15 would mean it’s on the same network as the network ID is the same. But something like 192.168.18.15 would mean it’s on a different network, as the network ID has changed.
Next, you should make sure the network discovery and file-sharing permissions and necessary services have been configured as instructed in this article. Finally, keeping your system updated can also be key in cases where the problem stems from driver issues or system bugs.

