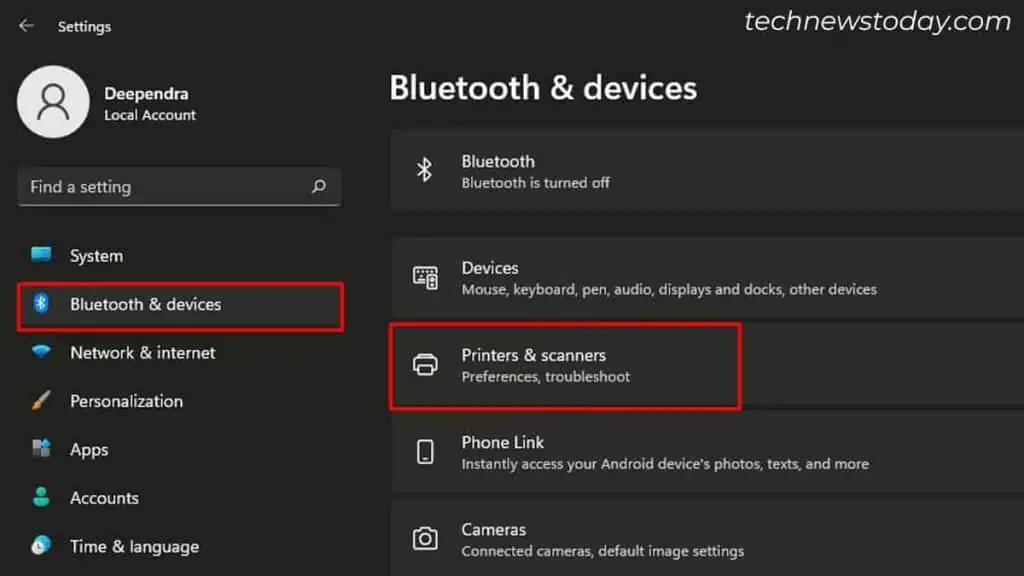
To share a printer, you can simply connect it to a Wi-Fi network. Then, go to Windows Settings > Bluetooth & devices > Printers & scanners, and add the printer.
This way, all the devices connected to the same network can access the printer.
But things do not always work that well! Wireless printers are notorious for running into issues like frequently going offline.
So, it’s better to share a printer over a USB connection—especially when your printer does not come with Wi-Fi support.
Let’s see how it is done.
Connect the Printer to the Host Computer
To begin with, grab the USB A-B cable that came along with your printer.
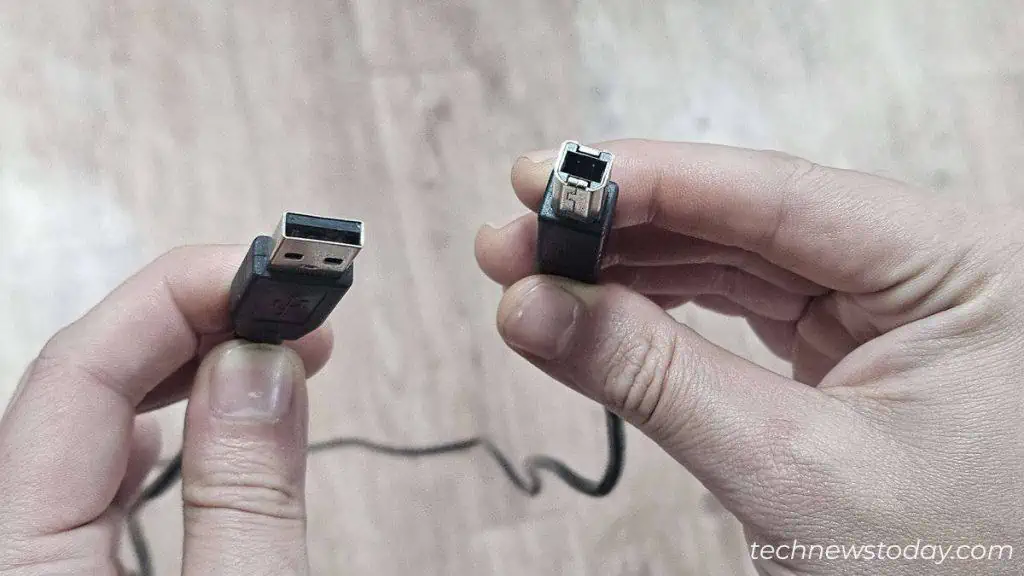
Then, use it to connect the printer and a host computer. Here, the host refers to the PC that will be sharing the printer.
After that, plug the printer’s power cable into the wall outlet and turn it on.
Turn on Network Discovery
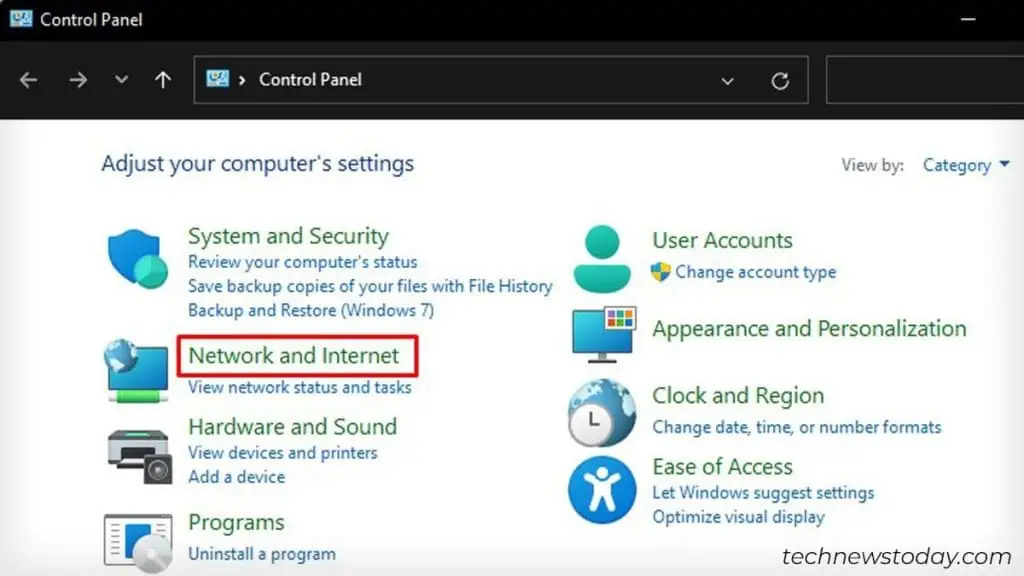
Now that your printer is up and ready to print, it’s time to enable network discovery on the host computer. For that, open the Control Panel and follow these steps.
- Click the Network and Internet menu.

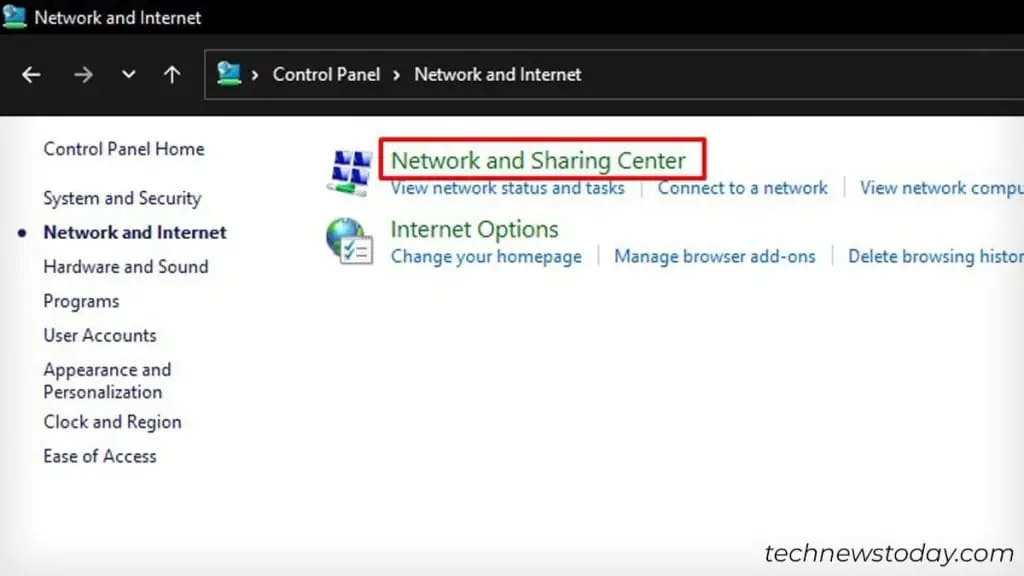
- Proceed with Network and Sharing Center.

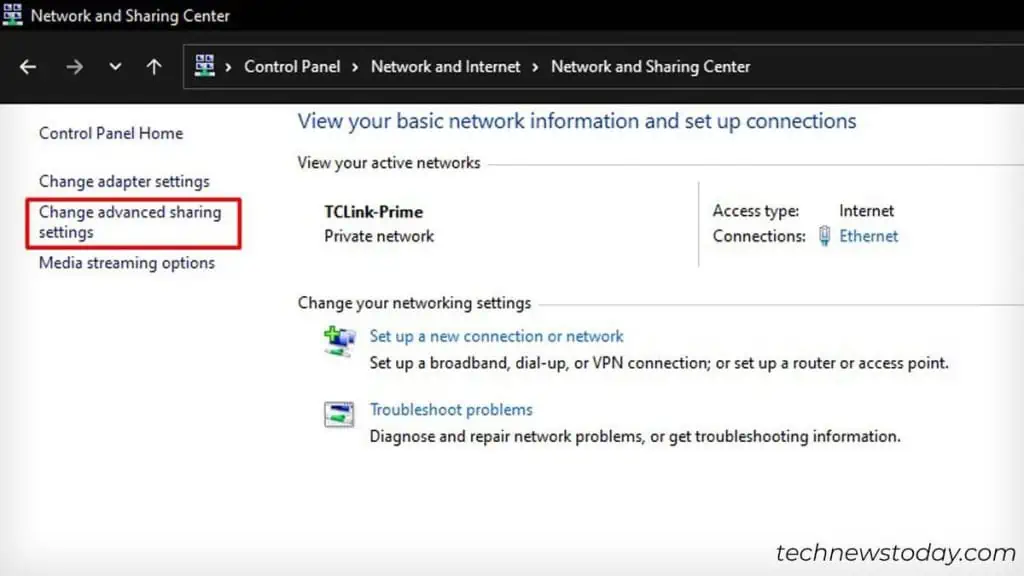
- Choose this option on the left panel.

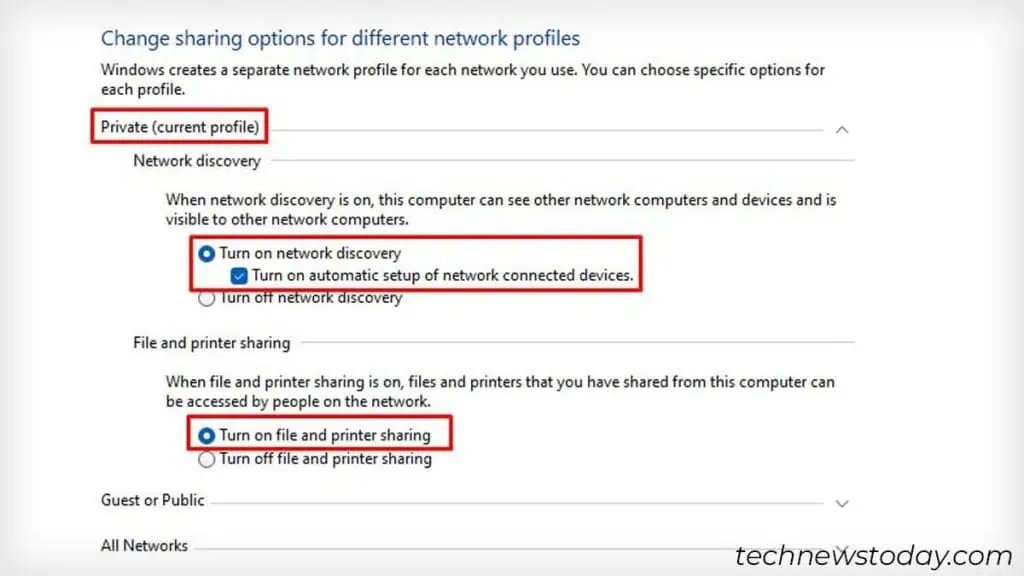
- Check these options under the Private profile.

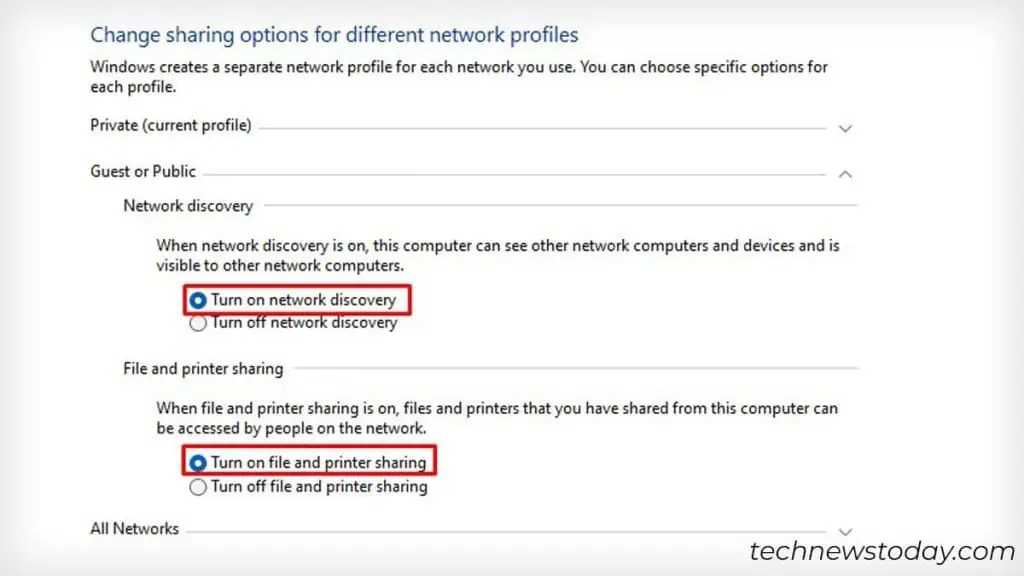
- Similarly, do it under the Guest or Public profile.

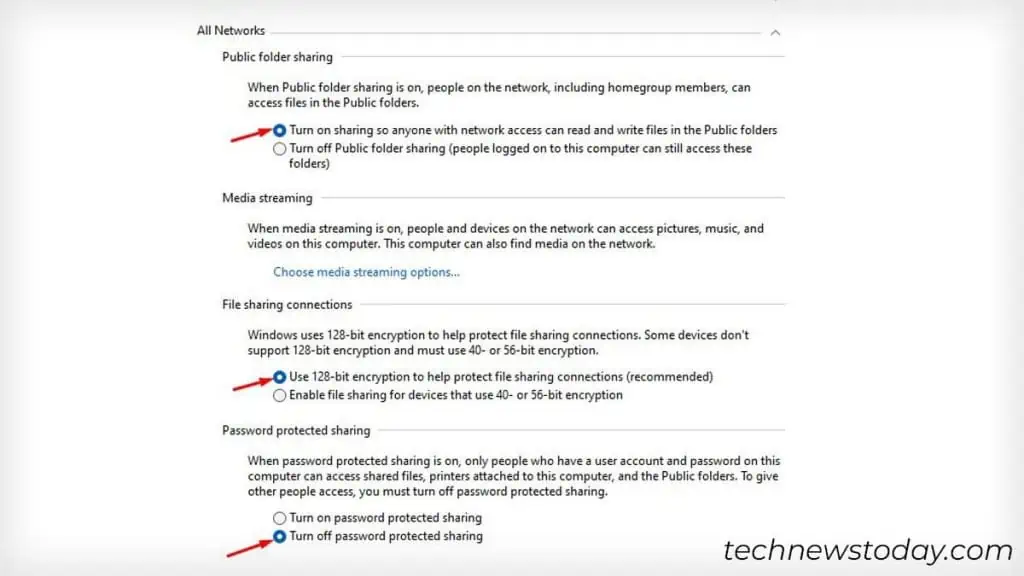
- Now, expand the All Networks profile and select the options as shown in the image below.

- Click Save Changes.
Enable Printer Sharing Over the Network
Let’s now configure the printer to appear on the network. To do it, we have to access the Printer Properties from the Windows Settings and enable printer sharing. Here are the detailed steps.
- First, open Settings.
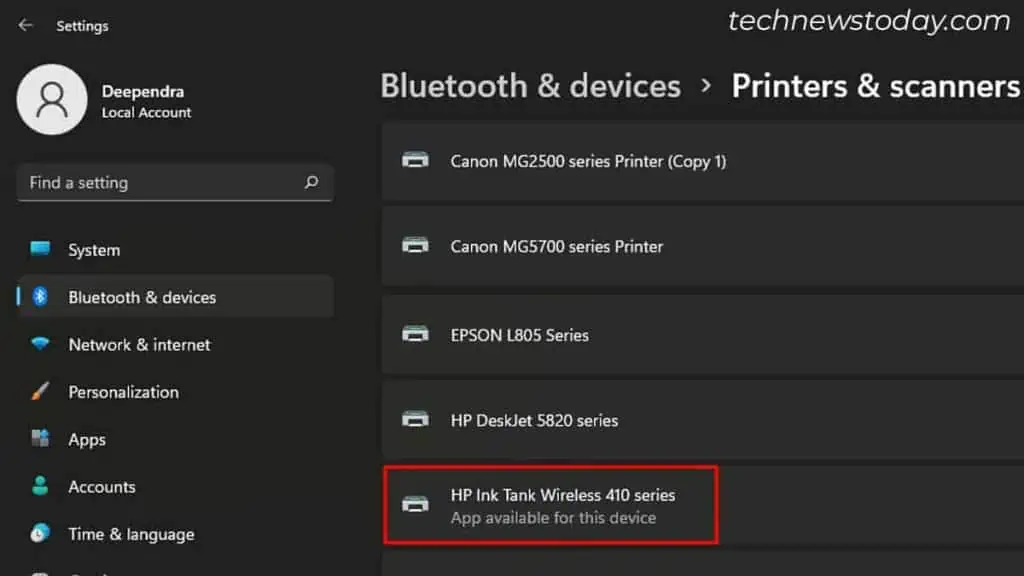
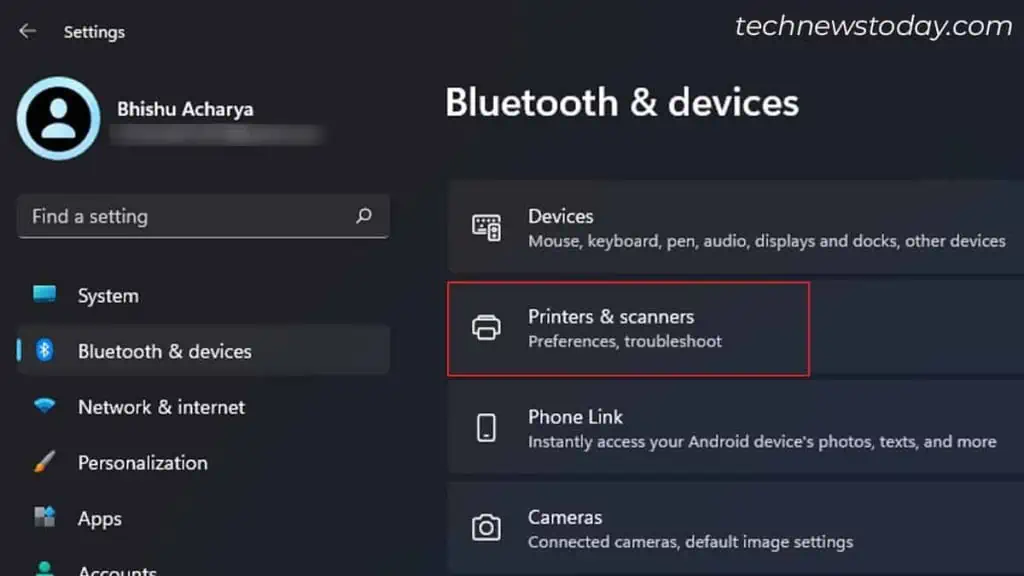
- Go to the Printers & scanners section.

- Choose the printer you are planning to share.

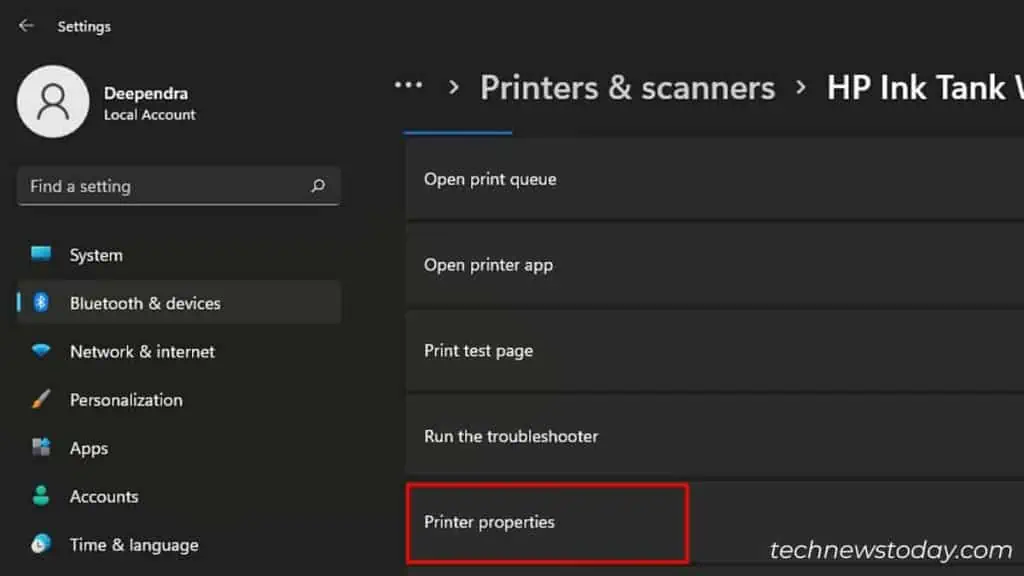
- Select Printer properties on the next screen.

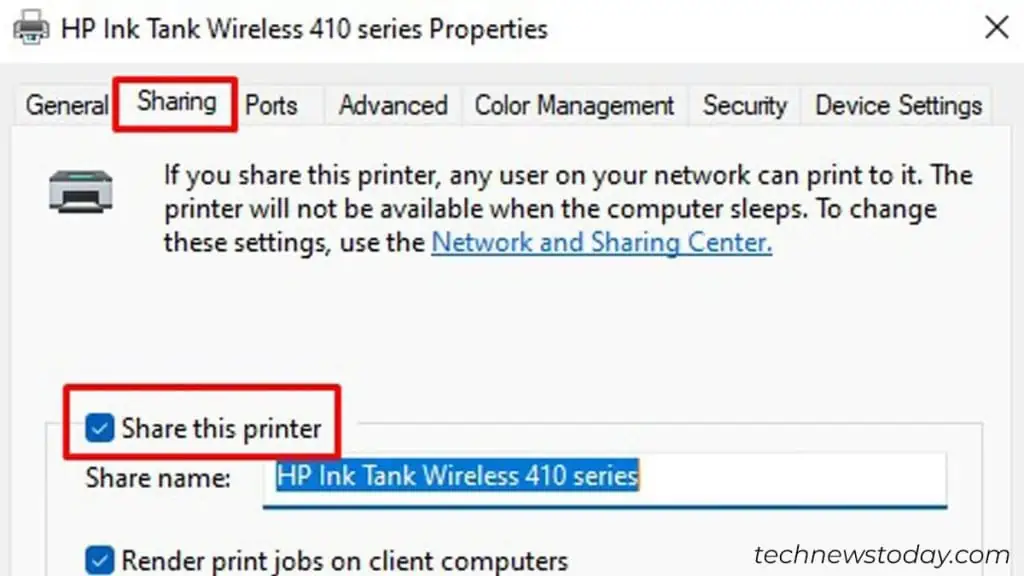
- On the next window, go to Sharing and check this option.

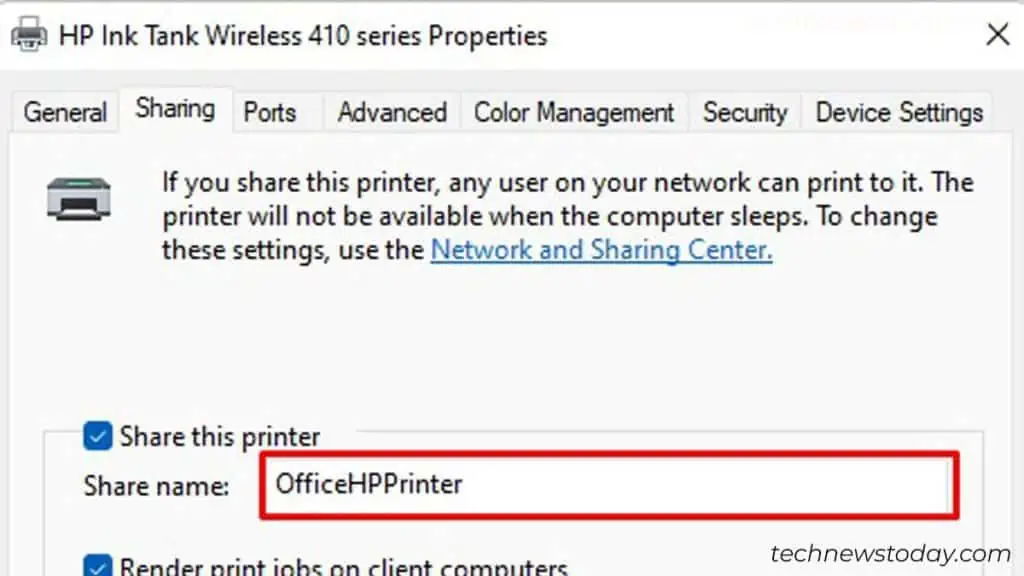
- Assign a unique name to your printer. This will distinguish the printer from the rest of the devices on the network. For instance, I set the name to “OfficeHPPrinter”.

- Click the Apply button > OK.
Add the Printer to Client Devices
Alright! We’re almost done with the host side now. Follow these steps to add the printer to client devices on the network.
- Open Settings and access Printers & scanners on the client’s device.

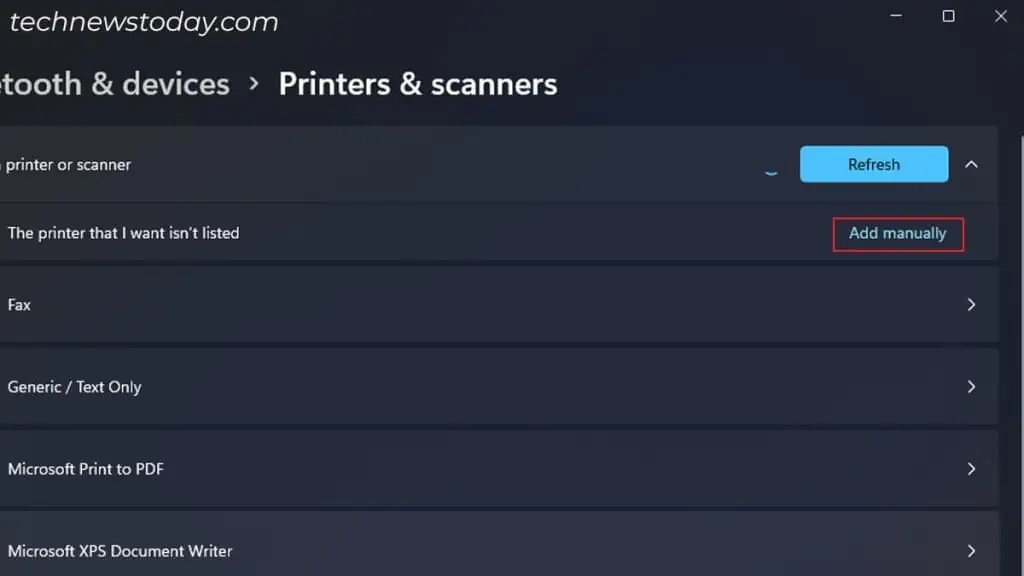
- Press the Add device button > proceed with Add manually.

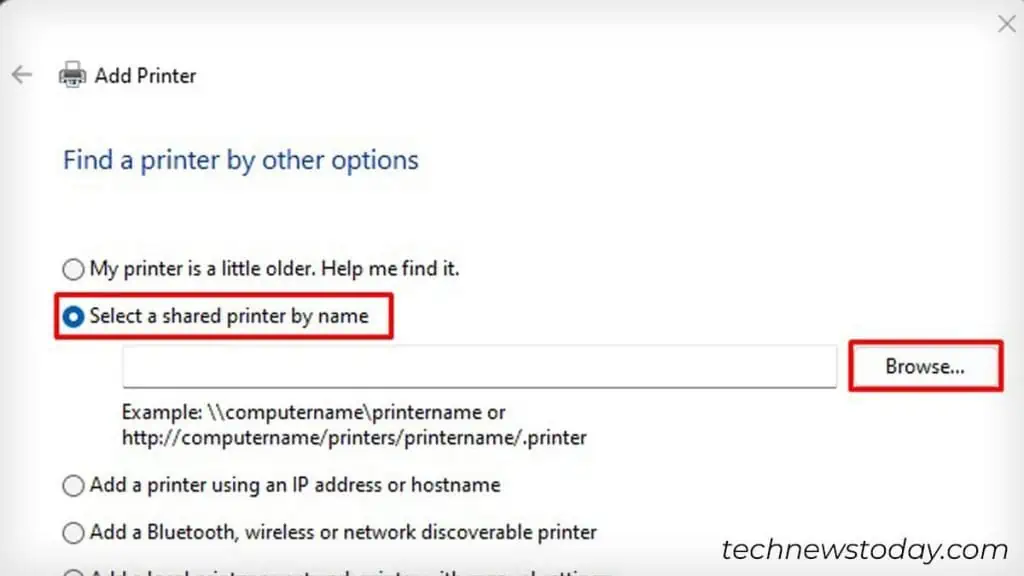
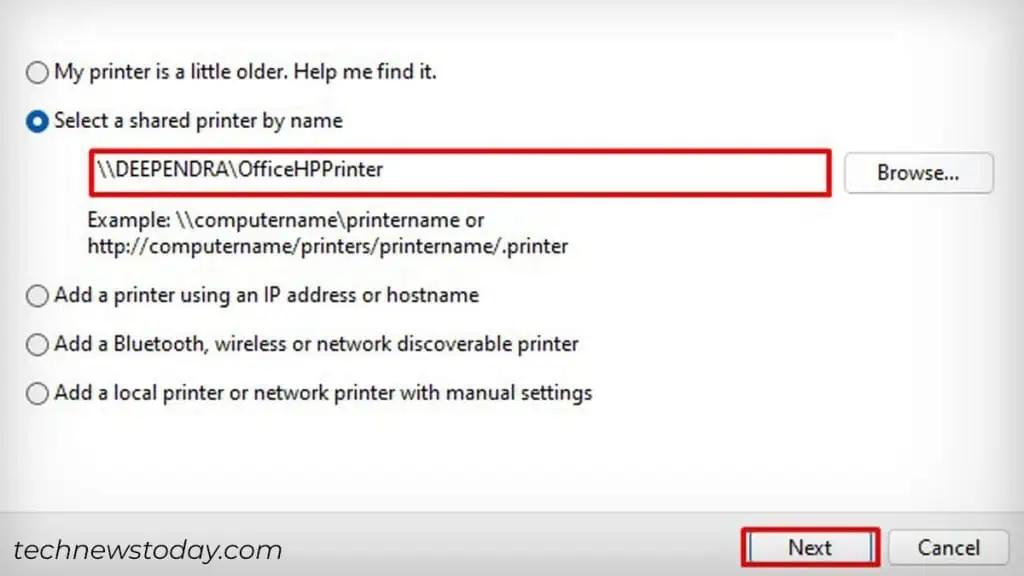
- Check the box next to “Select a shared……” > hit Browse.

- If prompted, turn on the network discovery the same way you did it earlier on the host computer.
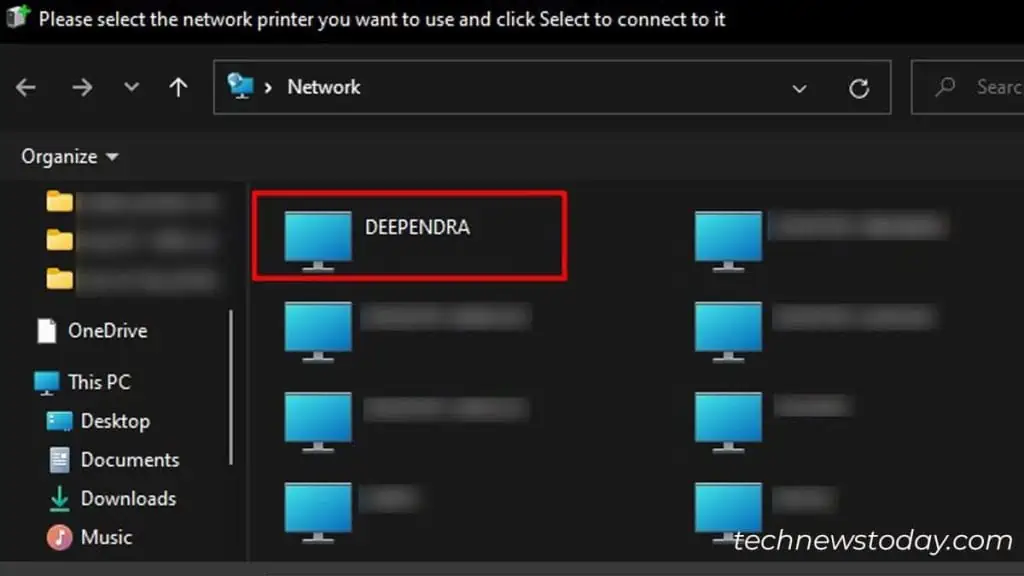
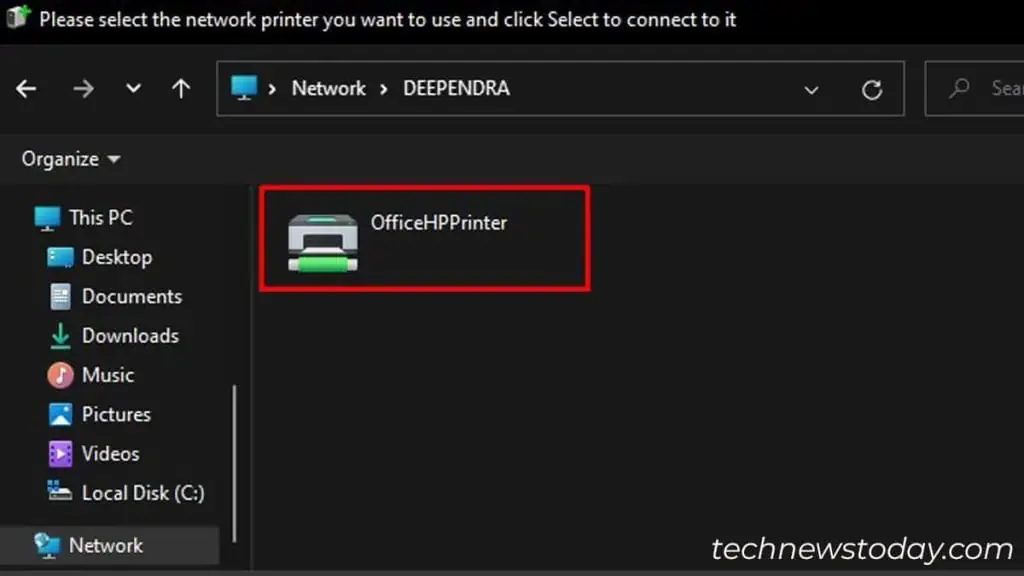
- Select the host computer on the next window. Currently, I am sharing the printer at my office. So, my colleagues have to select (DEEPENDRA) as a host.

- Select the printer.

- Click Next.

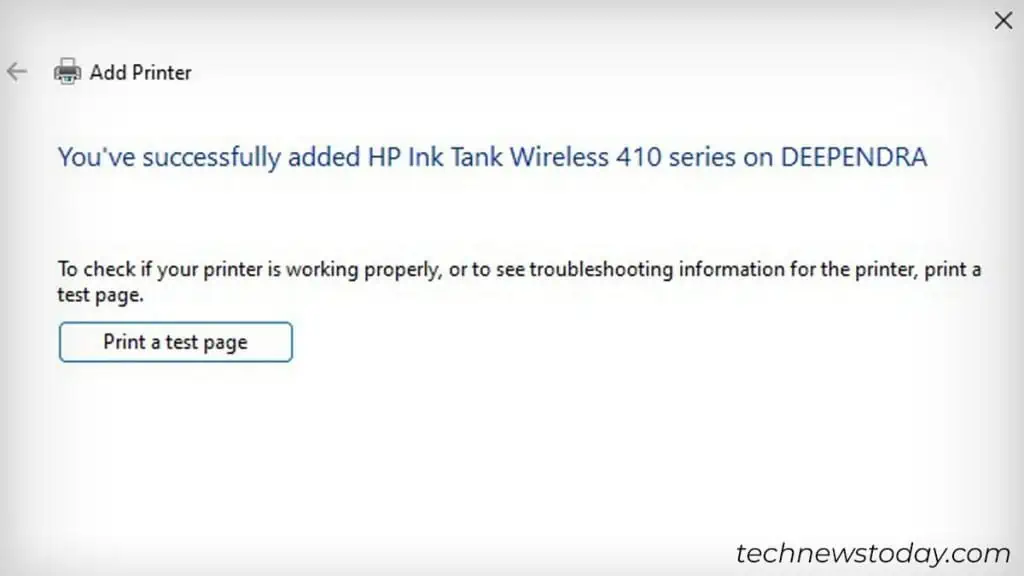
- As you can see, I have successfully added the printer on my colleague’s computer. You can start printing now.


