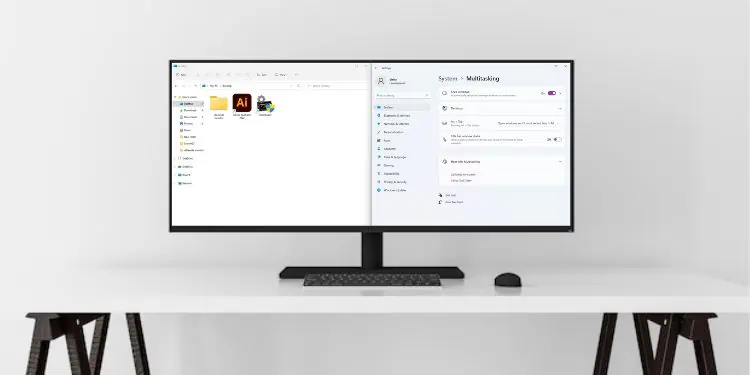
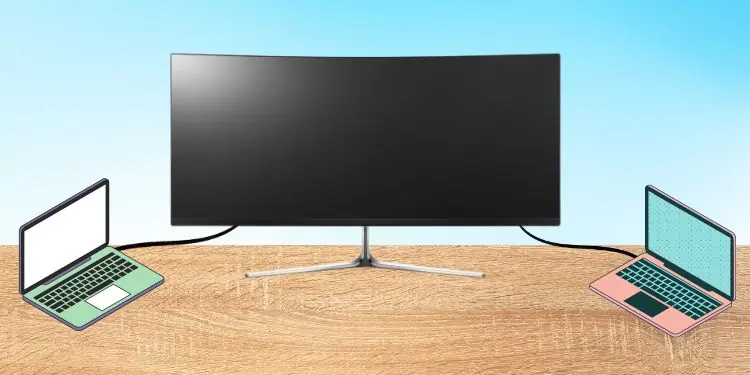
Ultrawide monitors provide more screen space and are ideal for splitting the display into two. Interestingly, you can even connect multiple systems on the same monitor and use them side by side.
Well, splitting the ultrawide monitor into two gives you the advantage of multitasking. For instance, you can play a game on the left side of your screen and perform any of your other tasks, like photo editing, document preparation, and even play another game on the right. This can be achieved by using two computers on one monitor or splitting the screen to accommodate separate windows.
Generally, we use the Picture-by-Picture mode to split ultrawide monitor into two. However, if you just want to split the windows, there are built-in tools, or you could even use Microsoft PowerToys. In this article, we will guide you on how to do each of them using simple steps.
How to Split Ultrawide Monitor Into Two Systems?
Splitting the ultrawide monitor into two systems is possible using the Picture-by-Picture feature. Basically, this mode is available on most brands, allowing you to separate the screen into two parts based on the display resolution you set.
Interestingly, you can connect two different systems in a single ultrawide monitor and place them side by side. Well, this can be your computer, Playstation, Xbox, or any other console. Given below is a comprehensive guide on how you can achieve it.
Connect Different Systems Using Right Adapters
The first step is to connect both your systems to the ultrawide monitor using the right cables and adapters. Well, you can use HDMI, DisplayPort, VGA, or even USB-C cables for displaying your content:
- Firstly, check and get suitable cables for your systems and the monitor.
- Next, connect the first end of the cable to the input port of your ultrawide monitor and the second end to the output port of the computer or console you’re trying to display.

- Now, take another cable and repeat the same process.
Enable Picture-By-Picture Mode
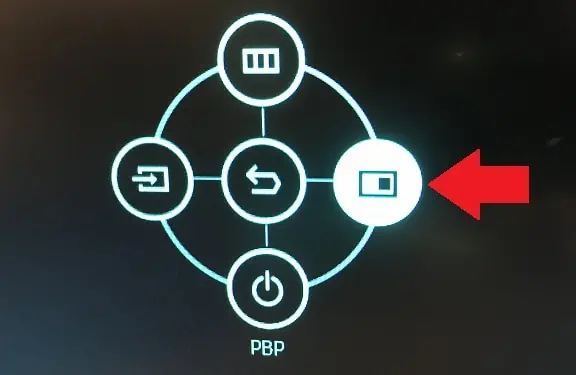
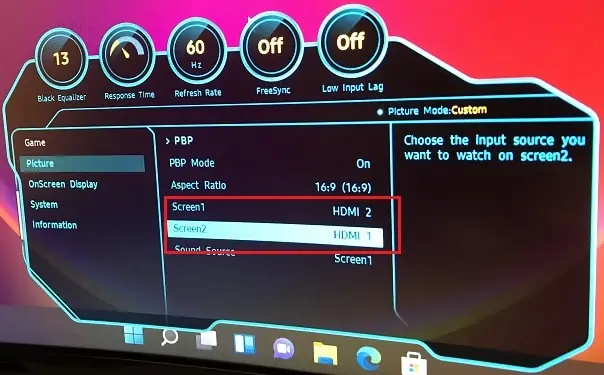
Once you have connected both your systems to the ultrawide monitor, it’s time for you to enable the Picture-By-Picture mode. This can be done using the display menu of your monitor:
- Press the menu button, which is generally located in the bottom part.
- Once the menu appears, navigate to the PIP/PBP option.

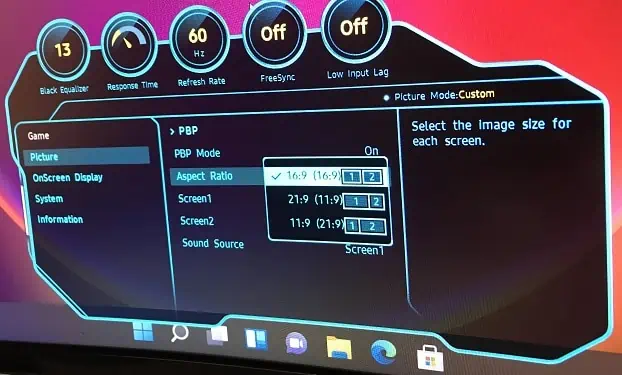
- Next, choose the PIP/PBP Mode and ensure it is turned on.

- Then, adjust the aspect ratio as per the availability.

- Also, ensure that you have chosen the right screen based on the cable you’ve used.

- Now, wait until your monitor splits the screen into two separate displays.
Configure Display Settings
Although your ultrawide monitor is now split into two sections, you may still be unsatisfied with its configuration.
Firstly, you may notice that the display resolution of your secondary system doesn’t sync with the monitor, displaying black empty spaces around it, or the display is cut off at the edges. To ensure that they align well, here’s what you need to do:
- Press Windows + I to launch the Settings app on your secondary system.
- Next, go to System and choose Display.
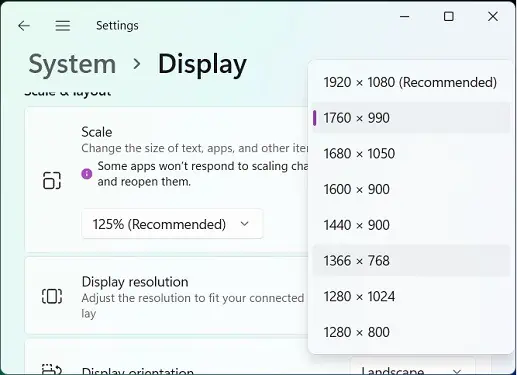
- Under Scale & layout, expand the Display resolution drop-down and set a higher resolution supported by your ultrawide monitor.

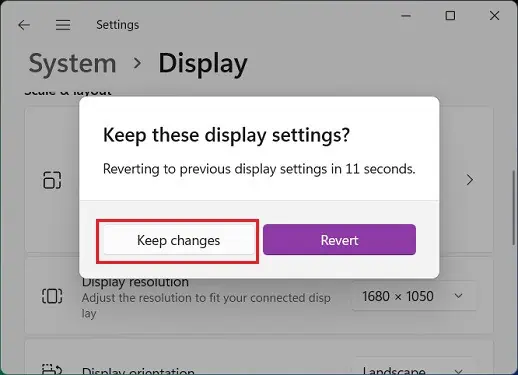
- Now, your display should turn black and adapt to your recent change. To save the configuration, press the Keep Changes button.

- If your second display still doesn’t sync, try another display resolution until you are satisfied.
However, if you’re using the ultrawide monitor as an external display for your laptop, you may wish to change the position of your extended screens. To do so, please follow the below instructions step by step:
- Right-click anywhere on your desktop screen and select Display settings.
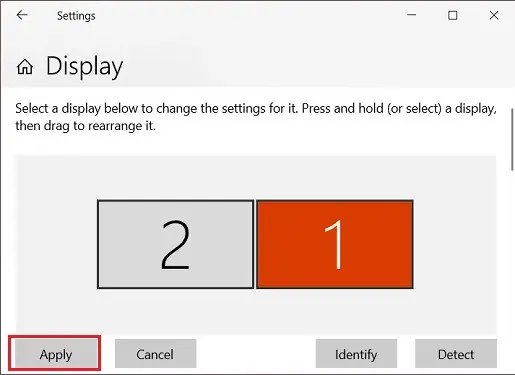
- Once the Settings window opens, you’ll notice two displays numbered 1 and 2. If you’re unsure about which is the primary display, you can simply click on the Identify button.
- Now, drag screen 1, take it to the appropriate position, and drop it.

- Finally, click the Apply button, and you should see that your primary and secondary monitors are swapped.

Use KVM Switch or Dual Controller Software
Using two systems in a single ultrawide monitor is fun, but you may face a serious issue – your input devices will function only on your primary system.
Well, you don’t face this issue when connecting consoles, as they utilize their own controllers. But, this problem often occurs when you’re trying to display two PC contents on the display device.
Thus, we recommend using a KVM switch or dual controller software to avoid this difficulty. Basically, these programs assist you in controlling the same input devices on both systems simultaneously.
Interestingly, there are several KVM switch software available online. Nonetheless, we recommend using Microsoft’s Mouse Without Borders to link your input devices connected to one system to another:
- First of all, download the installation file and install it on both of your systems.
- Next, launch the application on your primary system, and on the startup page, choose No.

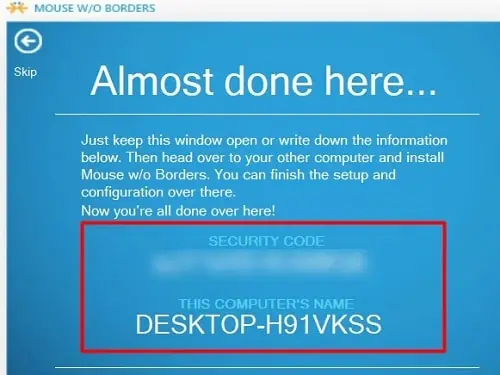
- Now, you will be taken to a screen providing you with the security code and your computer’s name.

- Then, launch the Mouse Without Borders app on your secondary system.
- This time, choose Yes to confirm that you have already installed the app on your other computer.

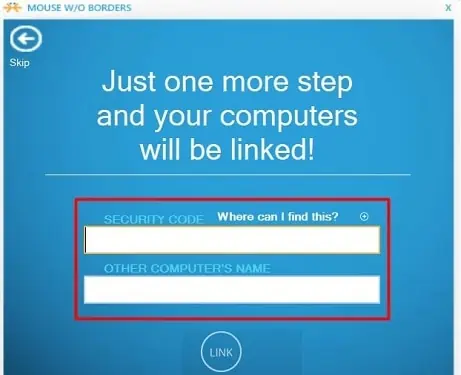
- Now, input the security code and the other computer’s name and click the Link button.

- Finally, you can use your input devices on both systems simultaneously.
How Can I Split Windows in Ultrawide Monitor?
Well, if you’re not planning to use two different systems but are opting for splitting just your windows for multitasking, it’s quite easy to do it on any ultrawide monitor.
Hence, this section includes the quick ways to split screens on Windows-based ultrawide monitors.
Drag & Drop to the Screen Edge
The first idea to split two windows is manually placing one to the left and another to the right. Here’s the correct way to do it:
- Press and hold the desired window’s titlebar.
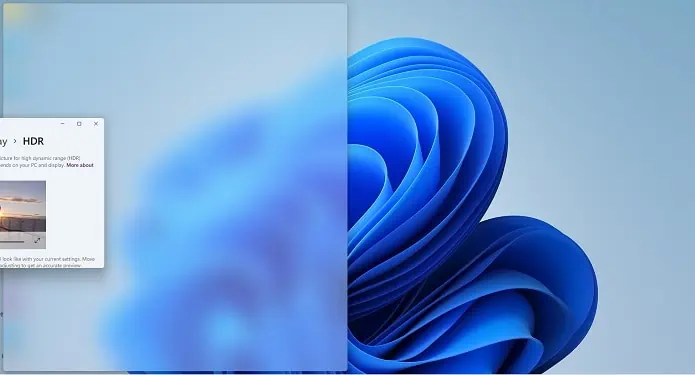
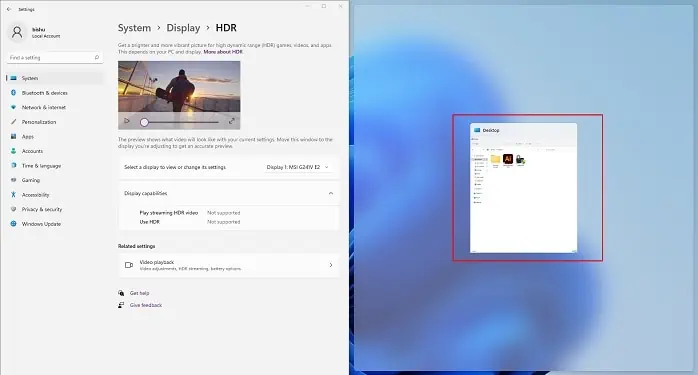
- Keep dragging it to the left or right part of the screen until you see a rectangular picture of how your window fits.

- Release it, and your window snaps well to that part of the screen.
- Now, choose your other window in the adjacent part of the display.

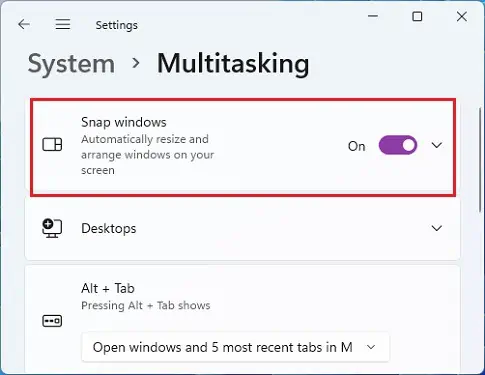
However, the drag-and-drop feature won’t work if the Snap windows feature is disabled. Below is the detailed guide on how you can enable it:
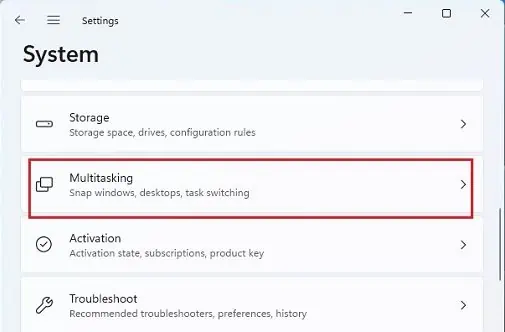
- Launch Settings and move to System > Multitasking.

- Then, toggle on the Snap windows option.

- Now, repeat the drag-and-drop steps as explained earlier. It should work just fine.
Using Snap Layout Feature [On Windows 11]
If you’re on Windows 11, there’s a much easier option to split your screen. Go through the below guideline to learn how you can use the split screen feature:
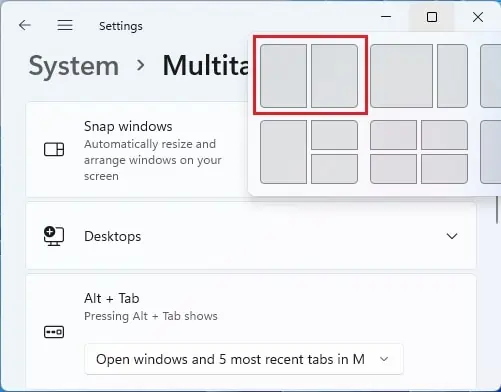
- Hover your mouse pointer on the maximize button.
- Now, you should notice multiple split screen options. So, choose the one you like.

For example, if you’re splitting the ultrawide monitor into two, choose the first one. This will snap your window to the left part of the screen. - Next, choose your desired application on the right side.
Note: If you do not see the snap layout while hovering over the maximize button, you’ll need to enable the Snap windows option from Windows Settings. Also, ensure that the Show snap layouts when I hover over a window’s maximize button is checked.
Using Shortcut Keys
Another alternative to splitting screens on Windows is using the shortcut keys. All you have to do is:
- Open any application on your ultrawide monitor.
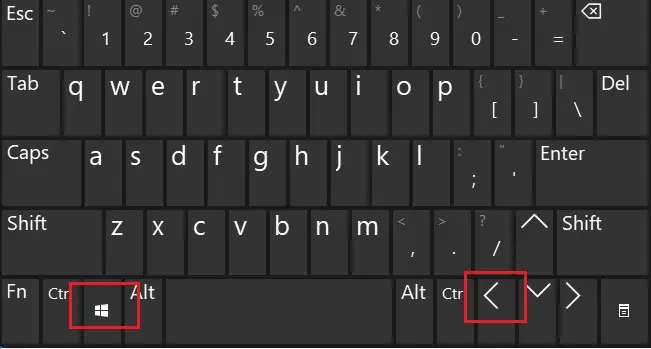
- Now, use the Windows + Left/Right arrows to take the window to the left or right as desired.

- Once the first window is in place, you can easily select the other from the right side.
Using Microsoft PowerToys
Indeed, splitting the screen is not at all a problem on an ultrawide monitor. But one thing is for sure you won’t get an option to choose your desired aspect ratio using the default Windows features.
Moreover, if you’re not using an older version of Windows, you’re also missing the snap layout feature that automatically maintains and splits the screen. However, if you’re looking for advanced options, you can use some third-party tools.
Well, we recommend using Microsoft’s PowerToys which is free to use and provides everything you crave for. Go through the below steps to get an idea of how you can split the ultrawide monitor into two or even multiple screens:
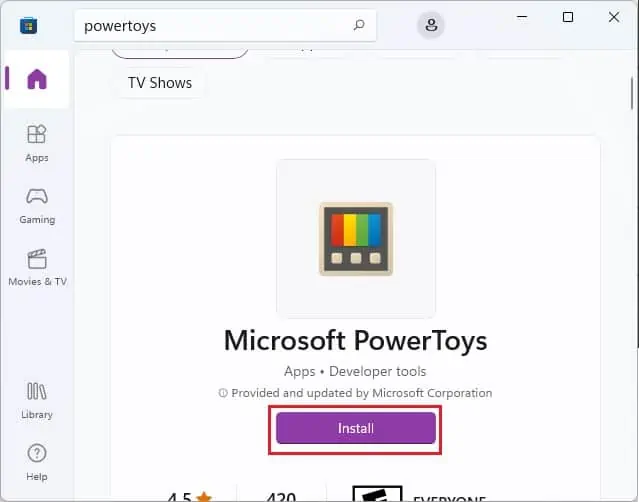
- First, download and install the Microsoft PowerToys app from the Microsoft Store.

- Once it has been installed, expand the system tray from the bottom-right corner of the screen. Here, choose the Microsoft PowerToys icon.
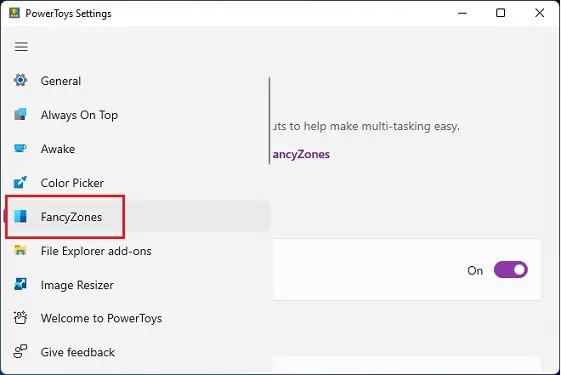
- After the PowerToys Settings window pops up, select FancyZones from the left panel.

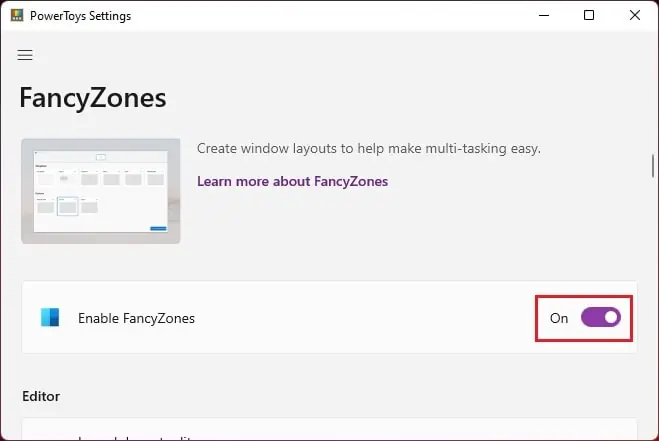
- Next, toggle on the feature if it is disabled.

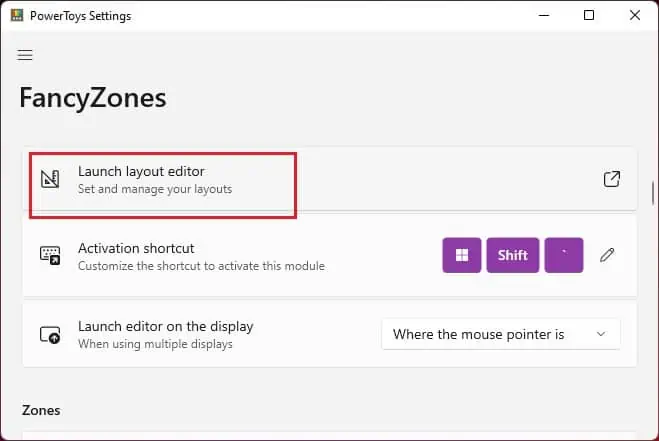
- Under Editor, click on the Launch layout editor button.

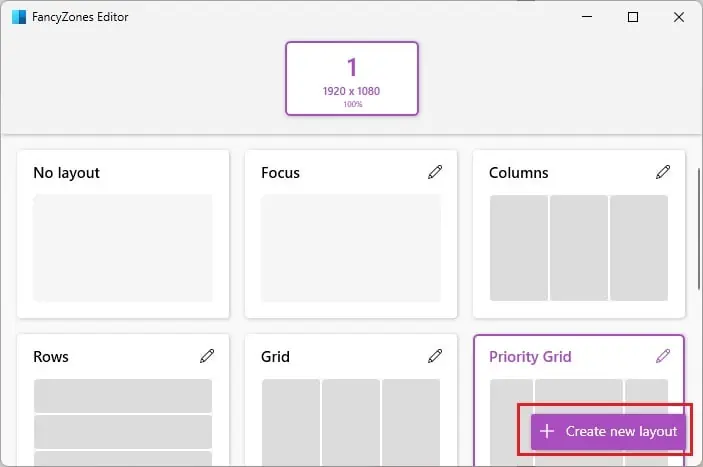
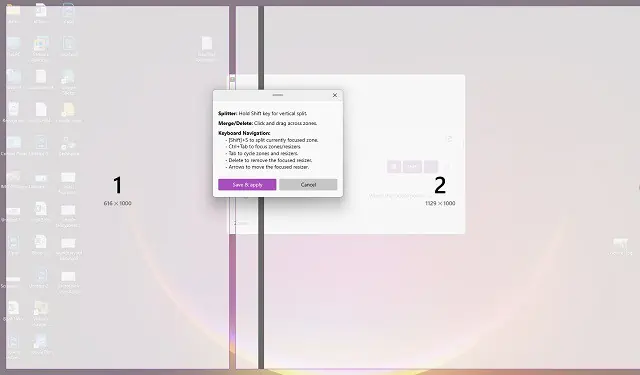
- Now, you can select any outline from the Template section. Alternatively, you can choose the Create new layout option and create a grid based on your desired aspect ratio.

- Press the Save & Apply button to save your custom template.

- Now, open any desired window and drag it, holding the Shift key.
- Then, simply place the window in the desired section.
- Again, open another application and place it in the next section exactly as you did earlier.

