Picture this. You are finished working on a document in your office and suddenly remember that you need to make some edits after reaching home.
So, how do you access it? And, even if somehow you accessed it, how do you keep the files synced up on both the systems (home and workplace)?
Well, you could literally carry a USB all the time and use it on multiple computers, but it doesn’t sync both files simultaneously. So, without much delay, let’s get into the article to explore various better alternatives to sync your files.
How to Sync Files between Multiple Computers?
If you use a Windows system, there’s already an option to sync your files on the same network.
On the other hand, you can use the cloud storage services like OneDrive and iCloud that come built-in in Windows (10 & 11) and Mac, respectively.
Also, you can use various third-party applications that sync your data across multiple computers.
To learn more in detail, you can continue reading the section below.
Share Files Over the Same Network (Windows)
Windows allows you to share and sync files between PCs on the same network. You can allow other computers only to view your files or make changes to them.
You can follow the steps below to do it.
Make the Folder Available for Syncing
First, you need to make the folder available for syncing. You can do it as follows.
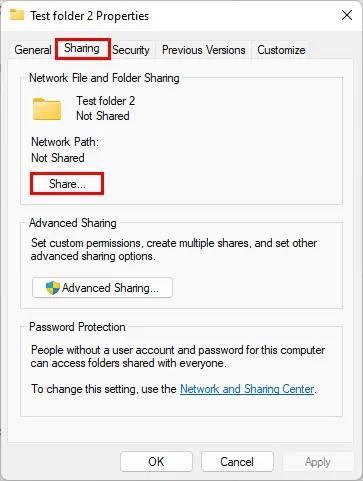
- Right-click on the folder you want to sync with other computers on the network and click the Properties option.
- Under the Sharing tab, click the Share button. Additionally, note the network path above it after sharing the folder.

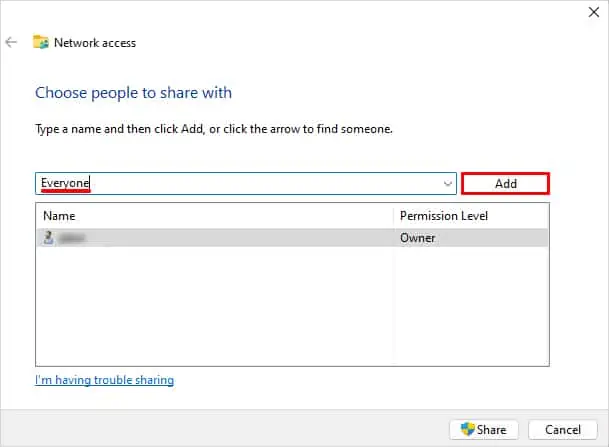
- Then, click the dropdown at the end of the search bar, select Everyone and click the Add button next to it. If you don’t find it, you can manually type it.

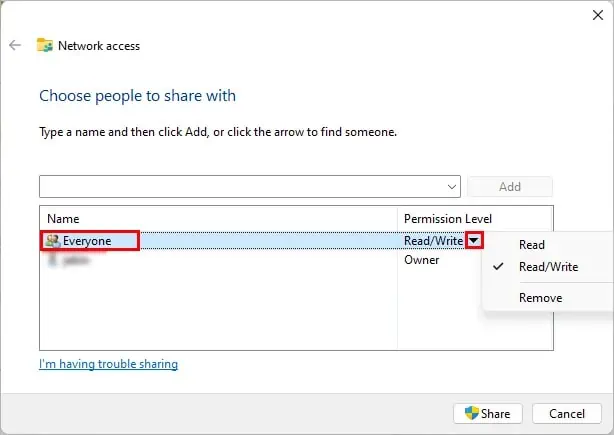
- Additionally, assign the permission level next to Everyone.
- Read: other systems can only view the shared file.
- Read/Write: other systems can view and modify (add, delete, rename) the contents of the file/folder.

- Next, click Share and follow the on-screen instructions.
- Click Apply and Close to exit the open window.
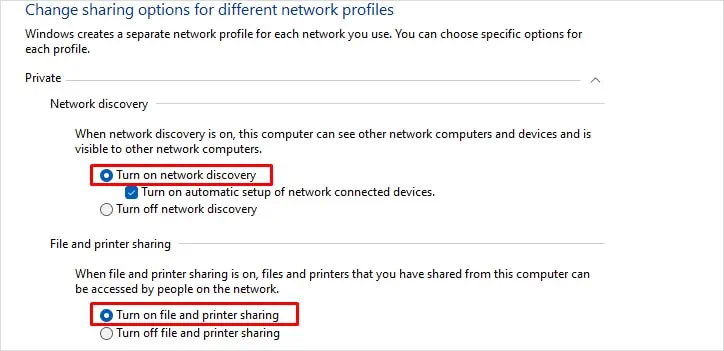
- Next, open the control panel and navigate to Network and Internet > Network and Sharing Center > Advanced sharing settings.
- Expand the Private dropdown and select the Turn on network discovery so that your system is visible to others in the network. Also, make sure you have enabled Turn on file and printer sharing below it.

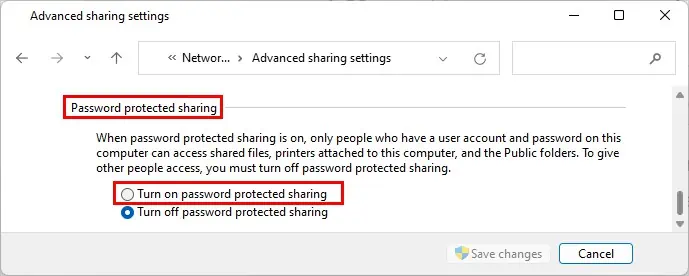
- Additionally, expand the All Networks dropdown and select the Turn on password protected sharing option so that one needs to know the password to access your network-shared files.

- Click Save changes when done.
Access the Files from Another Computer (On Same Network)
To access the shared file/folder/drive on another PC,
- Open File Explorer (Windows + E).
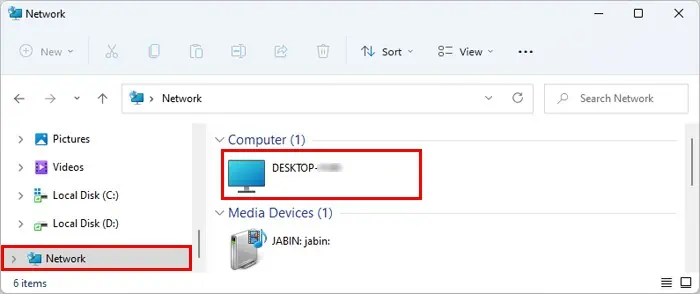
- Click Network in the left sidebar and select the computer which shared the folder.

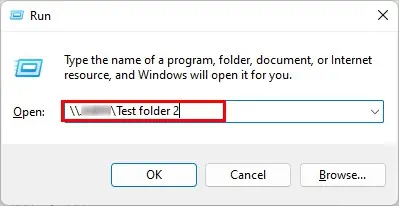
- Press Windows + R key to open the Run command.
- Type \\ and append the network path of the shared content (without any spaces) you noted previously.

Make the Files Available for Offline Use (Optional)
After making the folder ready for syncing, you can make them available for offline use when the host PC isn’t connected to the Internet.
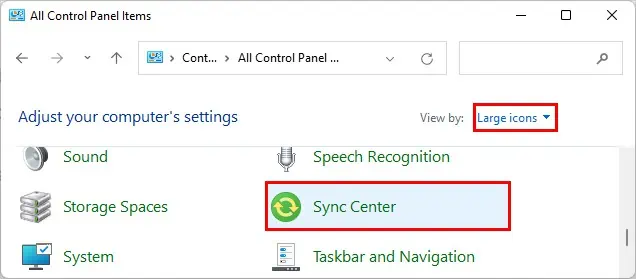
- Open the control panel and select the Large icons option next to the View by field.
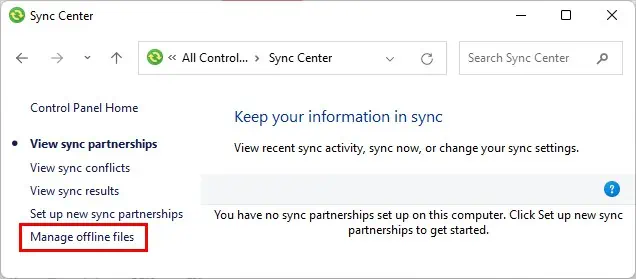
- Click Sync Center.

- Then, click Manage offline files in the left sidebar.

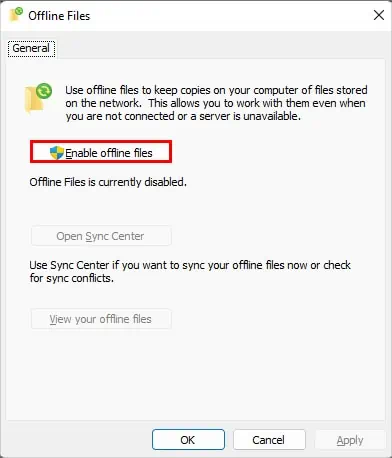
- Under the General tab, click Enable offline files.

- Click Apply and OK to save changes.
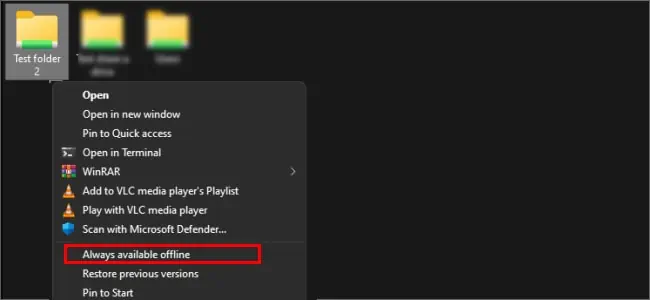
- Now, navigate to the shared network file, right-click on it, and select the Always available offline option. On Window 11, click Show more options.

Using Cloud Storage Services
Using cloud storage is by far the simplest method to sync files between multiple computers. You just need a cloud storage account and simply access a particular file from another computer.
Using OneDrive
By default, Windows has a built-in cloud storage app called OneDrive, which lets you store and sync your files across multiple computers. Similarly, you can use iCloud on Mac. Alternatively, you can use other cloud services like Google Drive, Mega, Dropbox, etc.
For demonstration purposes, we will be using OneDrive to sync files.
- Open a browser and log in to your OneDrive account.
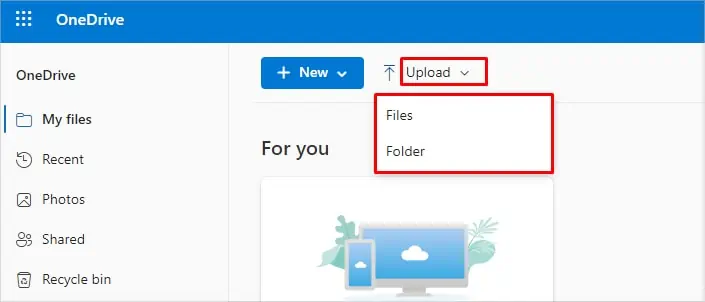
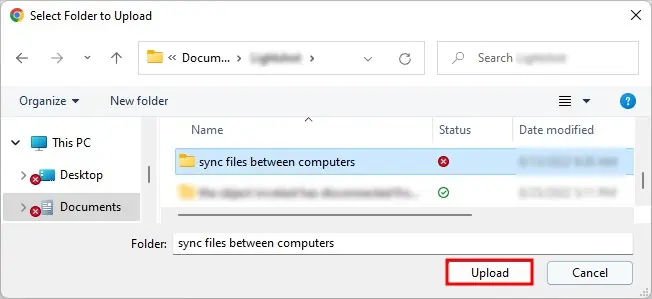
- Click Upload and select the Files/Folder option according to your needs.

- Browse the content you want to sync and select it.
- Next, click the Upload button.

- Wait for the upload to complete.
To access the file from another PC, sign in using the same OneDrive account from a browser.
Alternatively, you can use its desktop application and specify a particular drive/folder on your PC to access the files even when you aren’t connected to the Internet. However, they will take up some space on your PC.
Using iCloud
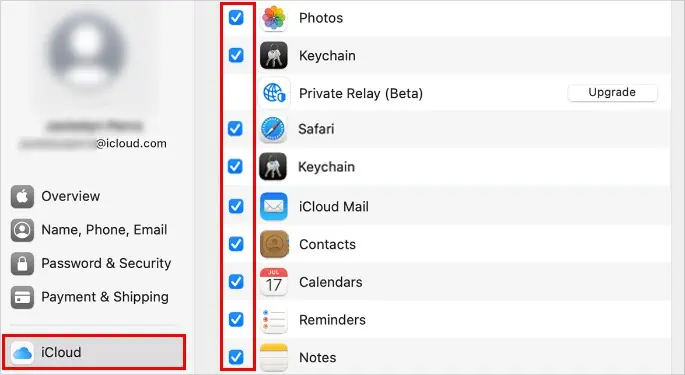
On the other hand, you can use iCloud to sync across your Mac devices as follows.
- Click the Apple icon and select System Preferences.
- Then, click your Apple ID.
- Next, click iCloud in the left sidebar and enable the checkbox next to the items you want to sync in the right pane.

Using Third-Party Applications
Using third-party applications, you can seamlessly sync between multiple computers without needing to be on the same network.
They can even integrate with other cloud services like Google Drive, OneDrive, Dropbox, etc. Also, they support two different kinds of systems, such as Windows and Mac.
Furthermore, some of them allow you to automate and schedule syncing of specific files/folders automatically at a certain period.
To use it, you just need to install the application on the computers where you want to sync the files/folders. Some of them even require you to have their accounts created separately.
Using NAS
Network Attached Storage or NAS, unlike an external hard disk, is a huge storage device connected to a network, generally with Ethernet for faster internet speed. Basically, it’s one of the centralized storage architectures.
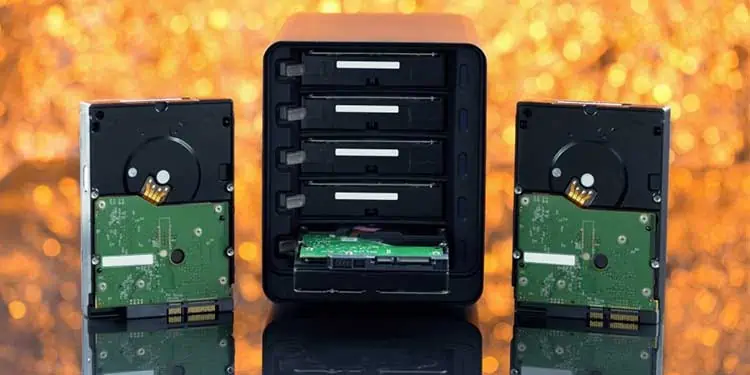
Multiple hard disks are connected to a NAS device and configured such that multiple computers on a network can access the same file/folders. You can also check out our other article on setting up a NAS server.
Generally, these are used within an organization or an enterprise and enable the team members to collaborate more effectively. All their data are synced on the NAS server and can be accessed by everyone depending upon the roles and permissions assigned to them.


