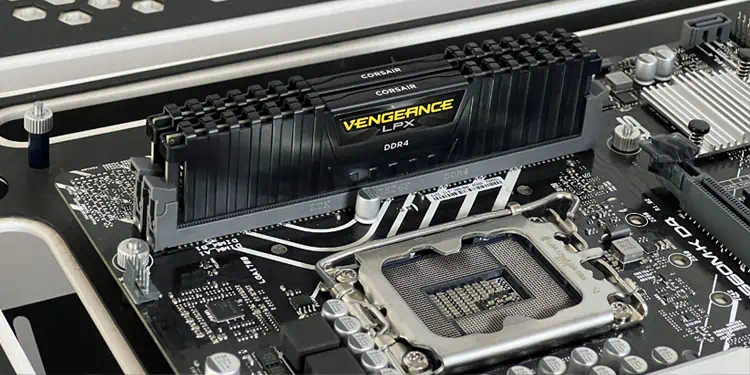
Memory issues can slow down your computer and can cause it to show random blue screen errors or frequent freeze/crash. To prevent such problems, I suggest checking your computer’s RAM for errors or corruption every few months.
You can test your RAM using the Windows built-in Memory Diagnostic tool. You can also use open-source applications like MemTest86, MemTest86+, Memtester, or HCI Memtest to test your RAM sticks.
Additionally, you can monitor RAM temperature using HWMonitor and inspect its voltage via the BIOS. Knowing these parameters helps you determine if your RAM sticks are overheating or not getting enough power.
For the test, we used an 8GB V-Color DDR4 4100 (running at 3200 MT/s) and another 16GB TridentZ Royal DDR4 3600 (running at 3200 MT/s).
But, before starting the test, disable any overclock in your system. Incorrect overclock settings may result in the test to display error messages. You can do this by resetting the BIOS.
Another thing that you should know is that testing several high-capacity memory modules will take significantly longer. Stopping the diagnostic process will restart it from scratch.
So, I recommend that you remove all memory sticks except one and run the test. This way, you can still use the system between each test.
Windows Memory Diagnostic Tool
If you are a Windows user, you can use its built-in tool to test your memory. Memory Diagnostic Tool runs a series of tests and checks the memory addresses for any faults that might cause system instability.
- Select the Windows + R key.
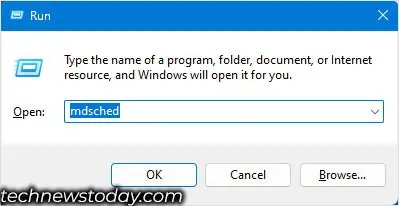
- In the Run window, type
mdschedand hit enter. This will open Windows Memory Diagnostic.
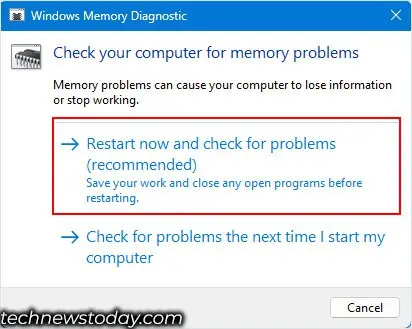
- Select Restart now and check for problems (recommended).

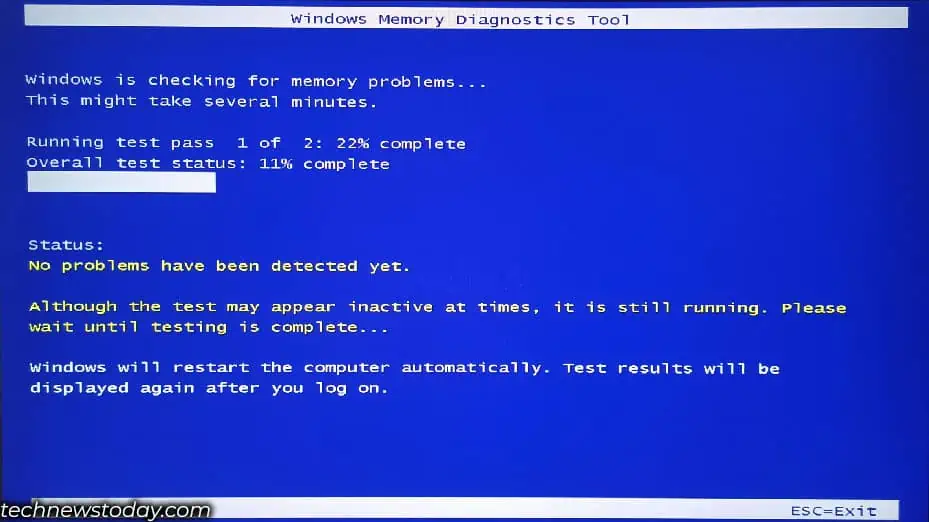
- The PC will now restart and begin the memory test.

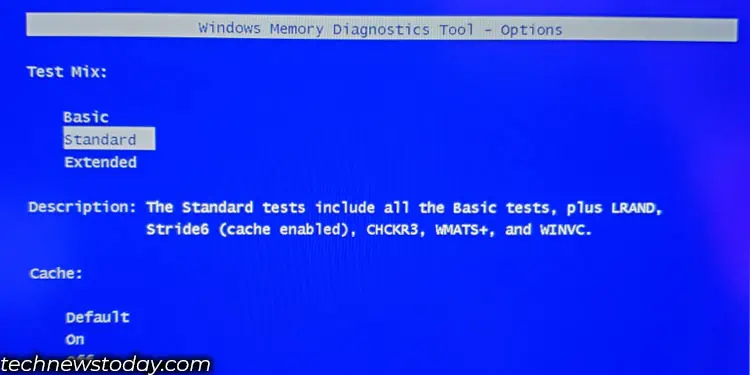
- You can press F10 to view Windows Memory Diagnostic Tool-Options. Here, you can choose between Basic, Standard, and Extended tests.

By default, the system will run the diagnostic in Standard mode. The standard mode includes tests like MATS+ INVC, SCHCKR, etc., where the tests are done with cache enabled.
With cache enabled, the CPU may not access memory but accesses data through cache. This will result in inaccurate results.
Therefore, I recommend that you run the Extended test, which disables the cache. Running a memory test by disabling the cache will take significantly longer but will give you more accurate results.
After the test is done, you can now use another built-in utility named Event Viewer to view the results,
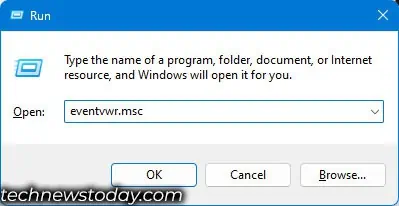
- Open Run, type
eventvwrand press Enter.
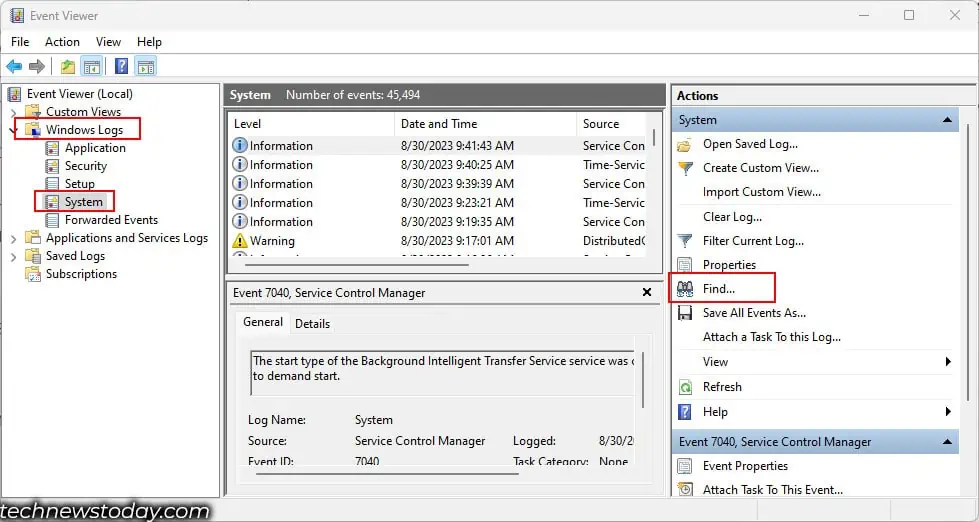
- On the left side, expand Windows Logs and click on System.
- On the rightmost panel, click on Find.

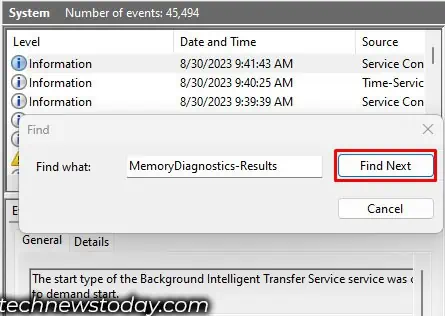
- Here, type
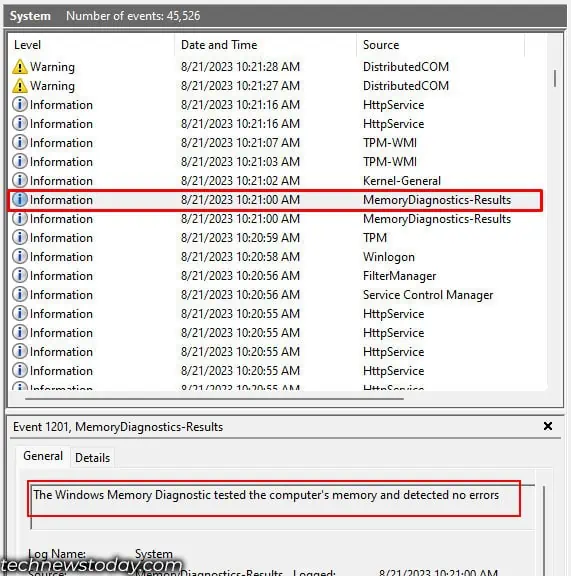
MemoryDiagnostic-Results, then click Find Next. The latest memory diagnostic event will be highlighted in the background.
- Close the Find dialog box.
- Click on the highlighted event. Under, you can see the details about the event.

- It will tell you “detected no errors” if the diagnostic did not find any errors.
MemTest86
MemTest86 is an open-source application that runs a series of tests, 13 to be exact and runs them four times (passes) to find any errors in your memory module/s.
It runs a total of 52 tests and, therefore, will take significantly longer. So, i recommend that you let this test run overnight if you are testing multiple memory sticks at the same time.
To run the test using MemTest86, you will require a USB drive. Make sure that the drive does not contain any files or folders, as the process requires you to format the drive.
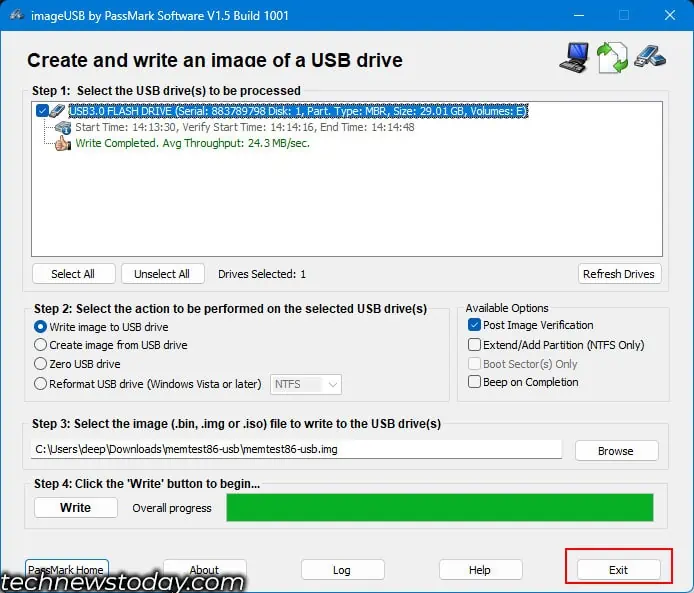
Now, you need to make a bootable USB drive. For that,
- First, download memtest86 and extract the downloaded folder.

- Insert the USB drive into the USB slot at the back panel of the PC (You must insert it in the USB port of the motherboard itself)
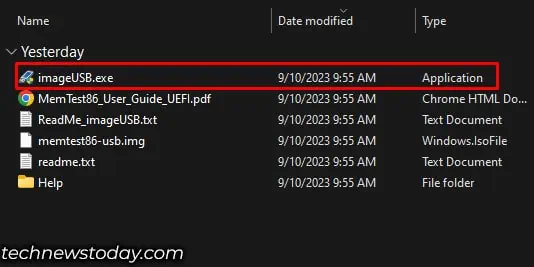
- Open the folder and run
imageUSB.exe.
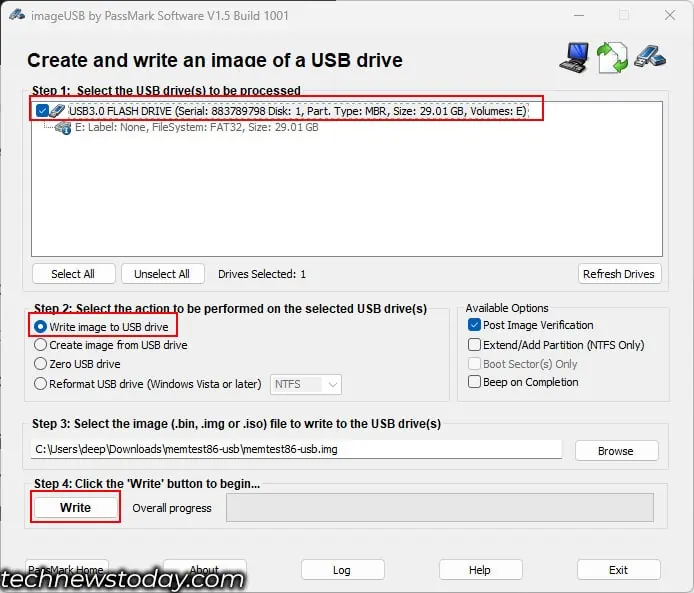
- Here, in Step 1, select the USB flash drive.
- Under Step 2, check Write image to USB drive.
- Click on Write.

- Select Yes.
- Again, click on Yes when it asks for confirmation.
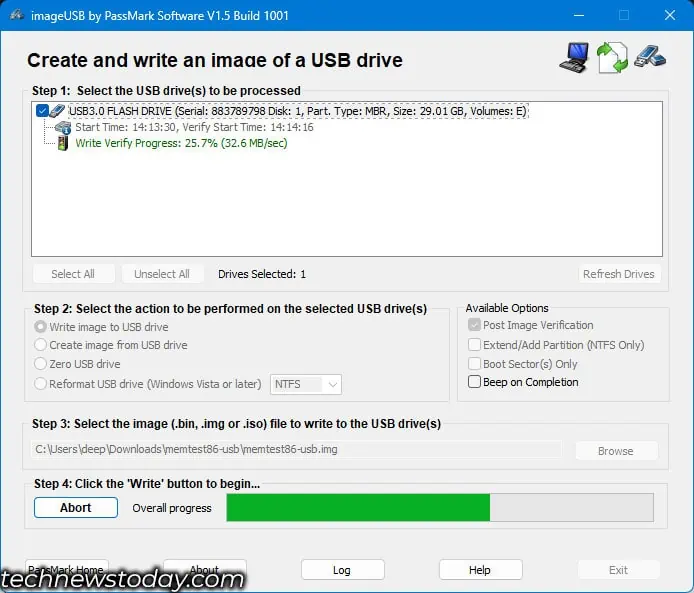
- Now, wait for the Write Process to complete.

- Once it says Write Complete, click on Exit.

You should see that the USB drive’s size is lower than what it actually is. This shouldn’t concern you for now; I will show you how to reformat and get the remaining capacity back at the end of this method.
Once you have successfully made the USB bootable, you need to change the boot order such that the system boots using the USB drive containing MemTest86.
Now, restart your PC, and the PC should boot from the USB drive,
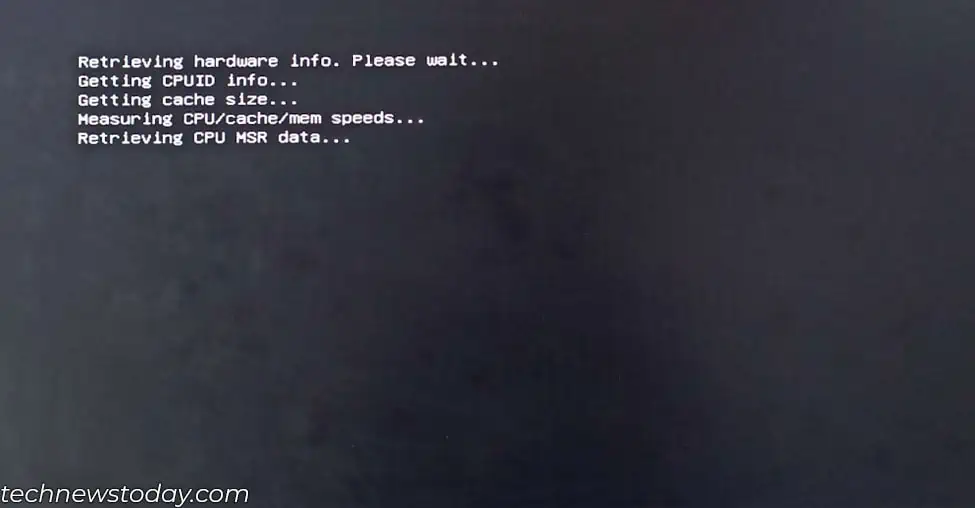
- Wait for the system to retrieve hardware information.

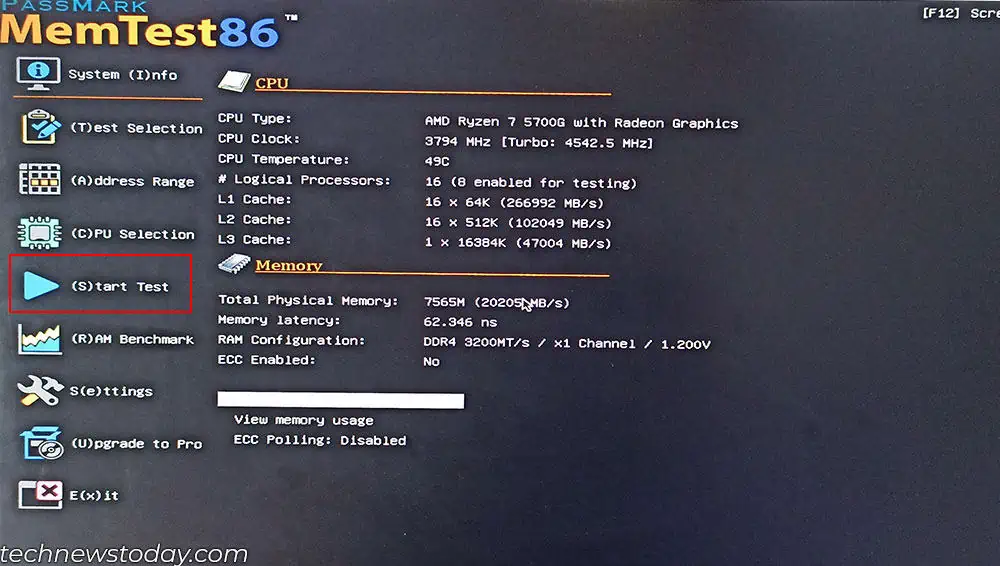
- Once you get to the home screen of PassMark MemTest86, press S to start the test.

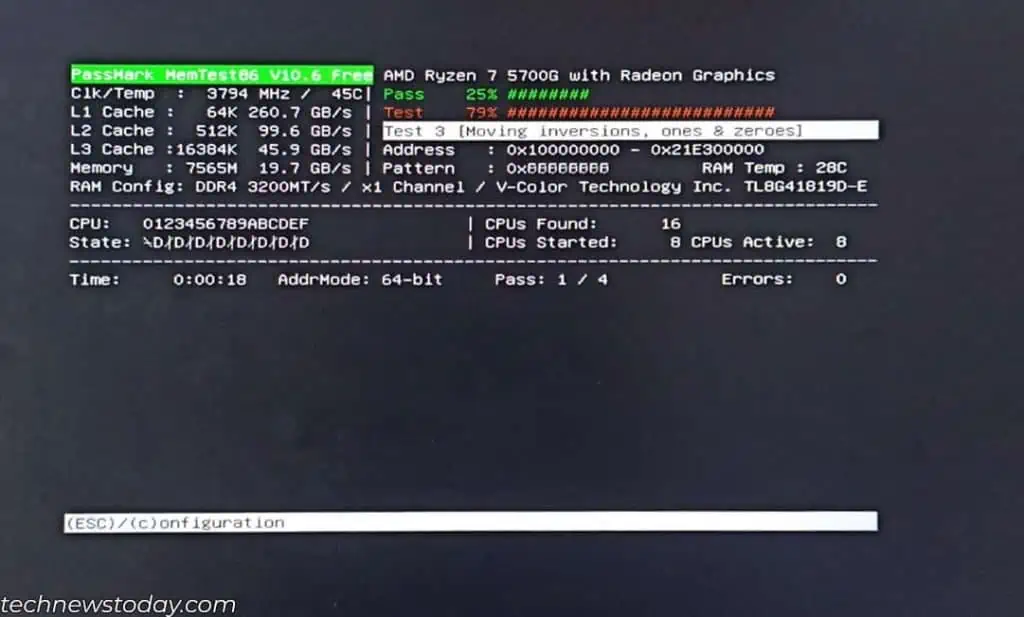
- Wait for the system to go through 4 passes of the memory test. Depending on the total memory in your system, this may take several hours.

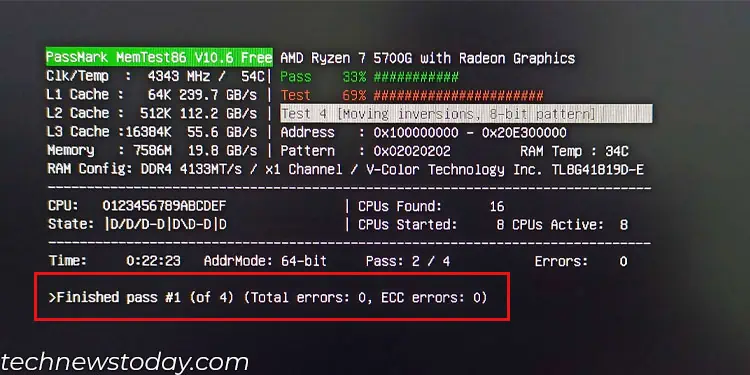
- Once the first pass is completed, you will see a message that says Finished Pass #1 and the total error in the memory. In my case, it’s 0.

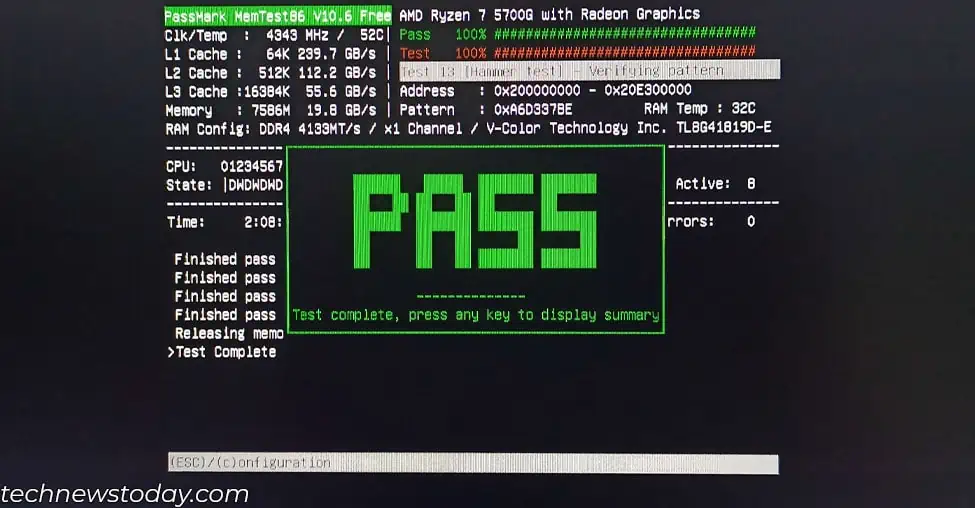
- Once all four passes are completed, you will see a green PASS text if the memory stick passes the test. If not, you will see a memory address error in red, along with multiple Errors.

During the test, make sure that the RAM temperature does not exceed 40°C for DDR4 and 55°C for DDR5.
If there are several errors, RAM reaches high temperatures or your system freezes constantly due to memory errors, it might be best that you replace the faulty memory stick.
But if all the memory sticks display errors during testing, it could be that the memory slot or the internal connection in the motherboard is at fault.
In such cases, you should clean the memory slot or test the motherboard for errors.
Once the test is completed, you would want to get the original capacity of the USB drive back. But first, change the boot order so that the system boots using the storage device containing the OS.
Then, follow the steps below,
- In Windows, open the MemTest-86 folder that you extracted previously.
- Run
imageUSB.exefile.
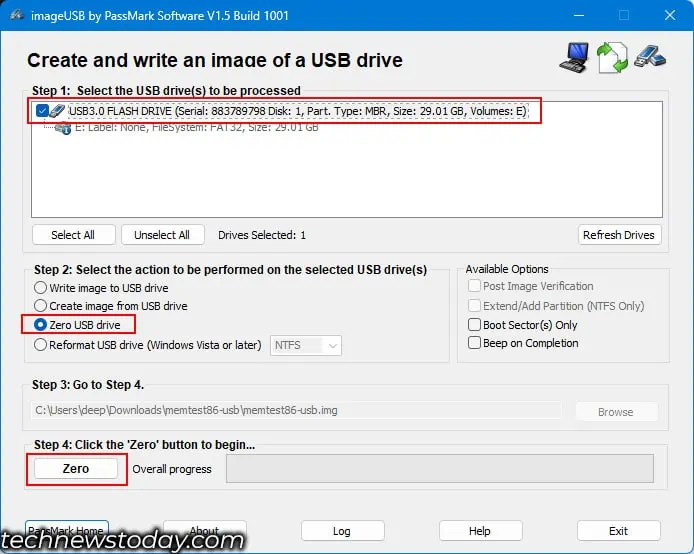
- Select the USB drive in Step 1.
- In Step 2, check the Zero USB drive.
- Finally, click on Zero in step 4.

- Click on Yes.
- Again, select Yes when it asks for confirmation.
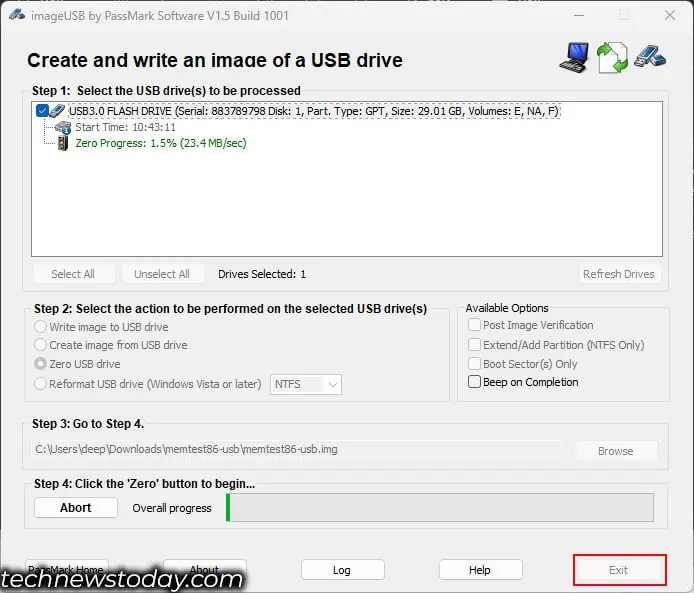
- Wait for the process to complete and click on exit.

- Again, format the USB drive, and it will return to its original capacity.
Check Memory Stick and Slot
If your system constantly crashes due to memory issues and cannot complete an extensive memory test, you can try using one stick at a time to find the faulty memory. This will only work if you have two or more memory sticks.
If your system does not have two memory sticks, you need another memory module to determine if the first one is faulty.
To test your RAM stick,
- Turn off the PC and remove the power plug from the wall outlet.
- Press the power button three or four times to discharge the capacitors.
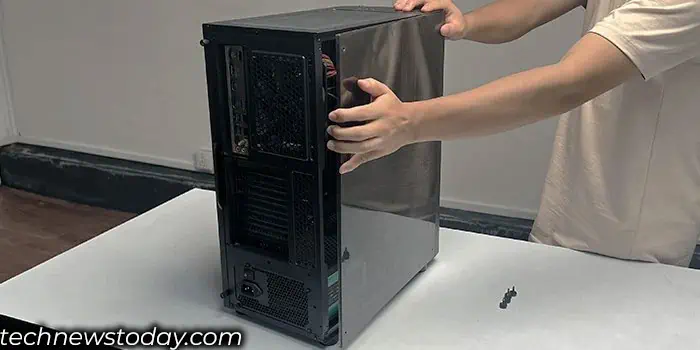
- Now open the PC case. For that, remove any screws that hold the side panel of the PC case and take the side panel out.

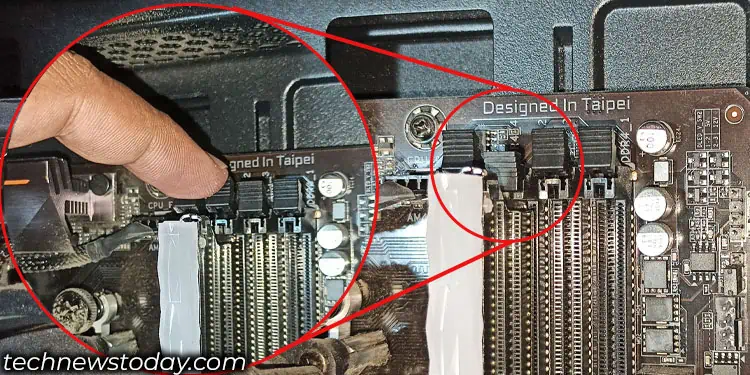
- The RAM sticks are normally placed beside the CPU. There should be two or four memory slots. If you are using a workstation motherboard, there might be more.
- Unclip each side of the memory slot by pushing it outwards. Some motherboards may only have a clip on one side of the slot.

- Remove all the memory sticks except one and use the PC.
- Check if the system still crashes or freezes. If it does, replace the memory stick.
- If you have more than two memory modules, repeat this until you find the faulty memory.
It could also be that the memory slot is damaged. To eliminate this possibility, try switching between DIMM slots.
If the same error/crash occurs on all the memory modules and slots, the problem could be with the motherboard’s internal memory connection.
Check RAM Voltage
A crucial detail that I recommend you check is the RAM voltage. Depending on the DDR version and the type of RAM installed on your system, it will require a certain voltage.
If the motherboard or the PSU is not supplying the recommended voltage, memory might throw several unexpected errors.
The minimum voltage requirements according to DDR version are,
- DDR3: 1.35 Volts
- DDR4: 1.2 Volts
- DDR5: 1.1 Volts
These numbers will be higher if you have enabled XMP.
You can check the voltage currently being supplied to your RAM sticks through the BIOS. Here’s how,
- Repeatedly press the BIOS key to enter your system’s BIOS. The BIOS key could be the Delete key or one of the function keys, depending on your motherboard.
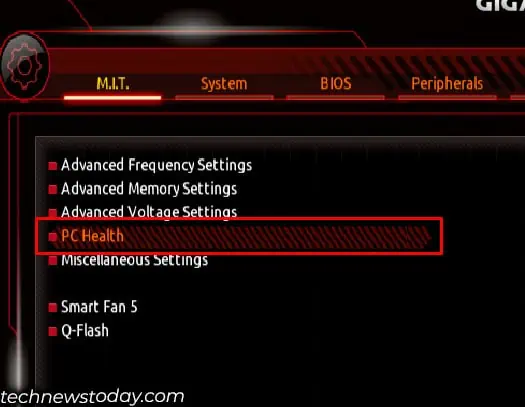
- Once in BIOS, check for an option PC health.

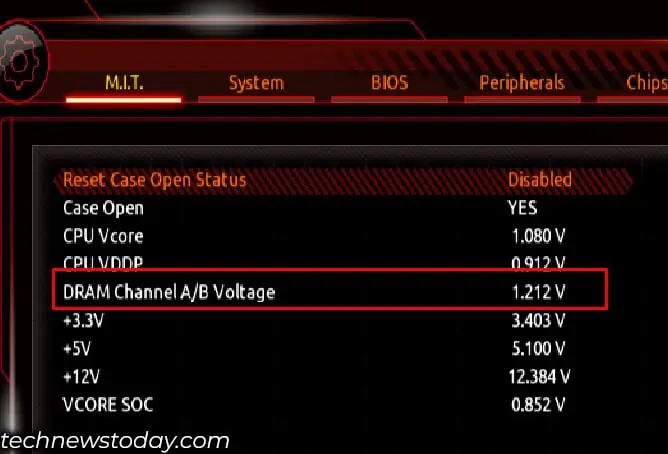
- Here, check the DRAM voltage. The number should be close to the value mentioned above.

Using a RAM Tester
All the methods mentioned above will require the system to POST. The methods will not work if the system cannot even boot into BIOS. In situations like that, I suggest using a RAM tester to diagnose your memory module.
You can find a memory module or memory slot tester that can accurately test your RAM for connection issues. In our case, we will just be focusing on the memory module tester.
These devices have numerous LEDs and their respective labels for each connection. The LED lights up when functional. Connection issues or faulty components will stop its corresponding LED from lighting up.
This device will help you pinpoint the exact area where the problem lies in your memory stick.
To use this device,
- First, insert the CR 2032 Lithium (CMOS) Battery in the memory module tester with the positive side up.
- Now, insert the RAM in the tester.
- Press and hold the black button.
- A series of LEDs will turn on.
- Here, check if any of these LEDs are turned off. If it is, the memory module is faulty.
There is a chance that the LED on the tester itself is damaged. To eliminate this possibility, try testing another memory module in the tester. If the same LED turns on, the tester itself is likely at fault.
Final Thoughts
If your system displays memory errors after running a few of the tests mentioned above, there could be a few reasons why this happened.
If you are testing the entire set of memory kits at a time, make sure that all of them are running on the same memory frequency and latency. Mixing RAM could also be one of the reasons behind memory errors.
Besides this, the memory slot could also be behind the memory error that you see from the above test. So, before jumping to the conclusion that the memory module is faulty, make sure to inspect the memory slots as well.
In case of a slot issue, the reason behind it could be an internal connection error or maybe even damaged components.

