Transferring photos from iPhone to a flash drive puts you in a win-win situation. On one hand, you have got yourself a backup of your favorite photos. On the other, you can free up storage space on your iPhone if need be.
There are different routes you can take to transfer photos from iPhone to a flash drive. From the methods suggested in this article, you can select the one that is feasible.
How to Transfer Photos From iPhone to Flash Drive?
When it comes to transferring photos from iPhone to a flash drive, you can go the direct or indirect methods.
The time and effort you need to put in for every method may vary. However, all of these methods are sure to work. So, based on your preference, you can choose either one.
Direct Transfer from iPhone to Flash Drive
If you have USB cables, adapters, or a specific flash drive designed to connect iPhones, you can opt for the direct transfer.
Using a USB Cable or Adapter
You can transfer photos from your iPhone to a flash drive with the means of a USB cable and a computer. You’ll have to plug in your iPhone to your computer with the help of a USB cable or an adapter. Likewise, insert the USB drive into another USB port.
During the pairing process, keep your phone turned on and unlock it. Another thing to keep in mind, in the case of Windows computers, is to update iTunes on the PC.
The steps to transfer your photos in this manner may take a longer time. But, in doing so, you save the time of downloading and installing some third-party apps.
Here’re the steps to Pair Computer and iPhone on both Mac and Windows:
- Pair your iPhone and computer with a USB cable or adapter.
- Once Trust This Computer alert comes up on the phone, select Trust. This will make your iPhone discoverable so that your computer can detect and connect with it.
- Then, if asked, enter the password too.
After this part, the steps to import the photos differ for Mac and Windows. So, follow the steps accordingly.
On Mac
- Open the Photos app.
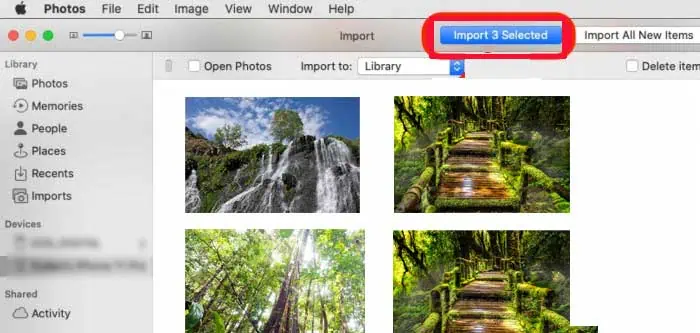
- Select the photos. To import only selected photos, click Import Selected. Likewise, there’s also the option to Import All New Items.

- After that, choose the album or folder you want to save them to.
- Wait for the photos to be imported.
- Open the folder where you saved the imported photos.
- Copy the photos by hitting Command + A and Command + C keys.
- Then, from the Dock on the bottom of the screen, select Finder.
- Under Devices, select and open the Flash drive.
- Hit the Command + V keys to paste the photos.
On Windows
- After the devices are paired, hit the Windows key on your PC.
- Search for the Photos app and select it.
- In the Photos app, click the Import option.
- Select From a connected device.

- The PC will look for devices to import from.
- After that, select the photos you want to import.
- Select the folder you want to save the photos to. Then, choose Import.
- Open the folder where you imported the photos from the iPhone.
- Copy them all using Ctrl + A and Ctrl + C keys.
- In the Navigation pane, select the Flash Drive.
- Open it and hit Ctrl + V keys to paste the photos.
Using a Flash Drive That Connects to iPhone Directly
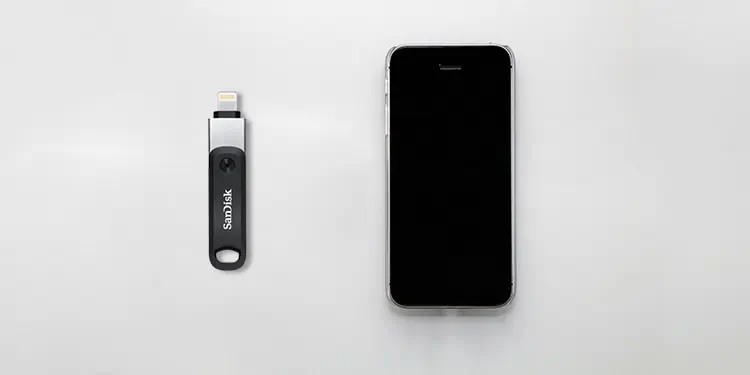
You can get a flash drive that’s made specifically to plug into iPhone directly. With this kind of drive, transferring photos from iPhone will be a cakewalk. However, it may be a little on the pricier side.
Some of the best-voted flash drives for iPhone are SanDisk iXpand, iDiskk iPhone Memory Stick, to name a few.
To show you how this works, we have chosen SanDisk iXpand flash drive, at random.
- Lift the flash drive’s lightning corrector.
- Plug it into iPhone.
- Then, a prompt will appear telling you to install the iXpand Sync app.
- When the App Not Installed message shows up, tap App Store.
- In the App Store, search for iXpand Sync.
- Once found, install it.
- Thereafter, open the app.
- A message saying You’re Connected! appears.
- Thereafter, an option will show up from where you can either Turn on Auto Backup or select Skip for now.
- If you choose Skip for now, select Copy Files from the listed options on the screen.
- Then, select Copy Photos from iPhone.
- Select the photos you want to transfer to the flash drive.
- Next, tap Copy to iXpand Drive.
- Select a folder to transfer the photos or create a new folder.
- Tap Copy Here.
Indirect Transfer from iPhone to Flash Drive
In case you don’t have any connecting cables or flash drives at your disposal, try the methods below.
iCloud Photos
You can use iCloud Photos to transfer photos from your iPhone to a flash drive. It’s easy, quick, and convenient. There also won’t be the need for USB cables or adapters.
To use iCloud Photos for photo transfer, you have to first turn on the iCloud Photo Library on your iPhone.
- Navigate to Settings on your iPhone.
- Tap your name/Apple ID.
- Then, tap iCloud.

- Select Photos.
- Now, turn on iCloud Photos by toggling the button to the right.

After enabling iCloud Photos, you can take the following steps to transfer photos to the computer.
On Both Mac and Windows
- Launch the web browser.
- In the search bar, enter icloud.com.
- Enter your Apple account credentials. In case you have enabled two-factor authentication, you have to enter the PIN sent to your iPhone.
- When the Apple ID sign-in request appears on the iPhone, tap Allow.
- If Trust this Computer alert displays, tap Trust on the iPhone.

- Now, after you access the iCloud web version, select Photos.
- Out of two options, Photos and Moments, select Photos.
- Select the photos that you want to download.
- Thereafter, click the Download option from the top-right corner.
- The photos will, then, download as a ZIP file.
- Once the ZIP file downloads, open it.
- On Mac, double-clicking the ZIP file will unzip it. On Windows, extract the photos by right-clicking the file and selecting Extract All. Then, choose any folder you prefer to keep the photos in.
Now that you have finally transferred the photos to your computer, here’s how you share them to the flash drive.
- Plug in the flash drive to the USB port on the computer.
- Then, open the folder to which you previously transferred the photos.
- Copy them all using Ctrl + A and Ctrl + C keys.
- From the navigation pane on the left, select and open the new flash drive.
- Then, hit Ctrl + V keys to paste the downloaded photos from the iPhone.
Google Drive
You can also use Google Drive to transfer photos from your iPhone to Flash Drive. For this, you won’t be needing a USB cable or an adapter. With 15 GB of free storage, you can most likely upload all your photos on Drive.
After that, you can connect the flash drive to your computer. Then, you can proceed to download the photos from Drive and save them to the flash drive.
Here are the steps you need to take.
- Open Google Drive on the iPhone.
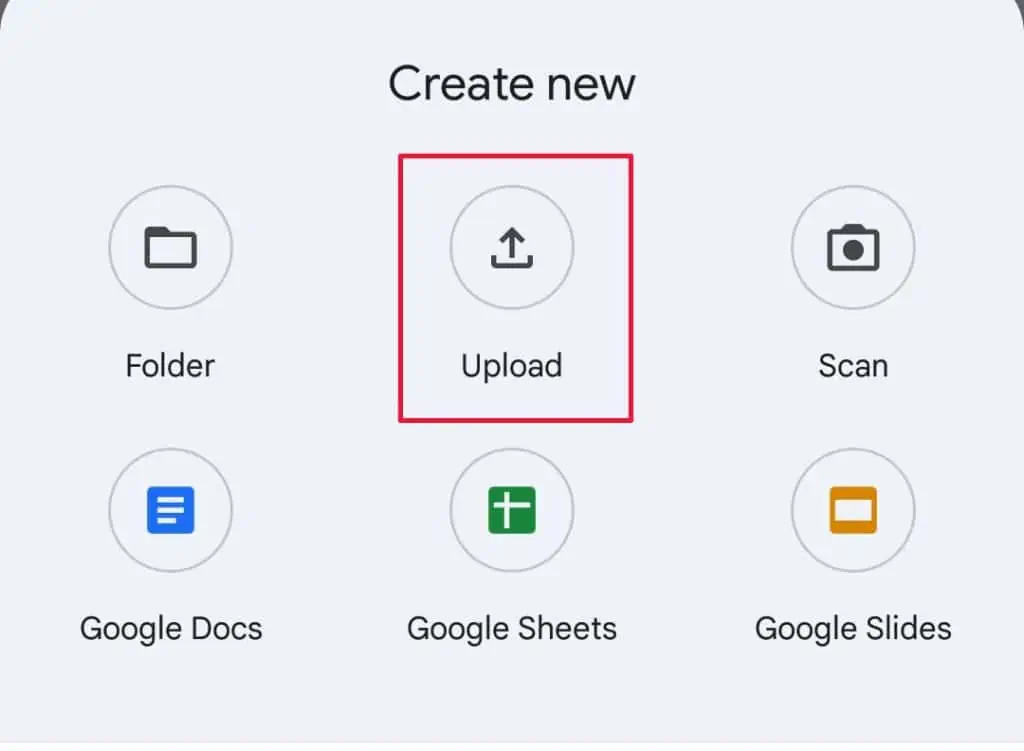
- Tap Add (the plus sign).
- Select Upload.

- Select the photos you want to upload to Drive.
- After the photos are on the Drive, open the browser on your computer (be it, Mac or Windows) and go to Google Drive.
- If you haven’t logged in, enter your Google credentials.
- Select the photos you want to download. To select all, hit Command + A on Mac or hit Ctrl + A on Windows.
- Click the three-dot menu which is at the top-right of the screen.
- Select Download.

Since these photos will be downloaded as a ZIP file, you can extract them in the same way as mentioned above in the iCloud Photos section.
Likewise, the same goes for transferring photos, once they have been unzipped, to a flash drive.
You probably have at least two email addresses. If you do, you can transfer photos from your iPhone to a flash drive through email.
- On iPhone, go to the Photos app.
- Select the photos.
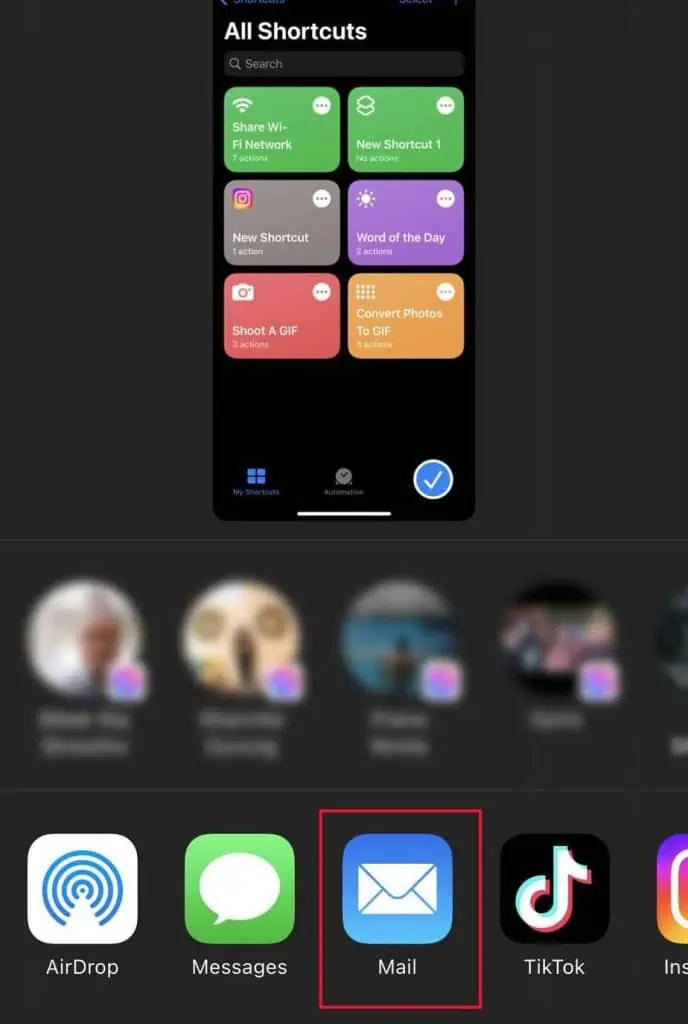
- Tap the Share button on the bottom-left corner.
- Then, tap Mail.

- Now, enter your email address.
- At last, tap Send.
After that, turn on your computer and log in to your email address. Download the photos, insert the flash drive, and copy-paste photos to the flash drive.

