If you are having trouble opening your laptop due to a broken power button, it’s best to replace it or get it fixed.
However, in the meantime, you may be in need of alternative methods to turn on your PC without using the broken button. Or, you may be simply looking for ways to power up your laptop from a remote location.
Whatever the reasons, we have provided the working ways to start your laptop without using the power button.
How to Turn On Laptop Without Power Button?
If your system is completely shut down and you have not enabled any waking features, then you should try the first two methods to turn on your PC. Let’s see them below.
Using Built-in Battery Reset Button
Nowadays, most laptops, such as Levono Ideapad 360, provide a button to reset their motherboard battery. You should check the laptop manufacturer’s website to see if it has one. You can press that button to power your laptop on.
- Look for a small hole on the side of your laptop or the back panel. It can be near the RAM compartment or the power button.
- Press the button using a thin object that can fit in the hole. Your system should restart and show the option to open BIOS or normal startup.
- Select Normal startup.
Your laptop should start powering up now. In some laptops, you may have to disassemble the back panel to access the reset button.
Jump Starting the Motherboard
The power button closes the circuit in the motherboard providing the path for current flow. So, you can jump-start the motherboard by manually completing the power button circuit.
Let’s see how you can do it.
- Remove the charger.
- Unscrew the back panel to get to the motherboard.
- Find the circuit where the power switch is connected. In some laptops, you may have to take out the keyboard and frame to access the power button.
- Procure a metal screwdriver and touch the positive and negative points at the same time with it.
The laptop will start now.
Now, you can enable certain functions in your BIOS to start your PC without a power button.
Waking by LAN
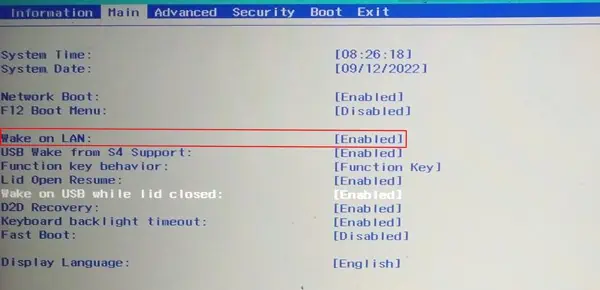
Most PCs have the function to turn it on by sending a signal from another PC or router connected to the same LAN. This signal is known as the Magic Packet, which communicates with the network card and directs it to start your PC. But for that, you should have enabled the function beforehand in BIOS.
Let’s see the way to do it.
- Restart your PC and repeatedly press F2, F12, Delete, or the respective key to get into the BIOS page.
- Go to Advanced Options and find Power Management. Some BIOS may feature the System Management option instead.
- Find Wake Up On LAN or PCIe or Resume by PCI/PCIe Device and enable it.

- Reboot your PC and press Windows + ‘R’ to open the Run dialog box.
- Type
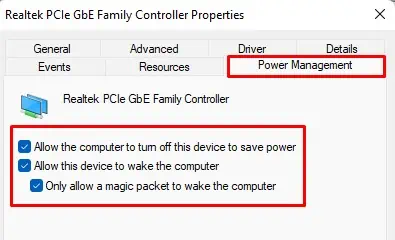
devmgmt.mscto open Device Management and expand Network Adapters. - Double-click on the LAN or PCIe device and go to Power Management.
- Check all the options available.

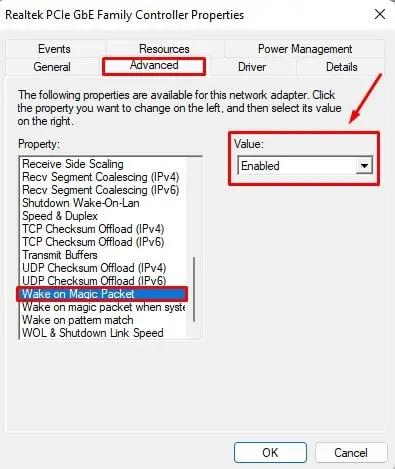
- Again, go to Advanced and enable Wake on Magic Packet.

- Click OK to save the settings.
Now that you have enabled the Wake on LAN feature, let’s move on to the way to turn on your PC by using this feature.
- Press Windows + ‘R’ on your device and type
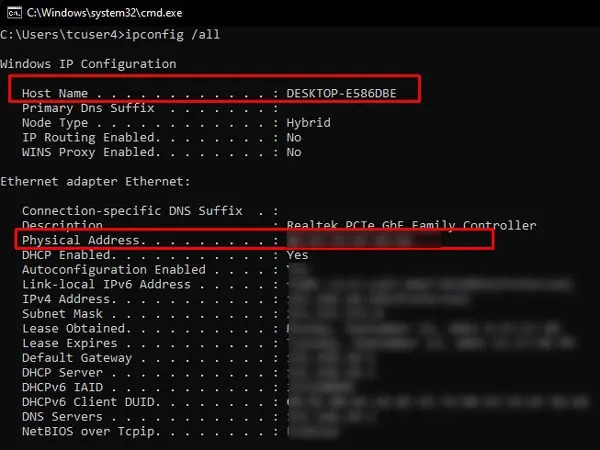
cmdto open Command Prompt. - Type
ipconfig /alland note the Hostname and Physical address (MAC).
- When you want to turn on your PC, open the router configuration on another PC connected to the same network as yours.
- Find Network Configuration or similar and look for Wake on LAN feature.
- Enter the MAC address of your computer on it and click Wake Up.
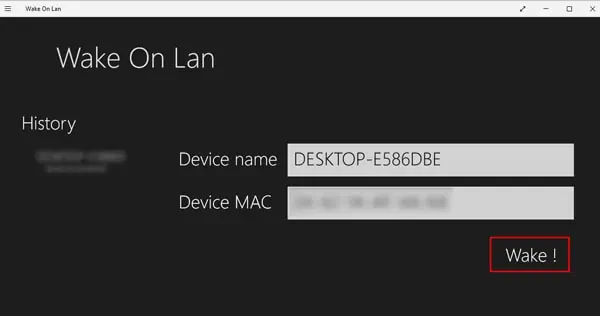
- You can also download the apps named Wake on LAN or Send Magic Packet on another PC or your phone. Then, enter the PC name and MAC address to wake your system.

You do not have to worry about the power button now.
Enable Wake By RTC
You can use your PC’s Real Time Clock (RTC) to start your PC on the specified date and time. You just have to enable the feature and enter the time when you would like your system to wake.
Let’s see how you can do it.
- Boot into the BIOS by pressing the respective key for your PC.
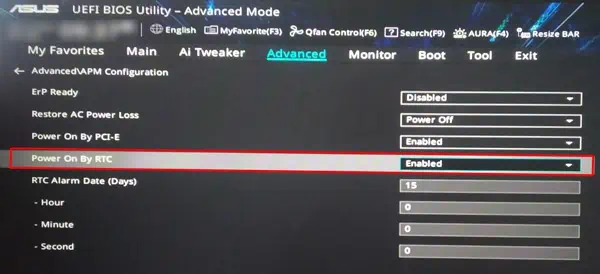
- Go to Advanced Options and find Power On by RTC or Wake on RTC option. Some systems may have the feature inside Power Management or APM Configuration.
- Click on it to Enable.

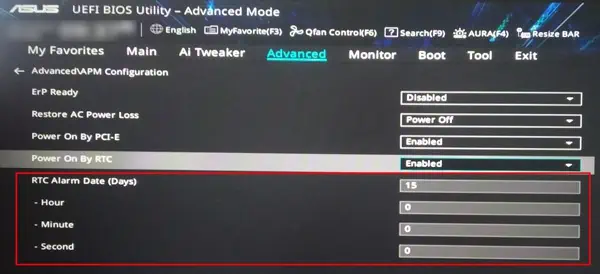
- Look at your motherboard’s manual or manufacturer’s website to find what time format it uses. For instance, the ASUS motherboard uses a 24-hour format.
- Set the time accordingly. For instance, on the ASUS motherboard, if you want to wake your laptop every day at 9:45 AM, set 0 in the day, 9 in hours, and 45 in minutes.

- Press F10 or the respective key to saving the settings.
This method can be most convenient for you if you use your laptop at a fixed time every day.
Enabling Wake on AC
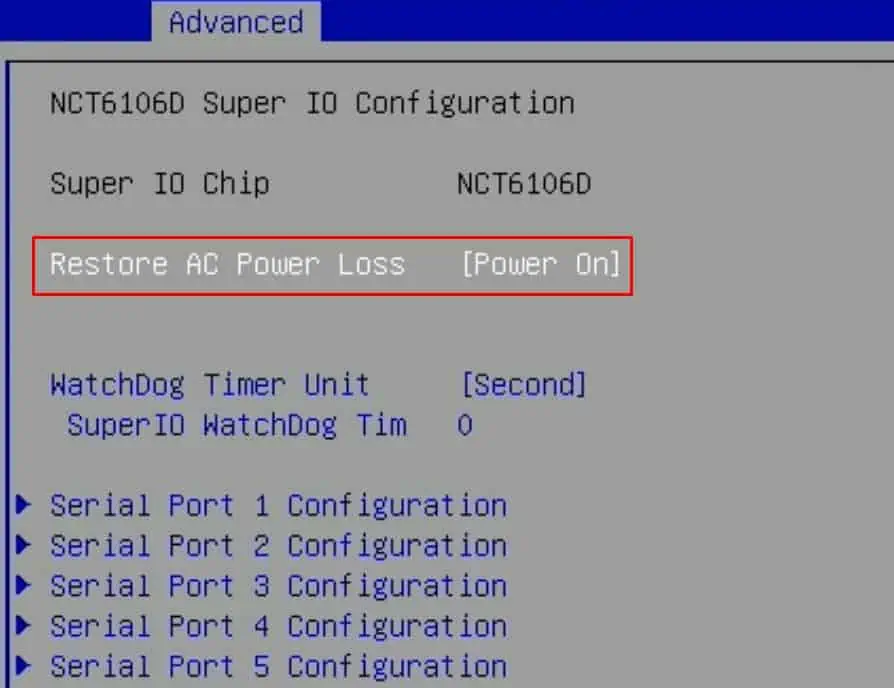
Most laptops’ BIOS has a feature to automatically wake the PC after plugging the charger. If you cannot use your power button, you should enable this function in BIOS.
Let’s see how you can do it.
- Boot your laptop into the BIOS page by pressing F2, Delete, or the respective key.
- Go to Advanced Options and find Wake on AC or a similar option.
- Enable it and press F10 to save the settings.

You can simply insert your charger to start your PC from the next session.
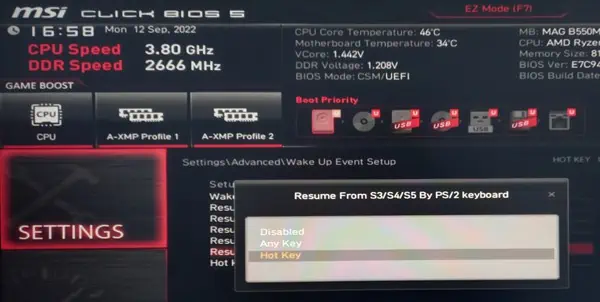
Enabling Wake by Keyboard
You can also turn on your PC by specifying a hotkey on your keyboard. However, this may not always work if your system is completely shut down.
Let’s see how you can enable this.
- Get into the BIOS by pressing the associated key.
- Select the Advanced Options menu and find the Wake by Keyboard, Resume From Keyboard/Mouse, or USB Wake option.

- Set the hotkey if prompted.

- Save and Exit the BIOS settings by pressing F10 or the associated key.
You can use the hotkey to start your system from the next reboot.


