Are you tired of your family or friends always snooping around your phone? Well, these instances can be extremely frustrating, especially when confidential data is stored on your devices.
For these cases, a privacy screen is an easy way to create a little extra seclusion and can help hide your confidential information from the watchful eyes of prying individuals.
If you have already applied a privacy screen protector on your iPhone device, but want to go the extra mile of securing your data, then there are a few settings tweaks you can make on your iOS devices.
So, in this article, let us learn about the different methods you can apply to take control of your device by protecting your data on your iPhone and iPad.
How to Turn on Privacy Screen on iPhone and iPad?
The best option for creating a privacy screen functionality is to keep all your apps locked. However, unlike Android devices, iPhones do not have a direct way to lock apps. Nevertheless, you can still apply a few workaround methods for this issue. You can use shortcuts, guided access, limit screen time, and more.
So, let us explore each of these methods in more detail below.
Create Password for iPhone
Before we begin the app lock methods, please ensure you already have a lock screen password set up for your device. We suggest you make a strong pin code that is not easy or predictable to hack. Also, depending on your iPhone model, you can access Touch or Face ID. So, you can have these features enabled for easier access.
Here are some steps you can follow.
- Open the Settings app from your device.
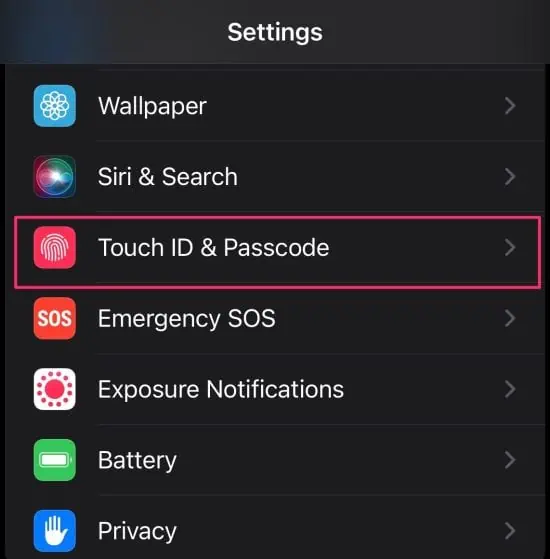
- Select the Touch ID/Face ID & Passcode option.

- Scroll down and tap on the Turn Passcode On option.
- Enter in your passcode and re-enter to confirm it.
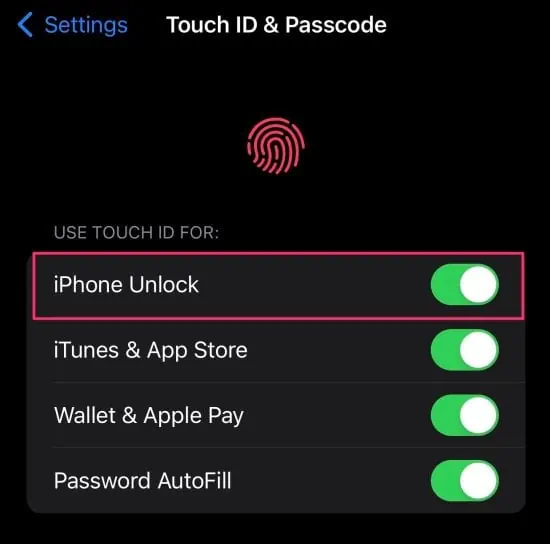
- Now, from the same page, under the Use Touch/Face ID section, toggle on the iPhone Unlock option.

- Here, follow the on-screen instructions, and you are all set!
Hide Default Apple Apps
If you have certain default Apple apps that you want to hide from your device, then enabling the content and privacy restrictions feature can be the perfect method for you to apply. This method is a bit different in comparison to locking apps. After disabling the app from this setting, you will not see it on your device even if you do a thorough search.
Here are some step-by-step guides you can follow.
On iOS 12 and Newer Versions
- Launch the Settings app from your device.
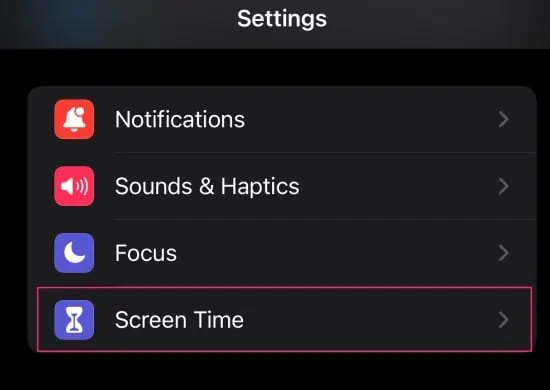
- Tap on the Screen Time option.

- If you have not enabled screen time, tap on Turn on Screen Time and follow the on-screen instructions.
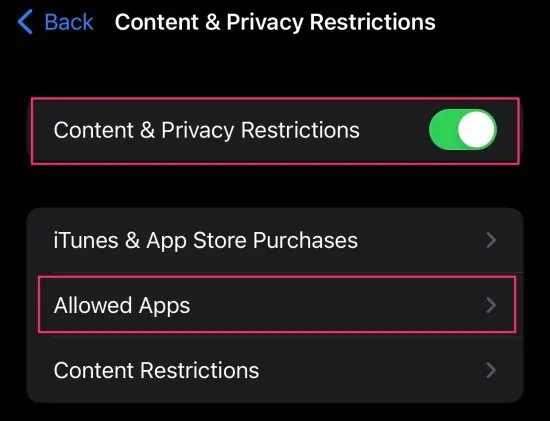
- Scroll down and now tap on Content & Privacy Restrictions.
- Enable the toggle for Content and Privacy Restrictions.
- Now, tap on the Allowed Apps option.

- Disable the toggle for the app you want to hide from your device.
- Now, exit out of the Settings to see the changes.
On iOS 11 and Older Versions
- Open the Settings app.
- Scroll down and tap on General.
- Now, scroll down again and tap on the Restrictions option.
- Enable by switching the toggle for Restrictions.
- Enter in a new password and re-enter to confirm the passcode.
Enable Guided Access
The guided access is a handy feature that allows you to keep your iPhone within a single app. As a result, it makes sneaking into your other apps impossible if you don’t have the needed passcode, touch id, or face id to exit out of this function. So, to enable this feature, here is what you need to do.
Set Up Guided Access
- Open up the Settings app from your device.
- Scroll down and tap on Accessibility.
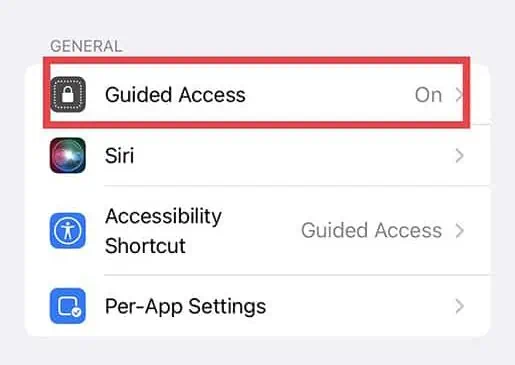
- Again, scroll down and under the General section, tap on the Guided Access option.
- Turn on the toggle for Guided Access.

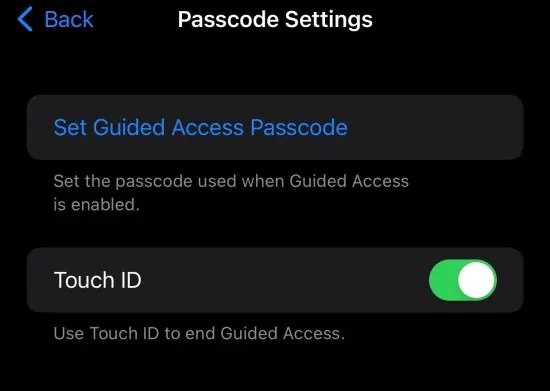
- Tap on the Passcode Settings option.
- Click on the Set Guided Access Passcode.
- Enter in your passcode and re-enter to confirm it.
- According to your iPhone or iPad model, you will see either the Touch ID or Face ID option. So, turn on the toggle if you want to end guided access by using these features.

Use Guided Access
- Head over to the preferred app of your choice.
- To activate guided access, triple tap the home button or power button.
- Tap on the Start option located in the top-right corner.
- Now, you won’t be able to exit out of the screen or switch to other applications.
- Similarly, To exit out, you can triple-tap on your home button or power button.
- Enter your passcode or exit through your Touch ID or Face ID.
Use Shortcuts
Alternatively, another useful way to lock apps is to create shortcuts that automate automatic locks when entering a specific app. You can initiate this process in single and multiple apps. This process is also quite easy to follow as you only have to configure it in shortcut settings and adjust them in your clock app.
Here is how you can do it.
Create App Lock Shortcut
- Locate and launch the Shortcuts app from your device.
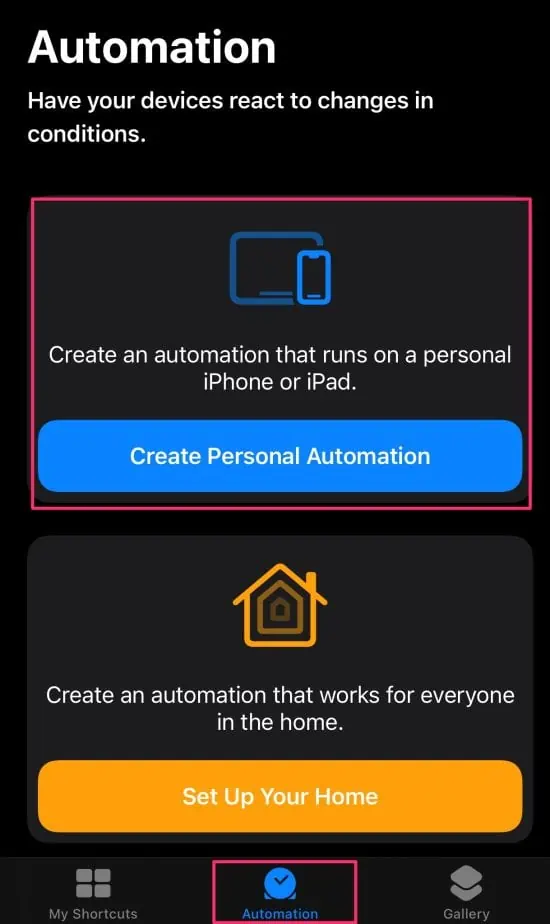
- Switch to the Automation tab and tap on the Create Personal Automation button.

- Scroll down and tap on the App option.
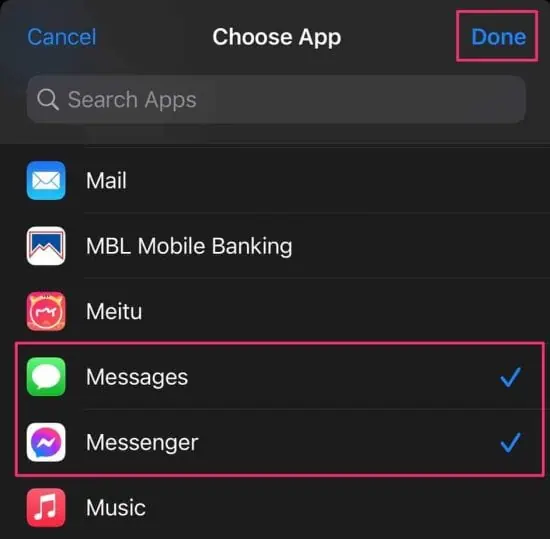
- Now, tap the Choose option to select the apps you want to lock.
- Once you have chosen the app, click on the Done button.

- Tap on the Next button from the top-right corner of your screen.
- Now, tap on the Add Action button.
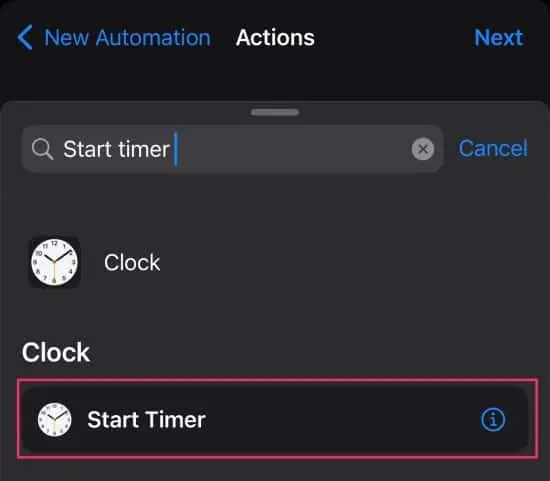
- Now, from the search box, type in Timer.
- Select the Start Timer option from your results.

- Now, change the time to 1 second from the drop-down options and hit the Next button.
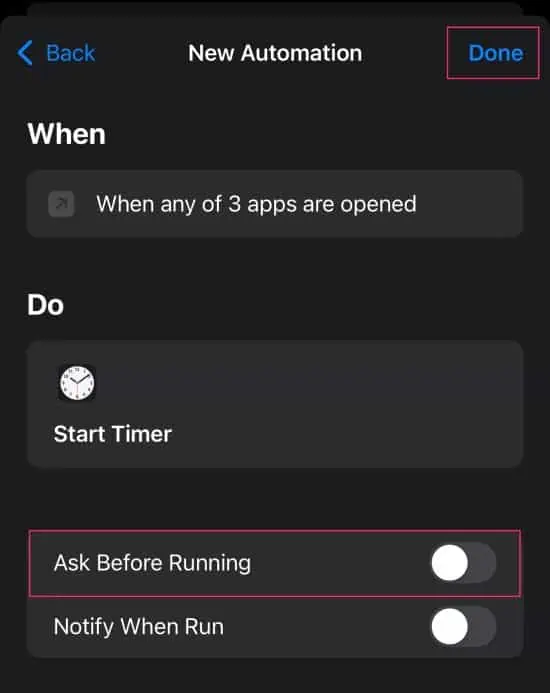
- Turn off the toggle for Ask Before Running.

- Finally, click on the Done button.
Configure in Clock App
- After the automation is set up, head over to the Clock app.
- Switch to the Timer tab located at the bottom section.
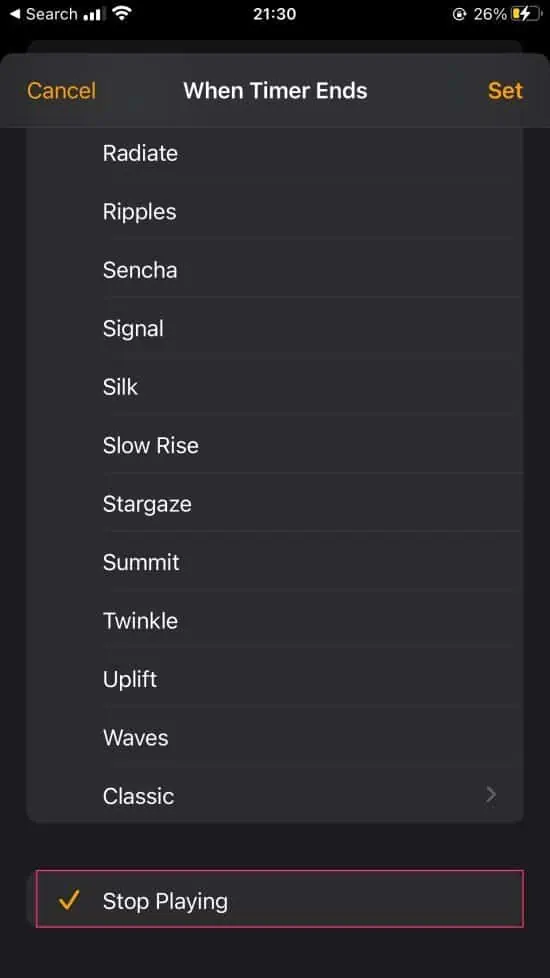
- In the When Timer Ends section, tap and scroll down to the bottom and select the Stop Playing option.
- Finally, click on the Set button to apply the changes.

Now, head over to the app you just locked via shortcuts to test it out. It will briefly open for a second but will immediately lock your phone. So, to access it, you will have to unlock your phone by either face ID, Touch ID, or passcode.
Enable Screentime Limits
If you want to allocate a specific time frame to use certain apps, then enabling a screentime limit can be extremely helpful. After the set time has expired, your iOS device will be locked, and you’ll be asked to enter the passcode to continue using the app.
Here is how you can enable screentime limits.
- Launch the Settings app from your device.
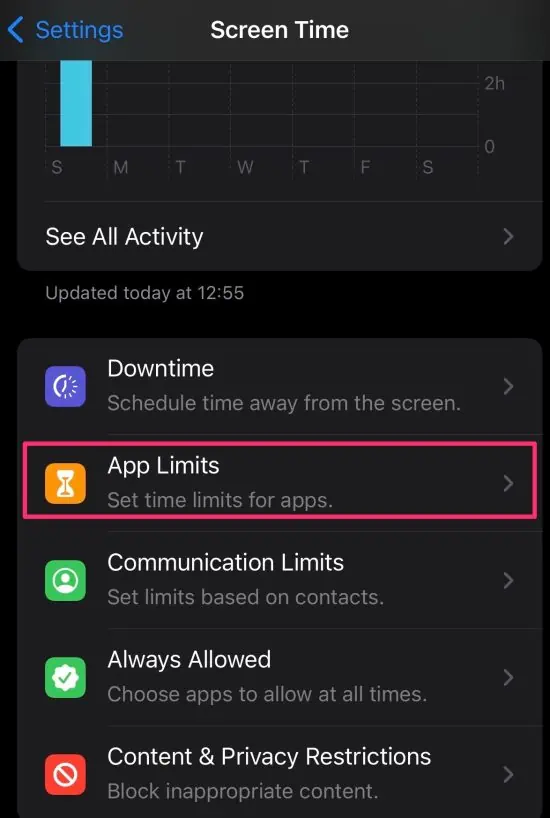
- Tap on the Screen Time option.

- Scroll down and tap on Use Screen Time Passcode.
- Enter in your passcode and re-enter to confirm it.
- If you do forget your screen time passcode, you can use your Apple ID to reset it.
- Simply, enter in your Apple ID and password and hit the OK button.
- Now, scroll up and tap on App Limits.

- Tap on the Add limit option.
- Enter in your Screen Limit Passcode.
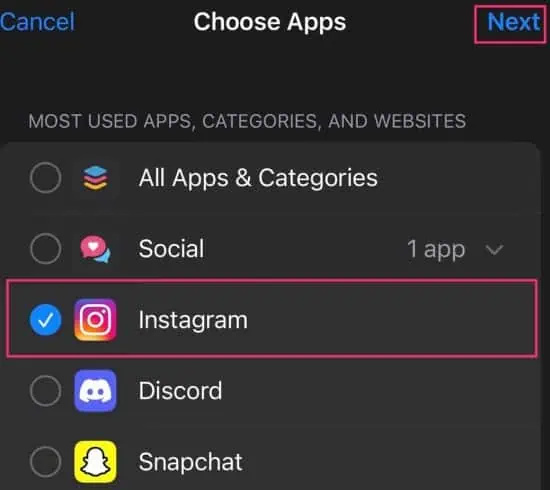
- Now, tap the category and select the app you want to lock.

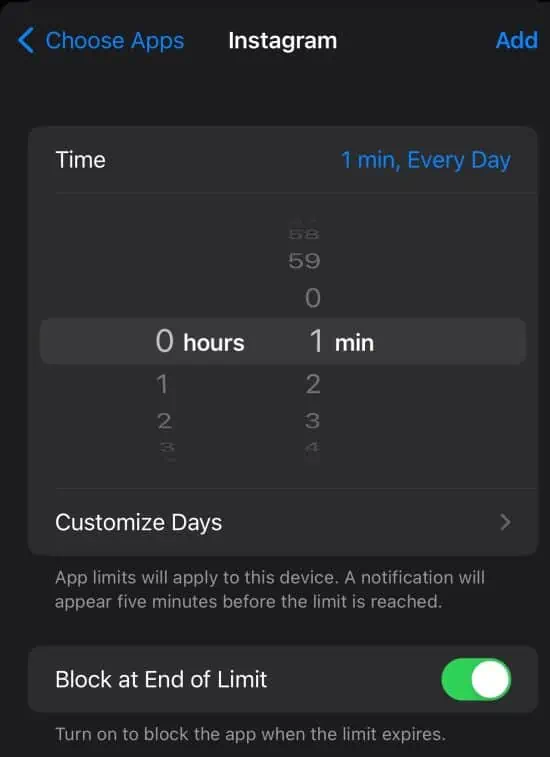
- Click on the Next button. Set the timer to 1 minute.
- Now, ensure that the toggle for Block at end of Limit is turned on.
- Finally, click on the Add button to apply the changes.

Use Built-in App Settings
Some apps from your App Store come equipped with a privacy screen feature built-in to their system. These apps include Google Drive, Outlook, Paypal, Whatsapp, and most finance or banking apps. Finding the privacy screen feature will require scouring the app’s settings, and you will likely be able to conde it with a passcode, Touch ID, or Face ID.
Use Third-Party Applications
Another plausible way to secure your phone is to install third-party applications on your iOS devices. Some of the more popular apps include AppLocker and Bio-Protect. However, with these apps, you will have to jailbreak your iOS devices which can possibly put your devices at more risk. So, please only use these options as a last resort.

