When purchasing new hardware to boost a network’s coverage, the general recommendation is to go for a dedicated Access Point (AP). In practice, though, people often go for routers instead, as routers with similar specs tend to cost way lesser than APs.
You don’t necessarily have to purchase a new router, either. Even when you’re working with older routers that don’t support AP as an operating mode, you can still repurpose it as an access point with some extra steps.
What is An Access Point?
An Access Point, also called a Wireless Access Point (WAP), is a networking device that allows client devices to connect wirelessly to a local area network. You may be wondering, doesn’t a router also do the same?
Well, kind of. The main function of a router is routing, i.e., directing traffic between networks. But wireless routers these days also handle various other tasks (switching, DHCP, firewall, etc). Through a wireless radio component, routers also include the functionality of an AP.

Dedicated APs have their uses too. Their compact form factor and portable nature make them easily mountable. They offer a high degree of control and customization options and are also rapidly deployable, which makes them popular in business settings.
However, in this article, we’ll focus on using routers as access points. Routers can operate in various modes, but the ones currently relevant to us are Router mode and AP mode.
Router mode, as the name implies, is where the device functions as a router and handles the various functions we talked about earlier. In contrast, AP mode is where the device only acts as an access point that allows other devices to connect to the network.
How to Use a Router as Access Point?
Setting up most routers in AP mode is very simple. Here are the necessary steps:
- First, grab the secondary router that you want to use as an AP. Hold the reset button for around 10 seconds to reset it.

- While it resets and restarts, note the default router IP and login credentials from the back of the router.

- Next, use an Ethernet cable to make a LAN port to LAN port connection with the main router.
- Connect any device to the secondary router’s network (either through Ethernet or WiFi).
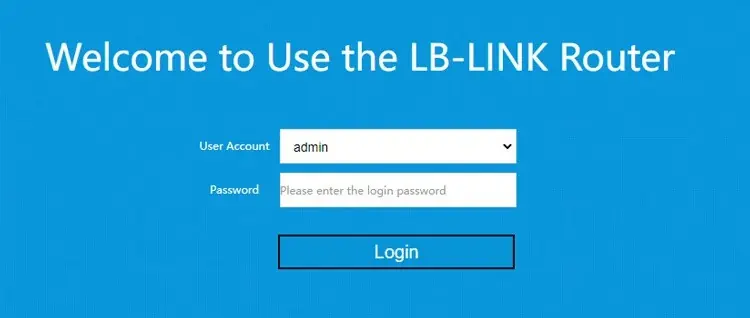
- Launch a web browser on this device and enter the IP address from Step 2 into the URL bar. Then, enter the router credentials to log in to the setup page.

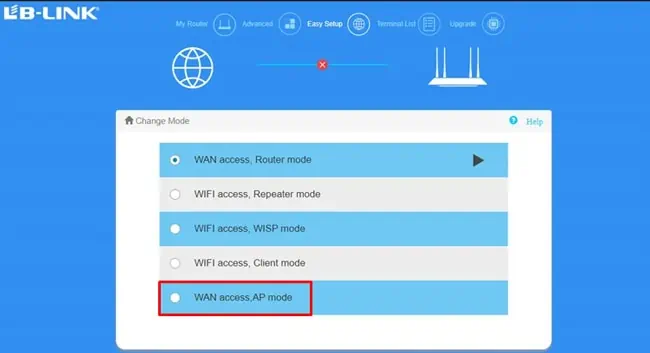
- You should land at the Quick Setup screen. If you don’t automatically land there after logging in, go to the Setup tab manually. Then, select Access Point as the operating mode here.

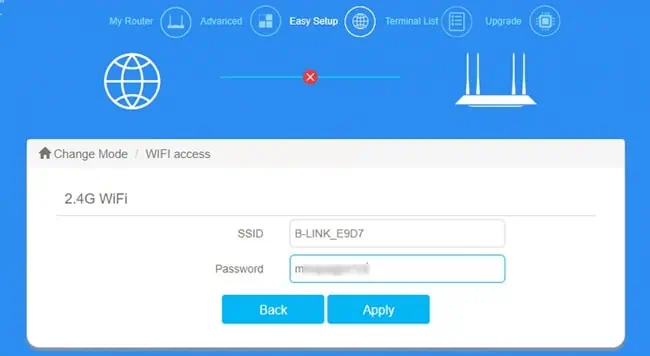
- On the next screen, enter the SSID and password for the new WiFi network.

- Once that’s done, the setup process will be complete, and the secondary router should be operating as an AP now.
What if Your Router Doesn’t Support AP Mode?
On older routers, AP mode may not be supported. We recommend checking the firmware update logs on the manufacturer’s site in such cases. If a recent firmware update has introduced the AP functionality, you could upgrade the firmware and follow the steps listed above.
An alternative method is to manually set up your router as an AP with some extra configurations. If you make a LAN to WAN port connection from the main router to the secondary one, all you need to do is configure the wireless settings afterward.
This method isn’t ideal, though, as it introduces double NAT, which can be a problem for things like Port Forwarding and UPnP. Instead, you can make a LAN-to-LAN connection and use a slightly longer process, as demonstrated below:
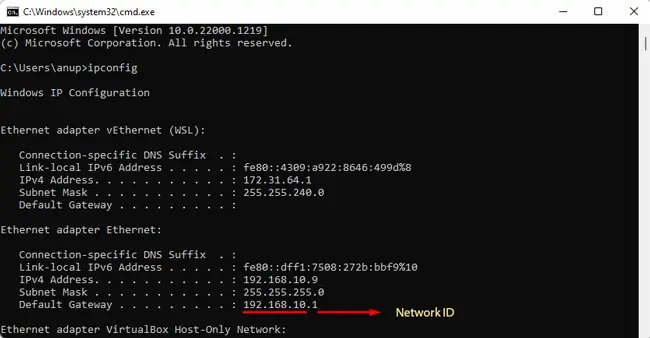
- First, find the IP address of your primary router. You can check the back of the router or use tools like
ipconfigfor this. You should be able to figure out the network ID here.
- Now, follow Steps 1-5 from the previous section.
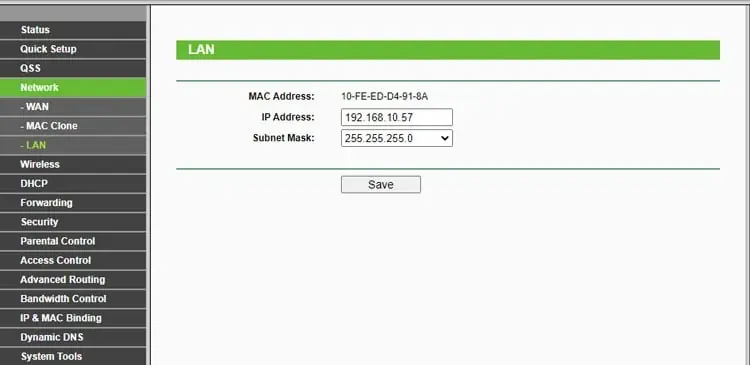
- On the secondary router’s setup page, go to the Network or similar tab. Look for the LAN section here.
- Set a Static IP for the LAN interface. When doing this, make sure that the Network ID matches that of the primary router so that it’s in the same subnet. Also, make sure this new IP address falls outside of the main router’s DHCP scope.

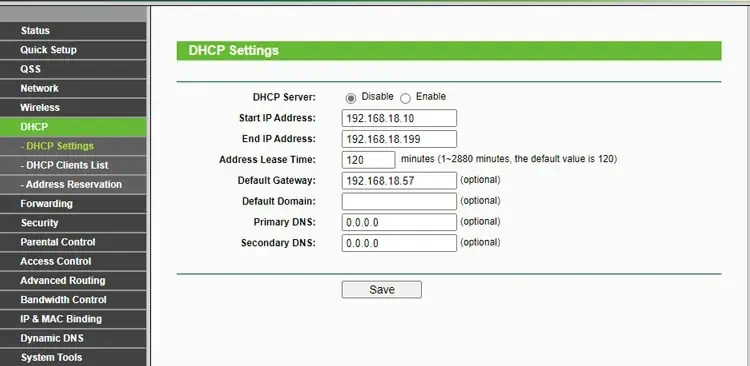
- Now, go to the DHCP section and disable the DHCP server option.

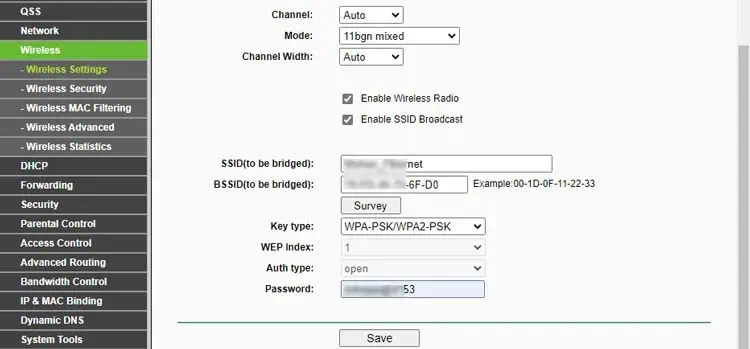
- Finally, switch to the Wireless or WLAN tab.
- Configure the wireless settings to your preference here. This includes the SSID (network name), password, encryption, etc.

- Save the changes and restart the router one more time. Once that’s done, you should be able to connect to the new network.
Router as Access Point with Same SSID

Setting up a secondary router as an AP creates a new network. One minor issue with this is that when moving around the building or something, there will be locations where your device will remain barely connected to the main network.
This happens even though the secondary network offers a better signal and performance at that spot. Or vice versa with the secondary and main networks.
The easiest way to remedy this is obviously by manually connecting to a better network when necessary. The second option is to set up the routers in bridging mode, which extends the main network under the same SSID.
Your device should theoretically connect to the AP with the best signal, but in practice, the effectiveness may vary. If you’re willing to splurge a bit, we recommend looking into mesh systems for the best results.
ISP-provided Router/Modem Combo
One common scenario we often get mailed about is that users receive a low-quality modem-router combo device from their ISP which affects their network’s performance. Since they have a better router available or are willing to purchase one, they want to know what the best way to proceed is.
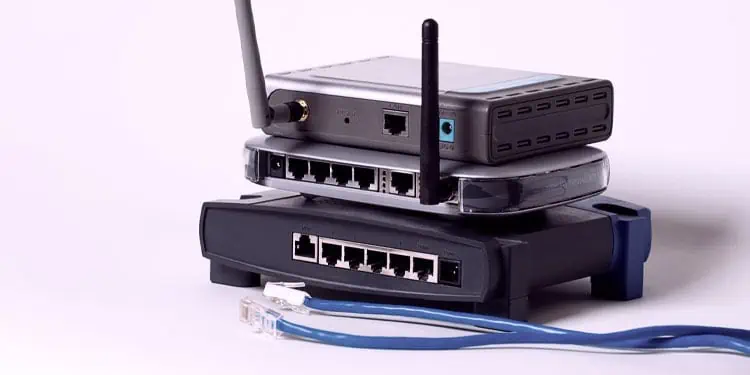
For such cases, we recommend contacting the ISP for help configuring the combo device in bridged mode. This will yield the best results as you’ll be able to use the higher-end router as a router instead of an AP.
If this isn’t possible, you can use the steps from this article to set up the second router as an access point. This isn’t ideal, but atleast you’ll still get the benefit of extended network coverage.


