When overclocking a CPU, the idea is to increase the voltage to achieve a higher clock speed. But that leads to overheating and can affect the overall lifespan of the CPU.
That said, the safest choice to reduce the temperature without affecting the performance is undervolting the CPU. The steps are almost similar to overclocking:
- Stress test the CPU at your current OC/stock settings.
- Enter BIOS or use any other relevant utility to lower the Core Voltage Offset.
- Stress test the new setting and ensure it doesn’t crash.
- Also, compare the temperature, voltage, and overall score with the benchmark test.
- Increase the voltage if your system crashes and repeat the steps.
- If your PC passes the stress test, keep decreasing the offset voltage until you find the sweet spot.
That’s one strategy. You can even tweak other voltage options to see how it works out for you.
Here, I’ll guide you with the easiest ways to undervolt a CPU and even share my experiences on different systems.
From BIOS
Trust me, this is the most reliable option. The only hassle is getting to BIOS each time to tweak the voltage setting.
Also, note that the exact steps depend on what motherboard you have as the UEFI interface varies by manufacturer.
Without further ado, let’s get into the steps:
- First, use any benchmark utility (Cinebench, UserBenchMark, FurMark, etc.) to stress test your CPU.
- Also, open a hardware monitoring utility (HWMonitor, HWiNFO64, AIDA64, etc.). Keep your eyes on the temperature, voltage, power, current, and clock speed. Note them for future reference.
- Now, enter the BIOS utility:
- Navigate to the Voltage Settings. As I stated earlier, the option is going to vary. Look and navigate to any of the following:

- Advanced Voltage Settings > CPU Core Voltage Control (usually on Gigabyte)
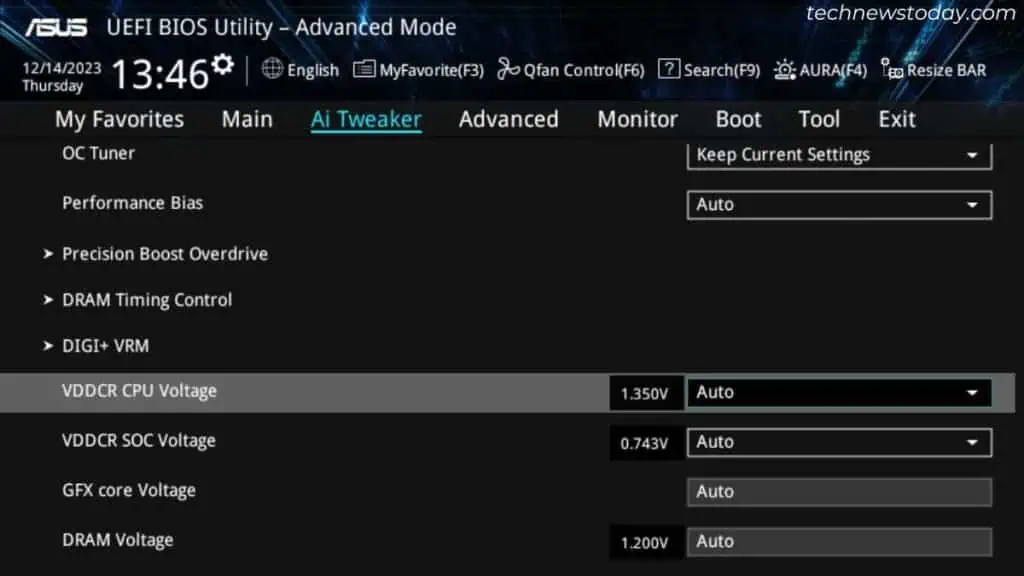
- Ai Tweaker > VDDCR CPU Voltage (usually on ASUS)
- OC > Voltage Setting > CPU Core Voltage (usually on MSI)
- OC Tweaker > Voltage Configuration > CPU Core/Cache Voltage (usually on ASRock)
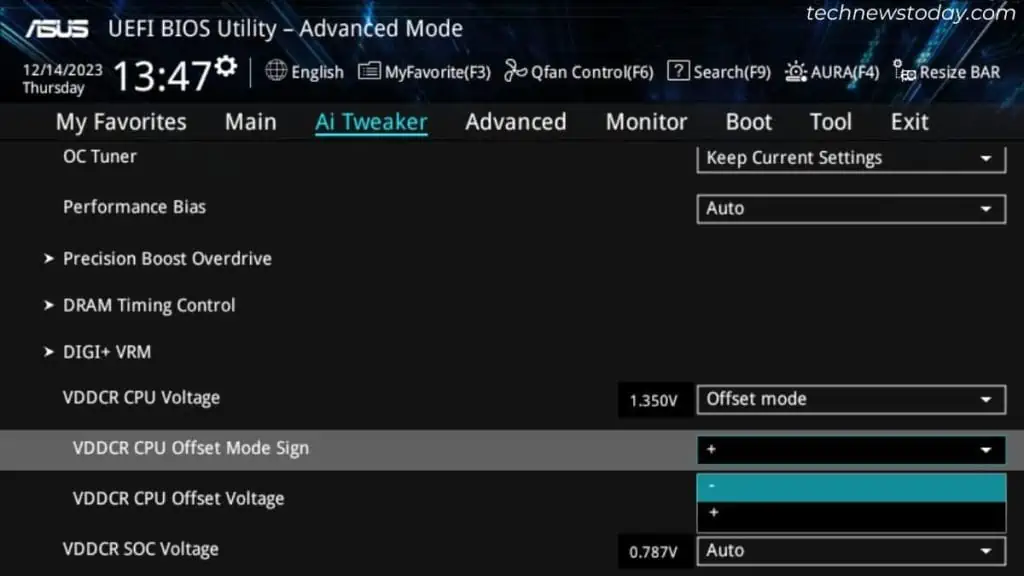
- The idea is to set this option to Offset mode. This will dynamically adjust the voltage depending on the CPU load.
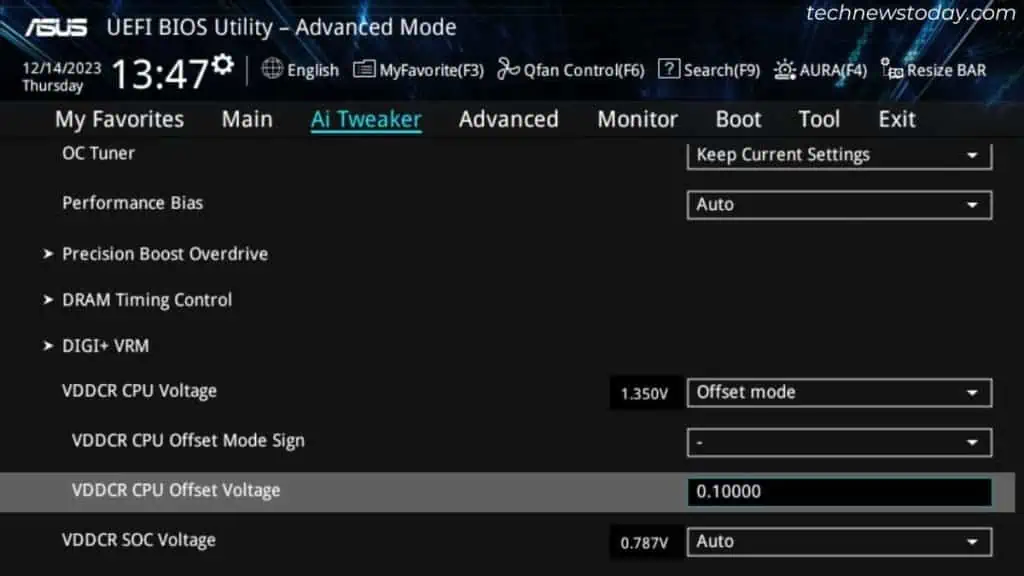
- Make sure the Offset Mode sign is negative.

- Now, follow any of the below approaches. Stress test and compare the values to the benchmark after every configuration:

- Set a higher value (-0.1 or -0.2). The strategy is to try to trigger the WHEA_UNCORRECTABLE_ERROR BSOD error. Then, we’ll start increasing the voltage until we find stability.
- Start from a lower value (for example, -0.015) and keep decreasing until your system crashes at a certain point.
Note: While you may configure the ‘Override’ option, this will make the voltage stable at all times (even when the CPU is at low load). Only go for this if your BIOS doesn’t support the Offset mode.
My Test Results:
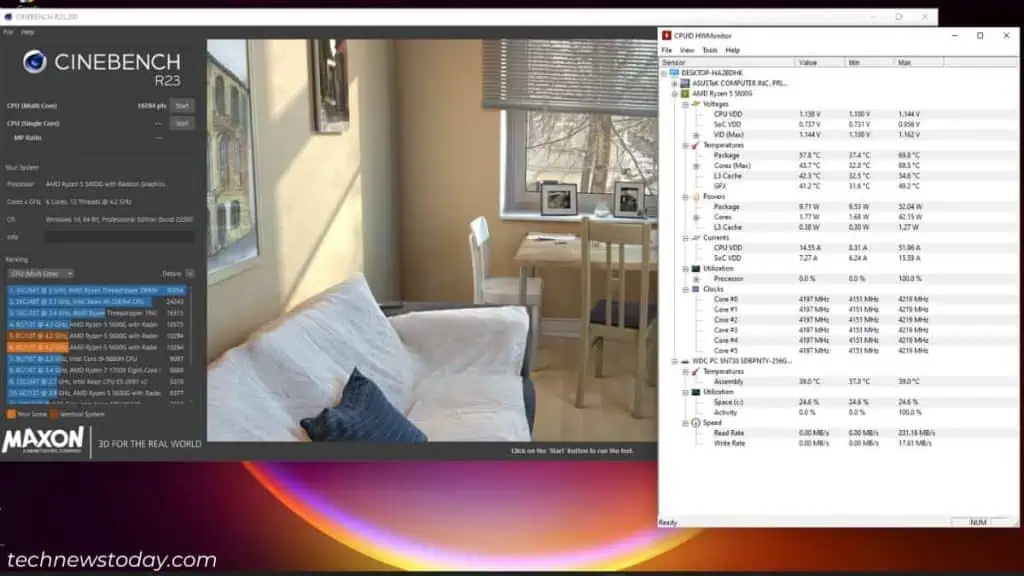
On my ASUS PRIME B450-PLUS with Ryzen 5 5600G APU, the 4200 MHz overclock overheated the processor to more than 95 degrees (max. voltage recorded = 1.44 V).
I’ve posted the highlights of my test in the table below. I wasn’t just able to decrease the temperature but even got a slight performance improvement, thanks to undervolting.
That’s because my Ryzen processor was thermal throttling in the previous OC setting, and couldn’t run at the clock speed it was meant to reach.
After the reduction in the temperature, there was no thermal throttling, so it was able to reach a slightly higher speed.
After testing out a few games, the sweet spot for me was the -0.275 offset.
| Voltage Offset (-) | Max. Voltage (in V) | Max. Temp (in °C) | Max. Speed (in MHz) | Max. Power Consumption (in W) | Cinebench Multi-Core Score |
| 0.085 | 1.356 | 86.1 | 4206 | 73.83 | 10206 |
| 0.1025 | 1.331 | 85.1 | 4230 | 72.32 | 10280 |
| 0.1165 | 1.325 | 85.4 | 4208 | 71.27 | 10310 |
| 0.125 | 1.319 | 85.6 | 4203 | 71.46 | 10278 |
| 0.20675 | 1.25 | 77.6 | 4210 | 63.27 | 10294 |
| 0.275 | 1.162 | 69.8 | 4219 | 52.04 | 10284 |
| 0.2875 | 1.156 | 71.8 | 4208 | 50.35 | 10276 |
Similarly, on my MSI MAG B550M MORTAR, I undervolted the Ryzen 7 5700G APU by -0.09 V.
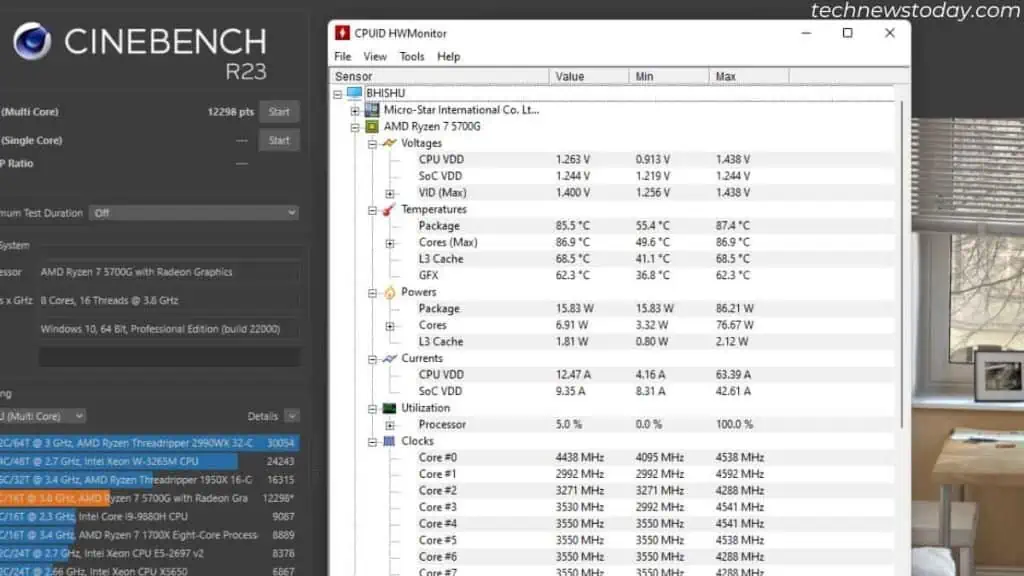
Here, the temperature used to hit more than 100 degrees (quite concerning!) at 1.438 V. With my new settings, the temperature doesn’t go beyond 88°C at 1.344 V.
Using CPU Utility
If your BIOS is missing the Offset option or is greyed out, you may opt for an OS utility. Choose the appropriate application depending on what processor you have.
Both the Intel Extreme Tuning Utility and AMD Ryzen Master offer enhanced user interfaces. Without getting to the UEFI/BIOS utility, you can easily overclock and undervolt your CPU or APU.
In fact, these are extremely helpful utilities for laptop users to reduce the temperature without making any physical changes. But keep in mind that your processor should be unlocked.
There’s no need to worry as you’re just going to lower the voltage. Even if you’ve undervolted too much, it just means the CPU is not getting enough power (which is pretty normal).
Restart your PC and the utility automatically sets the voltage to default.
Intel Extreme Tuning Utility (XTU)
Team Blue users can make use of the performance-tuning XTU software. Before downloading, make sure you check whether your CPU is listed under the ‘Supported products’ list.
Launch the tool after successfully installing it. You can utilize either the Compact or Advanced View to configure the Core Voltage Offset.
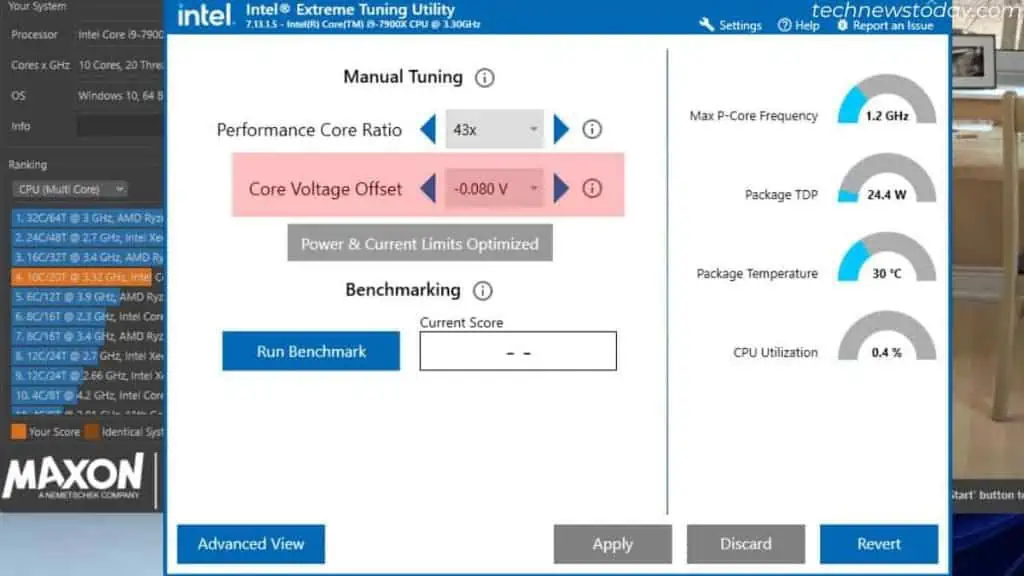
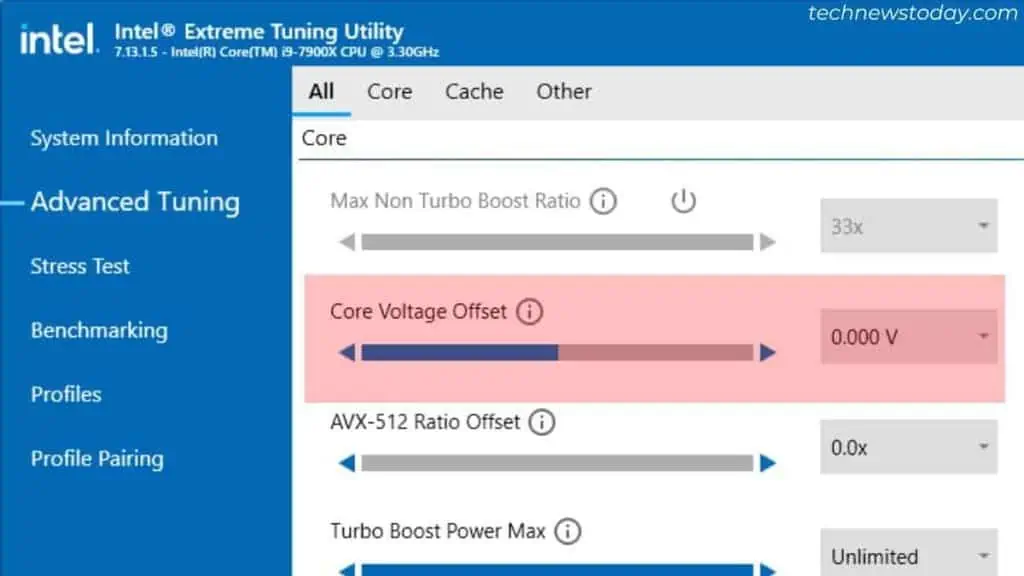
For undervolting, click on the left arrow. It should decrease the offset value by 0.01. Hit the Apply button to save changes and use Revert to set the value to default.
This utility even lets you stress test the processor and monitor the CPU utilization, frequency, TDP, and temperature. However, I’ve always preferred Cinebench and HWMonitor.
In fact, I’ve utilized the same for my test on the Gigabyte X299 UD4 Pro motherboard equipped with an i9-7900X CPU. However, I was only able to reduce the temperature by around 8 degrees on this build with very little impact on the performance.
| Voltage Offset (-) | Max. Voltage (in V) | Max. Temp (in °C) | Max. Speed (in MHz) | Max. Power Consumption (in W) | Cinebench Multi-Core Score |
| 0 | 1.3 | 95.8 | 4350 | 243.96 | 13563 |
| 0.05 | 1.205 | 93.0 | 4346 | 225.93 | 13545 |
| 0.075 | 1.129 | 90.4 | 4468 | 216.94 | 13652 |
| 0.08 | 1.125 | 87.9 | 4322 | 215.83 | 13492 |
AMD Ryzen Master
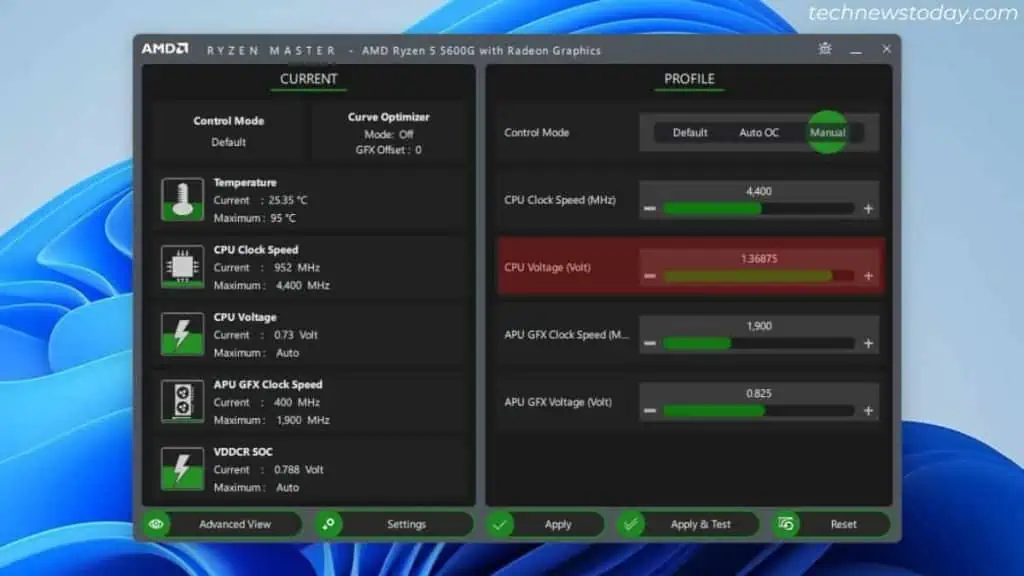
Unlike Intel XTU, Team Red users will have to manually override the voltage setting using the Ryzen Master utility. Here are the general steps if you’re in the Basic View:
- Under PROFILE, set Control Mode to Manual.
- Decrease the CPU Voltage (Volt) option to do the undervolting.

- The APU GFX voltage will adapt as per the configured CPU Voltage. So, there’s no headache on that part.
- Press Apply to save changes and use your preferred benchmarking utility to stress test the CPU.
- You can even use the Apply & Test option to stress test directly using the Ryzen Master utility.
Tip: For advanced overclocking and undervolting, use Advanced View. Along with tweaking additional voltage-related settings, you get to set multiple profiles and load them as per your needs.
While Ryzen Mater is an excellent software for hardware monitoring and quick configuration, many users have complained that it conflicted with their BIOS settings. That’s the reason I always prefer doing this from UEFI.
However, my Gigabyte B450 AORUS ELITE BIOS doesn’t offer much on voltage configuration. Even on the stock setting, I was getting too high temperature when playing FPS games (more than 85 degrees).
After undervolting Ryzen 5 5600G from 1.375 V to 1.344 V, I was able to reduce at least 10°C. At 3900 MHz, my multi-core Cinebench score was 8974 with the maximum temperature recorded at 74.2°C.
Through OEM & Third-Party Apps
Besides Intel XTU and AMD Ryzen Master, you can even utilize your motherboard’s utility to undervolt your CPU.
Visit your board’s support or download section. Check the description and download the appropriate tool for overclocking purposes.
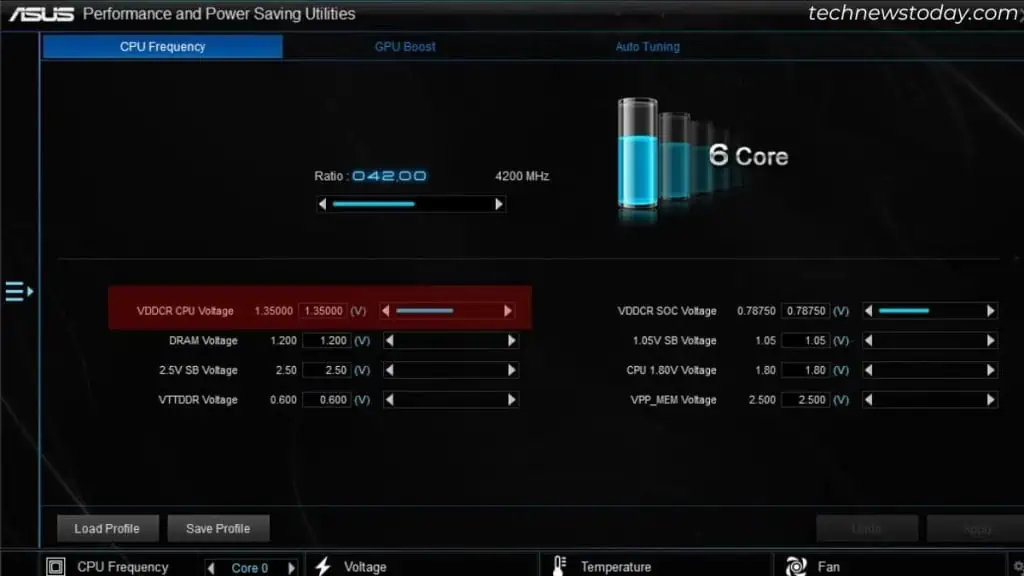
For example, ASUS offers the AI Suite application. To undervolt, navigate to TurboV EVO and here, you need to decrease the VDDCR CPU Voltage.
Similarly, ASRock users can go for the dedicated motherboard utility, which varies depending on the system model.
For my Z370 Gaming-ITX/AC, I use F-Stream. Yours might be A-Tuning. Look for CPU Core/Cache Voltage (Offset) in the OC Tweaker tab to do the needful.
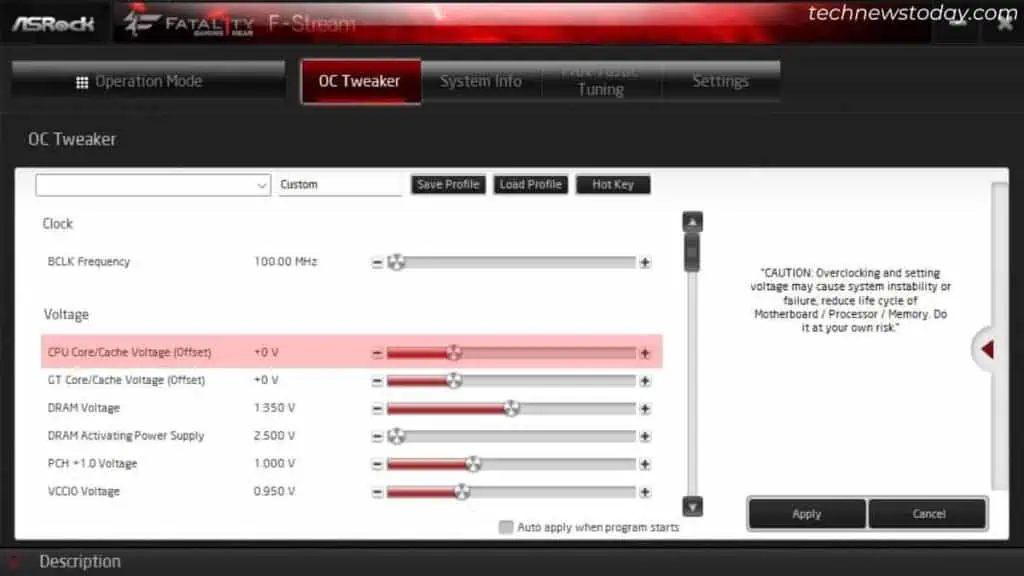
The idea is the same for all motherboards and you can use the strategies that I’ve been emphasizing throughout this article. Some of these apps even come with built-in stress testing and hardware monitoring features.
However, I’ve had unfortunate experiences when using such apps myself. When trying to undervolt using AI Suite 3 on my PRIME B450-PLUS, it kept crashing. And when I used F-Stream, the system froze and I had to force shut it off.
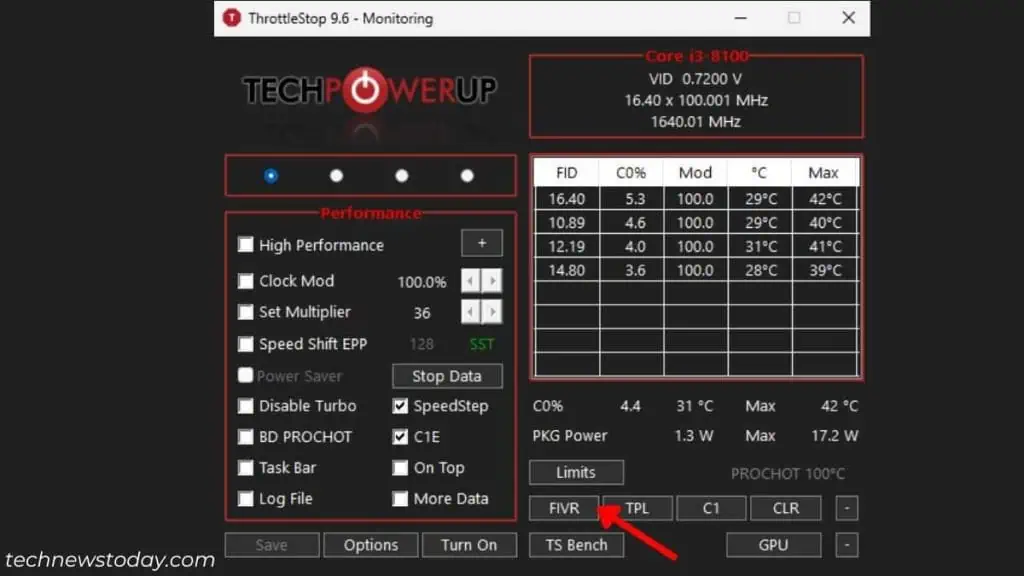
If you’re in the same boat, you may go for some third-party applications as well. ThrottleStop is a popular choice among most enthusiasts so I’ve used the same,
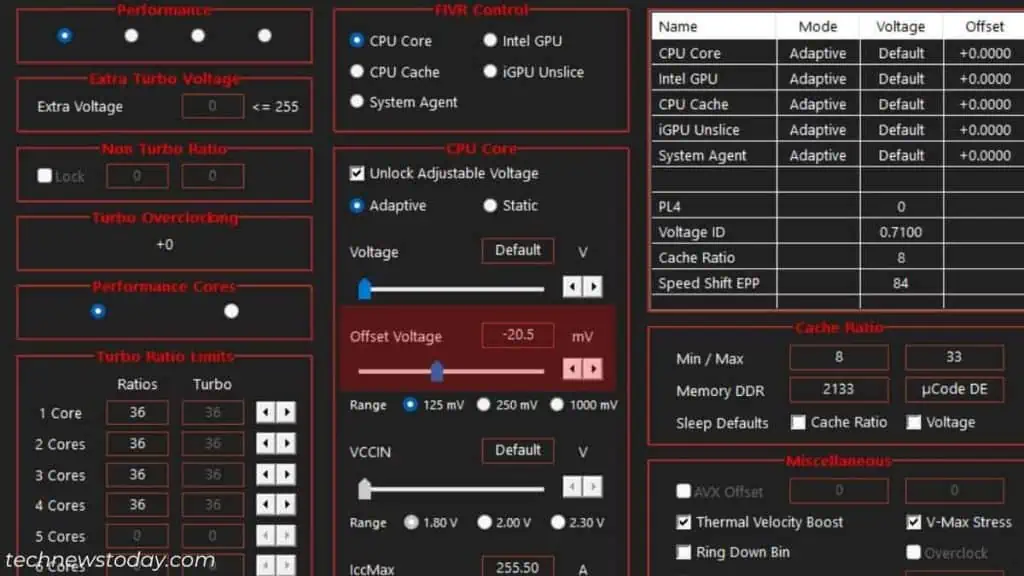
- Navigate to the FiVR option.

- Once the Turbo FiVR Control window opens up, check the Unlock Adjustable Voltage option. This is under the CPU Core section.
- Lower the Offset Voltage value in mV (milliVolts).

- Click Apply and stress test each setting until you get a satisfying result.
The downside is that this tool is only applicable to Intel users. AMD users may go for another software called Clock Tuner. But do note that it is only supported on a few Zen 2 Ryzen processors.
A Few More Things To Consider
I’ve covered the basics of how to undervolt a CPU and this should suffice for general users. But if you’re an enthusiast who wants to go for more, I advise tweaking some more voltage options to achieve better stability and higher FPS.
These settings vary on every motherboard. So, you’ll have to do some groundwork yourself. I’ll be bringing more undervolting content soon (specialized for the most popular brands – ASUS, Gigabyte, MSI, and ASRock).
Explore Adaptive + Offset and Advanced Offset modes. Try configuring the voltage to see if you get even better stability.
Also, tweak advanced voltage settings, like MESH, VCCIO, VRIN, System Agent, SOC, NB, etc. These are available on both BIOS and software-based utilities.
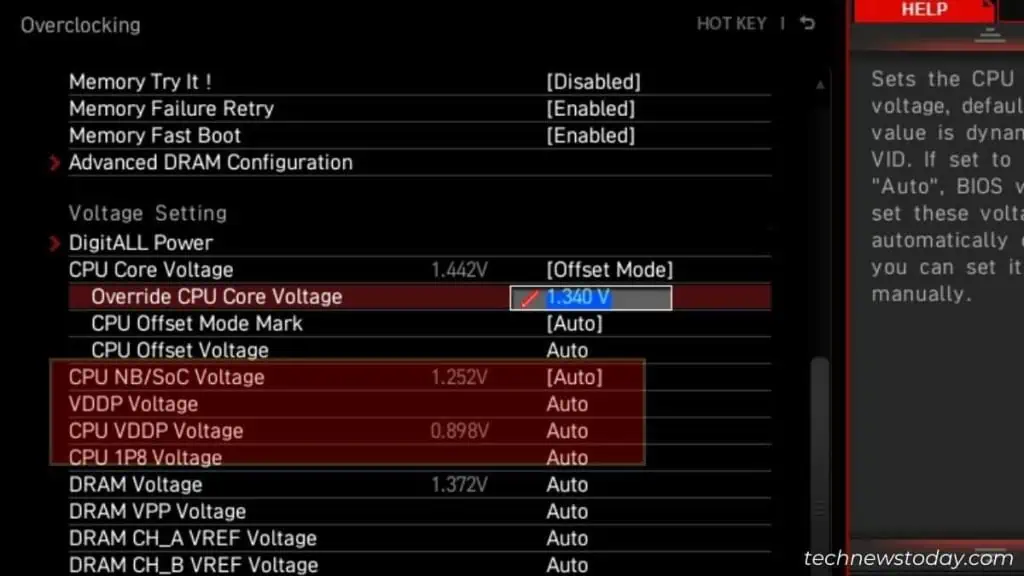
Some of the voltage options are related to memory. So, my tip is to read the on-screen description or check the respective user guide beforehand.
In case you’re facing instability issues even when tweaking voltage in a smaller range, there might be some issues with your system. Try updating your BIOS to fix this.
If the CPU temperature remains high, try setting an aggressive fan speed curve. Upgrade your cooling, change the thermal paste, and underclock (if it’s not working).
But if nothing helps, check our guide on delidding the CPU – this has helped a lot of users reduce temperature to some extent.
For avid gamers, I even recommend undervolting your GPU. This is extremely helpful as it helps reduce power consumption and fix the overheating problem with the component.

