You can easily uninstall a driver using the Device Manager utility in Windows.
But simply removing the driver may not completely get rid of the driver files. You also need to remove device driver packages using the Disk Cleanup utility.
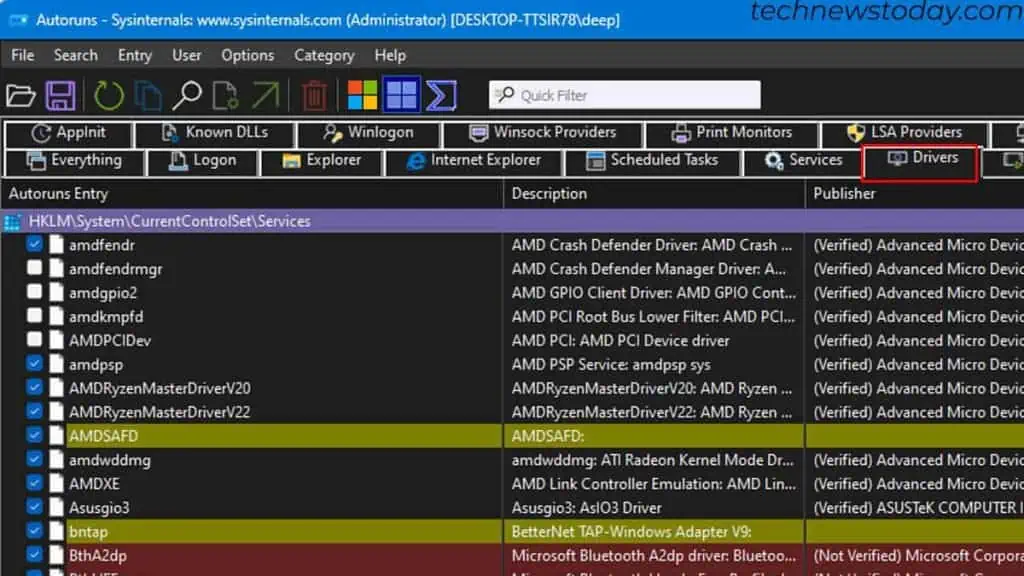
To remove drivers that operate in kernel mode, use a special utility from Microsoft, named Autoruns.
Uninstall Driver from Device Manager
The device manager keeps track of all the devices connected to the system and even its drivers. And the easiest way to uninstall a device driver is through Device Manager.
However, this method does not completely remove the driver files. So, opt for this only if you’re looking to reinstall a specific driver.
When you restart the system or scan hardware for changes, the OS will automatically install any drivers available in the system files. If the driver files itself is corrupted, you can run SFC and DISM to repair them.
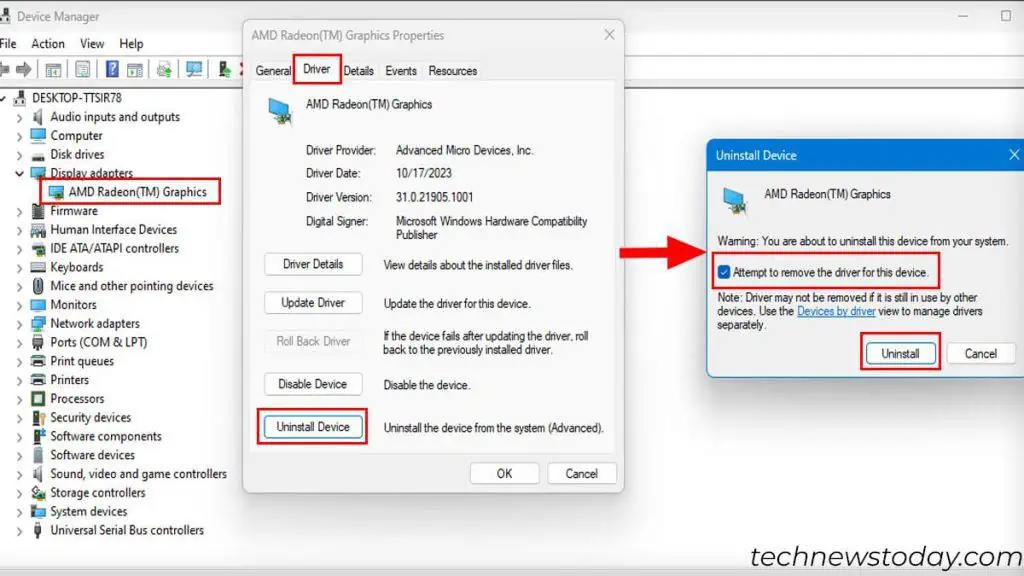
- Press the Windows + X key and click on Device Manager.
- Here, you need to expand and find the device whose driver you want to uninstall.
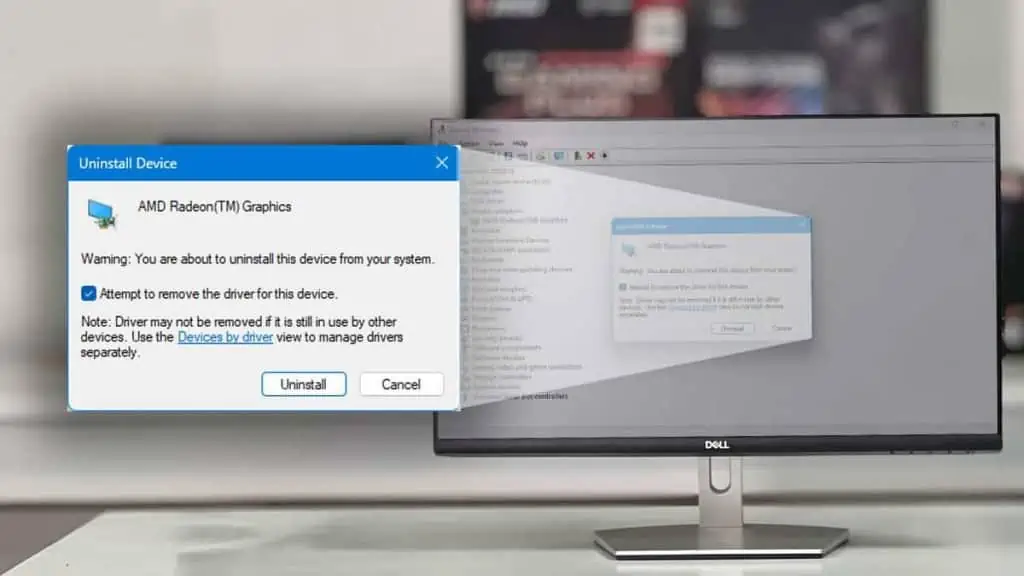
- Once you’re ready, double-click on it. Go to the Driver tab and click on Uninstall Device.
- Check Attempt to remove the driver from this device, if available.
- Select Uninstall.
You can also find hidden devices in the Device Manager. These are unused devices that you have previously connected to the system.
Although the device itself is not present, its drivers can cause conflict with existing ones. So, it’s best that you remove them as well.
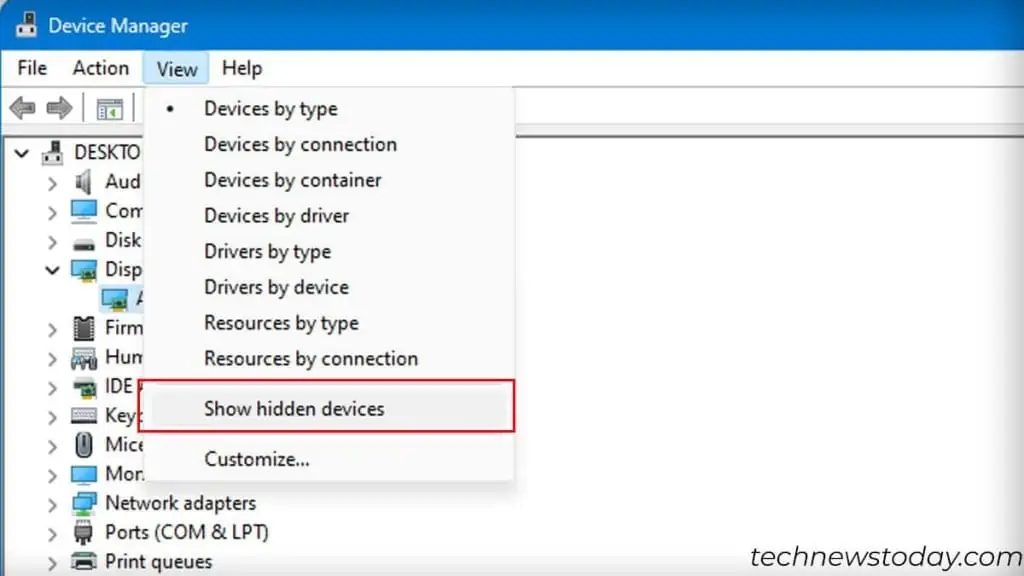
- In Device Manager, click on View.
- Select Show Hidden Devices.

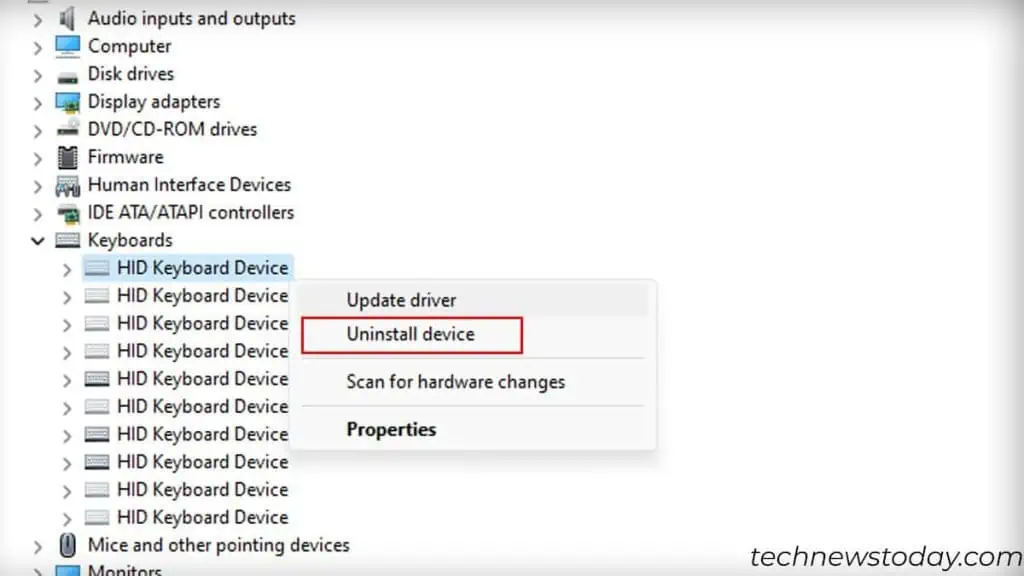
- Now, expand an item on the list, here you will see devices faded out. Right-click on it and select Uninstall Device.

- Depending on the device you choose, you might see an option to Attempt to remove the driver from this device. Check it if available.
- Click on Uninstall.
Remove Device Driver Packages
Windows keeps a copy of previously installed driver packages. Installing new drivers will not remove these driver packages.
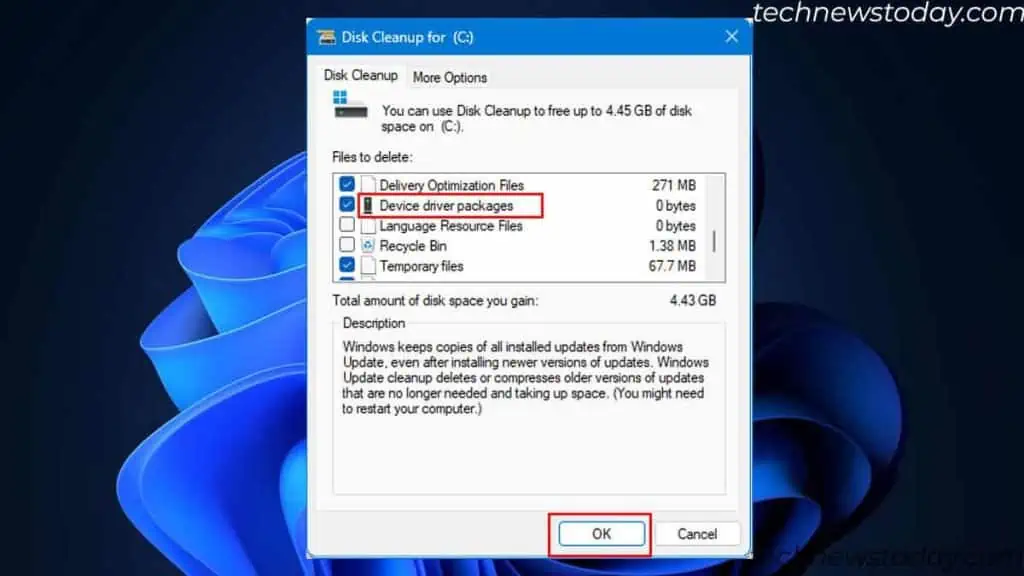
If you want to completely remove the previous drivers, you can get rid of them using Disk Cleanup:
- Open Run, type
cleanmgr, and press Enter. - Select the C drive and click OK.
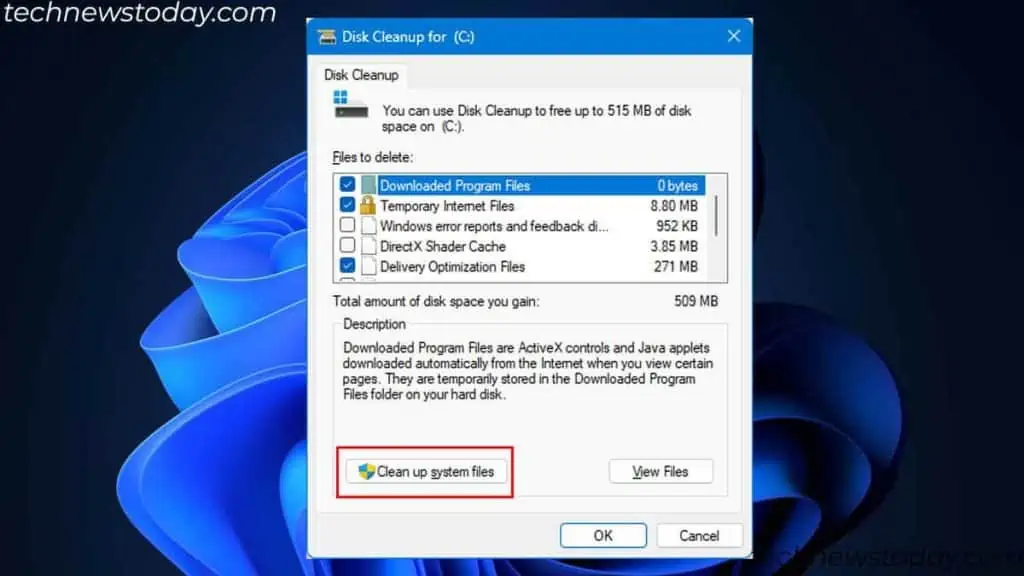
- Click on Clean up system files.

- Again, select C drive, and select OK.
- Under Files to delete, Check Device driver packages.
- Click on OK.

- Select Delete files.
Using DDU (For Display and Audio Drivers)
If you are uninstalling display or audio drivers, I suggest that you use a freeware named Display Driver Uninstaller (DDU).
Sometimes, the usual method may fail to remove drivers. Some traces of the driver may still be in your system. This could be the case especially if you have uninstalled the display adapters.
DDU thoroughly removes video and audio drivers from your system. This is why it is more effective and is what most users prefer.
First, you need to download the Display Driver Uninstaller and install it. Make sure that you boot into safe mode first.
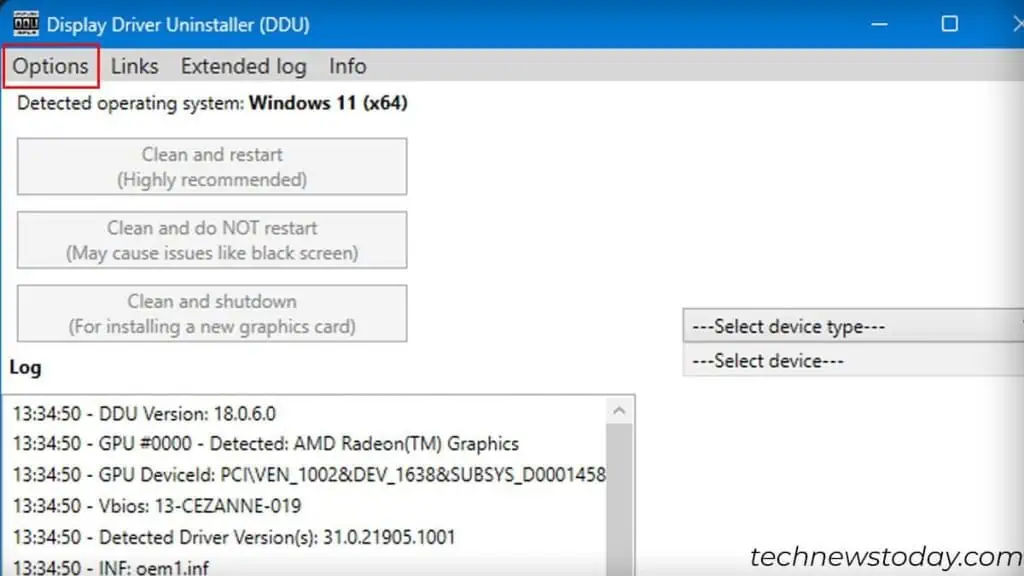
- Run Display Driver Uninstaller.
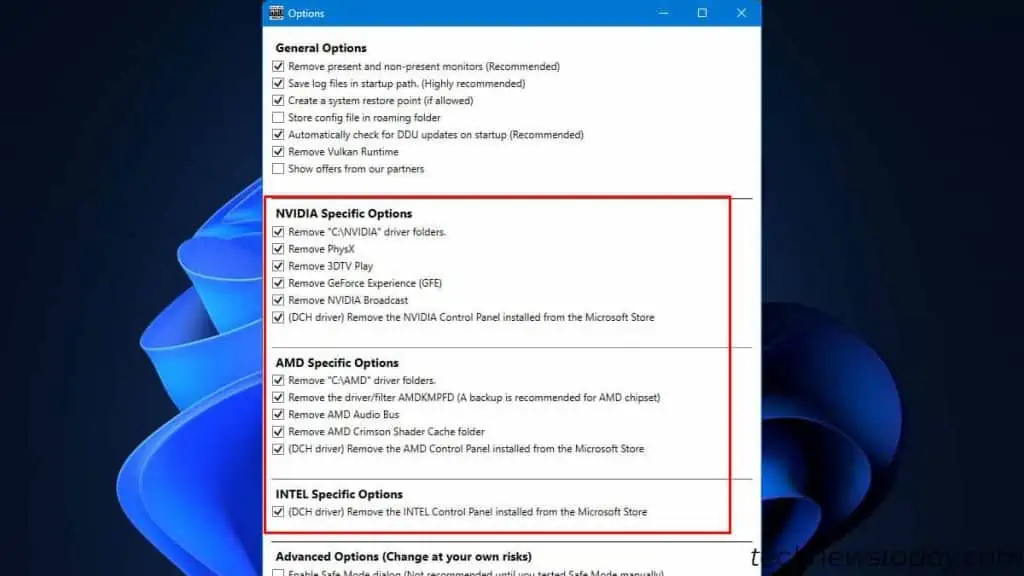
- Click on Options.

- Check all the options in NVIDIA, Intel, and AMD Specific Options.

- Click on Close.
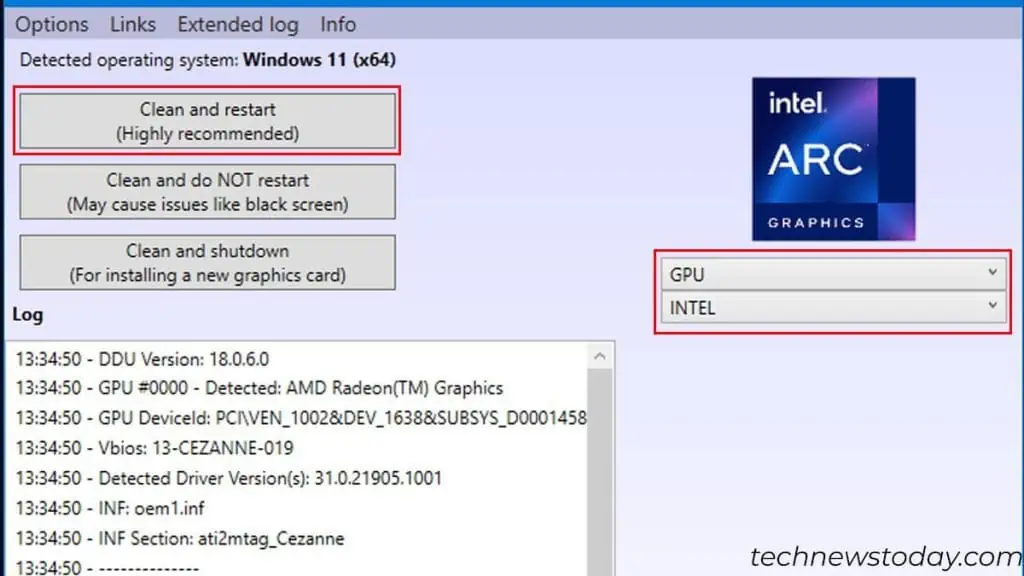
- Under Select device type, click on Audio or GPU depending on what you want to remove.
- Under Select Device, choose the device that your system uses.
- Click on Clean and restart.

- Wait for the process to complete. The screen will flicker if you are uninstalling the display driver in normal mode.
- Once the removal process completes, restart your PC. The system will now run on Microsoft’s default drivers.
Once you remove these drivers, head over to the manufacturer’s website and download the required display or audio drivers.
Disable Kernel Mode Driver
These drivers operate in kernel mode. This means they start as soon as you turn on the PC and operate at the hardware level. You can use Autoruns to uninstall these drivers.
- Download Autoruns.
- Extract the downloaded folder and run
Autoruns.exeas administrator. - Click on the Driver tab.
- To disable, uncheck the items on the list.

- To uninstall, right-click on the Autoruns entry and select Delete.
Recently, a kernel mode driver named VGC from Valorant caused a Memory Integrity warning error in my personal setup. It said it was due to a faulty driver named VGC.sys. Disabling this driver using Autoruns fixed the issue.
I also removed it to see if the driver would re-install automatically. However, this did not happen. This led to a blue screen error when opening the game. I had to reinstall the entire app to fix the issue.

