The best way to keep your device drivers up to date is to allow them update automatically. When the Wi-Fi interface is not working or running slow, updating the Wi-Fi drivers can do wonders for you.
On Windows, you can perform Wi-Fi driver updates through the device manager. Or, you can manually update it by downloading updates from the manufacturer’s website. However, on the Mac and Linux based devices, the update process is taken care of by the regular system updates.
In this article, we will discuss in detail how to update the Wi-Fi drivers across different OS platforms.
Using Device Manager
Windows device manager is an important platform to check all the drivers installed on your device. It lets you update, uninstall and even roll back the drivers. You can always use this tool to update your Wi-fi drivers to their latest version.
This is how you can do it using the device manager:
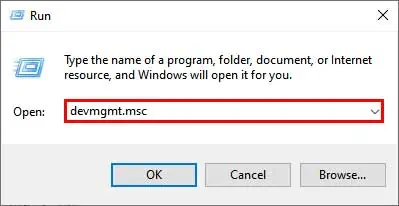
- Press Windows key + R on your keyboard and enter
devmgmt.msc
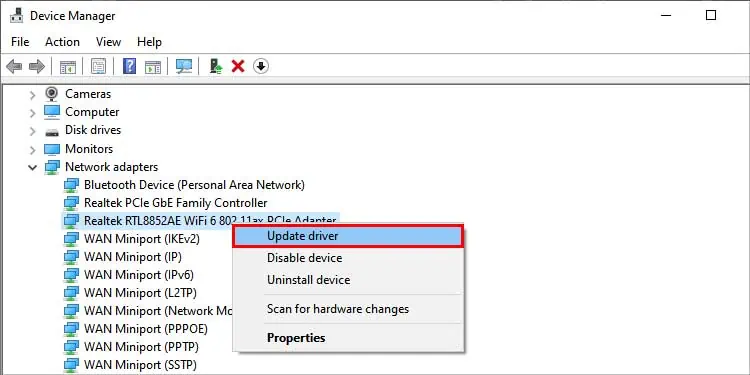
- Inside Network Adapters, you will see the Wi-Fi driver used by your device. Right-click on it and select Update Driver.

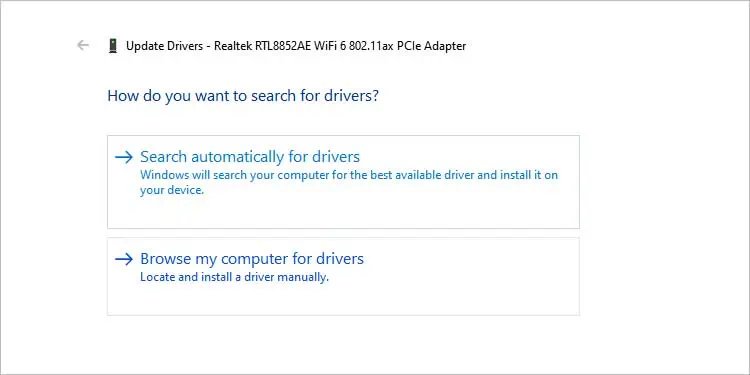
- Now, you will have two options to choose from
- Search Automatically for Drivers: If you choose this option windows will automatically search for wi-fi drivers over the internet and notify you if a newer version is available. In case the Wi-Fi driver is already up to date it will let you know that too.
- Browse my computer for drivers: Choose this option if you have already downloaded the Wi-Fi drivers manually from the manufacturer’s website. This option also lets you install older versions of the Wi-Fi drivers and also override the latest one.

- Install the latest driver and restart the system when finished. After the device boots up, go to the device manager and verify that the Wi-Fi driver has updated to its latest version.
Manually Updating the Wi-Fi Drivers
To update the Wi-Fi driver on your own, you need to download the driver’s installation files from the manufacturer’s website. Intel and Realtek are some prominent Wi-Fi driver manufacturers, so we will cover how to download the required drives from their websites.
Updating Intel Wi-Fi Divers
To update the Wi-Fi drivers without using the device manager, follow these steps,
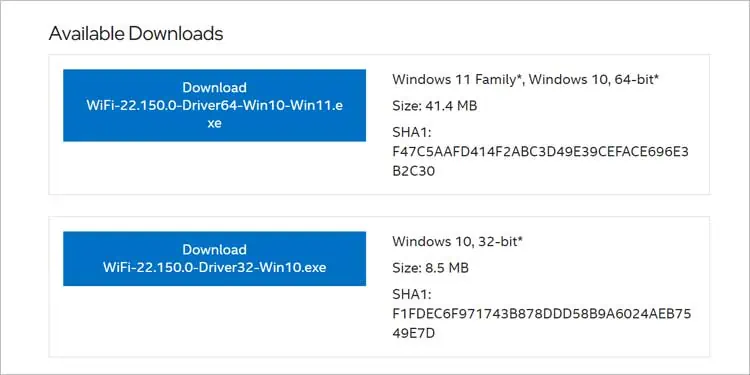
- Go to the driver download center from Intel’s official website.
- Find the correct driver for your device and download the file.

- Now, run the executable file and restart when installation is finished.
Updating Realtek Drivers
To update the Realtek Wi-Fi drivers, follow these steps:
- Go to Realtek’s official software download page.
- Find the latest WLAN driver that is compatible with your device and click on download.

- Open the downloaded file and perform the driver installation.
Using Windows Update
You can also perform windows update to keep your drivers, in this case, the Wi-Fi drivers up to date. It will automatically download and install the latest drivers for the Wi-Fi adapter.
To check and download the latest drivers using the windows update, follow these steps;
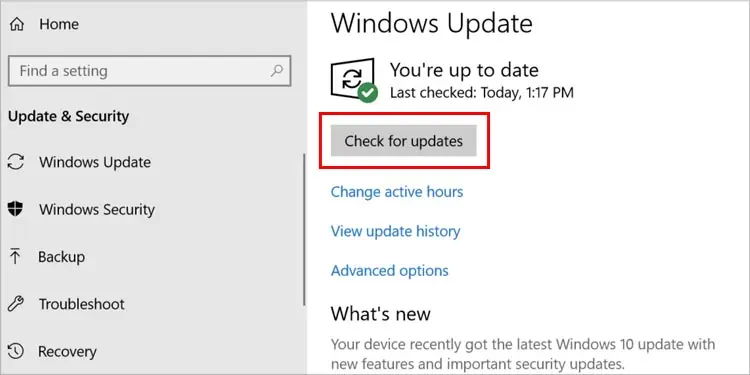
- Press Windows key + I to open settings.
- On the left panel of the settings window, Click on Windows update.
- Under Windows Update, it must say You’re up to date. If not, click on Check for Drivers to search for the available updates. If new updates are found, click on Download & install.

Update Wi-Fi Driver On Mac
On Apple devices, especially Mac, the drivers are automatically downloaded and installed when available. To check if any latest updates are available on this device,
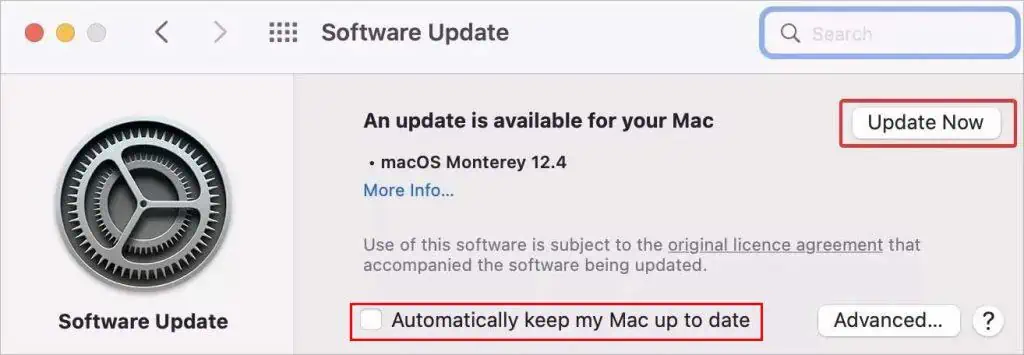
- Click on the Apple logo in the top left corner and select System Preferences.
- In the System preference window, go to Software Updates.
- Now, click on the Update now button. Also, check the Automatically keep my Mac Up to date box.

Update Wi-Fi Driver on Linux
The Linux kernels have the Wi-Fi drivers integrated into them. Therefore, the drivers get updated automatically when new updates for the kernel are rolled out. However, if you want to update the drivers you can use the GUI or the Terminal of the Linux distros. In this article, we will talk about how to install the Wi-Fi driver updates on Ubuntu and Fedora distros.
To perform a Wi-Fi driver update in Ubuntu, the most convenient thing to do is to use the Additional Drivers tool. To use this feature follow these steps,
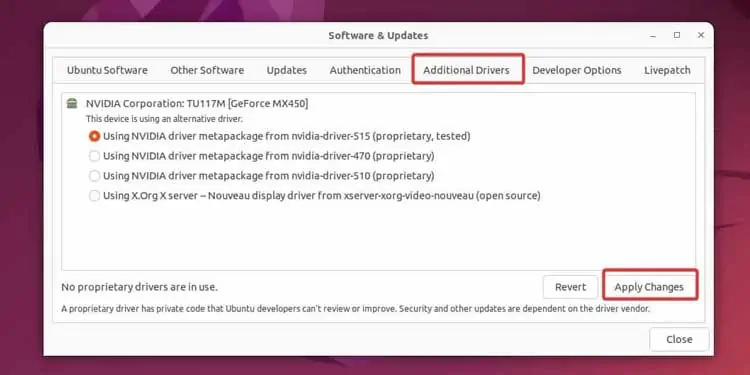
- Go to the Ubuntu dash and search for Additional Drivers. Click on the application.

- This application will start automatically searching for the latest Wi-Fi or other device drivers.
- On the list of all the available drivers search for the Wi-Fi driver update and select it.

- Finally, click on Apply Changes button and enter the authentication password.
- This process will download and install the latest Wi-Fi drivers for the system.
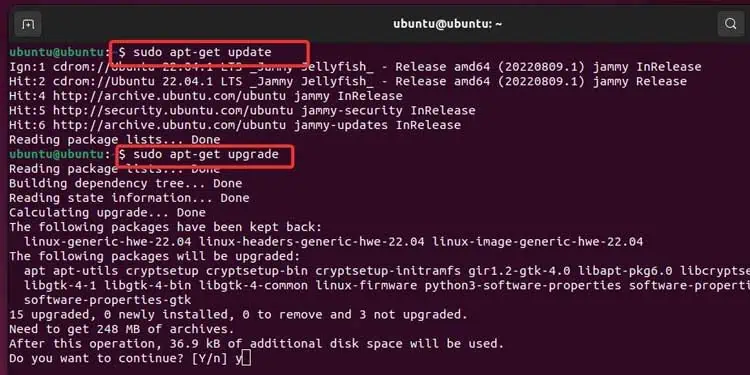
If you perform a thorough system update, this also can update the Wi-Fi device drivers. You can do this very easily using the command lines. Follow these steps to perform the system update.
- Open the Terminal by pressing Ctrl + Alt + T.
- Now type the command
sudo apt-get updateand hit enter. Enter the user password and it will start updating the packet index files. - After this, execute the command
sudo apt-get upgrade. This will update all the packages to their latest version including your wi-fi drivers.
- When asked, Press Y to continue, and this will install the latest package for the device.
In the case of Fedora, you can again update the drivers using the terminal. Open the Terminal and enter the command Yum Update and hit enter. This command will update all the packages available for the system including the Wi-Fi interface.
Update Wi-Fi Driver On Chrome OS
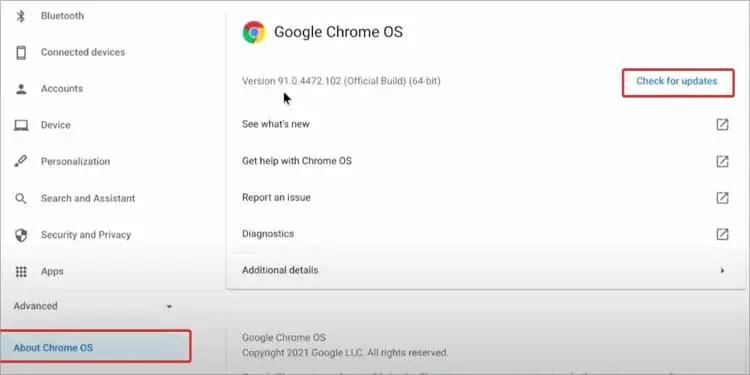
The OS updates on Chromebooks automatically install the Wi-Fi drivers for the device. So, just make sure your system is up to date and it will take care of the Wi-Fi drivers on its own. The Chrome OS generally updates automatically. However, you can also perform the updates by yourself by following these steps;
- Go to Settings
- Click on About Chrome OS.
- Now Click on Check for Updates. This will download and install the updates if available.

Wi-Fi Not Working in Windows After the Driver Update
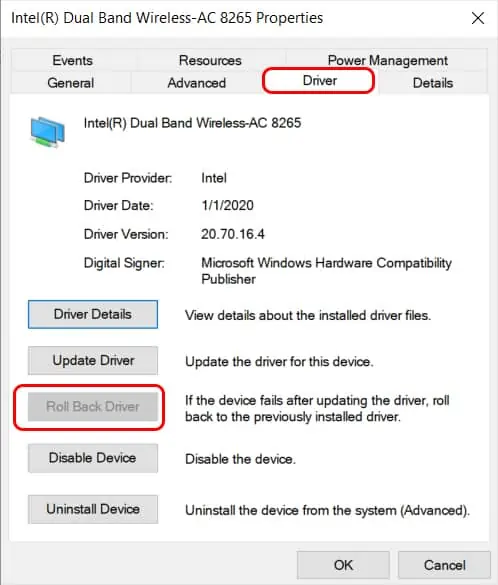
If this is the case, try rolling back the drivers to the previous version.
Follow these steps on Windows:
- Go to Device Manager
- Under the Network Adapters, right-click on the Wi-Fi interface.
- Select Properties and click on the Drivers tab.
- Now, click on the Roll-back driver button and do as instructed.


