The general idea to updating the BIOS on any computer, including your Lenovo device is—If it ain’t broke, don’t fix it.
But you may need to do so anyway if you don’t have the latest BIOS version and are experiencing device incompatibility issues or security vulnerabilities.
Usually, you only need to do so if your computer can’t detect or properly use specific devices.
Lenovo provides many options to update the BIOS in a safe and simple manner. Use tools like Lenovo Vantage, Lenovo System Update, or Lenovo BIOS Update Utility for this purpose.
You can also perform the USB Back Flash method to directly flash your BIOS using the BIOS files inside a USB flash drive.
Things to Keep in Mind
- Lenovo recommends resetting the BIOS to factory defaults before updating the firmware.
- Make sure to keep the laptop connected to its charger while performing the update. Any interruptions or power cut offs can brick the motherboard.
- Before updating the BIOS using the methods below, it’s better to run a system update. It will update your current drivers, including the firmware driver, if any updates are available.
- If you have enabled BitLocker Encryption on your device, it will ask for the recovery key after a BIOS update. Make sure to check the key on your Microsoft account or any backup beforehand. You can also turn off the encryption as an alternative.
- The USB Back Flash is the only method you can use to downgrade the BIOS. Other methods won’t let you roll back to a previous version.
Via Lenovo Vantage
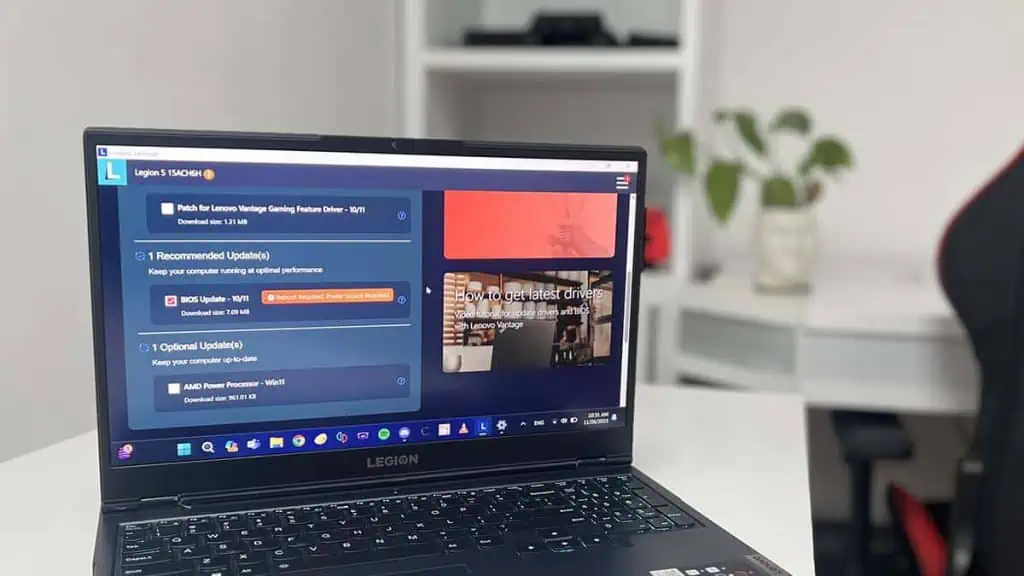
Using Lenovo Vantage is the easiest way to update the BIOS/UEFI on a Lenovo Laptop.
This application allows you to control additional settings of your device, including drivers and firmware updates.
- Download Lenovo Vantage if you haven’t done so already.
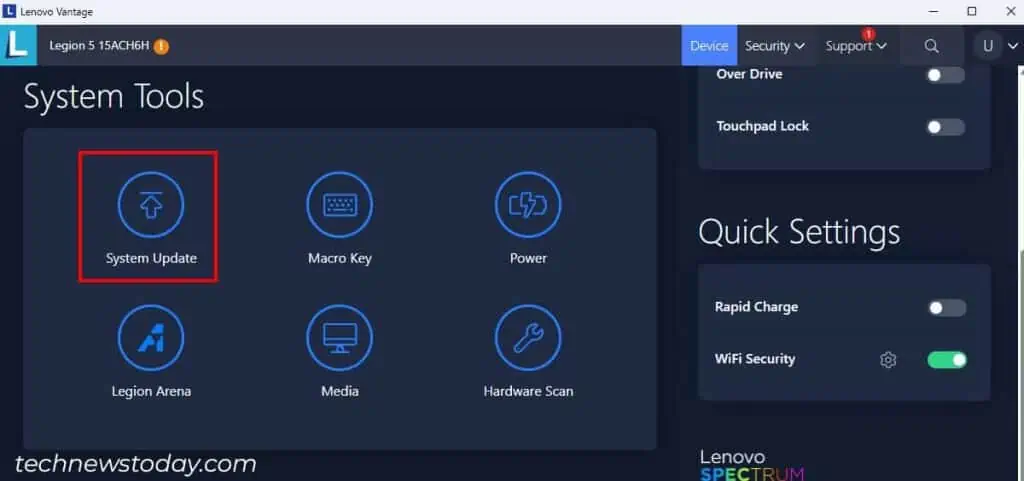
- Open Lenovo Vantage and click on the System Update under Device > System Tools.

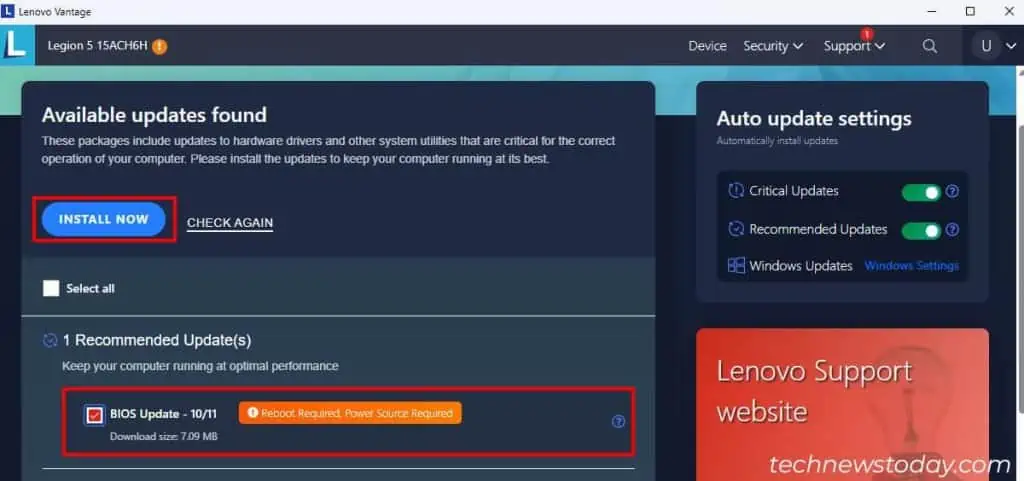
- Select Check for updates and see if any BIOS updates are available.
- If so, select that update along with anything else you wish to install and click Install now or Install selected updates.

- Follow any on-screen instructions.
Via Lenovo System Update
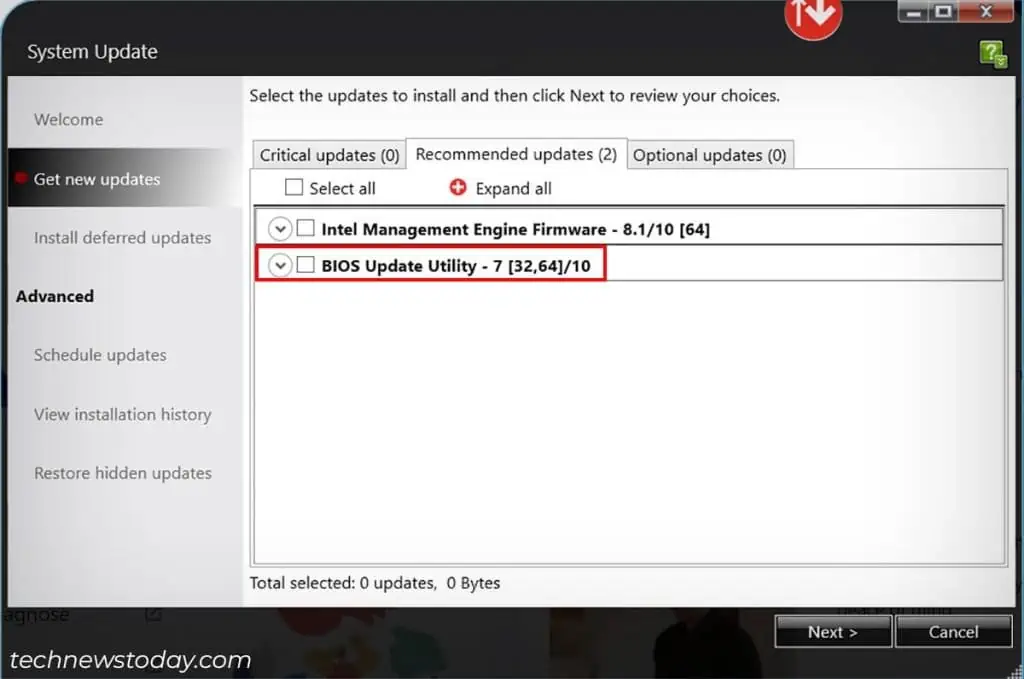
You can also use the Lenovo System Update utility on many Lenovo devices to update your BIOS.
The application works on all ThinkPad, ThinkCentre, ThinkStation and Lenovo V/B/K/E Series devices. Some Lenovo 3000 series computers also support this program.
Here’s how you can use Lenovo System Update to update your BIOS/UEFI on these devices:
- Download and install Lenovo System Update from the official website.
- Run the installed application by searching on the Search bar. You will also find this app on the Control Panel > Large icon view after installing it.
- Click on Get New Update and follow the on-screen instructions until you get to the update list.
- Look for the BIOS Update under Recommended Updates and check this option. You should also select all other updates you wish to install.
- Click Next and follow the on-screen instructions.
Via BIOS Update Utility
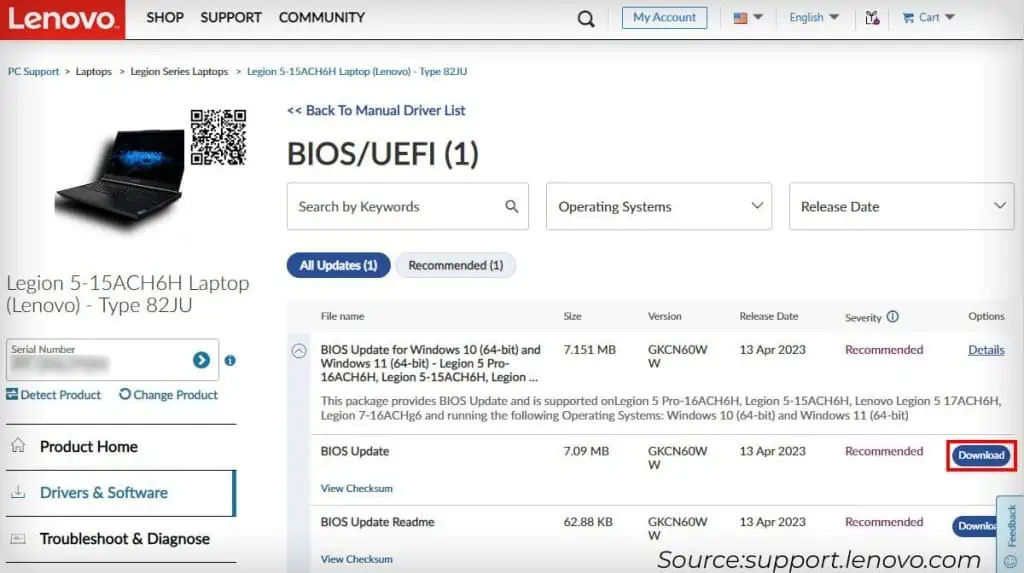
The official support webpage of each Lenovo device also provides the latest updates for its drivers and firmware (BIOS/UEFI).
Get to the respective webpage of your device model, download the latest BIOS version’s setup and run it to update your BIOS.
Here are the complete steps:
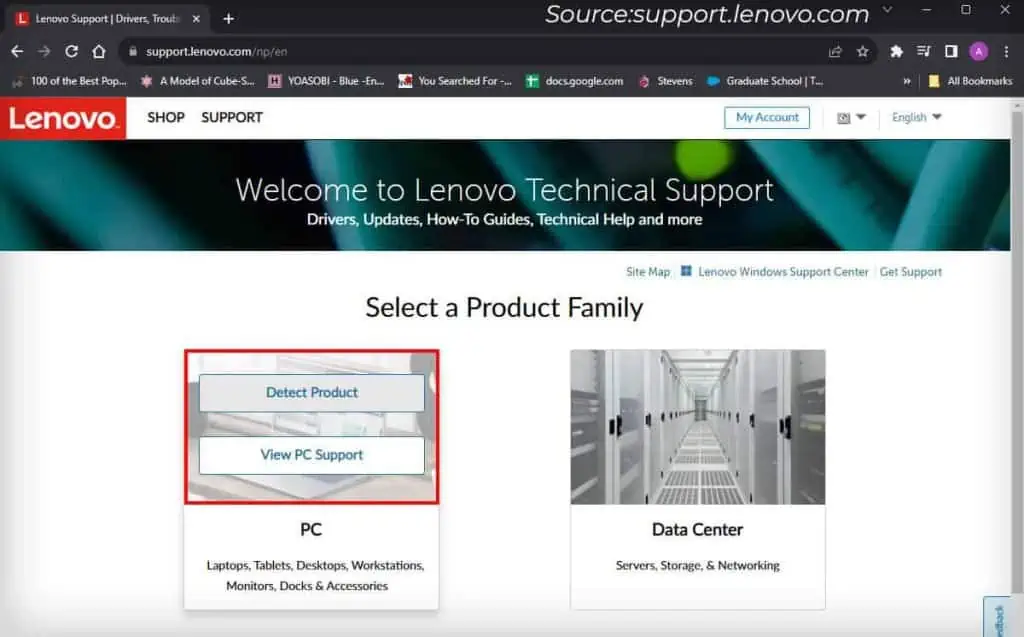
- Go to Lenovo’s Support Website.
- Hover over the PC category and click Detect Product. Agree with the terms and select Continue > Open Lenovo Service Bridge. This will install the app into your PC and then open the product support page.
- You can also select View PC Support instead of Detect Product and manually search for your device using its name or serial number.

- On the product support page, go to Drivers & Software on the left pane.
- Choose Select Drivers under Manual Update and click BIOS/UEFI.
- Click on Download next to BIOS, BIOS Update or BIOS Update Utility to download it.

- You should also download the Readme file for the update. It’s always better to read this file carefully and review the instructions to prevent any unforeseen issues.
- Run the setup file and follow the on-screen instructions to update your BIOS. If it asks you whether to extract or install the files, select Install.
Using BIOS Back Flash
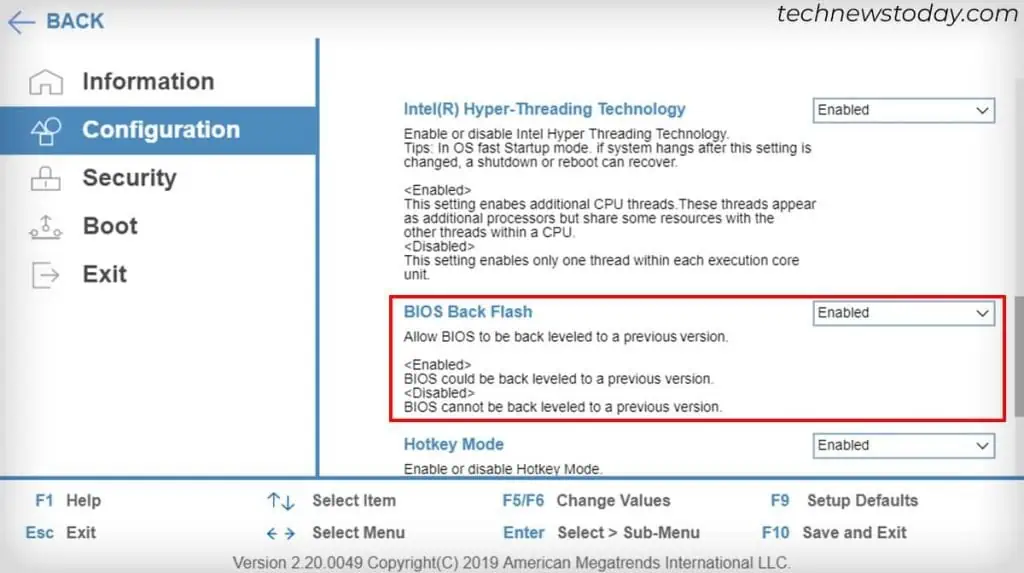
Many Lenovo laptops also support BIOS Back Flash which lets you flash your BIOS using the files in the USB.
It is not considered the best method, but it’s the only option you have if you want to recover your system after an unsuccessful or broken BIOS update.
So, only use this method if you can’t boot into Windows after a BIOS update. If the update was unsuccessful, flash to the same latest BIOS version.
But if you are encountering issues after a successful BIOS update, flash it to a previous version.
- Fully wipe a USB flash drive, change its partition scheme to GPT, and format it as a FAT32 drive (on another computer).
- Download the BIOS Update from the official website (same as above method) on another computer.
- Run the setup, but follow its instructions to extract the update, not install it. Alternatively, you can use third-party apps like 7-z or WinRAR to directly extract its contents.
- Copy the BIOS file from the extracted contents (usually with
.fdextension) to the USB flash drive. - Rename it to a
.binfile. The file name depends on your device model, so check official forums if you need help. - Get to your BIOS and change BIOS Back Flash or a similar option to Enabled.
- If the BIOS does not recognize your Flash Drive, enable CSM or Legacy support.
- Save changes and exit the BIOS. Shut down your computer and clear its CMOS.
- Connect the USB drive to the Lenovo device while the AC adapter cable is disconnected and the laptop is off.
- Press and hold Fn + R key and then connect the AC adapter cable. The laptop should start beeping. Release the keys after a few seconds.
- The laptop should power off and then on again after the process finishes.
