If you want to continue playing a game (especially online games) on Steam’s client application, you have to update it to its latest version.
Valve designed the Steam client application to update all your games automatically. So you don’t really have to worry about updating your games.
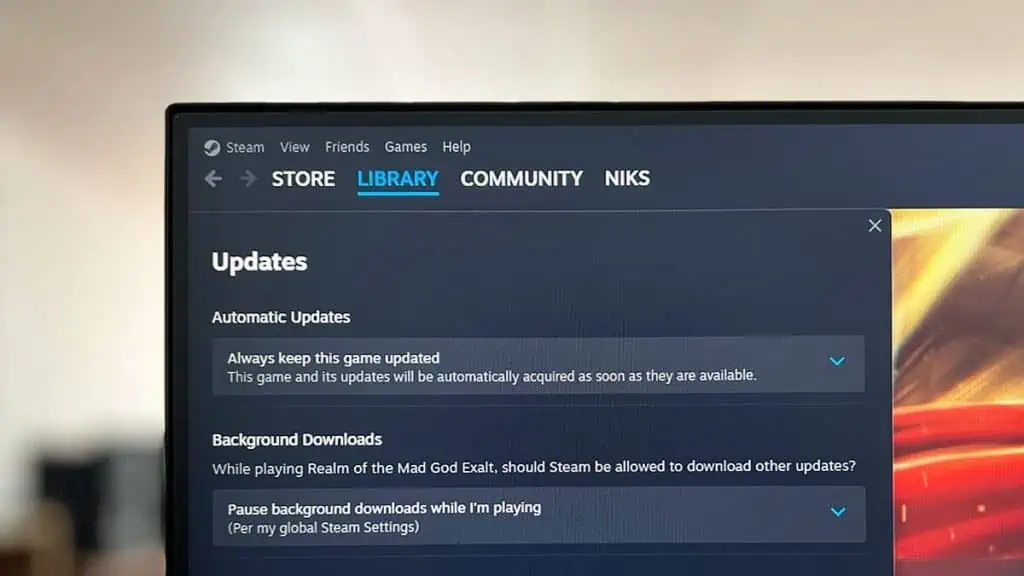
That being said, you can still control the automatic update from the settings. You can enable or disable auto-updates or even set auto-updates to higher priority.
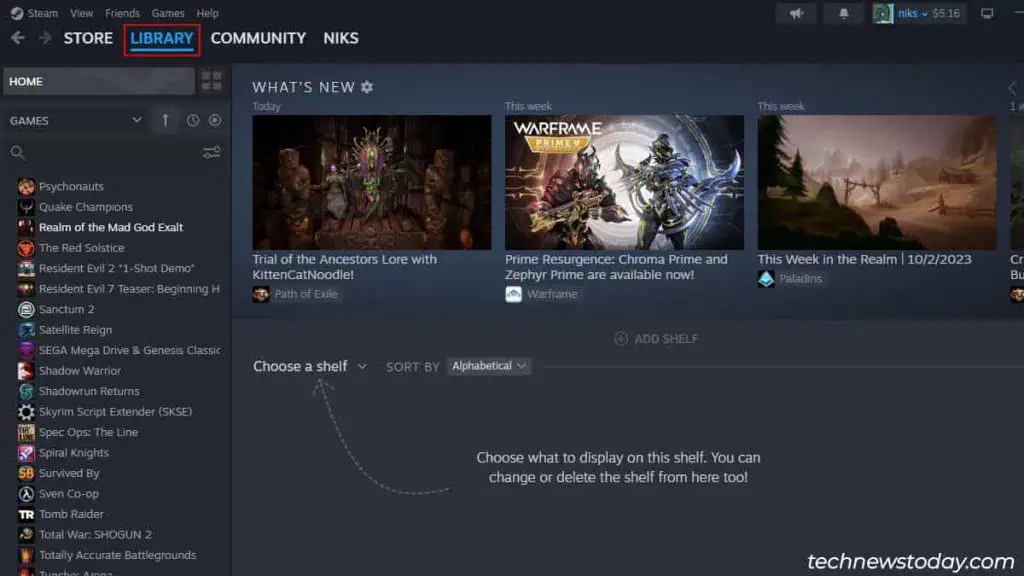
- Launch the Steam application and open the game Library tab.

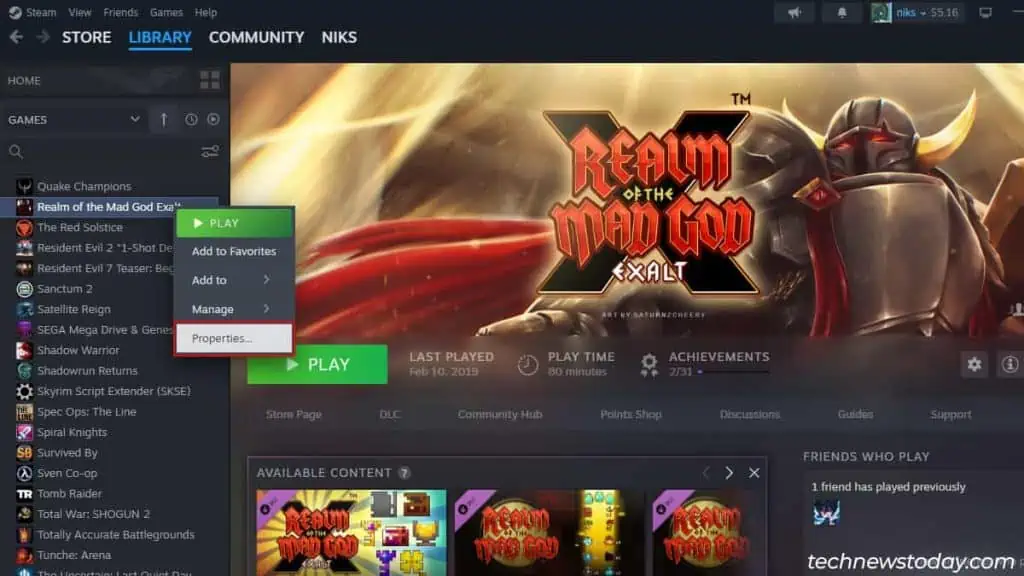
- Right-click on a game and select Properties.

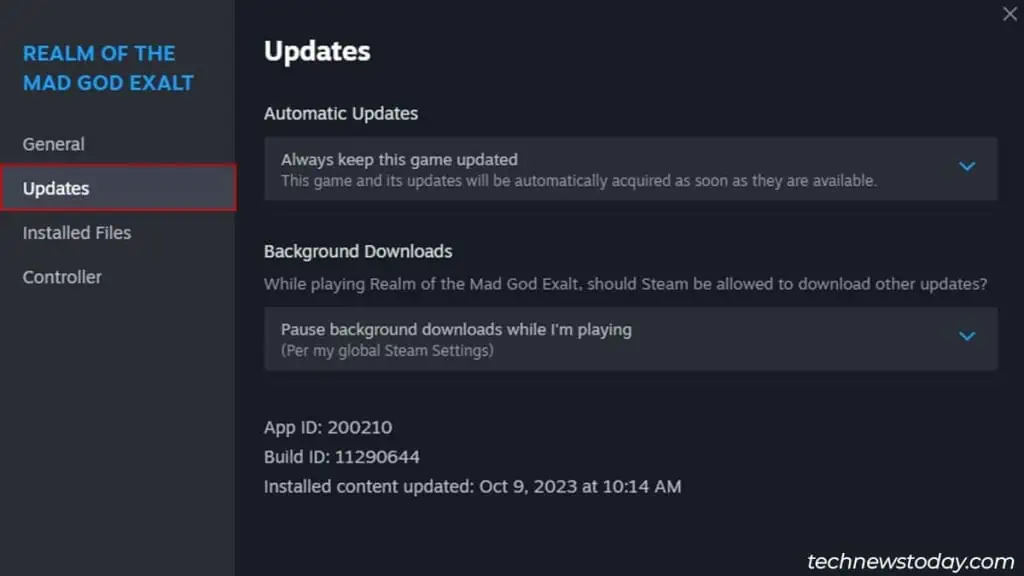
- Switch to the Updates tab.

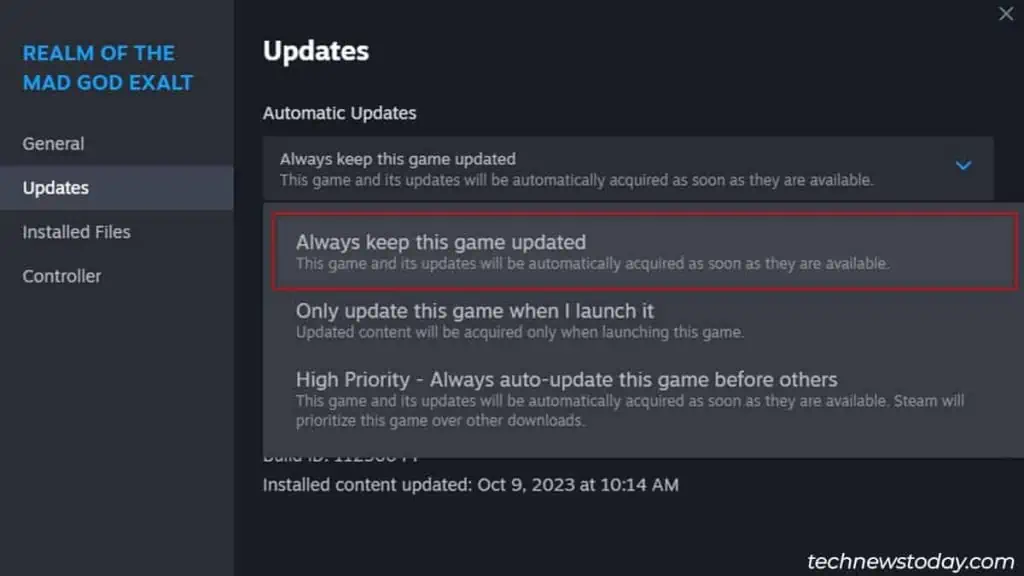
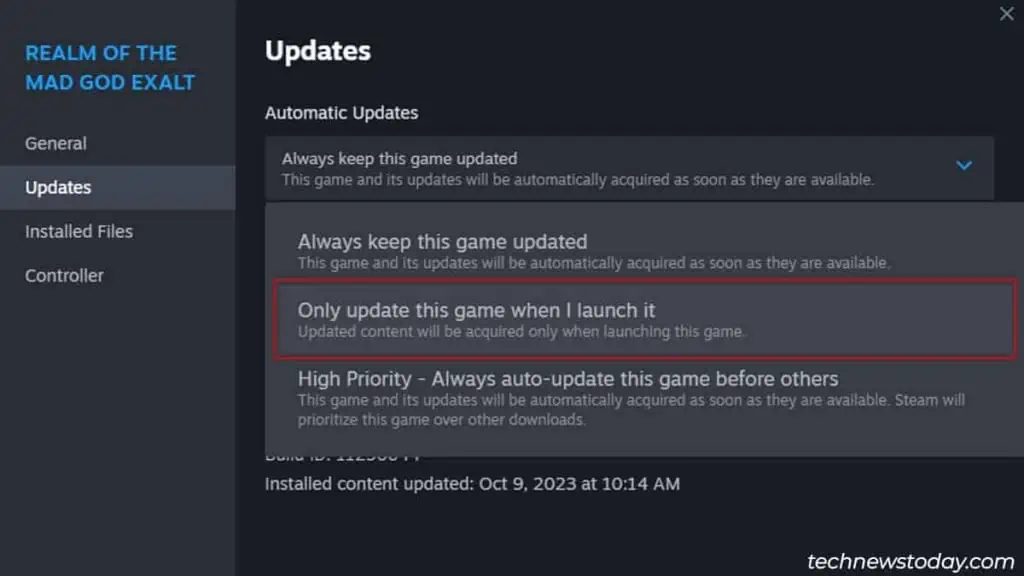
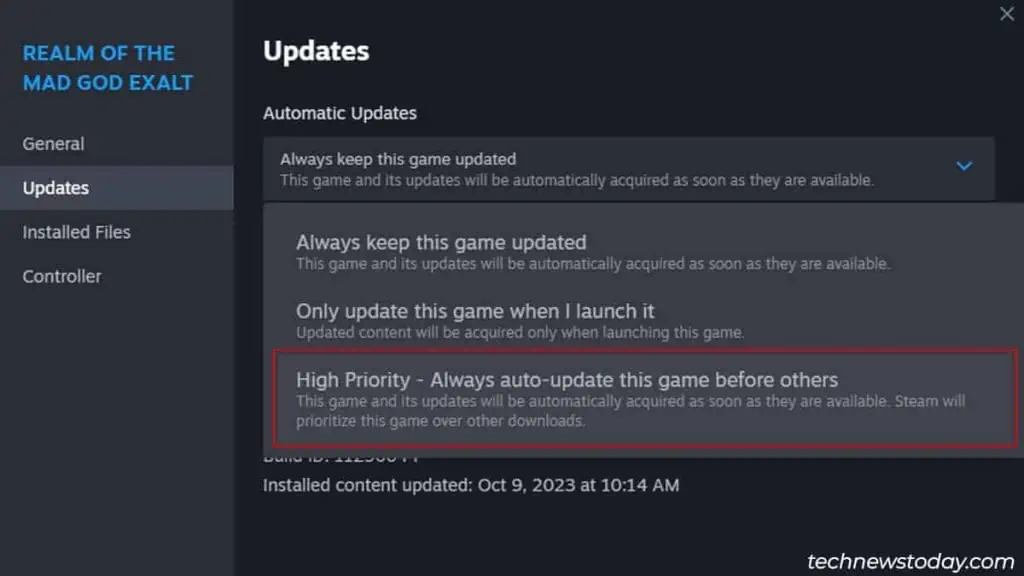
- Click the Automatic Updates dropdown menu to change the automatic update settings.
- Select the Always keep this game updated option if you want to continue auto-updating this game.

- If you prefer to update your games manually, then select the Only update this game when I launch it option.

- Pick the High-priority option if you want to prioritize this game’s update over others.

- Select the Always keep this game updated option if you want to continue auto-updating this game.
Updating Games With Launchers
There are some games on Steam that you cannot update from the client application.
These games instead have their separate launcher application. You’ll have to run the game normally from Steam and then perform the update from the launcher.
Scheduling Game Updates
Game updates are random, and they will start anytime you launch Steam. This can be problematic if you’re connected to a network with limited bandwidth.
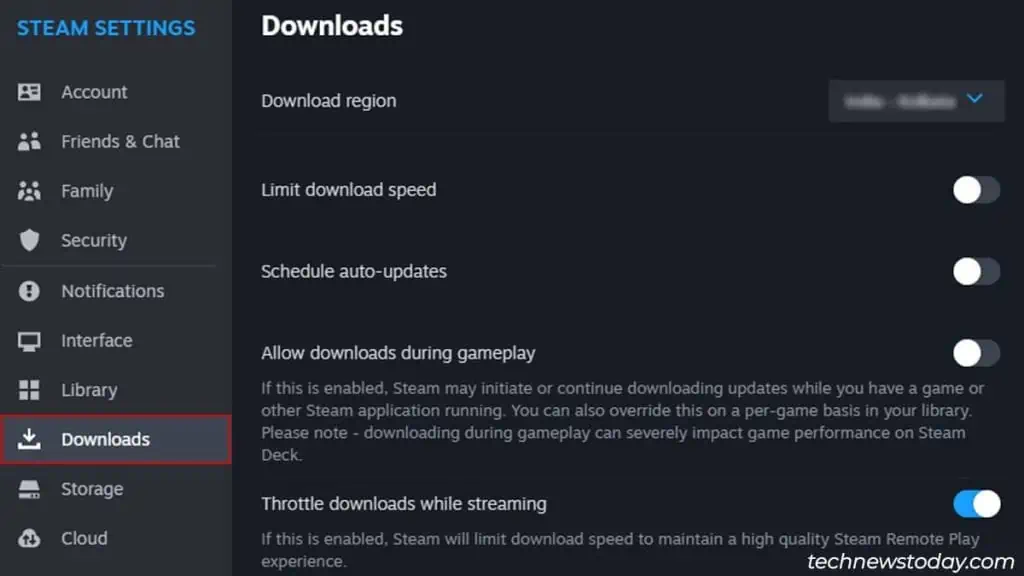
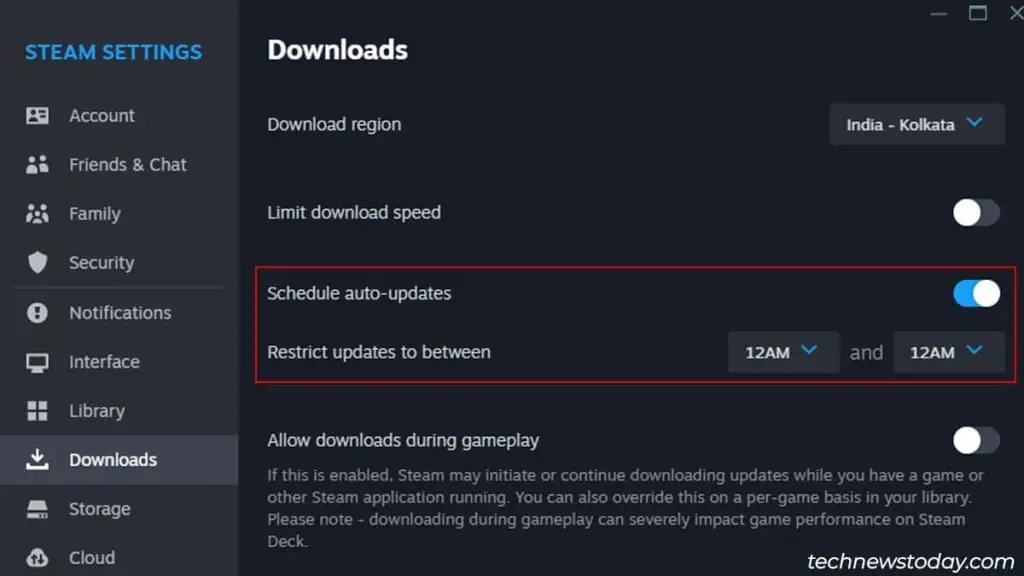
You can create an update schedule on Steam to ensure that game updates will only occur during a set time period.
To do so, follow the steps,
- Launch Steam and click the Steam option on the menu bar.
- Click on Settings.

- Switch to the Downloads tab.

- Toggle on Schedule auto-updates.
- Set the time frame when you wish to start auto-updates.


