Updating router firmware fixes bugs or security glitches within the networking device and additionally improves your Wi-Fi experience. While most TP-Link products automatically check and upgrade it, you also have the option to do this manually.
Although performing a firmware update is relatively easy, doing this wrongfully can void the router’s warranty or even cause permanent damage. It’s always recommended to do it manually or use a wired connection if it’s an online upgrade. Also, you should avoid powering off your devices when the update is in progress.
Online Update
The easiest way to update the firmware on any TP-Link router is to search for the necessary one online. There’s a dedicated button that lets you identify whether your device requires an upgrade.
For demonstration, we’ve used the Archer C7 model. Nonetheless, the step-by-step guide in this section should be similar to all the other TP-Link routers as well.
Open Router Management Interface
Before starting the firmware update, you need to first access your router’s settings using the default gateway. Here’s a complete guide on how to access your Wi-Fi router’s settings:
- Firstly, search for Command Prompt or Windows Powershell in the Start Menu, and launch it.
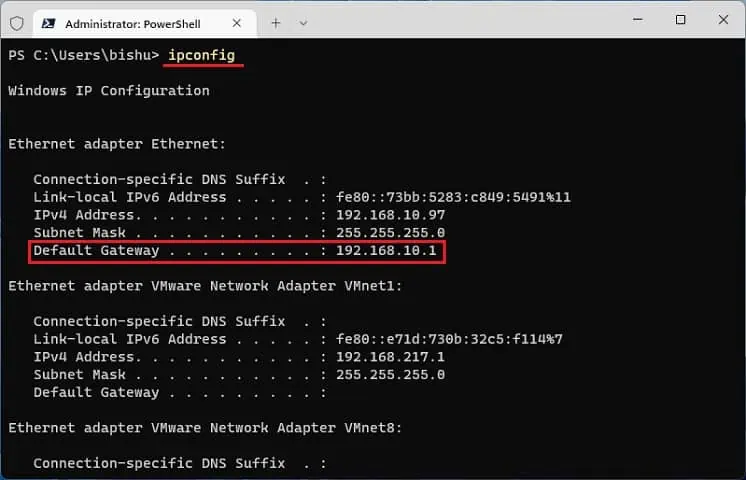
- In the command-line interface, execute the following command to get your IP details:
ipconfig - Check the Default Gateway field under the Ethernet or Wi-Fi adapter, whichever is your current network connection.

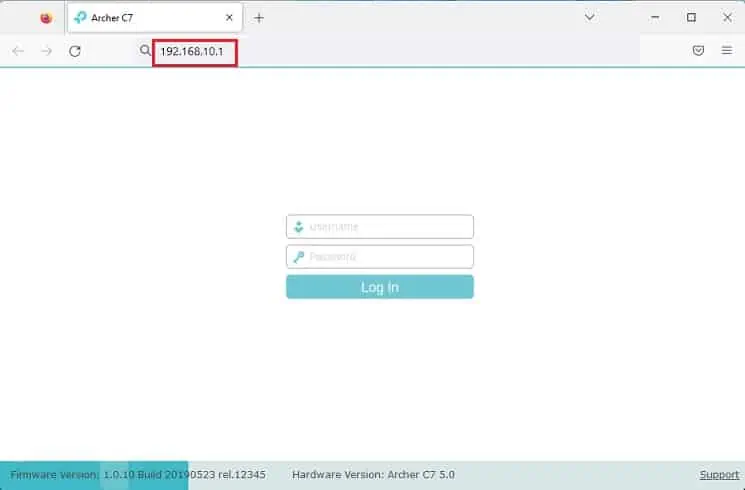
- Copy the IP and paste it into the address field of a web browser.
Alternatively, you can navigate to the router’s management interface from the following address:http://tplinkwifi.net - Here, input the correct login credentials to sign in to your router’s configuration page. By default, the username and password in all TP-Link routers are both admin (in lowercase).

Navigate to Firmware Upgrade Section
Every router dashboard has a dedicated Firmware Upgrade option, where you can perform both manual and online updates. To navigate here, kindly follow the below instructions:
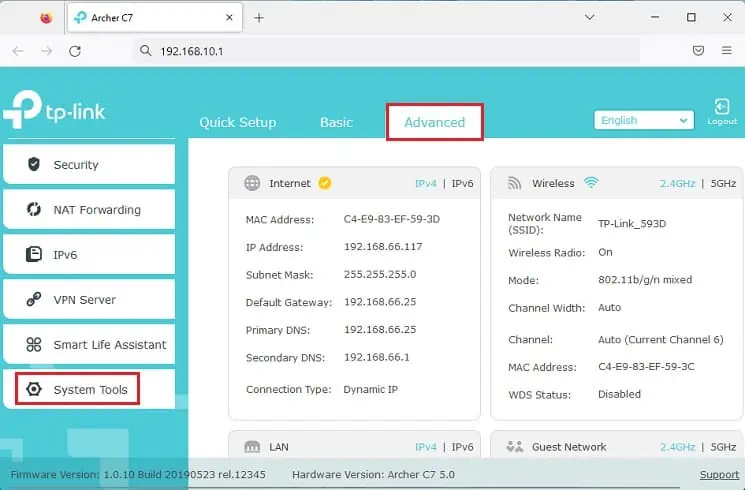
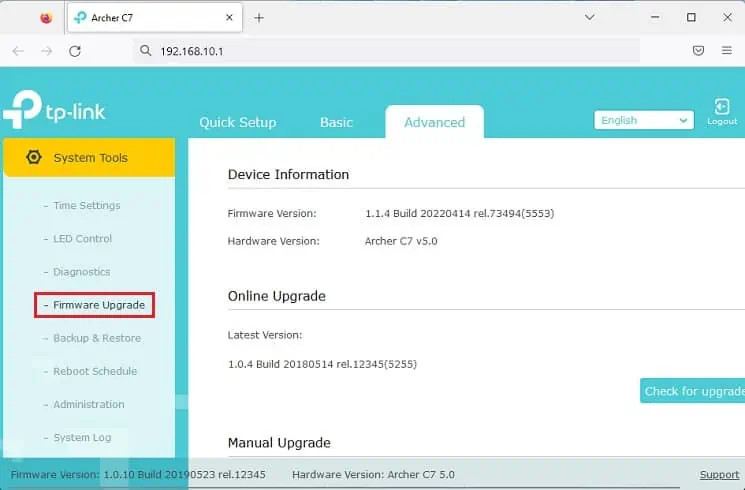
- Once you’re logged in to your router, navigate to the Advanced tab.
- From the left section of the web page, choose System Tools.

- Here, find and open Firmware Upgrade.

Check & Update Firmware
Finally, you can check whether there’s an available firmware update for your TP-Link router. If a new version is available, a dedicated option pops up that lets you upgrade it:
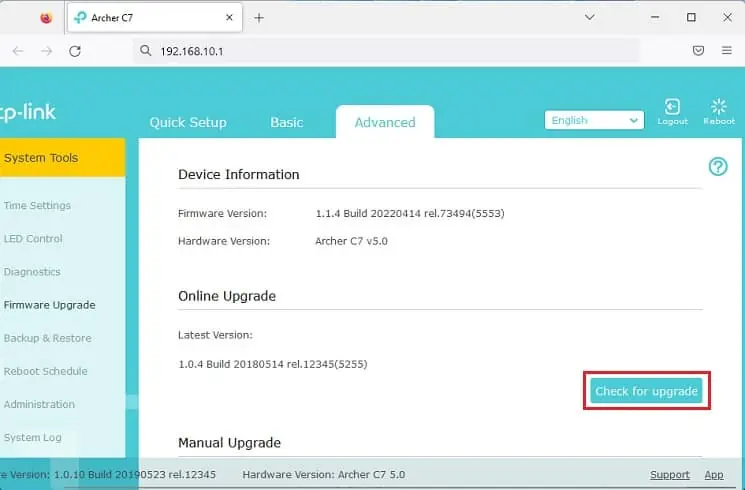
- Under the Online Upgrade section, hit the Check for upgrade button.

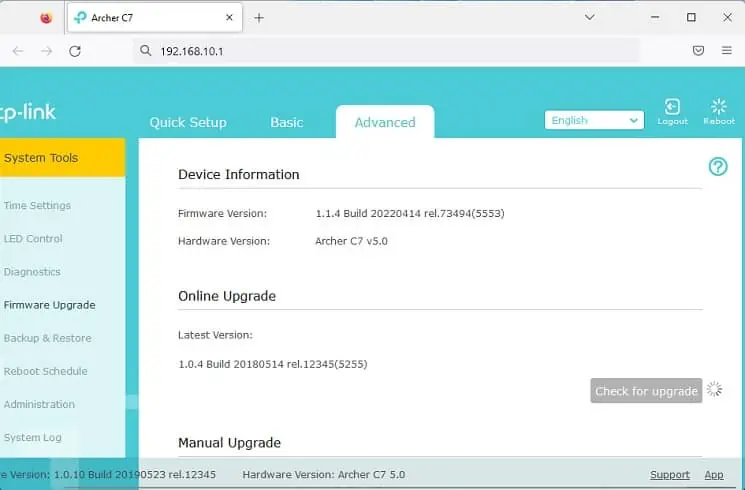
- Wait until the latest version is checked online.

- If found, the Firmware Upgrade button pops up. Press it to start the process.
- Once the update is complete, kindly reset and set up the TP-Link router again. This is to ensure that the networking device handles the latest upgrade.
Manual Update
The online method to update firmware may be unavailable on some TP-Link models. Also, an internet issue in the middle of the upgrade may cause corruption. The best way to overcome this is by manually updating the firmware.
For this, you need to first check the hardware version, backup your current configuration, and download the appropriate zip file from TP-Link’s official website. Below is the step-by-step guide on how to do just that.
Check Hardware Version
Hardware version is an important factor to consider when updating the router firmware. Installation of the wrong file may void the warranty of your TP-Link router and in the worst case, it may permanently damage the device.
Well, checking the hardware version is possible from the back label and the engraved characters of your TP-Link device. A much simpler technique is to find it from the management interface:
- Use the correct credentials to sign in to your router’s configuration page.
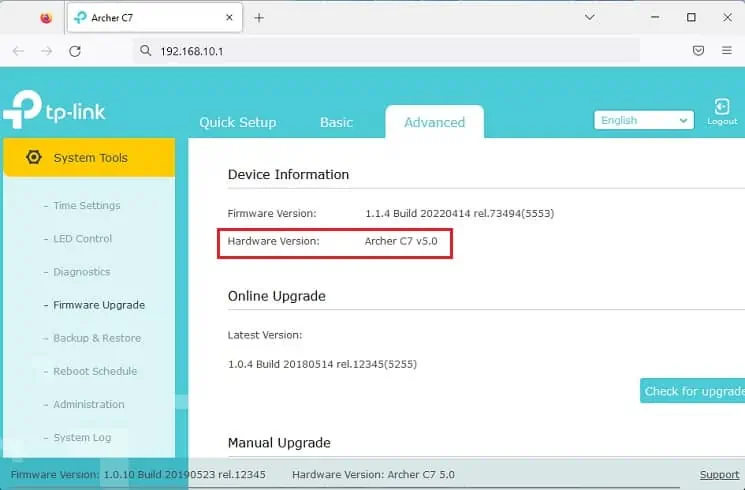
- Now, navigate to Advanced > System Tools > Firmware Upgrade.
- Under the Device Information section, check the Hardware Version field as shown below.

Backup Current Settings
Since you’ll need to reset your router after the firmware upgrade, we recommend backing up the current configuration. This way, you do not have to manually reenter everything from scratch:
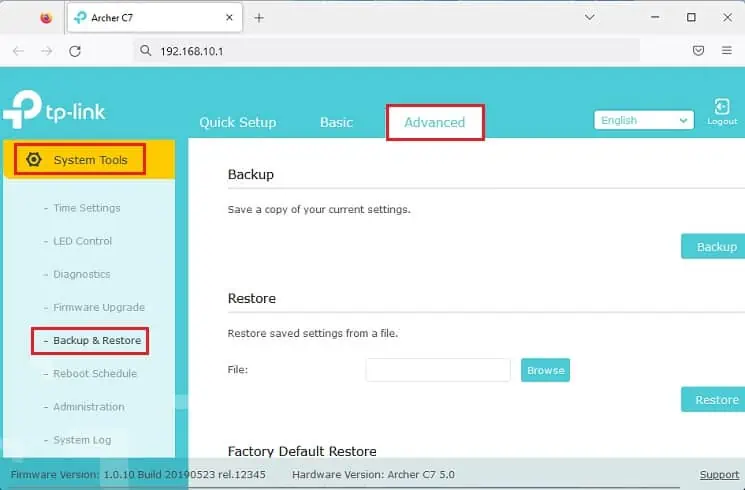
- In your router’s management interface, go to Advanced and expand the System Tools tab.
- Now, choose Backup & Restore.

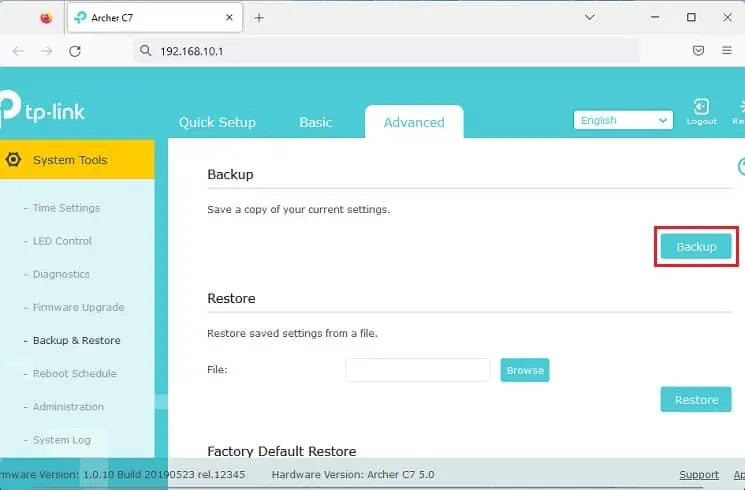
- Move to the right section and click on the Backup button to save a copy of your current settings.

- In the dialogue box, set your desired location and save the backup file.
Download Latest Firmware
Once you’ve checked the hardware version and backed up current settings, it’s time to download the latest firmware available for your router version. While doing so, you’ll need to check the published date and install only the appropriate file. Kindly go through the below procedure on how to do this correctly:
- Navigate to the Download Center on TP-Link’s official site.
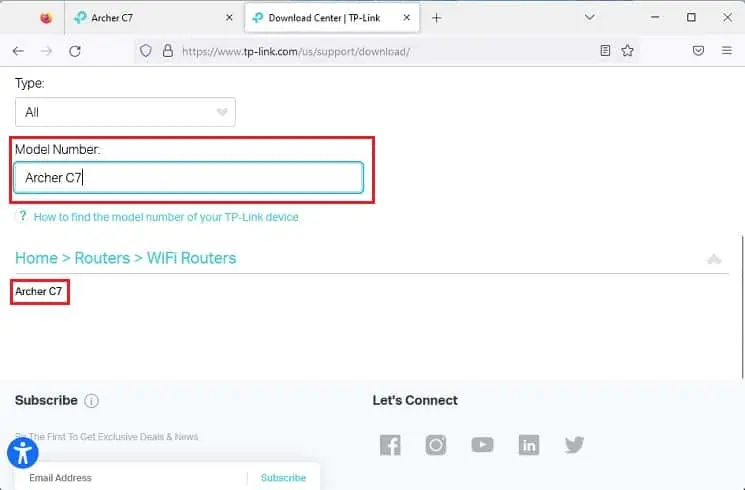
- In the Model Number Field, enter the correct model. For example, if your model is Archer C7, input the same here.
- Now, a link appears under Home > Routers > WiFi Routers as shown below. Simply click this to open the download page for your model.

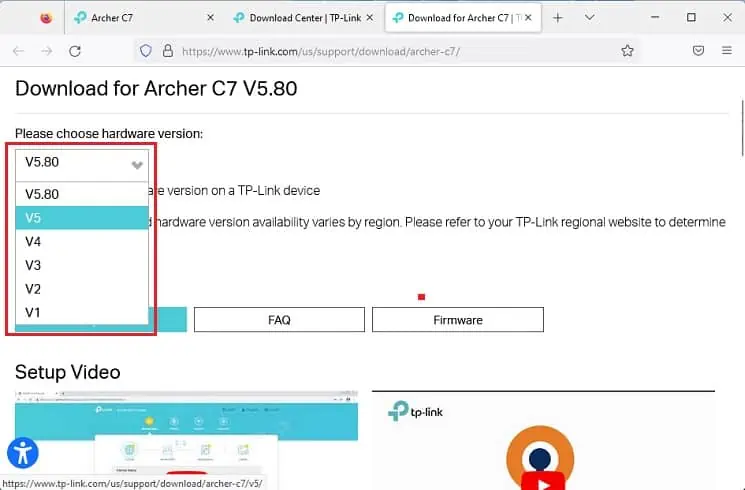
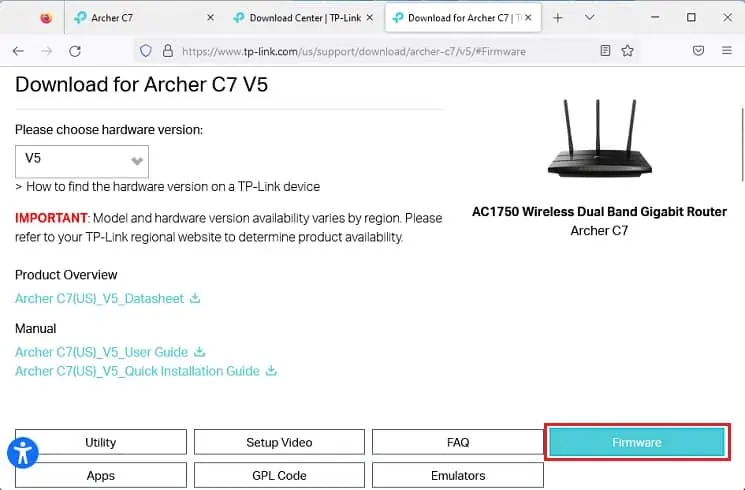
- Expand the ‘Please choose hardware version’ drop-down and select the appropriate version.

- Then, press the Firmware tab.

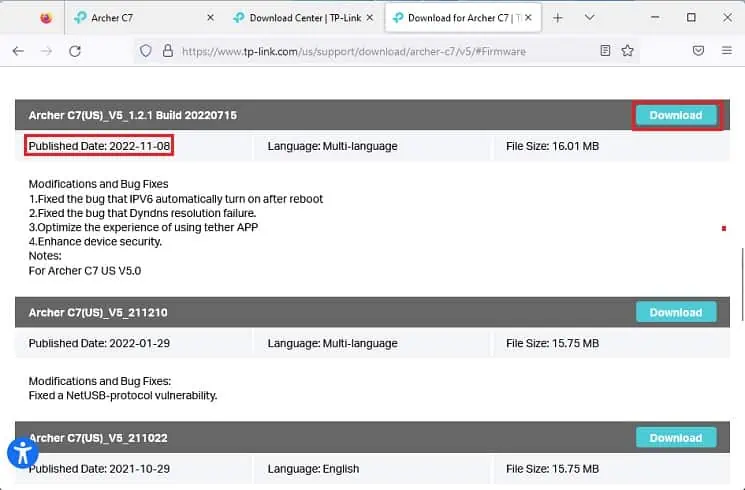
- Scroll down and check the Published Date to identify the latest version.
- Next, press the Download button, followed by Still Download to confirm your action.

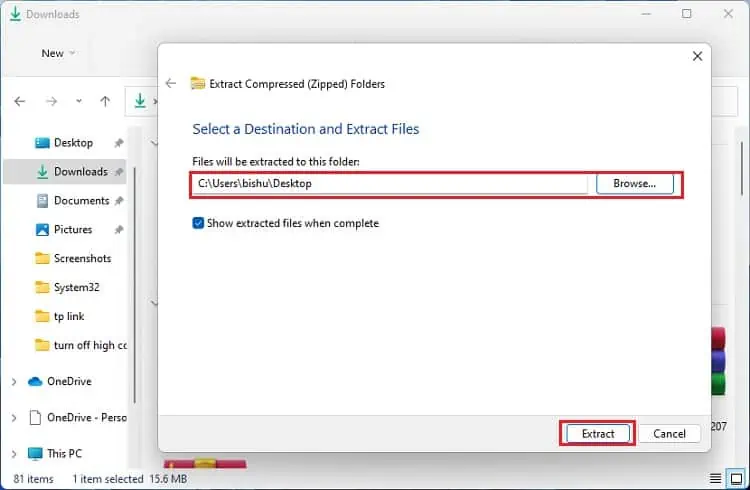
- Now, get to the location and unzip the downloaded file.

Perform Manual Firmware Update
After the download is complete, it’s time to upload the .bin file to the Firmware Upgrade section in your router’s dashboard.
Before doing that, kindly disconnect your Wi-Fi network and use an ethernet connection. If this is not possible, kindly close all the applications that access the internet. Once that’s done, follow the below process:
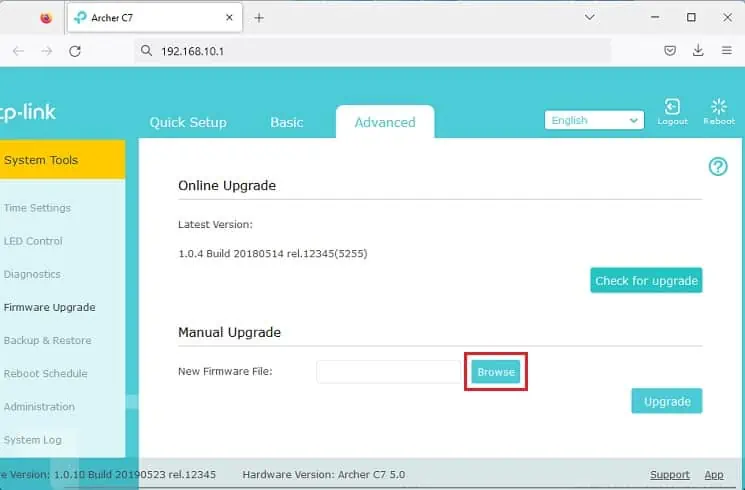
- Open your router’s management interface and move to Advanced > System Tools > Firmware Upgrade.
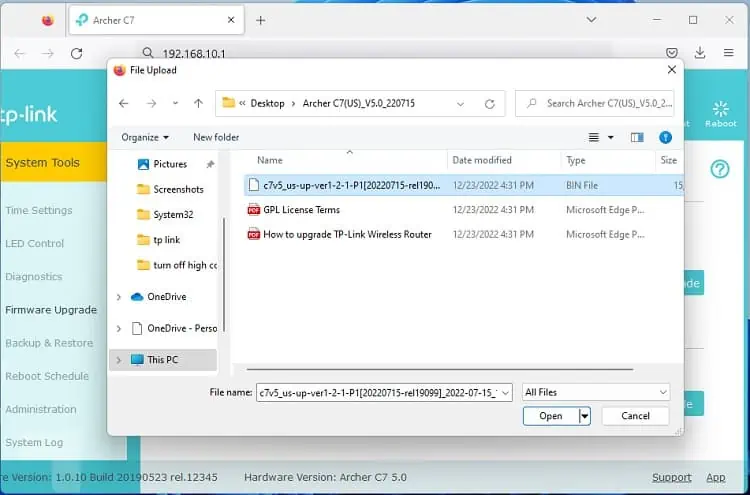
- Under Manual Upgrade, press the Browse button.

- Navigate to the unzipped location, open the file, and double-click the
.binfile.
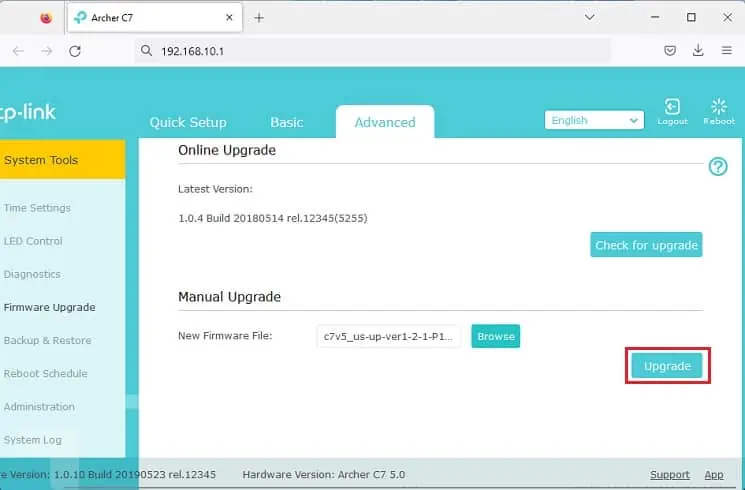
- Now, hit the Upgrade button.

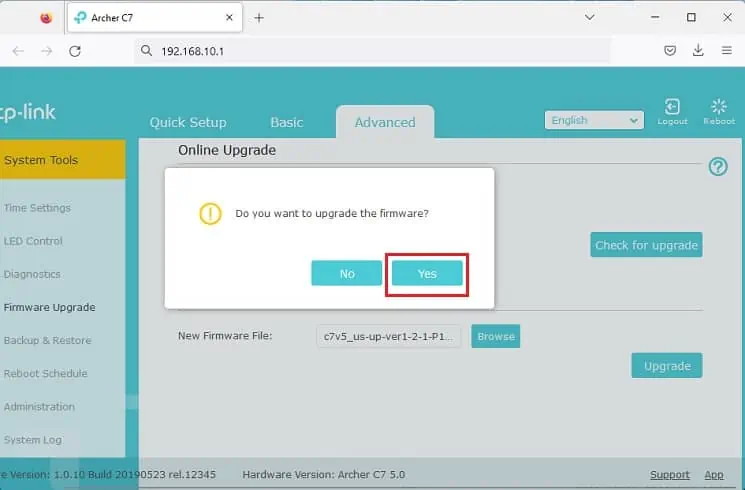
- Once the confirmation prompt opens, press Yes.

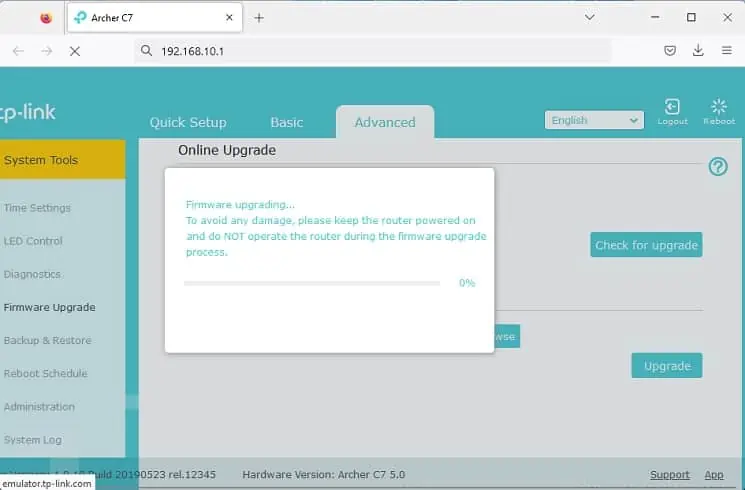
- Wait until the firmware update is complete. This may take several minutes.

- Finally, reset your TP-Link router by pressing the dedicated button for about five to ten seconds.
- After completing the basic setup, navigate to the Backup & Restore section to restore the saved settings.

