Physical to Virtual (P2V) operations are a critical part of server consolidation, and few solutions for this are as good as the ones from VMware. VMware vCenter Converter automates the conversion process, for the most part, allowing you to move workloads off physical machines to virtual environments easily.
One thing we must mention is that VMware last released vCenter Converter in May 2018 and officially dropped support for it in Dec 2019. As of Feb 2022, it was also made unavailable to download, citing security and reliability risks.
The good news, though, is that this hiatus is only temporary. Beta testing for the renewed version of vCenter Converter is already underway, meaning a full release of the new version isn’t far off now.
We’ll update this article when that time comes, but until then, you’ll be limited to performing the conversion on Workstation and vCenter Converter versions prior to Feb 2022 only.
Before You Start
Virtualizing a physical machine creates a snapshot of all the files and settings on the machine and exports them to a virtual machine. You can use Workstation Pro or vCenter Converter Standalone to virtualize a physical Windows machine, but only the latter option will work in the case of a physical Linux or Mac machine.
On the Windows machine, you’ll need an administrator account, and you’ll want to ensure that there’s network access. Next, you should temporarily disable the firewall with netsh advfirewall set allprofiles state off. Additionally, you must also disable User Account Control (UAC). Here’s how you can do this:
- Press Win + R, type
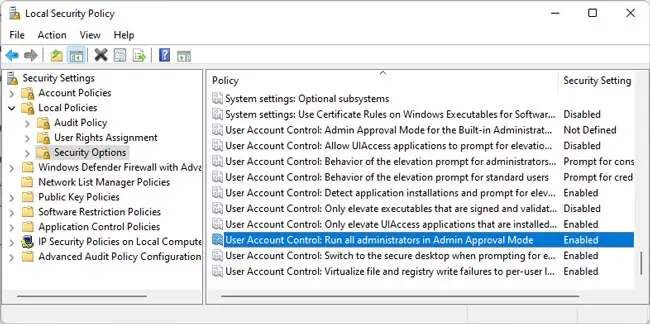
secpol.msc, and press Enter. - Select Local Policies > Security Options from the left pane.
- Scroll down and double-click the User Account Control: Run all administrators in Admin Approval Mode policy.

- Disable it, press OK, and restart your PC afterward.
Virtualize With Workstation Pro
Do note that with Workstation Pro, you’ll have to virtualize the entire machine, while the vCenter Converter Standalone app allows you to select specific partitions. With that said, on supported Workstation Pro releases, you can follow the steps listed below to virtualize a physical machine:
- First, turn on the physical system you’re trying to virtualize.
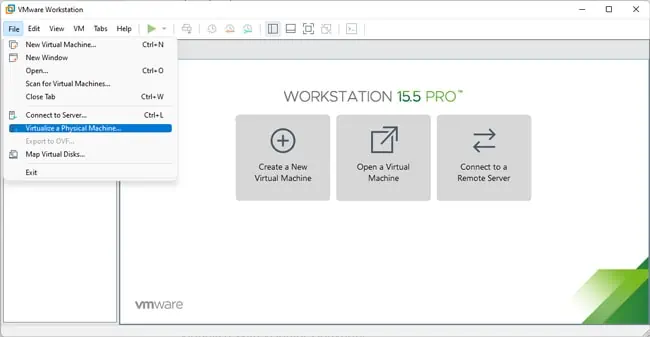
- Launch Workstation Pro and select File > Virtualize a Physical Machine.

- You may be prompted to download and install VMware vCenter Converter Standalone at this point. During the installation, select the default options and press Next on the first few screens.
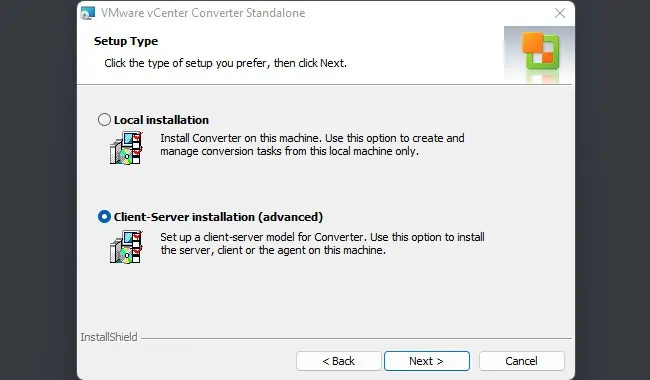
- In the Setup type screen, select Client-server installation (advanced) and press Next.

- In the Port Settings screen, change the HTTPS service port to an unused port. You can use the
netstat -a -b commandto display the currently used ports for this.
- Specify whether you want to join VMware CEIP and press Next > Install.
- After finishing the installation, select File > Virtualize a Physical Machine once again in Workstation.
- Use
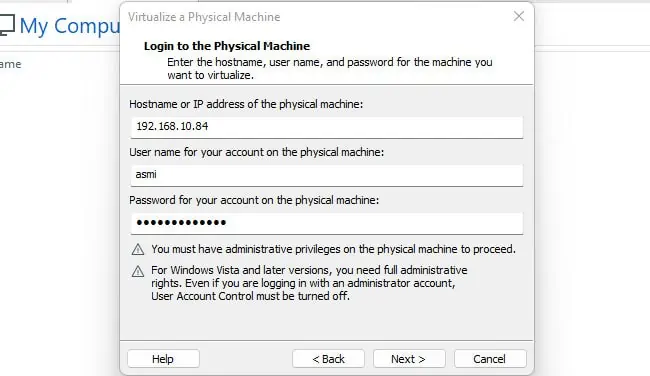
ipconfigto check the machine’s IP. - Enter the machine’s IP address or hostname, username, and password and press Next.

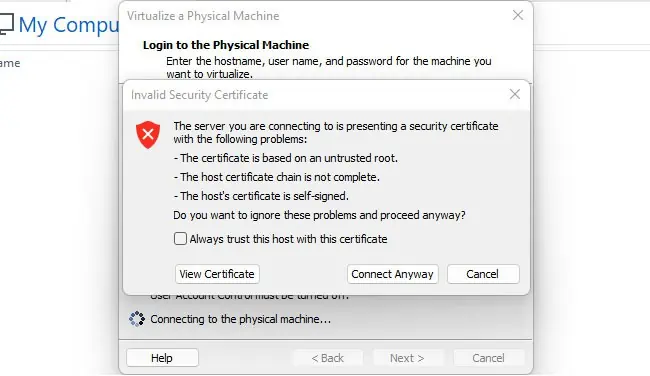
- If you receive a security certificate prompt, press Connect Anyway.

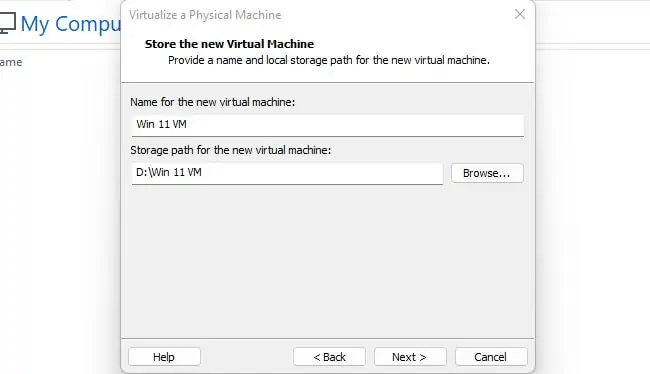
- Name the new VM and specify where you want to store the VM files.

- Enter the host machine’s username and password and press Finish.
- The time to create the VM will depend on the disk size of the physical machine, but you can generally expect a few hours atleast. Afterward, you can go to File > Open and open the
.vmxfile.
Virtualize With vCenter Converter
As stated, you can virtualize a physical Windows, Mac, or Linux machine with vCenter Converter Standalone, but there are a few things to keep in mind before you start:
- The external drive or network location must be formatted with ExFAT, NTFS, or FAT32.
- If Fusion Migration Assistant is installed, you must remove it before installing Converter Standalone.
- You should turn off the firewall, disable the antivirus, and consider uninstalling any third-party drivers.
With all that said, here are the necessary steps:
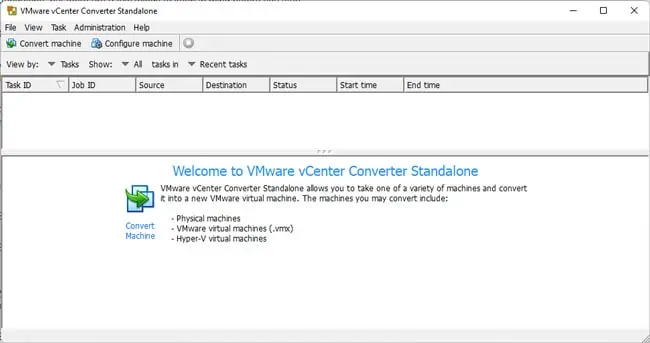
- Launch vCenter Converter Standalone and click on Convert Machine. Alternatively, select File > New > Convert Machine.

- In the Select source type menu, pick Powered on. Powered off allows you to convert existing VMs to VMDK, but as we’re trying to virtualize a physical machine, it’s not relevant to us at the moment.
- In the Specify the powered-on machine section, we’ll select This Local Machine and press Next for this tutorial. The other options allow you to convert a remote machine by specifying its IP and credentials.

- Select VMware Workstation or other VMware virtual machine from the Select Destination Type menu.
- In the Select VMware product menu, pick the appropriate VMware version.

- Name the VM, click on Browse, and select the location to save the VM to.
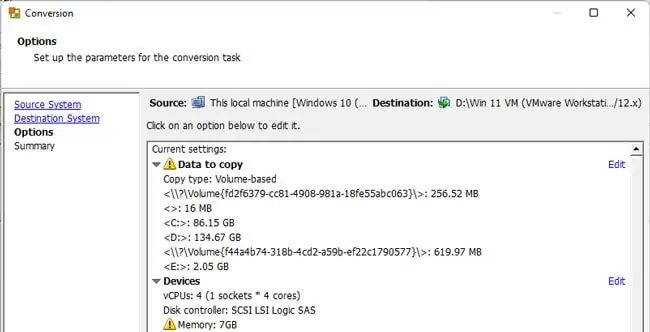
- If you want to specify the partitions to convert, click on Edit in the Data to Copy. Otherwise, press Next.

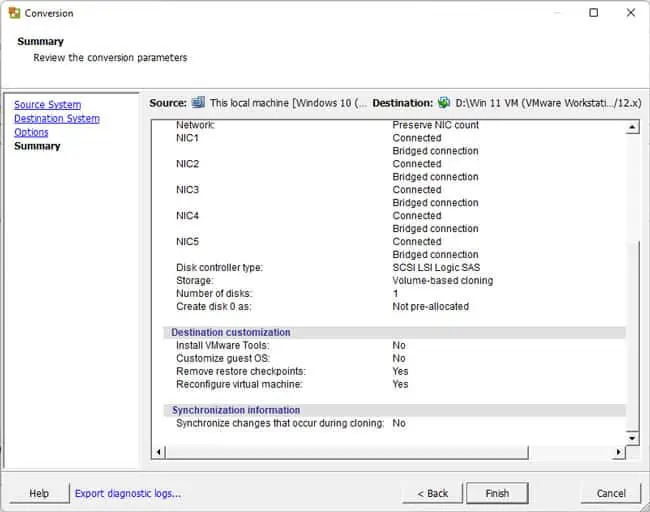
- Review the conversion parameters one last time, and if you’re satisfied, press Finish.

vCenter Converter Standalone will now copy the machine’s contents into a virtual disk file (.vmdk). Depending on the disk size of the physical machine, the conversion process will vary, but you can expect a few hours, atleast in most cases.
After the VMDK is created, you can use it to create a virtual machine. But once you do so, the files will be locked to that VM and not available to create other VMs. As such, you’ll want to create copies of the VMDK files if necessary. You’ll also want to ensure all the child VMDK files are in the same location and not scattered.
With all that said, here’s how you can create a Workstation virtual machine using .vmdk files:
- Launch Workstation and select File > New > Virtual Machine.
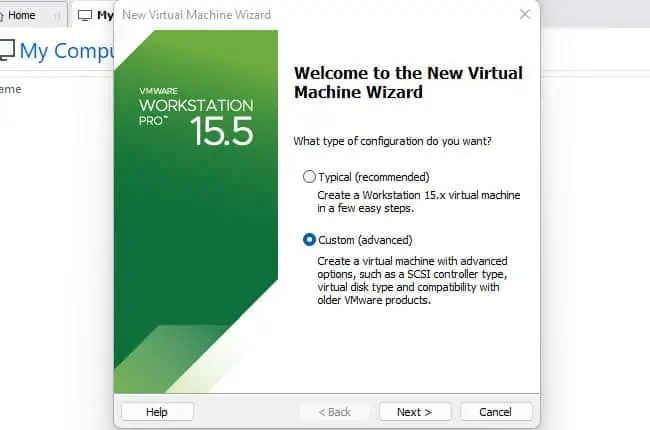
- Select Custom (advanced) and press Next.

- Select the Workstation version you’ll use for hardware compatibility and press Next.
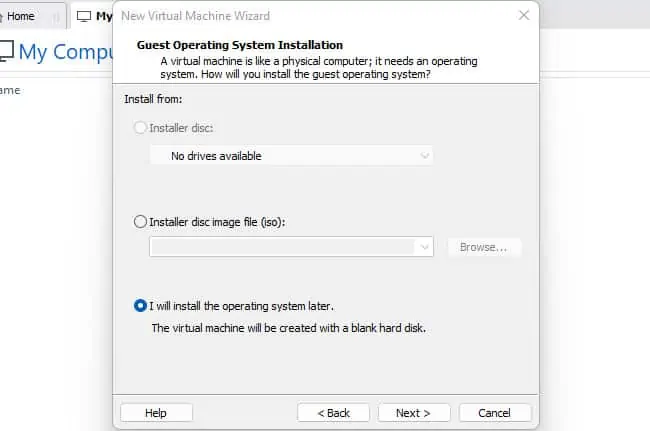
- Select I will install the OS later and press Next.

- Specify the Guest OS and version contained in the VMDK and press Next.
- Name the VM, specify where you want to save it, and press Next.
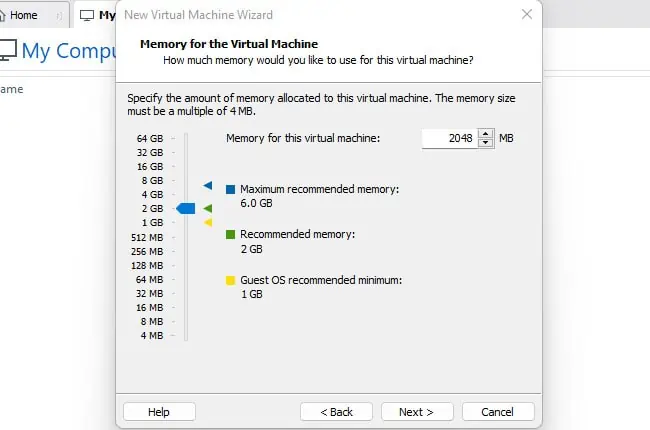
- In the next few screens, you can pick the recommended options, or you can manually adjust the firmware, processor, memory allocation, network type, I/O controller, and disk type according to your preference.

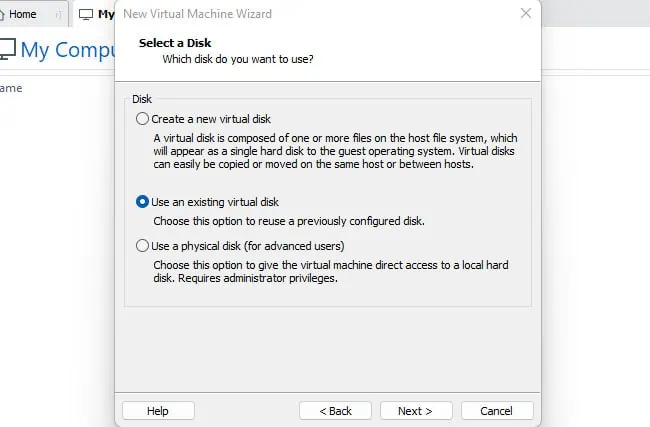
- In the Select a Disk screen, pick Use an Existing Virtual Disk and click Next.

- Click on Browse, locate the VMDK file, and press Open > Next.
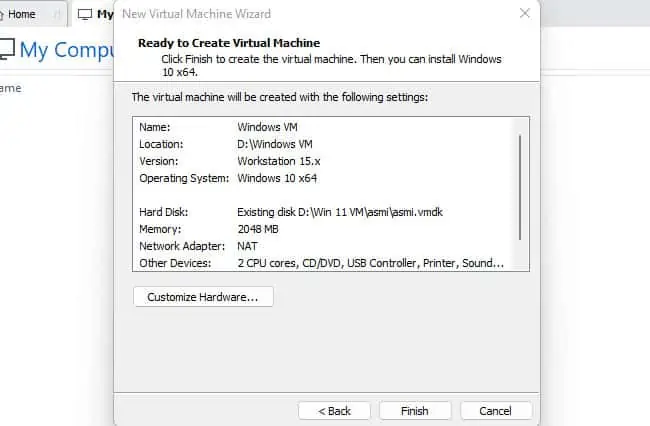
- Check the configurations in the summary window, customize the hardware if necessary, then press Finish.


