If your HP laptop is not turning on, you may face one of these possible scenarios:
- No keyboard light and the fan doesn’t work after pressing the power switch.
- Black screen with no sign of HP logo.
- Light blinking or beep sounds in a pattern trying to indicate the source of failure.
- The HP laptop is unable to charge or even when charging, it doesn’t have sufficient power to startup.
These can happen due to problems with the power adapter, battery, embedded controller, power switch, BIOS, or even CPU/RAM.
Start the troubleshooting by checking loose connections and replugging the power adapter. Identify whether the power outlet is at fault. If the issue persists, move on with other fixes.
First, Identify Blink Code
Since your HP laptop isn’t responding after pressing the power button, I can assure you that this is a hardware failure.
If you’re at least seeing the splash/logo screen, it could be related to boot and software issues. Also, signs of fans running and keyboard light mean that the laptop is turning on but rather has display issues.
In such scenarios, I advise trying out the basic solutions first. Follow my other guide related to black screens on HP laptops and try the fixes.
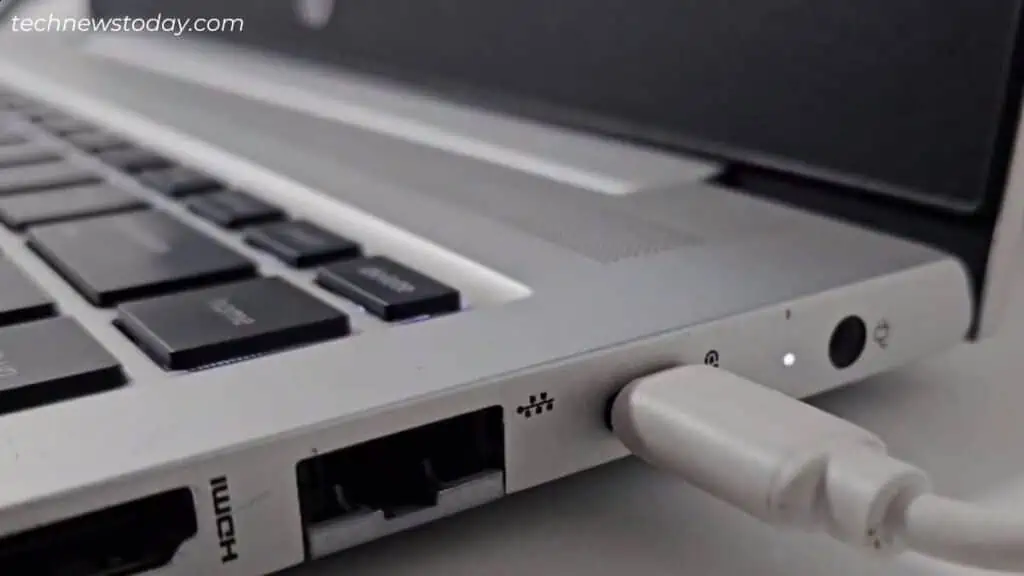
Whatever underlying problem there might be, most HP laptops indicate the source of the problem through blink codes. Check if your AC power adapter/Battery LED, Num Lock, or Caps Lock blinks white or red.
Here are the possible solutions that should work on all HP models:
| Blink Code | Issue | Solution |
| Continuous Blink or No Light | Power Supply | Identify whether the laptop is charging. Check if the power adapter or charging port could be at fault. |
| Continuous Glow | Battery | Let the HP laptop charge sufficiently. If it’s still not turning on, there’s a major issue with the battery. So, you may require replacing it. |
| 2 long then 2 short (or 6 blinks) | BIOS | Clear CMOS and Try BIOS Recovery |
| 2 long then 3/4 short | Embedded Controller | Reset Embedded Controller |
| 3 long then 2 short (or 3 continuous blinks) | RAM | Reseat the SODIMM module. Clean the memory stick(s) and slots. Make sure the slot is working or not. Replace the memory module(s). |
| 3 long then 3 short | Graphics failure | The graphics chip could have failed. You need professional support from the nearest HP service center. |
| 3 long then 4 short | Power Supply | Check if the power adapter or charging port is damaged. |
| 3 long then 5 short (or 1 blink) | CPU failure | Try reseating the heatsink/heat pipes. Clean the thermal paste and reapply. Also, clean the fans and vents. Upgrade the laptop CPU. If that’s not possible, you need to contact the vendor. |
| 3 long then 6 short | CPU not supporting a feature | Clear CMOS. Upgrade the CPU (if possible). |
| 4 long then 2/3 short | CPU (overheating) | Thoroughly clean the laptop |
| 4 long then 4 short | GPU (overheating) | Thoroughly clean the laptop |
| 5 long then 2/3/4 short | Embedded Controller | Reset Embedded Controller |
| 5 | Motherboard | Try clearing CMOS and performing BIOS recovery. If these fixes do not help, you need to replace the motherboard. |
Now, let’s break down each of the aforementioned solutions in detail below. Even if there’s no blink code as discussed above, proceed step-by-step to identify and fix the underlying problem.
Identify Battery Failure
When resetting the keyboard or embedded controller, did you notice any signs of battery swelling? If so, I’m pretty much sure that your HP laptop isn’t charging at all.
You can identify this by checking the battery LED. If it doesn’t flash any light, you can confirm that the laptop isn’t receiving power.
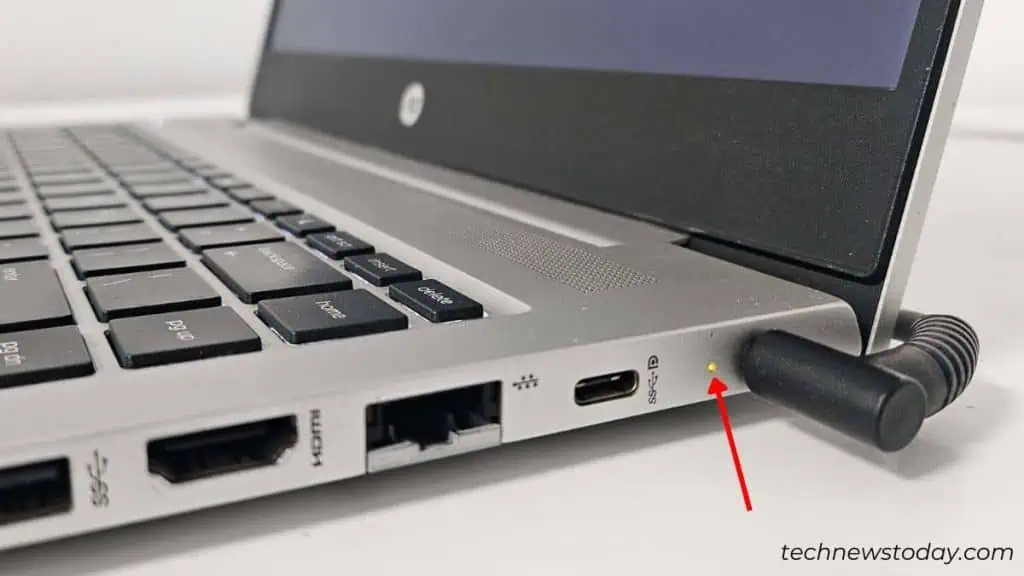
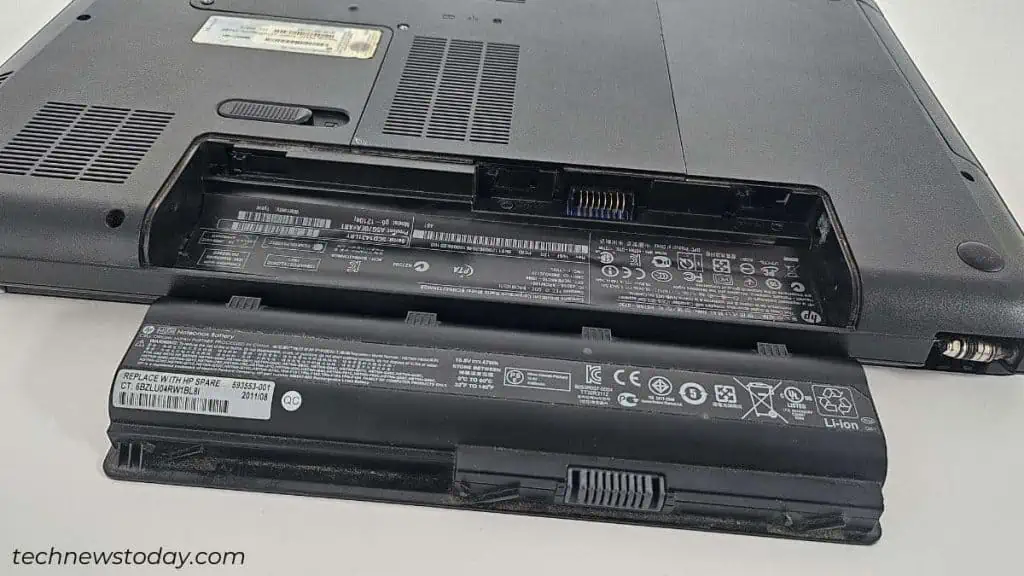
However, not all HP models support this feature. To validate whether the battery is at fault, I suggest starting the laptop without it. All you have to do is remove the battery, keep the AC adapter plugged in, and turn it on.
If your laptop boots up, there was an issue with the battery and it requires replacement. Make sure to get the authentic one from the official HP store (that has the same wattage rating).
Additional Tip: All laptops have dedicated battery drivers. In case these get corrupted or disabled, the device won’t charge. Eventually, this may completely drain the laptop and it won’t turn on.
If it starts with only the AC adapter attached, make sure you update/reinstall the driver.
Verify Faulty Power Adapter
If your laptop isn’t turning on even after starting it without a battery, there’s probably an issue with the power adapter. Here are the possible ways to verify this:
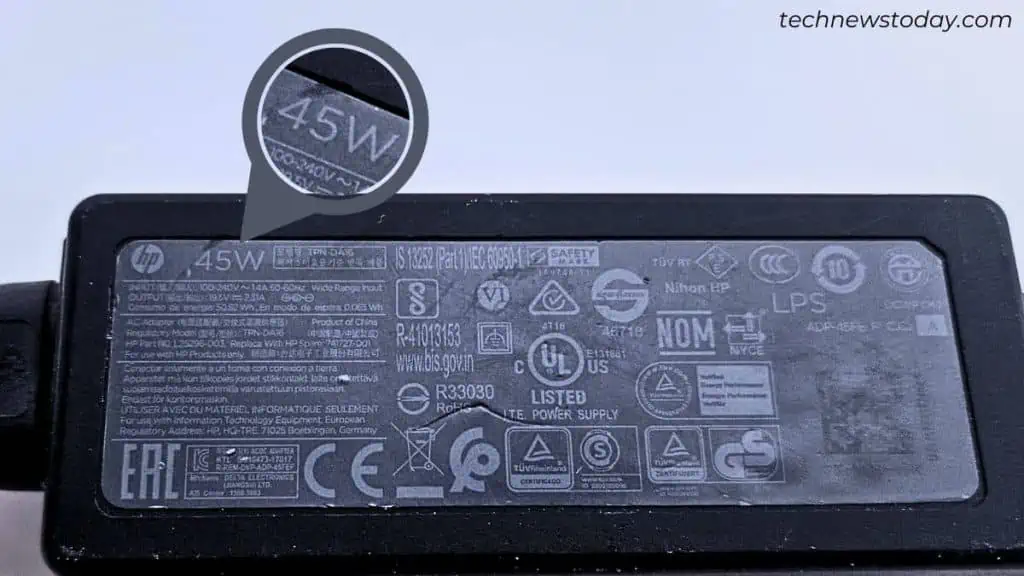
- Check the wattage rating on your AC adapter’s label and compare it with the specifications online.

- If your notebook supports a USB Type-C Power Delivery or Thunderbolt port, you can utilize a dedicated cable to charge it.
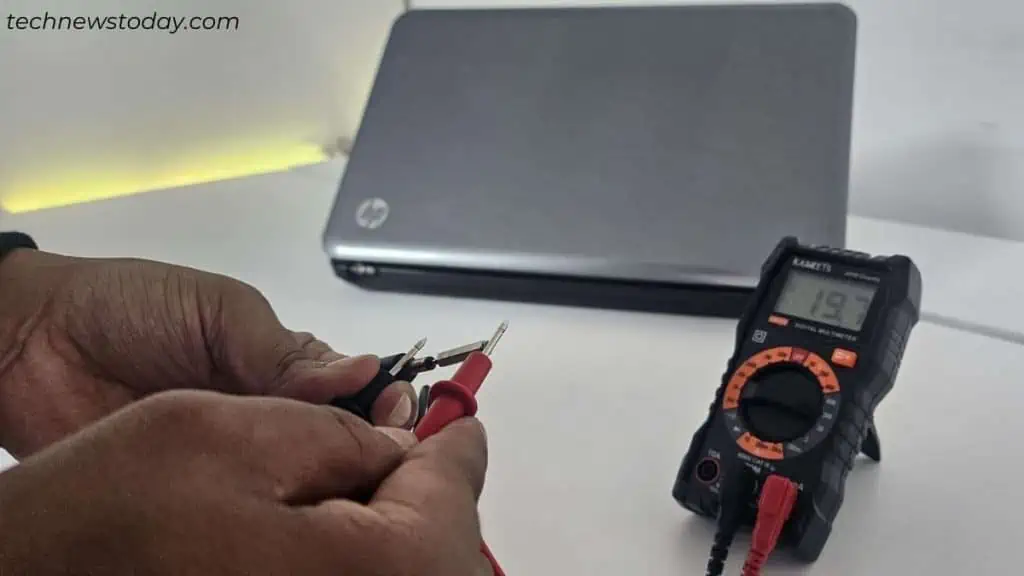
- For users with basic electronics knowledge, you may use a digital multimeter to test the DC voltage:

- Make sure the dial is set to DC (20 or 200V).
- Insert the red lead into the charger (make sure it touches the pin or any metal conductor inside). In case the pin doesn’t touch, you may use a nail or anything conductive. We used a screwdriver bit to test ours.
- The black lead should be touching the outside metal body.
- Ensure the DC volt reading is somewhere between 18 and 20. Check the charger’s output voltage (for most, it’s 19V).
- In case you have an identical charger or one with similar current and voltage ratings, test that out.
- If any of the aforementioned tests fail, you’re probably not using an authentic charger. Replacement is required!
- For advanced users here’s a guide that should help repair the broken laptop charger yourself.
Reset Embedded Controller
Oftentimes, issues with key sequence, boot block, and firmware/BIOS lead to startup issues with the HP laptop.
By resetting the dedicated Embedded Controller chip, you should be able to fix the underlying hardware issues. This is even handy as it resolves any defective power management function.
If your HP laptop supports a reset pinhole (at the bottom), insert a paperclip and press it for about 10 to 20 seconds.
In case that doesn’t help or the notebook doesn’t support such functionality, you need to drain the capacitors. The process is fairly easy and here’s how to do it:
- Disconnect all the external peripherals as well as the power cord.

- Next, remove the external battery (skip this if yours supports the internal battery).
- Press and hold the power button for 10 to 20 seconds. This might not be enough in severe cases. Thus, I recommend holding it for about a minute.

- Once the capacitors drain, reconnect the AC adapter and start Windows.
- If it starts, you may turn off, reinsert the external battery, and restart the HP laptop.
Try Resetting CMOS
Another main cause for boot or POST (Power On Self Test) failure involves a corrupted BIOS. Resetting CMOS should clear all the stored data and reset the firmware.
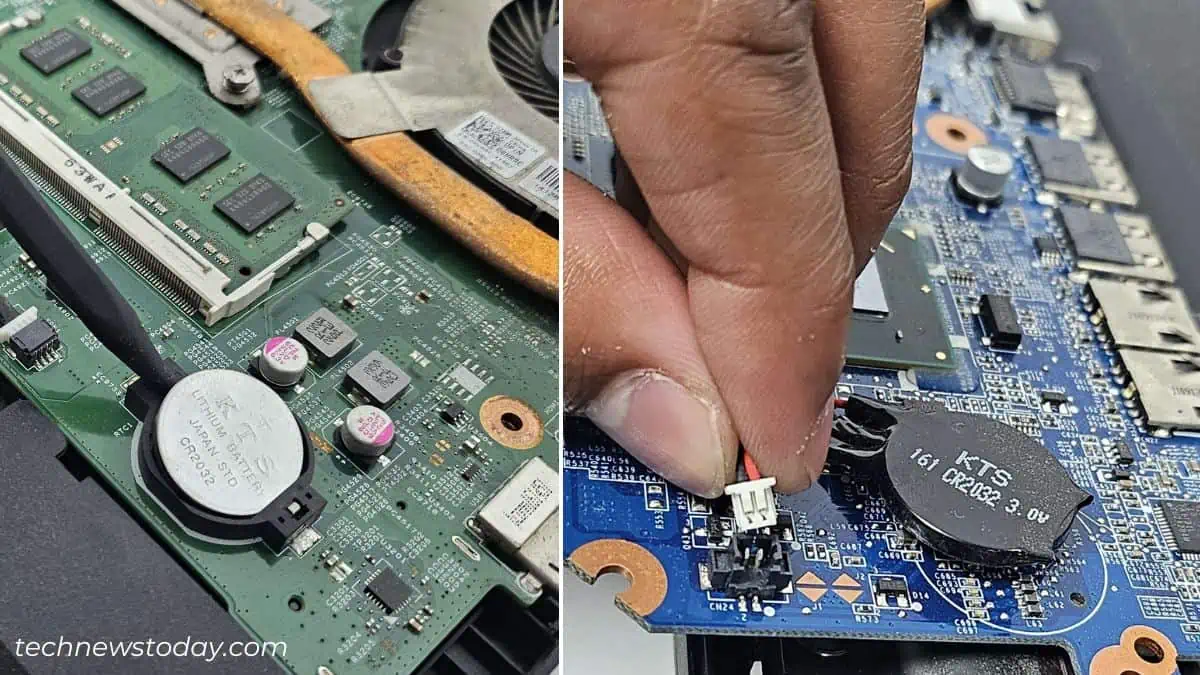
- First, open up your HP laptop’s back panel.
- Locate the coin-shaped CMOS battery and remove it. Some might even have it on the rear side of the motherboard as shown above.
- Wait for about 15 to 30 minutes before reinserting it.
- Reattach the back panel and power on the device.
- You might get a CMOS Reset message if the procedure was successful. Hit Enter and you should be booted into Windows.
If there’s no CMOS battery, repeat the steps I provided to reset the EC. This time, keep the external battery out for a longer time (at least 30 minutes).
In case your HP laptop has an internal battery, open the bottom panel. Disconnect the cable for several minutes and replug. Reassemble and check if it turns on now.
Additional Tip: You can even test the CMOS using a multimeter. In case the reading falls below the specified voltage, know that the CMOS battery is probably dead.
Trigger BIOS Recovery
Clearing CMOS works most of the time and it also helped our team solve a similar issue on Probook 440 G6. However, if you’re encountering this issue after a failed BIOS update, the only solution is performing auto recovery or doing this manually.
For the auto-recovery feature to work, there should be a backup of the BIOS existing in your HP laptop. Otherwise, you’ll have to try a key press combination or use a recovery USB drive.
Before You Begin: Ensure your laptop doesn’t support HP Sure Start. BIOS can’t be recovered on HP models supporting this functionality.
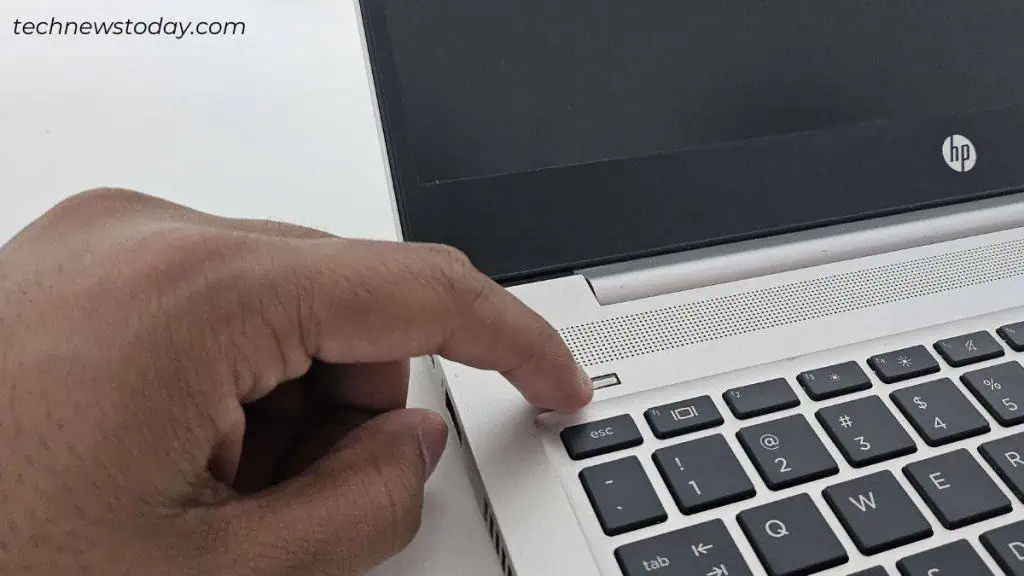
For some, holding the power and mute buttons together for a few seconds has also helped. You can try that for sure.
Try Key Press Combination
- Properly shut down your notebook computer while keeping the power adapter plugged in.
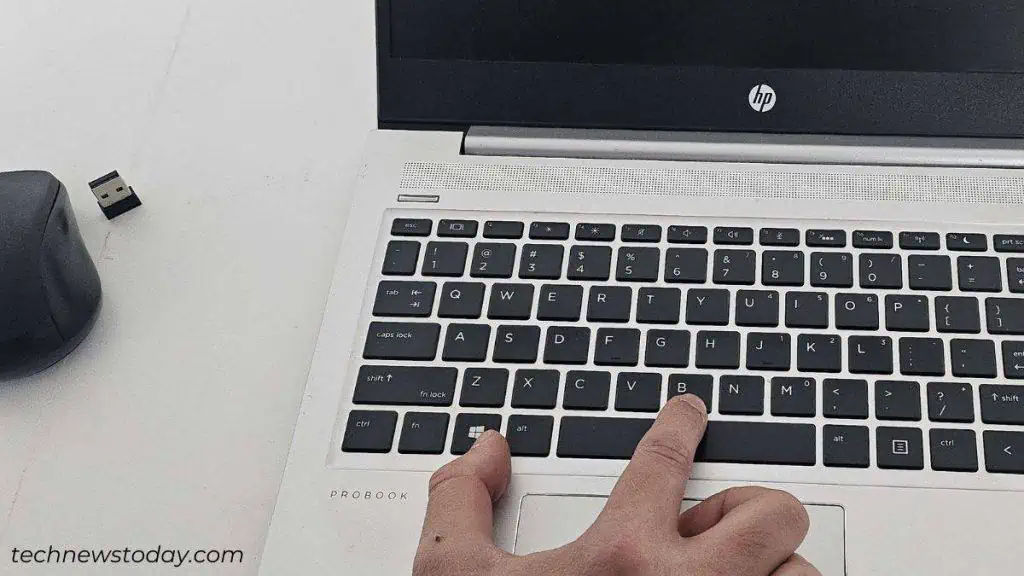
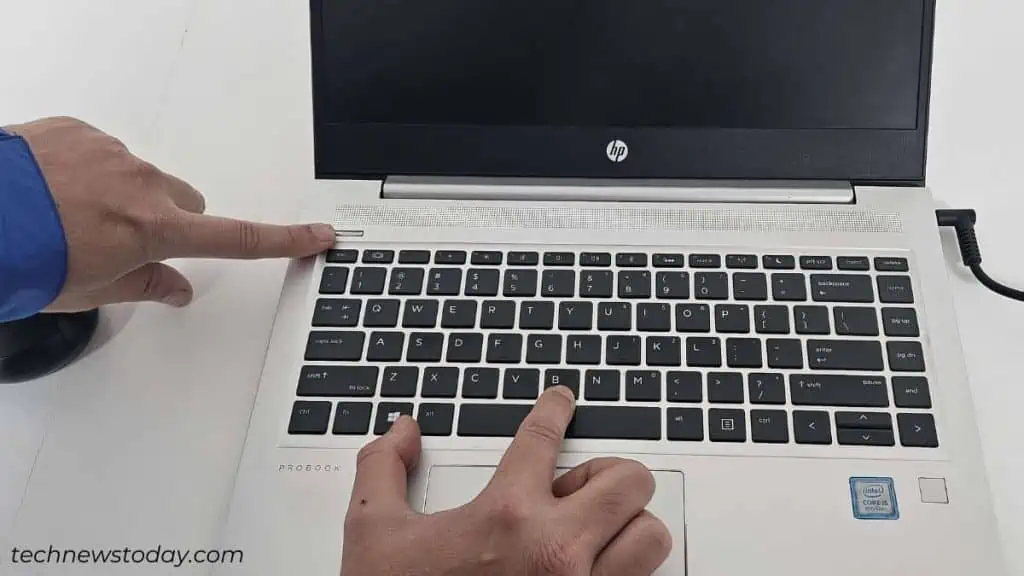
- Keep pressing Windows + B. If that doesn’t help, try Windows + V.

- While at it, hold the power button for a few moments (not more than 3 seconds).

- Once you release it, you should be greeted with the HP BIOS Update window. Just wait until the recovery is complete.
- If you’re able to boot up, I advise updating your HP laptop to its latest BIOS version.
Manual BIOS Recovery Using USB Flash Drive
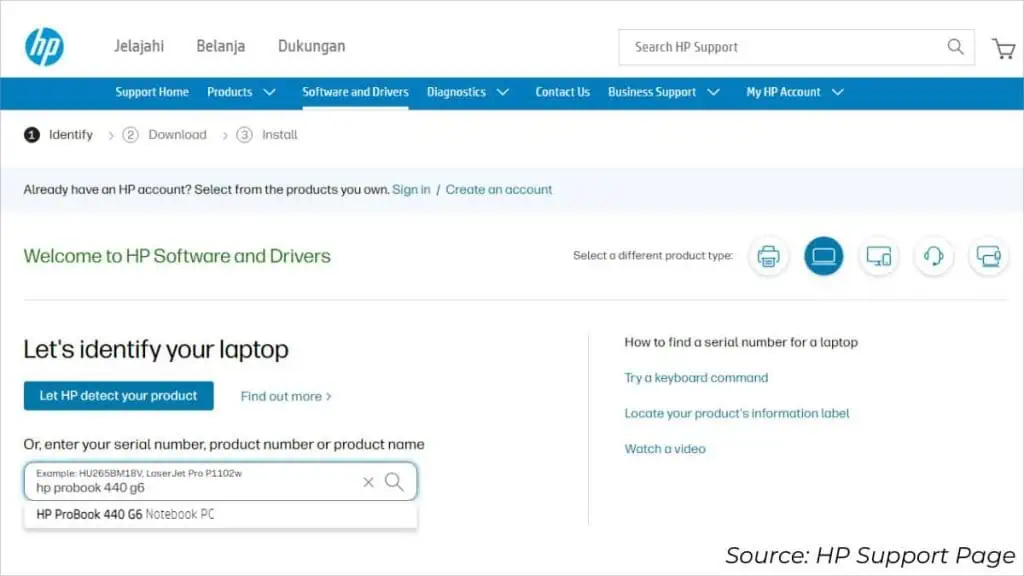
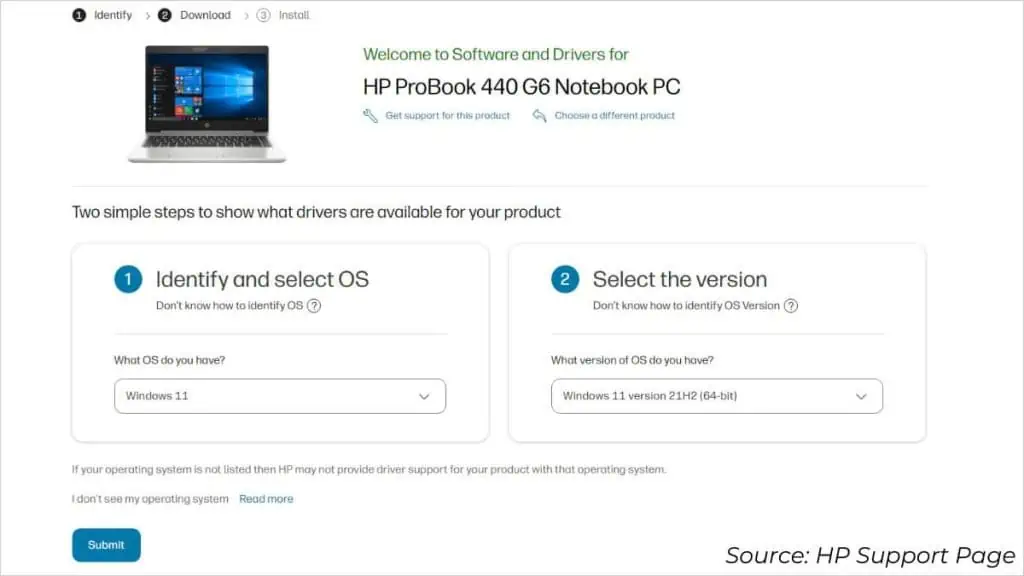
- Use a working PC to visit the official HP support page.
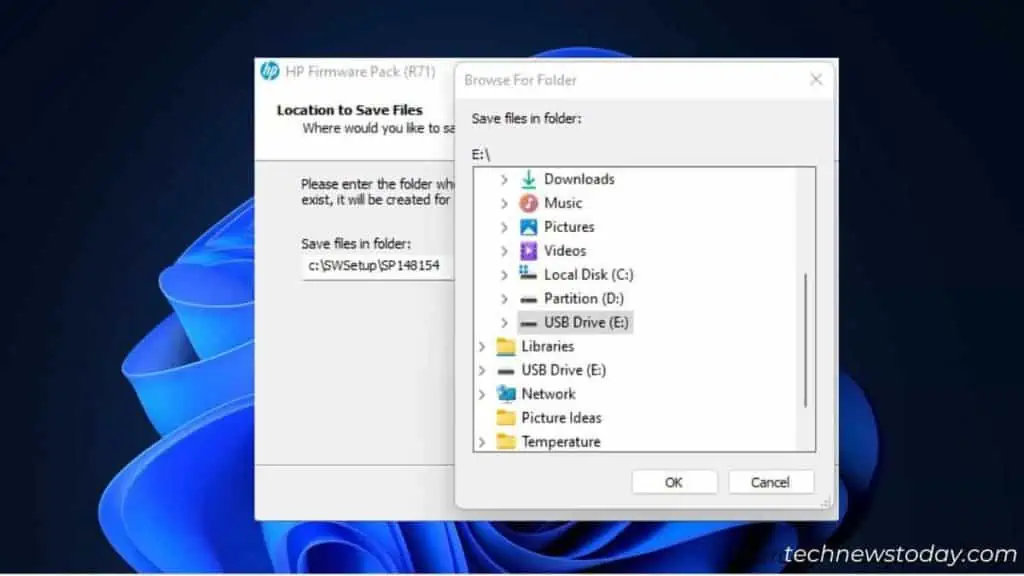
- Don’t forget to plug a FAT32-formatted USB stick here.
- Enter your HP laptop’s serial number/product number/product name.

- You’ll also need to select the appropriate Windows version.

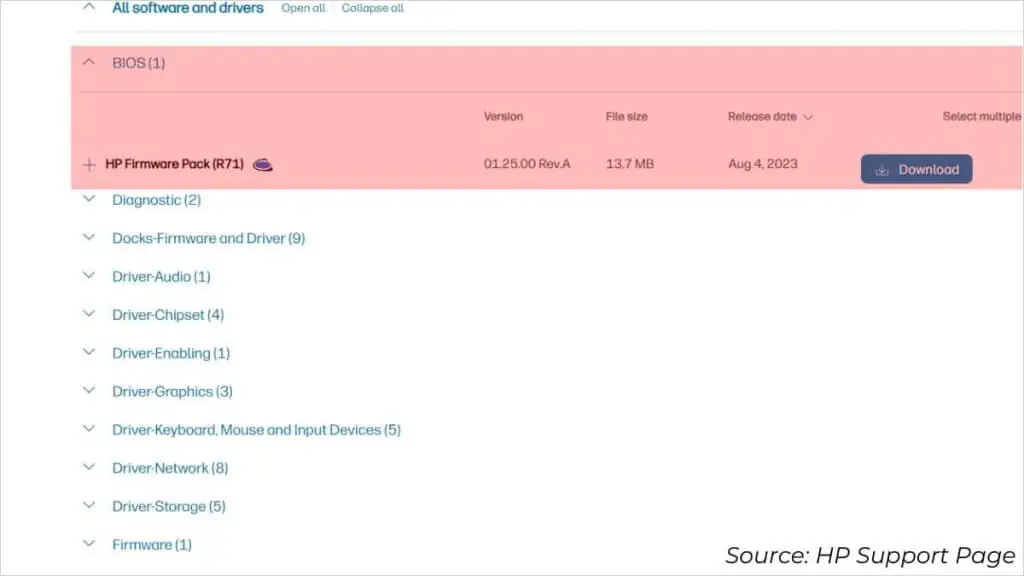
- Identify the correct version in the BIOS section and download it.

- Run the utility and continue with the on-screen instructions. The idea is to extract files to the flash drive.

- Get to your HP laptop and insert the flash drive.
- Repeat the same process as prescribed in the “Try Key Press Combination” section above.
Reseat or Replace Faulty Components
When an HP laptop doesn’t turn on, the culprit is usually power failure or corrupted BIOS. However, faulty components can also lead to NO BOOT and NO POST issues.
There should be some form of blink codes as tabulated in the first troubleshooting step. Based on that, you can try reseating the memory module or the processor (if possible).
Follow the general instructions below to learn the right way to reseat laptop RAM:
- Remove the external battery and press the power button for at least 10 to 20 seconds.

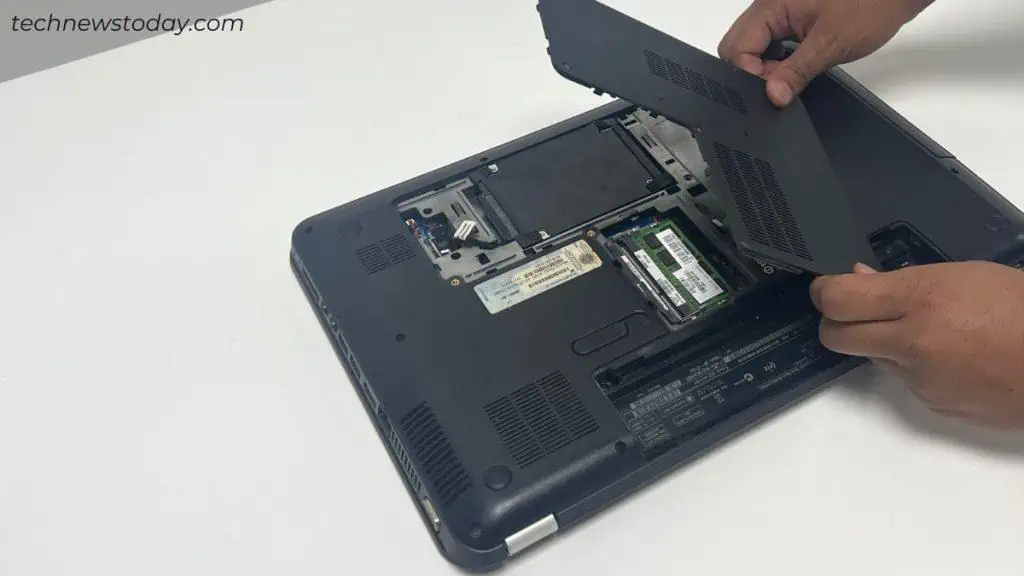
- Once the capacitors are discharged, open the bottom cover.

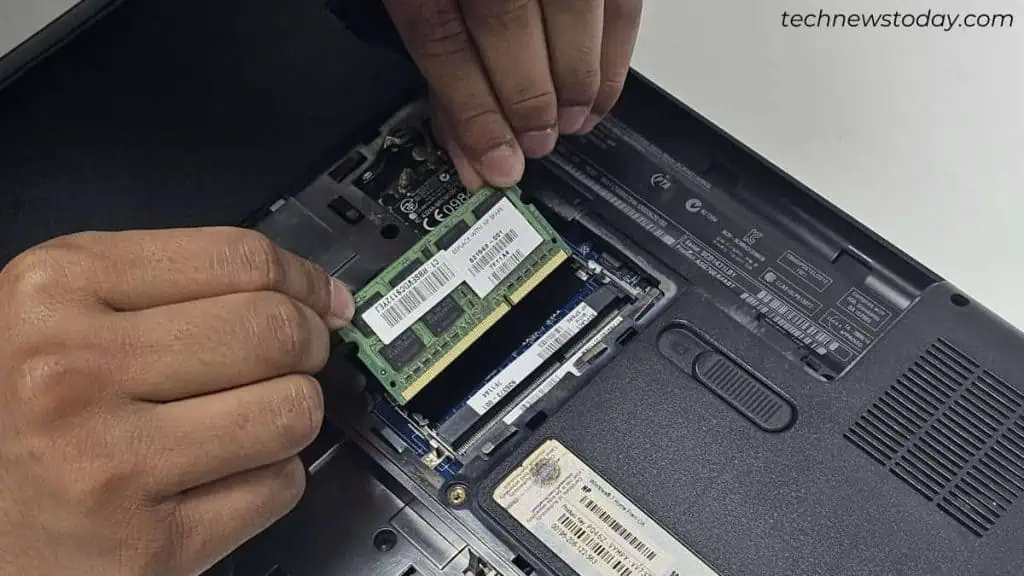
- Look for the SODIMM slot and carefully detach the memory stick(s).

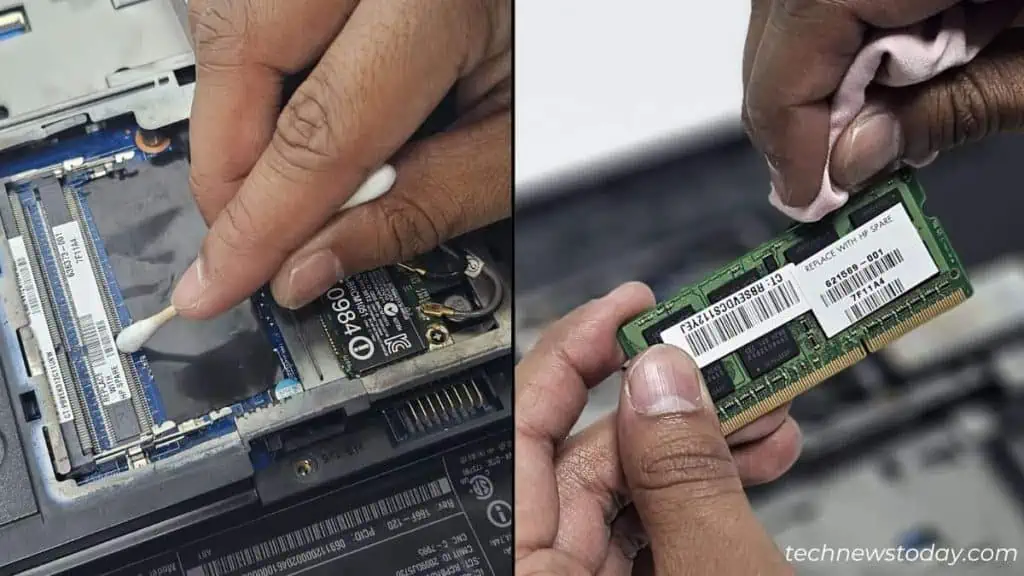
- Next, clean the RAM using a lint-free microfiber cloth. You may use a cotton bud to clean the slots.

- Align the notch and reinstall the memory module.
- Assemble everything and start your HP notebook.
- If you’re only using one memory stick, try it on another slot.
- If the laptop still doesn’t turn on, you’ll need to replace the stick.
Unlike RAM, laptop CPU upgrade or replacement is only supported by a handful of HP models. Most are soldered onto the motherboard and you won’t find a dedicated processor socket.
Nonetheless, you can still reapply the thermal paste and do a proper cleaning of your laptop to see if this helps out. Don’t forget to clean the fans and blocked air vents.
Replace Damaged Charging Port
Are you using a broken charging port? Well, there are obvious signs, like loose connectivity, slow or intermittent charging, visible damage, etc.
As I stated earlier, you can try charging your laptop with an alternative method. If it doesn’t work as well, this could mean the charging port itself is faulty.
While it may be too hectic to fix a charging port, a quick replacement is a much easier option. Do note that it is not applicable to every HP model.
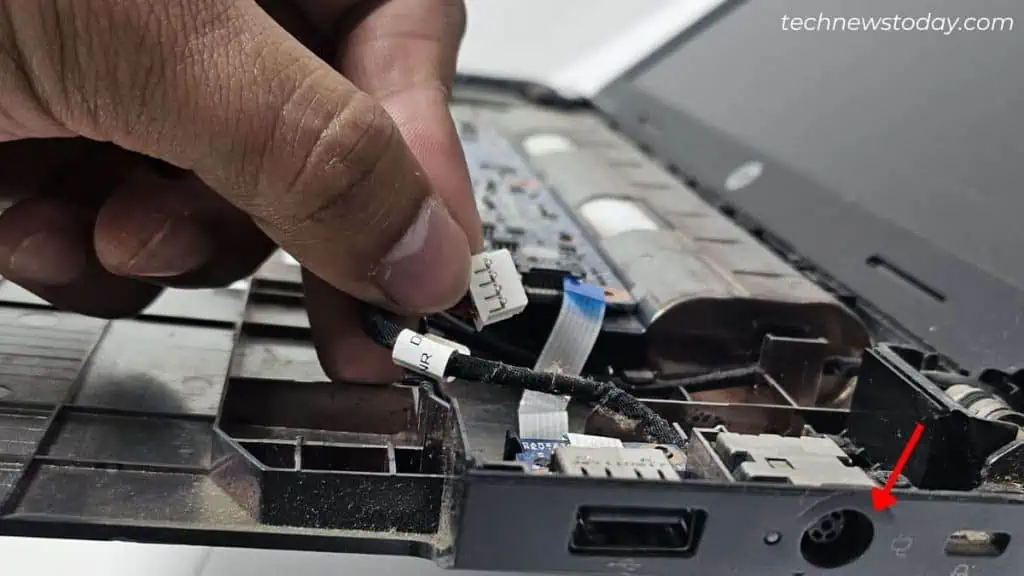
First, open up the laptop’s back panel and check if there’s a relevant cable connected to the mainboard. Replug and see whether this solves your problem. And if not, you have to go for a replacement.
Visit a repair shop or you can even order it online. Just make sure you purchase the appropriate one depending on the model.
Some HP laptops have the charging port slotted directly onto the motherboard. Even so, if you possess hardware and soldering skills, you might still be able to replace it.
Check the Power Switch Connector
Sometimes, there’s no indication of POST or battery failure. Yet, the HP laptop doesn’t respond when pressing the power button. Not even the fans make noise.
While it’s a rare case scenario, there could be something wrong with the power switch connector. The button might not be pressing properly or the motherboard connector might have gone loose.
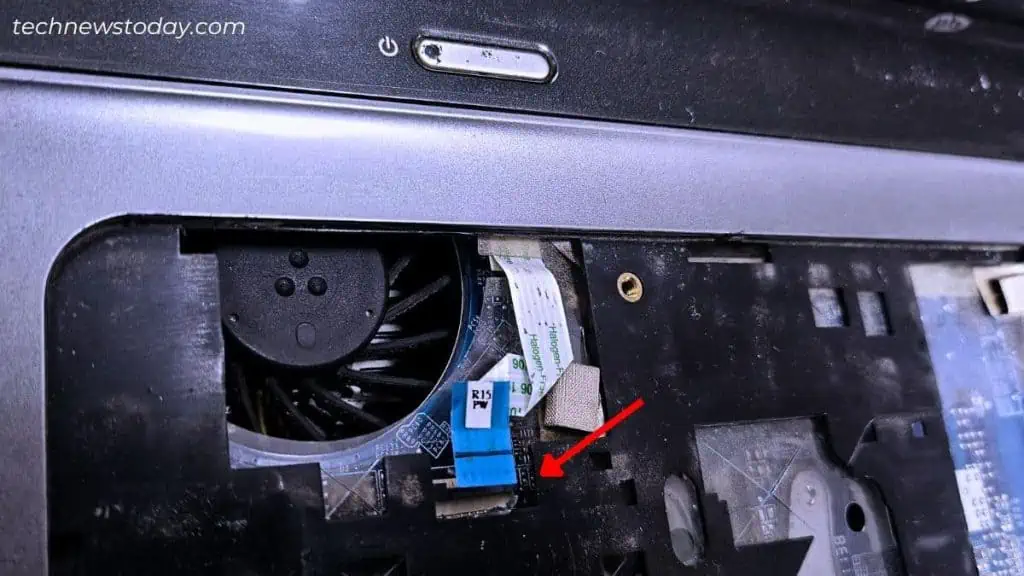
Open up the bottom casing and identify the power switch connector location. You may get help from the user manual. Reconnect it and turn on the HP laptop.
Even if that doesn’t help, I recommend shorting the keyboard connector’s two pins. This should help you turn on the laptop without the power button. If this works, know that the switch is faulty and you need to replace it.
Contact Vendor for Motherboard Replacement
You have tried everything and yet the HP laptop doesn’t turn on. This could be an indication that the motherboard is dying or is probably dead.
Also, there could be an underlying issue preventing from getting a sufficient power supply. For instance, the power module may have short-circuited after a power surge.
Before destroying or disposing of the laptop, I suggest contacting the vendor/manufacturer. If the warranty hasn’t been void, they might replace the laptop or its damaged parts.
Your storage drive shouldn’t be affected. So, make sure you remove the HDD or SSD and recover data using another computer.
In my case, the old HP Pavilion G6 laptop was completely broken with no signs of life. I’ve harvested some of the working parts and still use them today.

