A touchpad on any laptop is one of the crucial pieces of hardware that helps users navigate the Operating System’s UI. If by any chance, it stops working, you will solely have to rely on keyboard shortcuts.
One particular reason you might be facing this issue on an HP laptop is that the touchpad is disabled within the OS or in the BIOS. Besides this, system file failure and corrupted driver files are known to cause issues with hardware. And this includes the touchpad as well.
This article further lists why the HP touchpad stops functioning, along with a step-by-step guide on fixing the issue.
Why is the Touchpad on My HP Laptop Not Working?
On most HP laptops, you can double tap on a corner of the touchpad to enable or disable the touchpad. Once you double tap on the corner, an LED light on the touchpad will turn on, indicating that the touchpad is locked.
- Touchpad disabled
- Corrupted Driver Files
- Outdated driver
- Switching between Tablet and Laptop mode
- Complications due to third-party application
- Hotkey damaged
How to Fix an Unresponsive HP Touchpad?
You can follow the solutions mentioned below to fix the touchpad on HP laptops.
Enable the Touchpad
The touchpad is not a device that malfunctions easily. If your touchpad is not responsive, it is usually due to it being disabled. You can find several settings in Windows, mouse properties, device manager, and the BIOS that can disable the touchpad.
Even if you disable the touchpad in any of the settings, you cannot use the touchpad. Therefore, first, check if the touchpad is enabled on your laptop.
From BIOS
A BIOS (Basic Input Output System) has access to all the hardware connected to the motherboard. And since the touchpad is also connected to the motherboard, you can enable or disable it from the BIOS.
You can follow the steps mentioned below to enable the touchpad from BIOS.
- Press F10 repeatedly during startup to enter the BIOS menu.
- Go to the Advanced tab and then select Built-in Devices Options.
- Check the Touchpad checkbox.
- Save and Exit the BIOS.
Depending on the laptop, you may have a BIOS with a different UI. In that case, navigate the BIOS to locate and enable the Touchpad setting.
From Windows Settings
Windows settings also have full access to your touchpad. However, accessing the touchpad setting can be difficult without a functioning touchpad. Below, we have a step-by-step guide on enabling the touchpad by just using the keyboard.
- Press the Windows + I key to open Settings.
- Using the up and down arrow key, go to Bluetooth and Devices.
- Keep pressing the Tab key until the Devices section highlights.
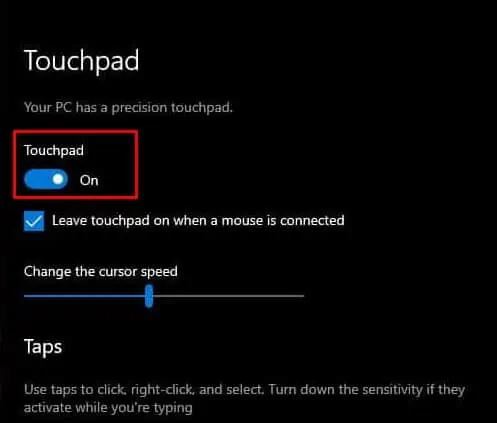
- Using the arrow key, go to Touchpad and select Enter.

- Press Space to set the radio box to On.
Once done, try using the touchpad.
Using Hotkey

Some HP laptops have a dedicated function key that enables or disables the touchpad. If this key has its LED turned on, it means that the touchpad is disabled. To enable, press Fn and the function key simultaneously.
The function key will have a logo that represents a touchpad. On HP laptops, this key is mostly F6 or F9. However, depending on the laptop, it can be any of the function keys. You can refer to your laptop’s user manual to locate this button.
Touchpad Switch
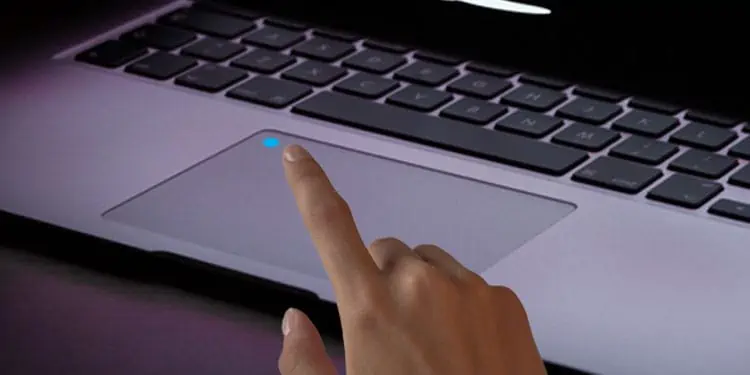
If your laptop does not have a dedicated function key, your laptop may still have a feature to enable or disable the touchpad. Check for any LED on one of the corners of the touchpad. Usually, this is located on the upper-left corner of the touchpad.
Double tap this area to enable or disable the touchpad. When the touchpad is disabled, it will have an LED light indication. If your laptop does not have this feature, try enabling the device using the device manager.
From Device Manager
The device manager has access to all the devices and their drivers connected to the computer. You can also disable any device from the device manager. If your touchpad is not working, it can be that the setting is disabled here.
- Press the Windows + X key, use the Arrow key to highlight Device Manager, and press Enter.
- Press Tab to highlight the first list item.
- Press the Arrow key to navigate to Human Interface Devices.
- Press the right arrow key to expand Human Interface Devices.
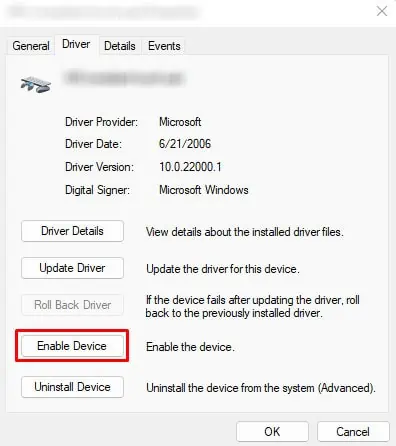
- Again, scroll down to the HID-compliant touchpad and press Enter.
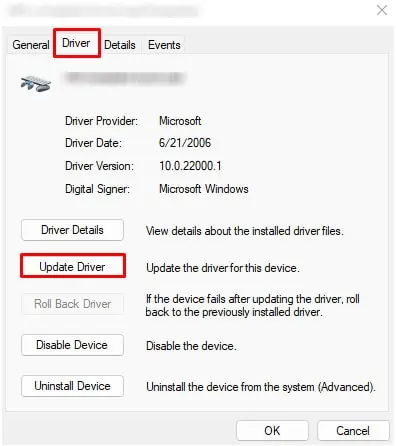
- Highlight the General tab and press the right or left arrow to go to the Driver tab.
- Again press the Tab key to highlight Driver Details.
- Scroll down and click on Enable Device.

- Press Ok.
Run Hardware Troubleshooter
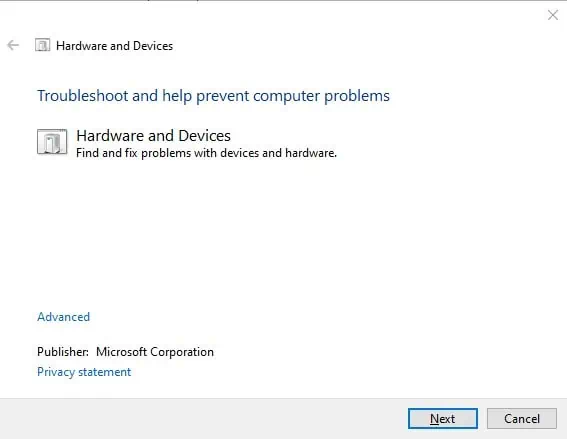
The hardware and Devices troubleshooter searches for issues with the device and attempts to fix any found issues. It scans the device and its drivers and performs a series of tests to figure out whether it functions smoothly. And if it finds any issues, it changes requires windows settings that may fix the problem.
To run the troubleshooter,
- Press the Windows + R key to open Run.
- Type
msdt.exe -id DeviceDiagnosticand press Enter.
- Select Next and press Enter.
The troubleshooter will now perform a series of tests to fix any issues.
Update Windows
Microsoft provides a series of updates to their customers. Windows update fixes minor bugs, provides improved security, and improves systems performance. If the problem with the touchpad is due to a bug in Windows, an update might fix the issue.
- Press the Windows + I to open Settings.
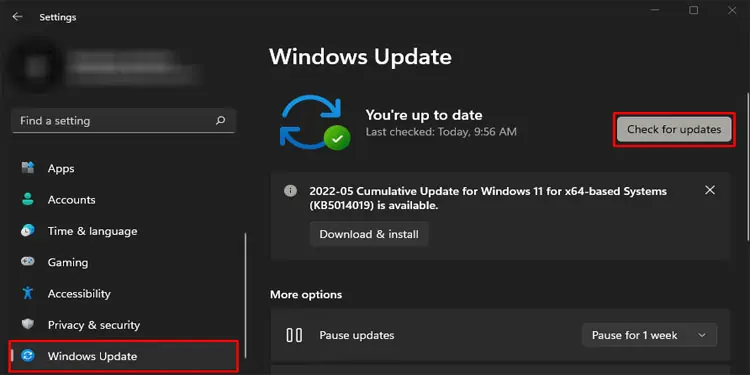
- Press the down arrow to highlight Windows Update and press Enter.
- Repeatedly press the Tab key to highlight Check for updates or Install updates.

- Restart your PC once the installation process is complete.
Run OS in Safe mode
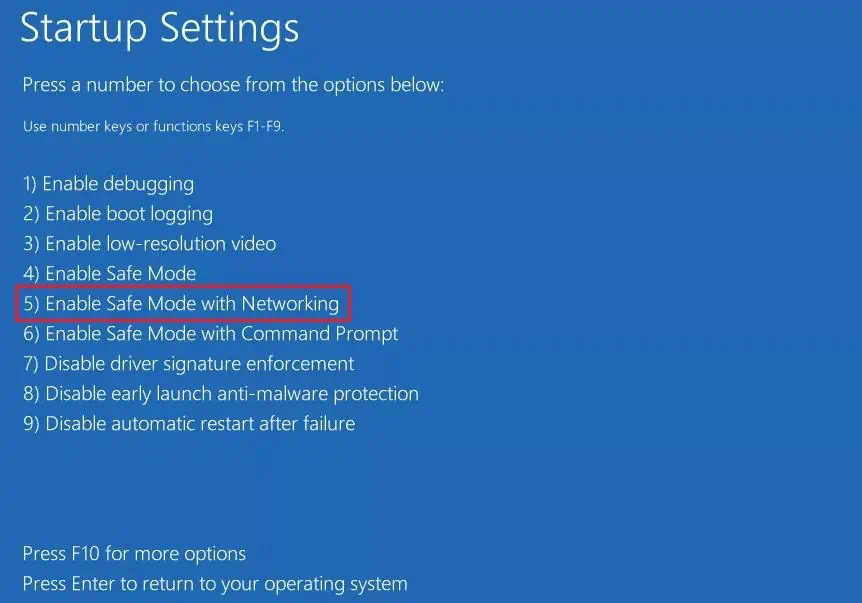
When the system runs in safe mode, the Operating system will run without most of its drivers and software. It only runs a few of the basic drivers. By doing this, it gets rid of any complications that might be stopping the touchpad from functioning.
If your touchpad works fine on safe mode, there is a possibility a software or a driver is causing the issue.
- Press the Windows + I key to open Settings.
- Keep pressing the Tab key to highlight Recover on the right panel and press enter.
- Again press the tab to highlight Restart now on Advanced Startup and press Enter.
- After the restart, go to Troubleshoot > Advanced options > Startup Settings > Restart.
- Once the PC restarts, press F5 to boot into safe mode with networking.

Switch Between Tablet Mode and Laptop Mode
You can use a laptop that can turn 360 degrees in both tablet and normal mode. You cannot use the keyboard and the touchpad when in tablet mode. When you switch between modes repeatedly, the touchpad sometimes may still think that the laptop is in tablet mode when actually it is in laptop mode.
If this happens, you may be unable to use the touchpad or the keyboard. To fix this, set your laptop in normal mode, and restart the PC.
Update HID Touchpad Drivers
The touchpad driver makes the physical touchpad communicate with the Operating system. An outdated version of a touchpad driver will have a lot of issues and may not transfer data to the OS efficiently.
To fix this, you need to update your drivers to the latest version.
- Press the Windows + X key, use the down arrow key to highlight Device Manager, and press Enter.
- Press the Tab key to highlight the first list item in the device manager.
- Press the down arrow key to navigate to Human Interface Devices.
- Press the right arrow key to expand Human Interface Devices.
- Again, scroll down to the HID-compliant touchpad and press Enter.
- Highlight the General tab and press the right or left arrow to go to the Driver tab.
- Again press the Tab key to highlight Driver Details.
- Scroll down and click on the Update driver.

- Restart your PC once the driver update is complete


