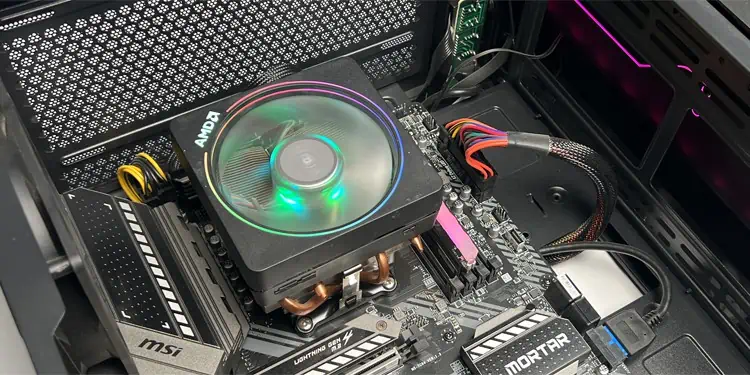
After you install your CPU into the motherboard, the next thing you do is install a CPU fan to keep the processor cool. It remains valid regardless of whether you are building a new PC or if you need to reinstall another fan when your old one no longer suits your needs or is failing.
While you will find different types of CPU fans in the market, they are all easy to install and follow the same general process. You simply need to place them above the processor and lock them in place using the cooler’s locking mechanism (screws, retention clips or push pins).
Here, I will only be talking about the CPU fans that come attached to a heatsink. Other types of air coolers that use radiator fans also use similar processes. You just need to use corresponding brackets depending on the socket type.
Note: You need to use an antistatic wrist band and ground yourself before installing a CPU fan. Static electricity can build up on your body due to friction with clothes or carpet and touching any electronic components when charged can damage them.
You can also periodically dissipate any potential static charge by touching a grounded metal surface.
Prepare the CPU and CPU Fans
Before you begin, ensure that you have a CPU fan that is compatible with your motherboard or CPU. Then, you need to make the following preparations to be able to install the CPU fans without any issues.
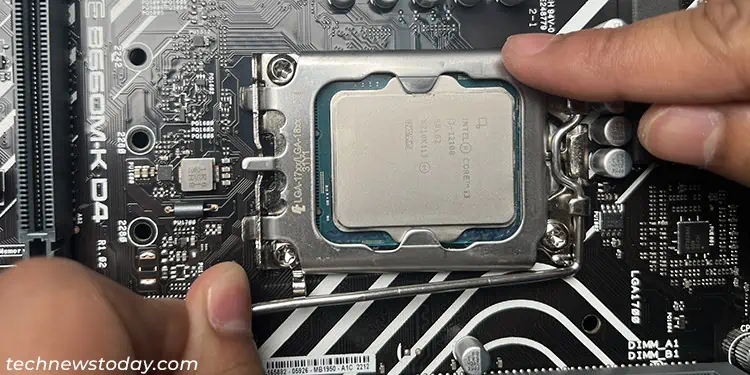
- Make sure that you have installed a proper CPU into the motherboard’s socket. You can check out our guides on installing AMD CPU as well as installing Intel CPU if you need any help.

- Now, take out the CPU fan from its package and remove the plastic lid covering its lower portion along with any stickers on the base. Make sure not to touch the thermal compound there.
You may also need to clean and apply the thermal paste on the CPU, depending on your situation.
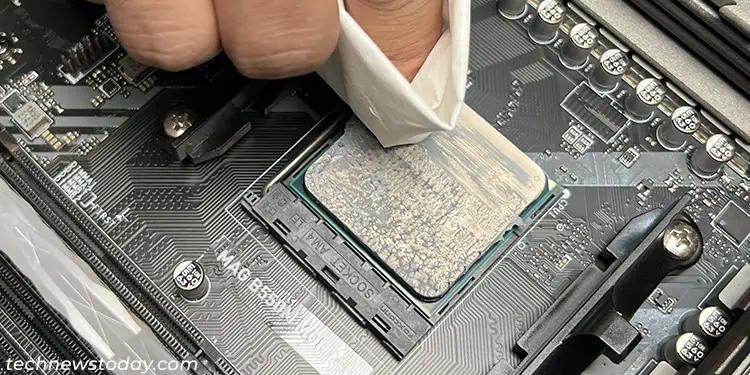
- If you are trying to install a CPU fan after removing another, you need to clean the residual thermal paste on the CPU. You can use microfiber cloth with isopropyl alcohol to do so.

- A new fan should already have a thermal compound layer applied to it, so it might not be necessary to apply the additional paste to the CPU. But I recommend you clean that compound and replace it with a better-quality thermal paste instead.
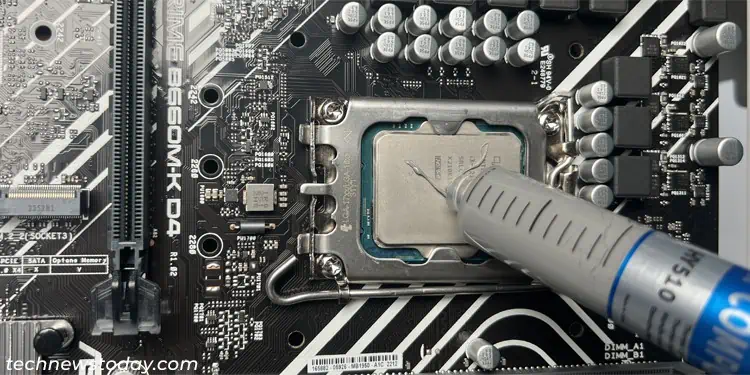
- But if you are installing an old fan, first clean up the messy or dried-up paste on the cooler’s heatsink and apply a suitable amount of the paste to the CPU while using a proper pattern.

- If you are applying any new thermal paste, make sure to use only higher quality ones. Cheaper ones won’t allow the fan to dissipate heat properly and they dry out pretty quickly.
Install CPU Fan
Depending on the type of CPU fan as well as the motherboard it is suited for, your fan may have one of three locking mechanisms— spring screws, push pins, and retention clip.
You need to use different procedures to install these fans into your motherboard.
Installing CPU Fan with Push Pins
Most CPU fans for Intel motherboards come as push pin fans. These include stock coolers for motherboards with LGA115X, LGA1200, etc., sockets as well as Intel Laminar RS1/RM1 coolers.
This type of fan uses four pressure pins (not screws) to hold itself to the motherboard. The pins come with caps which you can turn in different directions to lock or unlock the fan.
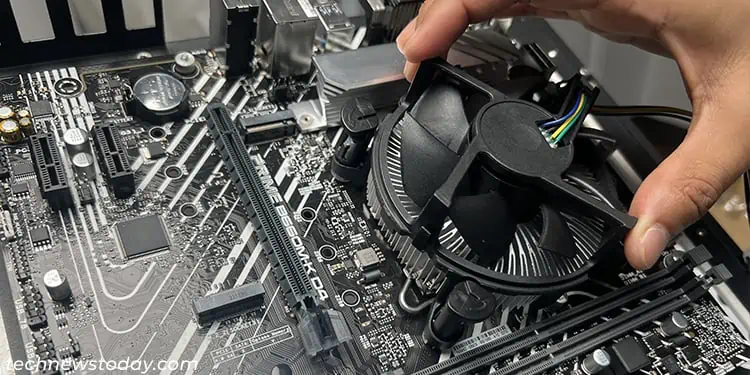
- On the fan, turn all the push pin 90° anticlockwise using your fingers or a flathead screwdriver to unlock them. Most sources, including the official ones, will tell you that you don’t need to do so, as you can push them inside and lock the pins. However, it can wear down the pins, so I personally unlock them before installing.

- Now, place the fan/heat sink onto the CPU while aligning all the pins to the respective holes on the motherboard. Orient the fan in such a way that the fan cable easily reaches the CPU_FAN header. Also, make sure that the fan does not trap the cable.

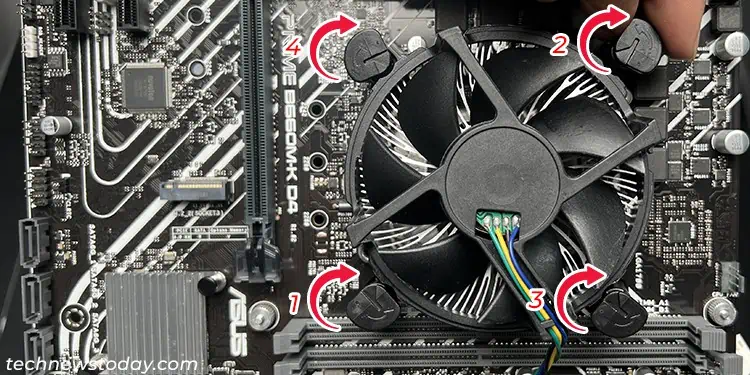
- Push all the pins gently while making sure they are straight to get them inside the holes. Then, turn the pins 90° clockwise to lock them in place. Make sure to turning them in diagonal order (as I have shown below) to prevent any alignment issues.

- Try pulling up the cooler to confirm if you have properly locked all the pins.
Installing CPU Fan with Spring Screws
Most fans for AMD motherboards and some fans that target Intel motherboards (Intel Laminar RH1, RTS2011AC, and so on) use spring screws. To install these fans, you need to attach the spring screws to a CPU backplate through the motherboard.
- Insert the CPU backplate (that comes with the motherboard or the fan) on the motherboard’s screw holes for the fan from the back side and hold it in place. You can also get help from someone else to hold it.

- In some motherboards, the backplate might come pre installed along with CPU retention brackets. You need to unscrew these brackets and hold the backplate in place in such scenarios.

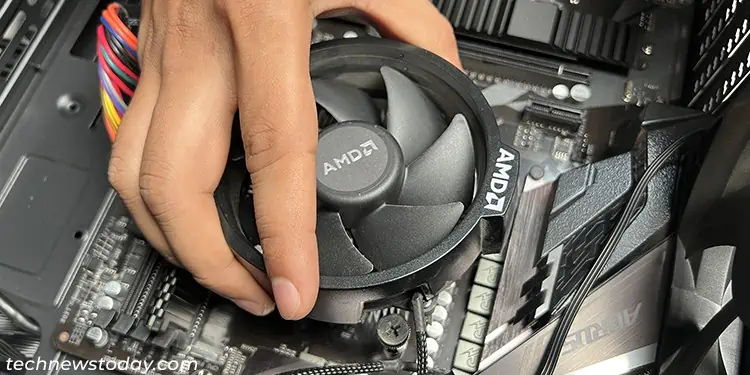
- Place the fan onto the CPU while aligning all the spring screws to the respective holes on the backplate. Orient the fan in such a way that the fan cable easily reaches the CPU_FAN header. Also, make sure that the fan does not trap the fan cable.

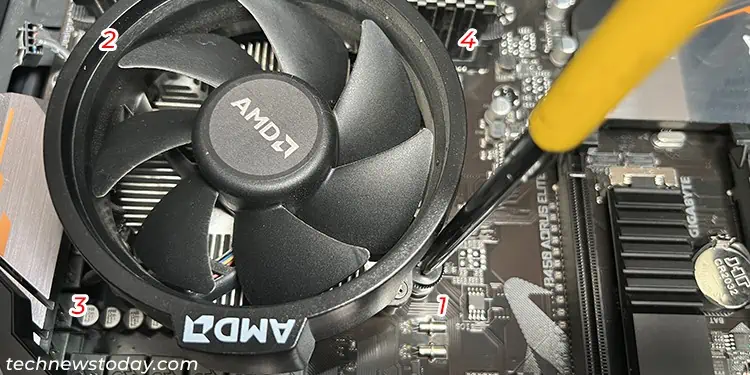
- Rotate all the screws a little bit clockwise to insert them slightly into the holes and have them in the proper place. It’s better to rotate the screws on one diagonal at a time to prevent any alignment issues.

- Then, tighten all the screws securely using the same diagonal pattern until you can’t turn them anymore.
- You can also confirm if you have properly locked all the screws by pulling up the CPU fan slightly.
Installing CPU Fan with Retention Clips
CPU fans for AMD motherboards (like Wraith Prism) can also come with retention clips instead of spring screws. These fans are much easier to install and remove but you need to use separate CPU brackets to hold the fan.
- If your motherboard already comes with pre-installed CPU retention brackets, you can directly go to the next step. Otherwise,
- Insert the CPU backplate on the motherboard’s screw holes for the fan from the back side and hold it in place. The backplate should come with the motherboard or the fan.
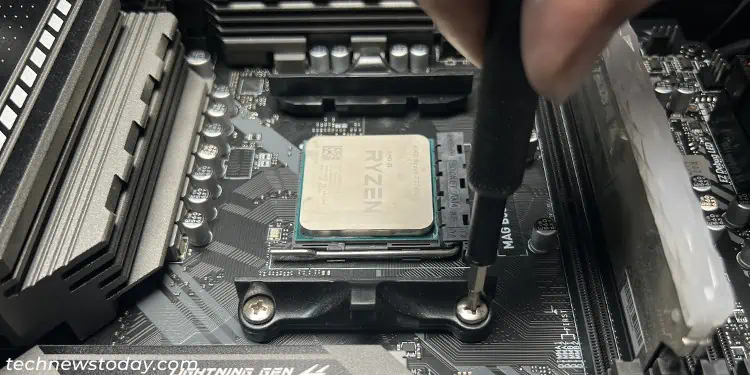
- Then align the CPU retention brackets from the motherboard’s package in place and screw them securely.

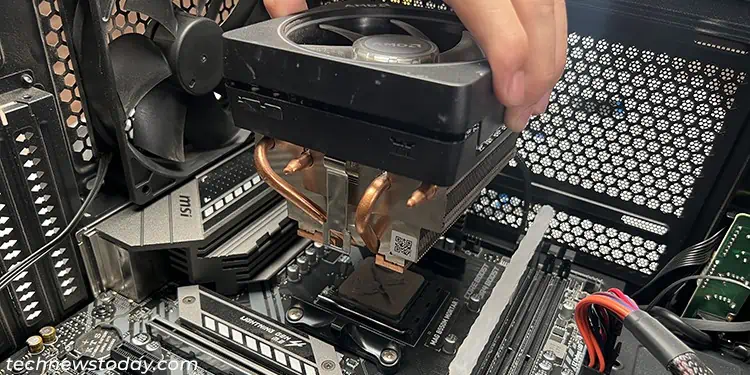
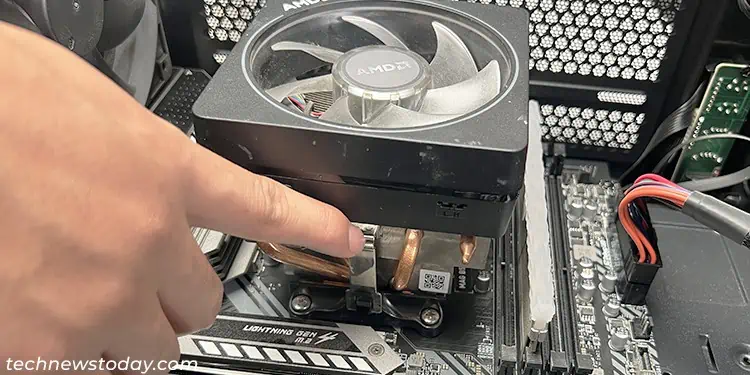
- Now, place the CPU fan above the processor while aligning the retention clips to the mounting clips on the brackets.

- Press down the clips to hook them in place. You can also hook one clip at a time. If any other components like the RAM obstructs you, it’s better to temporarily remove them until you finish the fan installation.

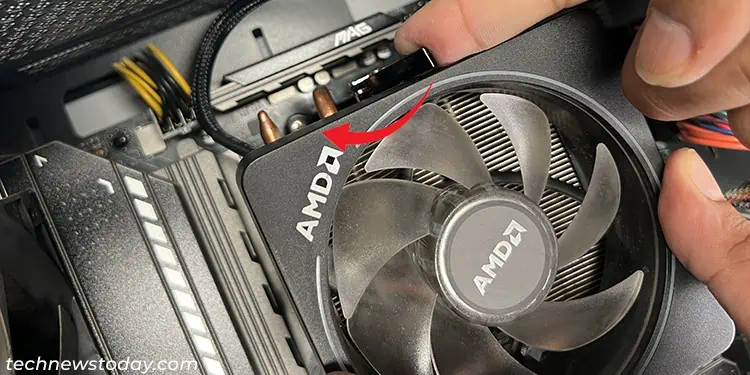
- Then, pull the cam lever to the other side and press it downwards to lock the cooler.

Connect CPU Fan Cables to the Motherboard
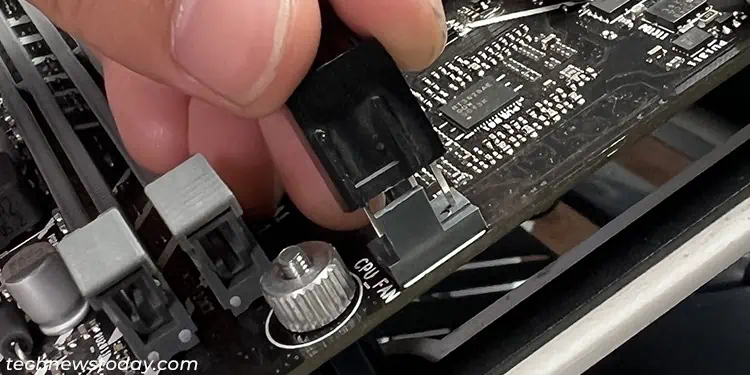
Now you need to connect the fan power cable to the CPU_FAN header. It is possible to connect the cable even when the number of pins on the fan cable and the motherboard header do not match. Use the plastic guides on the header and the fan cable’s connector to determine how you need to connect the cable.
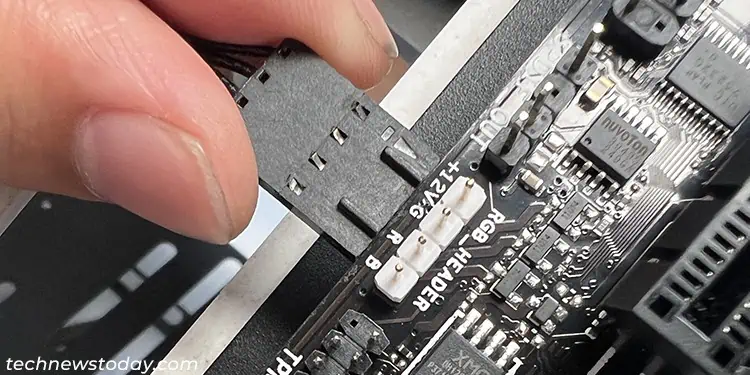
If your fan comes with RGB, you will have to connect the RGB cable to the proper 4-pin RGB headers to be able to control them. They usually show labels with +12V, G, R, B. You need to look for an arrow sign on your cable connector and make sure that it goes to the +12V pin.
You can similarly connect the 7-pin USB cable (if available) to any of the free USB headers on the motherboard. For some fans, these additional cables come as modular units and you need to plug them into the fan as well.
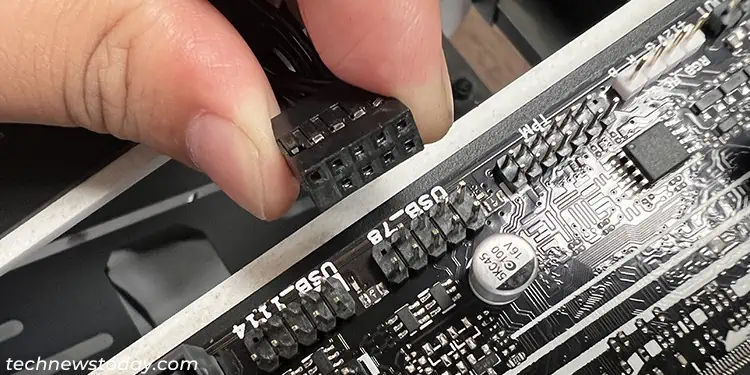
You can also check the user manual for the motherboard or check its online platform if you can’t find the RGB and USB headers.
After installing the fan (and finishing building your PC), it’s always a good idea to get to your motherboard’s BIOS and customize the fan speed per your preference.
