The Internet Recovery mode on Mac acts as a last resort when all other recovery options fail. However, it can sometimes stop working. In such a scenario, you may experience a grey screen, or the globe icon keeps revolving.
Generally, it occurs when your internet connection is not working properly or is too slow. Likewise, a corrupted or deleted Recovery partition on the drive can also cause the problem.
To help you fix the problem, we will introduce you to the probable causes and the methods to fix the issue.
Why is the Internet Recovery Mac Not Working?
If the Internet Recovery is not working on your Mac, it might be because of these reasons:
- Bad internet connection
- Mac is operating on pre-Sierra OS.
- Faulty Keyboard
- The corrupted or deleted Recovery partition on the drive.
How to Fix the Internet Recovery Mac Not Working?
Before jumping on fixes, you can check and clean Mac’s keyboard to make sure that it is working fine. Also, it’s worth knowing about the OS and chipset of the computer. For that, select the Apple icon > About This Mac.
You can fix the Internet Recovery problem by creating a bootable installer and using it in the Terminal app. Likely, resetting some Mac settings such as PRAM, NVRAM, and SMC also helps.
You can find a detailed and step-by-step guide to these fixes below.
Check the Internet

While using the Internet Recovery mode, the internet will play a great role since the system needs to connect with Apple’s server. Whether you are using Wi-Fi or an Ethernet cable, make sure that the internet is working fine, and the speed is good. If the internet is lagging and is slow, the download process will consume a lot of time.
So, you can check the internet connectivity on your other devices and make sure it is working fine. Otherwise, you can restart the router to restart the router’s power cycle.
Using the Internet Recovery Mode in the Correct Method
To commence the Internet Recovery mode on your Mac, you need to use the correct method. To do so,
- Hit the Restart option after you choose the Apple icon.
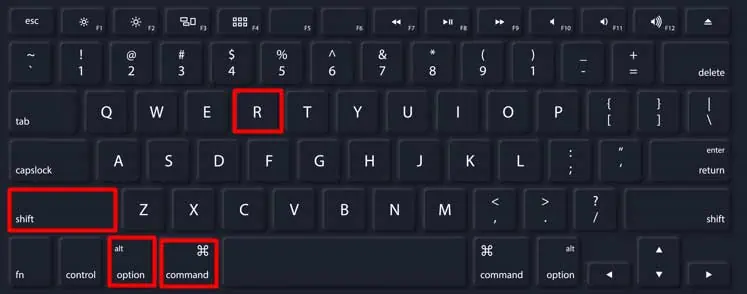
- Then, simultaneously press the keyboard’s Command + Option/Alt + Shift + R keys.

- Keep on pressing the keys until you see the Globe icon revolving on the screen with the text ‘Starting Internet Recovery. This may take a while.’
- After a while, you will get to choose a Wi-Fi connection. You can go to the next step if you are using an ethernet cable.
- The system will download the recovery system directly from Apple’s servers upon the successful internet connection.
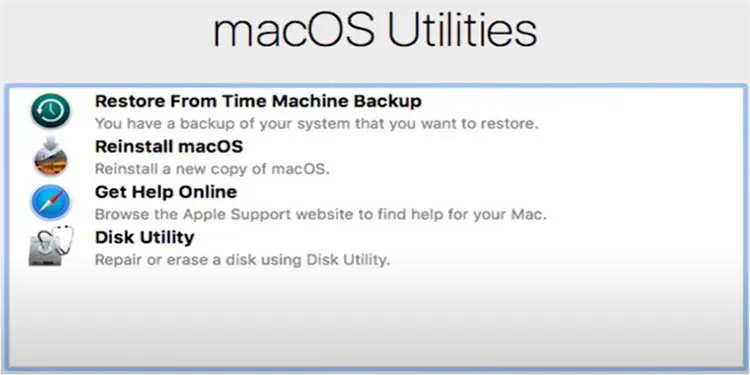
- Next, you will see the Mac OS X Utilities window on your screen.
- Select the recovery mode you intend to use.

Use the Bootable Installer Through the Terminal App
When you face the Internet Recovery problem on the Mac, one of the most reliable solutions would be to troubleshoot via a bootable installer. The method only requires you to enter a single command on the Terminal app. For that, you will have to enter createinstallmedia in the Terminal app.
The createinstallmedia command varies based on the macOS version on your Mac. You can check it on Apple’s official site.
You can follow the steps below to create and install a bootable installer on your computer.
- Plug in the USB flash drive to the Mac.
- Then, open the launchpad, type Disk Utility, and click the app.
- Now, select the View tab from the top panel and choose Show all devices. It will display the external root drive with its volume.
- Next, select the root drive from the left sidebar and press Erase. Here, select the format as macOS Extended and set the scheme as GUID Partition Map.
- After that, the system will set the drive’s default name as Untitled. You can set the name as per your preference.
- Again, you will need to select the Erase option and when the partition is created, choose Done.
- Now, press Command + Spacebar to open the spotlight. Then, type Terminal and click it to open the app.
- Here, you will need to paste the createinstallmedia text as per your macOS version.

- Then, hit the Return key and provide your Password. After that, press the Return key again.
- Next, press Y for confirmation to delete the volume and hit the Return key.
- Now select OK.
- Wait for some time while the Terminal completes the process.
- Connect the bootable installer to your Mac. Make sure that the Mac has an active internet connection.
- Click Restart from the Apple menu.
- Now, you need to keep pressing the Alt/Option button until you see the bootable volume on the screen. On the M1 Mac, press the power button until the boot options emerge.
- Select the volume with the bootable installer and hit the Return key.
- Click the Install macOS.
- Then, choose Continue.
Reset the PRAM (Parameter Random Access Memory)
It is handy to know that resetting the PRAM can solve apps and software problems. It can also help with the Internet Recovery problem.
Here’s how you can reset the PRAM on your Mac.
- First, turn off the Mac.
- Then, press the Power button. It will start up your Mac.
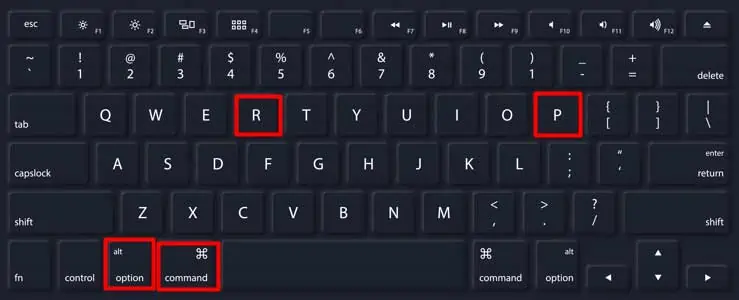
- Now, press and hold the Option + Command + P + R buttons together on your keyboard.

- You need to keep holding the keys until you see the Grey screen on the Mac.
- For an older Mac version, you need to keep holding the buttons until you hear the chime sound for the second time. Likely, for newer Mac versions, hold the buttons until you see the Apple logo appear and vanish from the screen the second time.
- After that, you can release the buttons and let the system finish the reboot process.
Reset the NVRAM (Non-Volatile Random Access Memory)
Sometimes, the problem can arise when there are some internal issues in the system. So, you can reset the NVRAM by following these steps.
- Shut down your Mac.
- Then, when the computer is fully shut down, switch it back on by pressing the Power button.
- Now, you need to press and hold the keyboard’s Command, Option, P, and R keys collectively as the Mac starts up.
- You can release the keys once the system starts up. Make sure to listen carefully to the Startup chime sound. For newer models, do this until you see the Apple logo vanish for the second count.
- Doing so will successfully reset the NVRAM on your Mac.
Reset the SMC (System Management Controller)
SMC handles essential functions such as power options, system indicator lights, etc.
So, the problem with SMC can also create the issue we are talking about. Thus, you may consider resetting the SMC.
Mac With Removable Battery
- Shut down your Mac.
- Unplug the computer’s charger and then eject the battery.
- For about 5 seconds, keep holding the power button.
- Now, insert the battery back into the Mac and plug the charger into your computer.
Mac Without Removable Battery
- First, turn off your Mac.
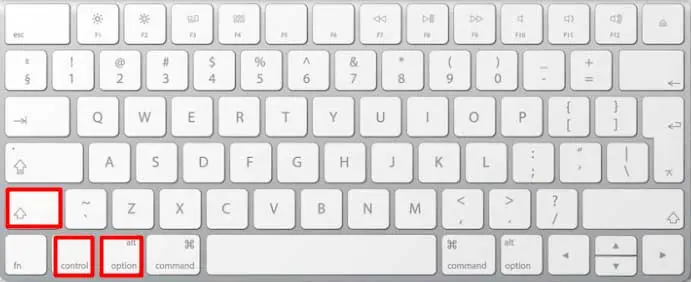
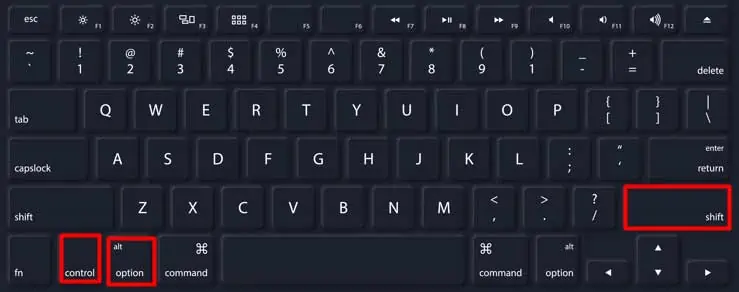
- Then, keep holding the Left Shift, Left Option, and Left Control keys on the keyboard for about 10 seconds.

- Next, press the Power button for about 10 seconds while still holding the other buttons.
- Release the buttons and switch on the computer.
Mac With an M1 Chip
- Switch off your Mac.
- Then, close the Mac lid. Leave it closed for about Half a minute.
- Next, switch on the computer.
Mac With a T2 Chip
- Shut down the Mac.
- Unplug the charger.
- Then, press the Left Option, Right Shift, and Left Control keys for around 6-8 Seconds.

- Also, hold the power button for around 6-8 seconds while pressing the other keys.
- After that, you can let go of all the buttons and turn on the computer.


