Usually, the process involving all Apple products is supposed to be seamless. However, various issues can be at play in a case like iPhone to iPhone migration on QuickStart. For instance, the transfer process might get stuck, or you might see an error message that says “Unable to Complete Data Transfer.” Or the process could simply take hours.
Such problems can arise when several factors are not aligned with the transfer process. So, let’s move on to learn why this error occurs and all the ways you can fix it.
Why is my iPhone to iPhone Transfer Stuck?
The transfer process can get stuck due to these potential reasons:
- Your data size is considerably large.
- Unstable internet connection
- Outdated iOS version
- Network Connectivity issues
- Software glitches
- System bugs
7 Ways to Fix iPhone to iPhone Transfer Stuck
Prior to applying the fixes below, let’s check off some basic necessities.
- Check if both the iPhones have Bluetooth turned on.
- Make sure both iPhones are connected to the same Wi-Fi network.
- Both your iPhones must have an adequate amount of battery.
If such factors are good to go, you can proceed with the solutions below:
Keep both iPhones in Close Range
This may seem insignificant, but distance can be one of the reasons your transfer process is taking a long time or is stuck. So, a simple fix you can try without diving into any settings is placing the two iPhones close to each other. Also, make sure to maintain the close range until the process is complete.
Update iOS on both iPhones
A common reason the iPhone to iPhone transfer may not work or even appear on your device is an outdated iOS version. Apple requires both iPhones to be iOS 12.4 for the QuickStart feature to work. So, if your iPhone is of an older iOS version, it’s best to update it to the latest version quickly.
To update your iOS,
- Go to Settings > General.
- Now, tap on Software Update and install any available updates.

Insert SIM Card into iPhone
For the transfer process to work smoothly, iPhone you want to move data to must have a SIM card. Without it, you won’t be able to activate it. After adding the SIM card, you can try transferring files again.
Delete Unnecessary Data
If your data size is around or more than 500 GB, the transfer process can face lags simply due to data overload. So, it’s a good idea to sort through your data first. Delete any photos, videos, apps, or large-size documents that you don’t need anymore.
Reset Network Settings
Since the transfer process relies on your network strength, any glitches in the network can cause the process to be laggy. In such cases, it’s helpful to try resetting your network settings. Doing so will refresh the network data and can help you proceed with the transfer process. You can perform the following methods on both the iPhones:
- Go to Settings and then tap on General.
- Now, tap on the Transfer or Reset option.
- Again, tap on Reset and then select Reset Network Settings.

Now, you can reconnect your phones and try the transfer process again.
Improve Internet Speed
If you’re transferring iPhone data over Wi-Fi, the process can get stuck if the connection is not smooth. Factors like physical distance from the Wi-Fi router, too many devices connected, or a compromised bandwidth can cause the network to be slow. So, here are a few easy ways you can improve your Wi-Fi speed:
- Switch to either 2.4 GHz or 5 GHz frequency band.
- Pause any large downloads.
- Disconnect a few devices from your Wi-Fi network.
- Use a private hotspot.
- Perform the transfer process near your Wi-Fi router.
- Contact your internet service provider.
Force Restart iPhone
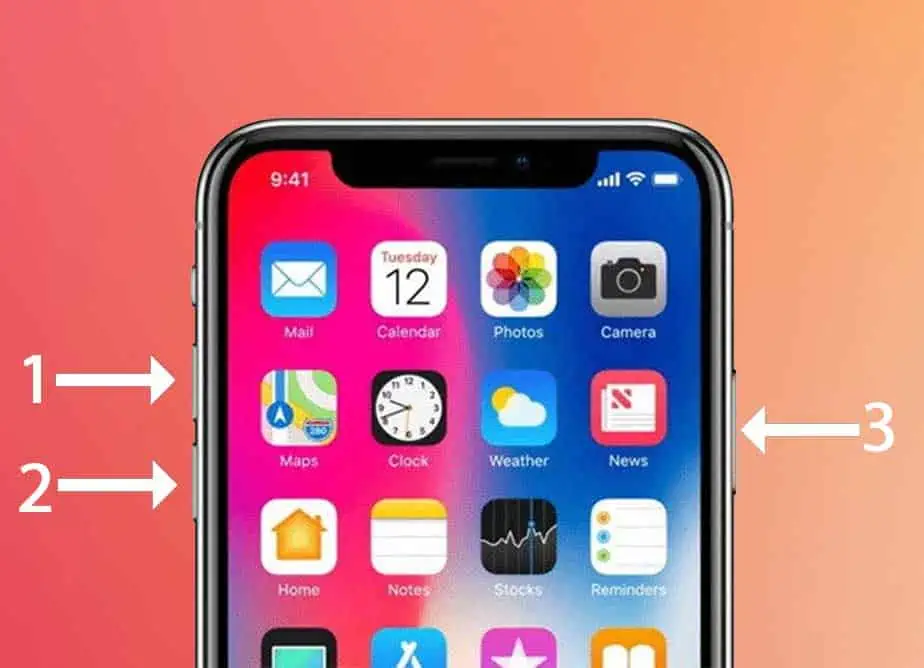
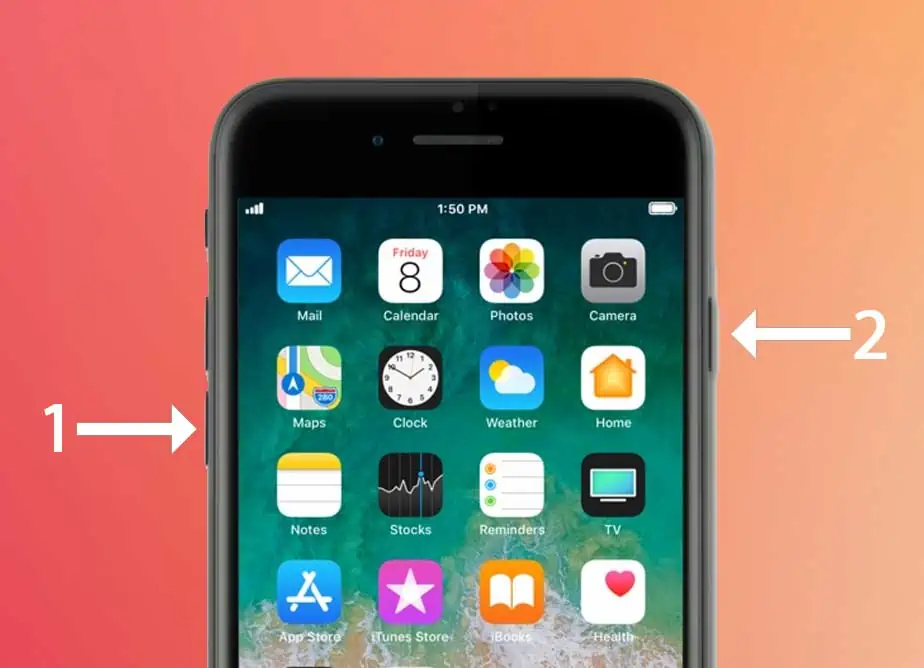
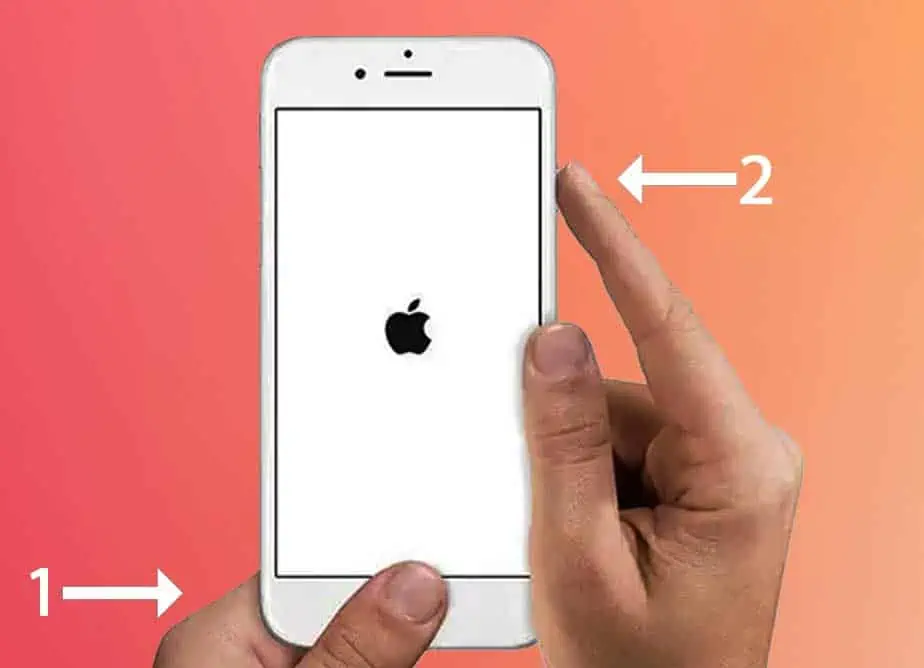
If most solutions aren’t helping you, you can try performing a force restart on both iPhones to eliminate any system glitches. Here’s how you can do it on various iPhone models:
- For iPhone 8 or above: Press once on the Volume Up button. Again, press once on the Volume Down button. Then, hold down the Sleep/Wake button. Keep doing this until there’s an Apple logo on the screen.

- For iPhone 7: Keep pressing the Sleep/Wake button and the volume down button until you see the Apple logo.

- For iPhone 6s or iPhone SE (1st Gen): Keep holding down both the Home button and the Power button until the Apple logo appears on the screen.

Finally, if you still have issues with the process, you can contact Apple Support anytime.
Other Ways to Transfer Data from iPhone to iPhone
Alternatively, you can use any of the following methods if the traditional transfer method is not working on your iPhone.
Transfer Via Lightning Connector
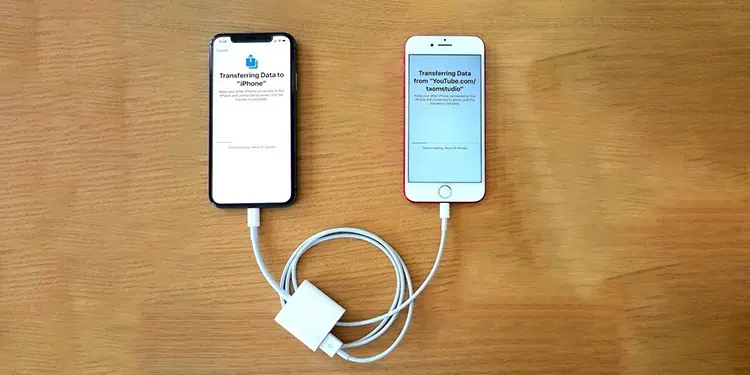
Thankfully, you don’t need to be dependent on Wi-Fi to transfer your files. You can simply connect your iPhone to another iPhone using a lightning cable when your Wi-Fi network is unstable.
However, to make sure the lightning cable is present on both ends, you’ll need to use a Lightning to USB 3 Camera Adapter. Then, you can follow these steps:
- Connect your Lightning to USB cable to the USB camera adapter.
- Then, connect another lightning cable to the same USB camera adapter.
- Connect one lightning cable to your iPhone and connect another one to the source iPhone.
- You can now view the Quick Start screen and begin the transfer process.
Using iCloud
Another easy and quick way to transfer iPhone data is through iCloud. This method requires you to have all your data fully backed up to iCloud. So, check if your iCloud is up-to-date before moving data to another iPhone.
- Turn on your new iPhone and connect it to a Wi-Fi network.
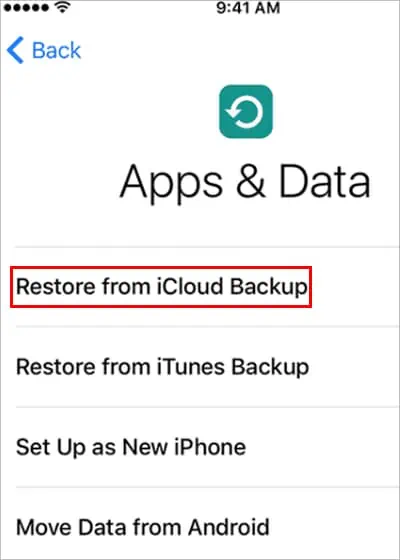
- Set up your new iPhone until you reach the Apps & Data page.
- Tap on the option that says Restore from iCloud Backup.

- Log in with your associated Apple ID. Now, you can pick a specific backup you want to restore on the new iPhone.
The restoration process may take a while to complete.
Using iTunes
Similar to iCloud, here’s how you can restore all your data from the old iPhone to the new iPhone using iTunes:
- Plug your new iPhone into your PC using the lightning to USB cable.
- Launch iTunes and click on your iPhone logo. Make sure you’ve selected the Trust option on your iPhone.

- Go to the Restore Backup option and select a backup version of your choice.

- Then, click on Restore.

