Keyboards hold great functionality while using a computer. Everything from inserting information from using shortcuts to performing a command, our keyboards got us covered.
With the variety of actions it covers, a keyboard malfunctioning is the worst thing that could happen to a user. If you found yourself in a similar situation, here’s how you can fix your keyboard that is not typing.
Why is My Keyboard Not Typing Letters?
The keyboard is a sensitive device and may malfunction easily. Various factors can damage it, ranging from repeated pounding to outdated drivers. Here are some of the reasons why the input device isn’t working.
- External Keyboard Incorrectly Plugged: If your external keyboard isn’t working properly, it is likely not correctly plugged in. If it is loosely connected, your device fails to establish a connection with the keyboard.
- Battery Low: If you use an external keyboard that runs on batteries, your device may be running low on power. Most devices slow down or stop working when they’re low on battery to save energy.
- Accidental Spillage/ Hidden Debris: Did you recently drop your favorite drink on your keyboard? Although cleaning up the keyboard’s surface might seem to do the job, it is possible that the liquid seeped into the device.
- Repeated Pounding: Are you a gamer who uncontrollably pounds on your keyboard keys? Hitting the keys on your keyboard excessively hard can damage it. The PC cannot read the commands prompted by the user through a damaged keyboard.
- Outdated Driver (Windows): The Keyboard Driver is the gateway that allows communication between the keyboard and the PC. If your driver is not updated, your PC might not recognize your keyboard and fail to read the information you type. A missing or corrupted driver may also lead to a similar problem.
- Low Keyboard Sensitivity: Most devices have the option of turning the keyboard sensitivity up or down. This mechanism allows your keyboard to respond according to the force the keys pressed. It is possible that you accidentally left the sensitivity setting at low if the keys aren’t being read at normal pressure.
- Operating System Not Updated: Leaving your system un-updated will cause your peripheral devices to crash. New updates usually have fixes for bugs that exist in the previous update. An un-updated operation system may be why your keyboard may not be working.
Fixes for Your Malfunctioning Keyboard
Now that we’re past diagnosing the problem, let’s move on to fixes. Depending on the severity of the problem, there are several fixes. You might, however, have to change your keyboard if the damage is beyond repair.
Plug Your Keyboard Properly
Make sure that your external keyboard is plugged into your PC correctly. Most keyboard devices use USB or PS/2 ports. If you’re using a wireless keyboard, restart your Bluetooth and try connecting again.
Change Batteries
When the batteries start to get low on a wireless keyboard, the system will have issues when recording a button press. Only when you press a button by force does it record. If you face issues such as this, try changing the batteries inside the wireless keyboard to fix the issue.
Most wireless keyboards use AA batteries. However, some use AAA batteries as well. Change them depending on the type of keyboard you use.
Clean Your Keyboard
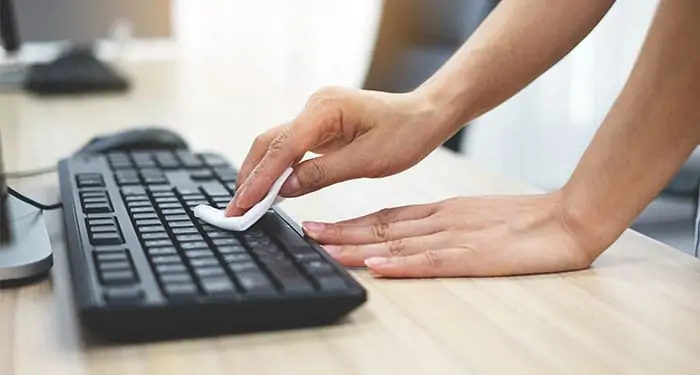
If you suspect fallen debris on your keyboard, it’s best to try cleaning your keyboard first. Follow these steps to clean your keyboard safely:
- Turn off your laptop or plug off your keyboard.
- Flip the device upside-down and shake it. You might even want to pat it occasionally.
- Use a soft brush or compressed air between the keys to loosen up the debris.

Run Keyboard Troubleshooter
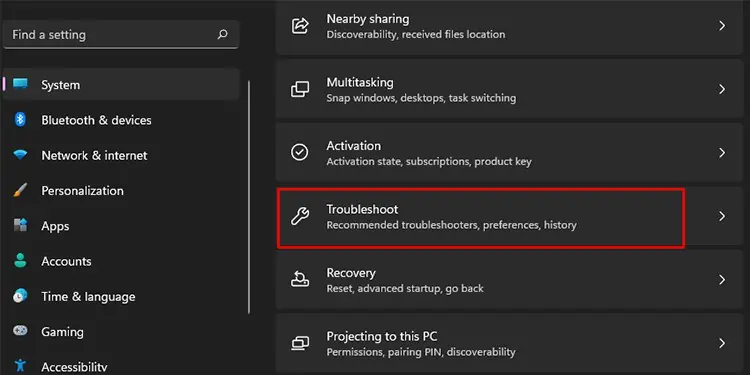
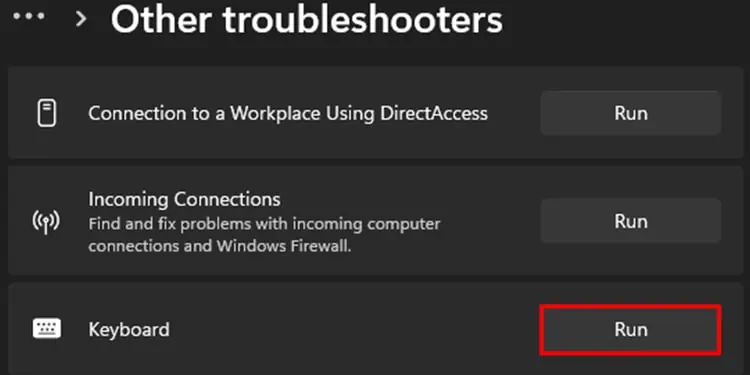
You can run the keyboard troubleshooter for your device to identify and fix the issue with your hard drive. This is especially helpful if you’re having issues in diagnosing the issue with your keyboard. Follow these instructions to run the Keyboard Troubleshooter:
- Open Start to open the Settings application.
- From System, select Troubleshoot.

- Move to Other Troubleshooters, then scroll down to Keyboard.
- Select Run next to Keyboard.

Disable Filter Keys
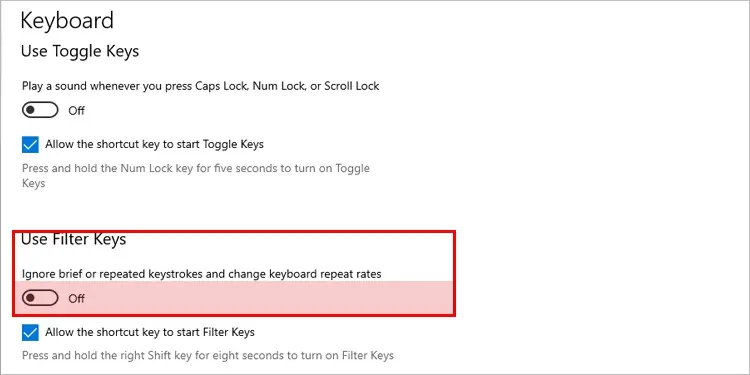
Windows has a special feature that can set the keyboard sensitivity, named Filter keys. Enabling filter keys can ignore short and repeated keypresses. Windows added this feature for people who suffer from random seizures.
However, when you enable this feature, the OS will not detect a key press unless you press it for a long time. This may be why your keyboard may seem like it is not typing.
Follow the steps mentioned below to disable filter keys.
- Press the Windows + I key to open settings using the on-screen keyboard.
- Go to Ease of Access > Keyboard.
- Here, toggle Filter keys to Off.

Uninstall Recently Installed Application
Any application that may tinker with the keyboard baseboard may also cause the keyboard not typing issue. An application that controls RGB or changes the polling rate of the keyboard has direct access to the keyboard’s internal board.
If you use these applications, especially the ones that are unauthorized, there is a chance that it might damage the system files.
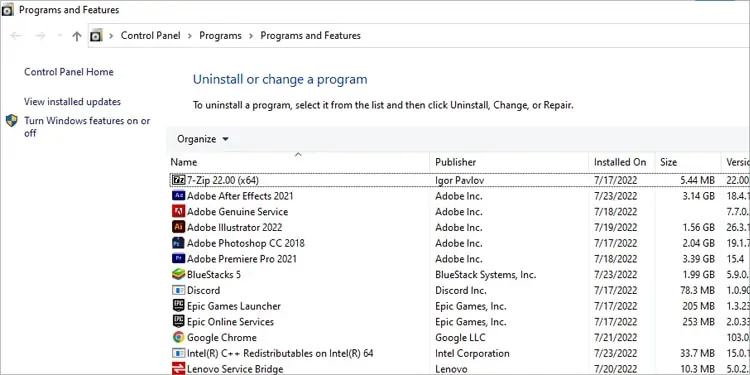
Furthermore, if you see the keyboard malfunctioning after installing these applications, try uninstalling them to see if it fixes the issue.
- Press the Windows + R key to open Run.
- Type
appwiz.cpland press Enter to open Programs and Features. - Select the application that you want to uninstall and select Uninstall.

Update Keyboard Driver
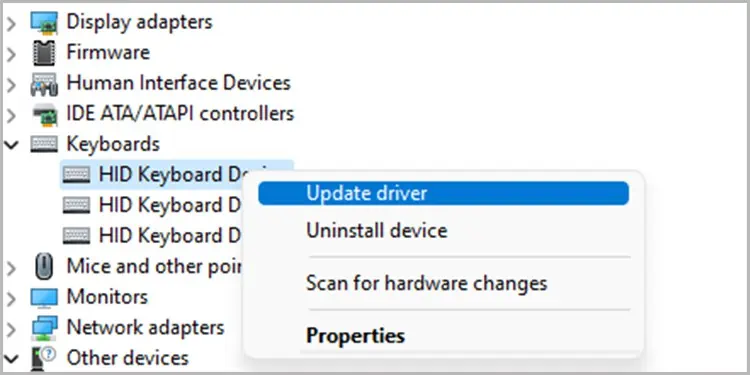
It is necessary to update your keyboard driver to maintain communication between your keyboard and PC. Follow these instructions to update your keyboard driver on your laptop with Windows OS:
- Search for Device Manager on the search option on your taskbar.
- Locate Keyboard under the list. Select the drop-down menu on its left.
- Double-click on your problematic keyboard and select Update Driver.

- Follow the instructions presented to you.
NOTE: MacBooks and Chromebooks do not have a separate option for updating drivers. All drivers are updated with the system update.
System Update
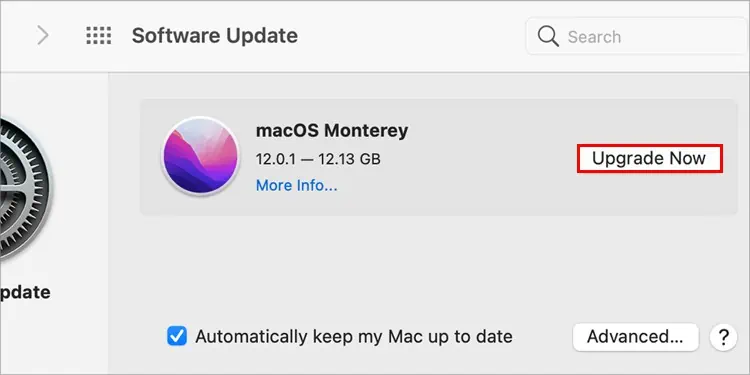
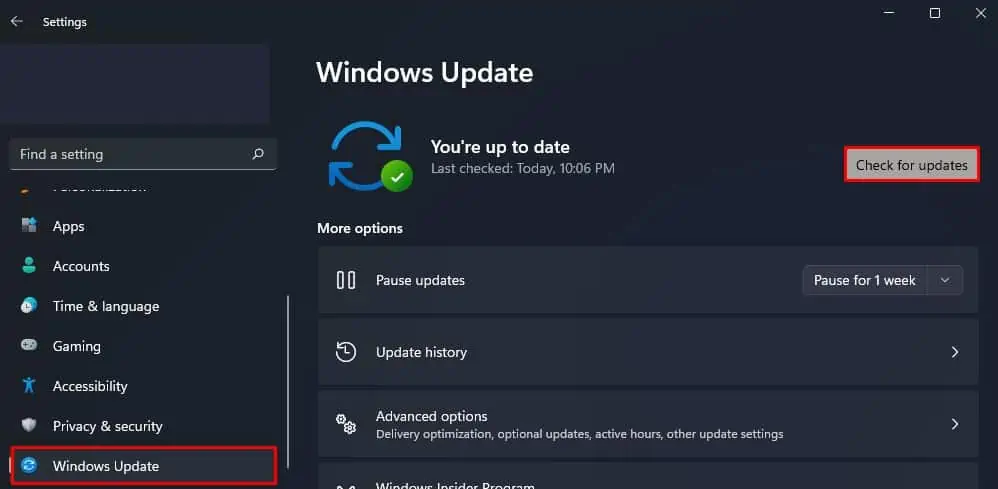
Update your operating system to ensure the bugs from the previous update are fixed. Follow these steps to update your system or check for new updates:
For Mac
- Open Apple Menu
- Select System Preferences.
- Click Software Update and check for the latest updates.
- If there are any updates available, select Update Now / Upgrade Now.

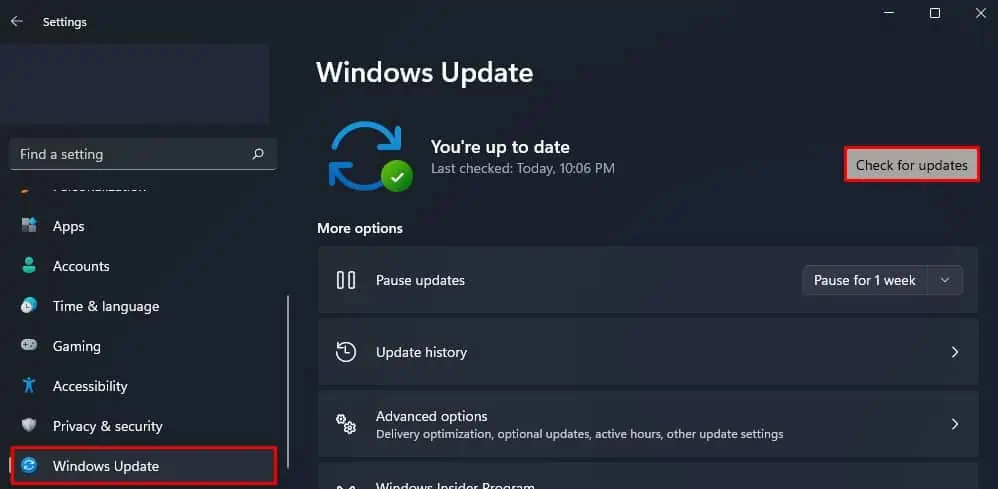
For Windows
- Open Settings.
- Select Windows Update.
- Click on Check for Updates.

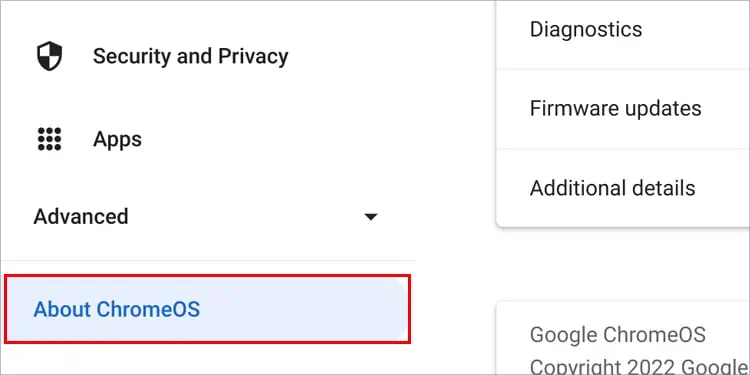
For Chromebook
- Open Settings.
- Select About Chrome OS.

- Click Check for Updates.

Adjust Keyboard Sensitivity
You can increase the keyboard sensitivity for your laptop for the keys to be pressed easily. Follow these steps to adjust your sensitivity:
For Mac
- Open Apple Menu
- Go to System Preferences
- Click Accessibility, then select Keyboard
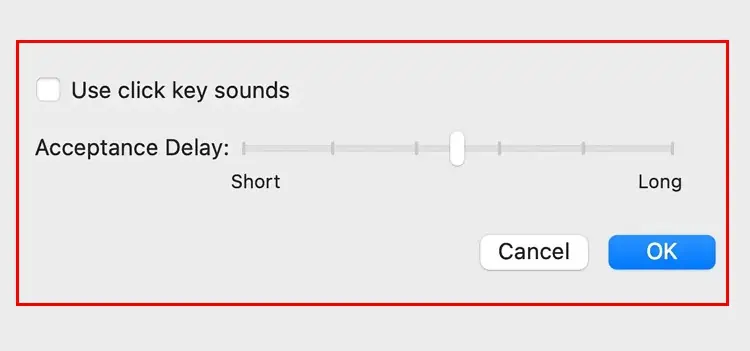
- Select Hardware then, enable Slow Keys then click Options
- Drag the Acceptance Slider to adjust your keyboard sensitivity.

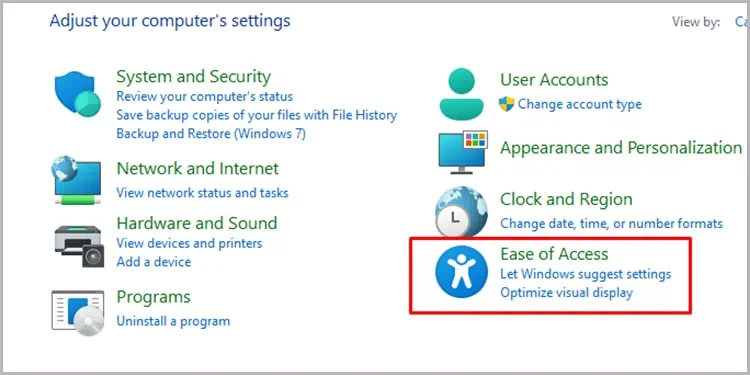
For Windows
- Open Control Panel.
- Select Ease of Access.
- Navigate Ease of Access Center.

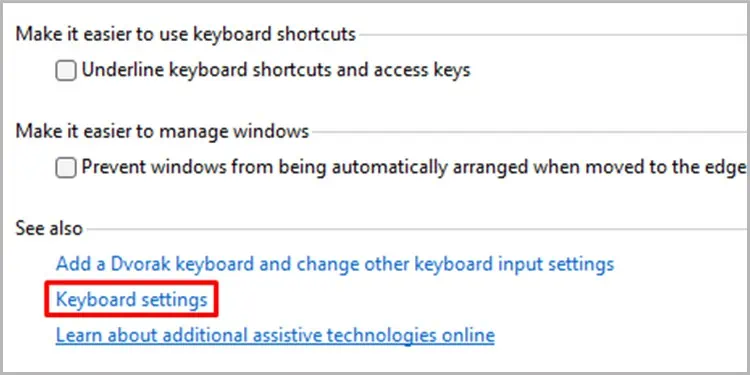
- Under Explore all settings, select Make the keyboard easier to use.
- Under See also, select Keyboard settings.

- Under Keyboard Properties, adjust the keyboard sensitivity in the Speed Tab.
For Chromebook
- From the bottom-right corner of your screen, select the Time widget.
- Open Settings.
- Locate Keyboard .
- Toggle on Enable auto-repeat.
- Adjust slider for Repeat Rate and Delay before repeat.
Disable USB Selective Suspend
Windows cuts off the power supply to the USB port that is not in use to save power. However, if the USB keyboard stays idle for a long time, it gives the OS the impression that the USB port is not in use.
When this happens, the device connected to the USB port will not work. You can use the device again once you reconnect. However, you can disable this feature altogether as well.
- Press the Windows + R key to open Run using the on-screen keyboard.
- Type
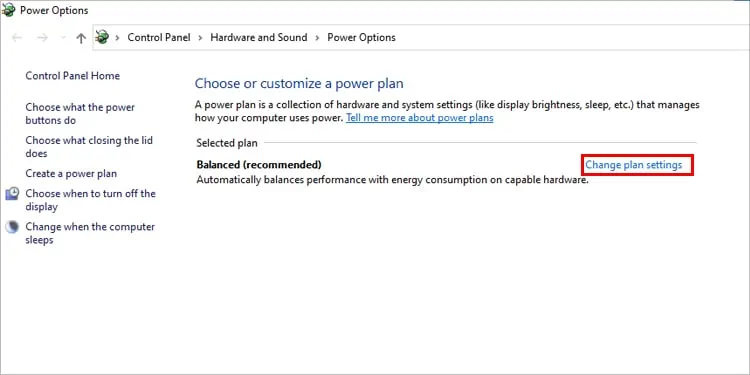
powercfg.cpland press Enter to open Power Options. - Click on Change Plan Settings on the selected power plan.

- Click on Change advanced power settings.
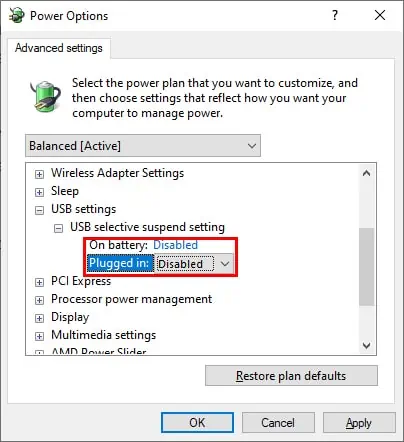
- Expand USB settings. Inside it, expand USB selective suspend settings.
- Select Disabled.

Enable On-Screen Keyboard
This solution is the most effective when you have to get something typed as soon as possible. To enable an on-screen keyboard, follow these steps:
For Mac
- Open Apple Menu.
- Select System Preferences.
- In the window, choose Keyboard.
- From the Keyboard window, select the Input Sources tab.
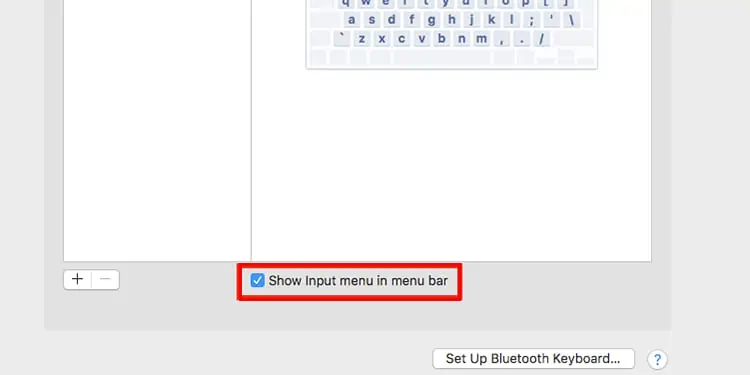
- Check the box next to Show input menu in menu bar. This will create an input menu icon on your system tray.

- Select the input menu icon from your menu bar.
- From the drop-down menu, choose Show Keyboard Viewer.
For Windows
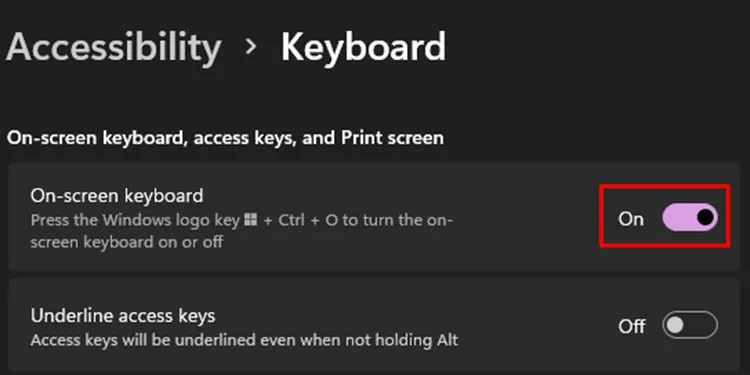
- Open Settings.
- On the left, select Ease of Access.
- Scroll down to Keyboard.
- Toggle on On-screen Keyboard.

For Chromebook
- Enter your credentials to sign in to your Chromebook.
- Click on time at the bottom to open Settings.
- Select Advanced at the bottom.
- Under Accessibility, select Manage accessibility features.
- Select Enable on-screen keyboard under Keyboard and input text.


