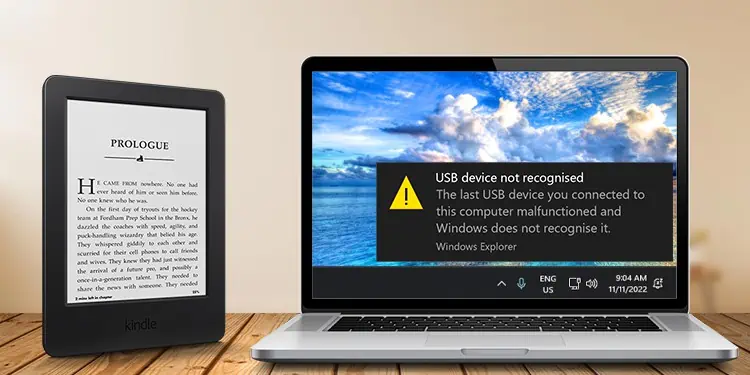
With a USB cable, you can simply transfer your Kindle files to Windows in a snap. But, sometimes, while you’re attempting to do so, you might have encountered your Kindle device just not showing up on your PC.
Usually, this happens when your Windows PC does not recognize your Kindle. This could be due to a loose connection, or your driver is outdated. So, there are minor fixes you can try to solve the issue on your own. In this article, we have compiled proven fixes to troubleshoot the problem.
Causes for Kindle Fire Not Showing Up on Windows
- Loose Connection
- Defective USB Cable
- Disabled ADB on Kindle
- Outdated Driver
- Debris in Port
- System bugs
- Internal device error
How to Fix Kindle Fire Not Showing Up on Windows?
Is your Kindle device locked? Windows PCs will not recognize your Kindle if you do not turn on your device after connecting. So, as a minor fix, you can unlock it by swiping the lock screen or entering the password. When you are on the home screen, your device must appear on Windows.
Moreover, if you have an extra PC, you try connecting your Kindle to a different PC. Sometimes, there might be an issue within your PC itself. In case it still does not work, you can try out the major fixes listed below simultaneously.
Reconnect Kindle
As a primary fix, you can reconnect your Kindle to Windows. However, this time there are a few things you might consider during the setup. Your Kindle might still be in the Charging Mode and not set to Transfer Files.
You can check out the detailed steps below.
- Firstly, take out the USB cable from the Kindle and your PC
- Then, reboot your device. Press the Kindle Power button and hold it until you see a logo on your screen.

- Now, gently connect one end of the USB cable to your Kindle and the other end to your PC. Ensure that it isn’t loose.
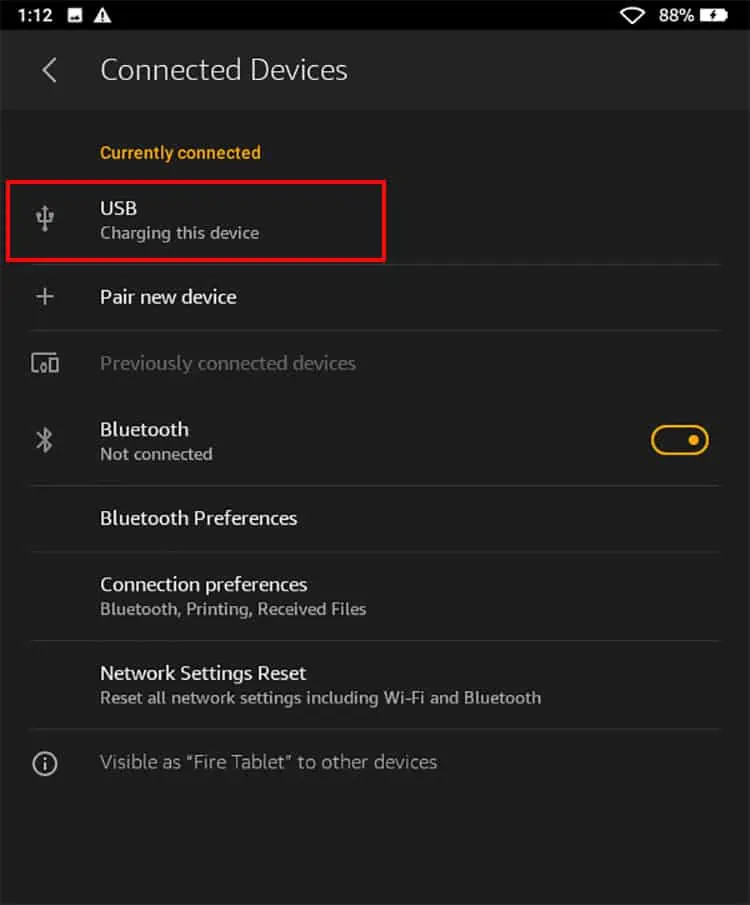
- Once connected, unlock your Kindle and navigate to Settings
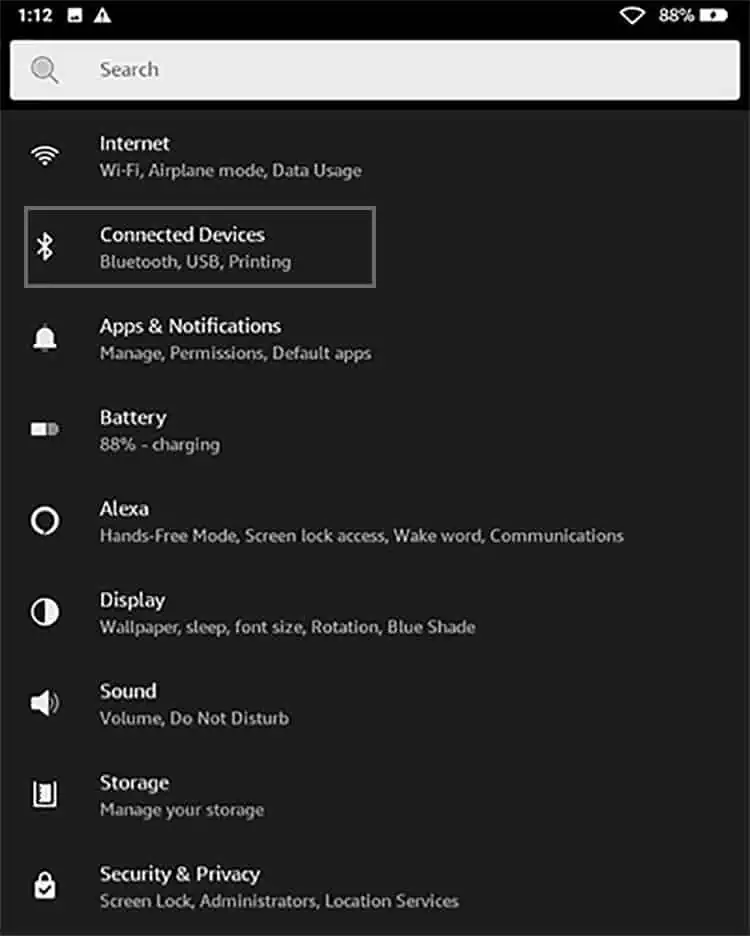
- Choose Connected Devices > USB

- Under Use USB for, tap File Transfer

Switch to Different USB Cable
If the Kindle does not appear on your Windows device after reconnecting, you might have to switch to a different cable. Your current USB cable might be defective. Or it might be incompatible with your device. You need to ensure that you are connecting micro-USB transfer cables.
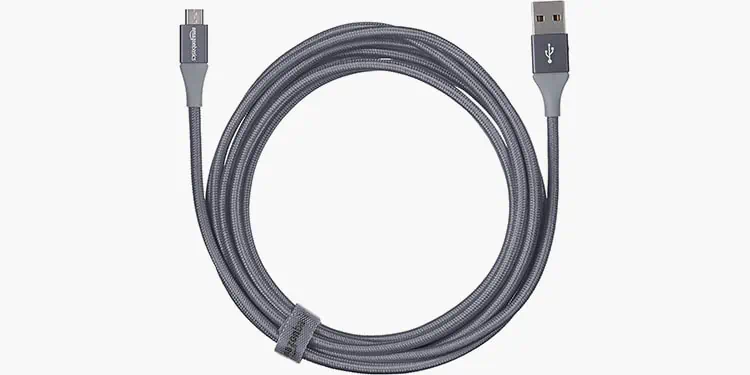
Moreover, you can also try plugging into different USB slots of your PC. Sometimes, such ports may be faulty or might only support charging. After switching the cable and slot, you can try reconnecting properly with each step mentioned above.
Clean Kindle USB Port
We don’t often clean our Kindle or its charging USB port. So, there are chances that debris might be present in it. Since such dust particles can cause connection issues, your PC will not discover Kindle. You might also encounter charging issues. You must be attentive while cleaning, as a slight mistake might damage or worsen your device.
Things to consider before cleaning.
- Do not wet the tool used for cleaning.
- Avoid blowing into the port with your mouth. You might accidentally wet the port with your saliva.
- While using a toothbrush, the bristles tend to break. Thus, there is a risk of it getting stuck on the port. Refrain from using it for cleaning.
Here’s how you can clean the Port:
- Power off Kindle.
- You can use your mobile’s flashlight to see inside the Port.
- Now, taking the Toothpick, pull out the debris from the port. Be gentle and ensure not to break it.

- After waiting for some time, Turn on your Kindle
- Connect USB Cable to see if it works.
Run Troubleshooter
If there are hardware issues on your PC leading to this problem, you can troubleshoot to identify the cause. It might help you to solve the error. Although the settings for running a troubleshooter might slightly differ according to windows version, the steps are similar.
Below, we have mentioned the steps to run the troubleshooter in Windows 11.
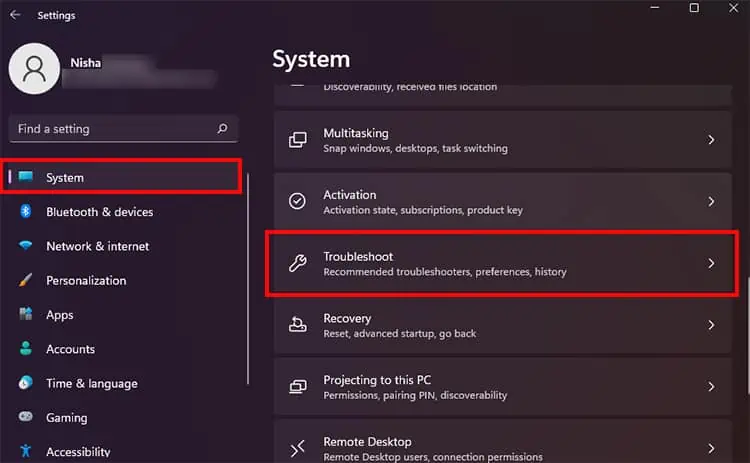
- Launch Windows Start.
- Navigate to Settings.
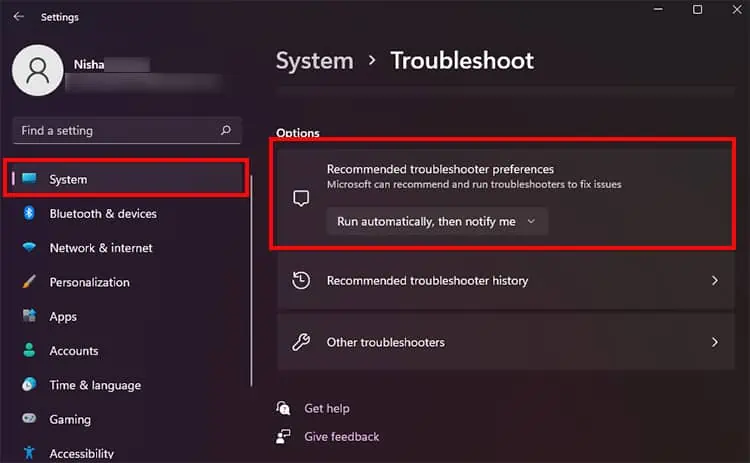
- Click on System > Troubleshoot

- To continue, pick your Recommended troubleshooter preference.

Update Windows and Kindle App
There might be bugs on your Kindle or PC that interrupt the connection. So, you can manually update both of your devices to solve the issue. Check out the steps given below.
On Windows
- Enter Windows + I key
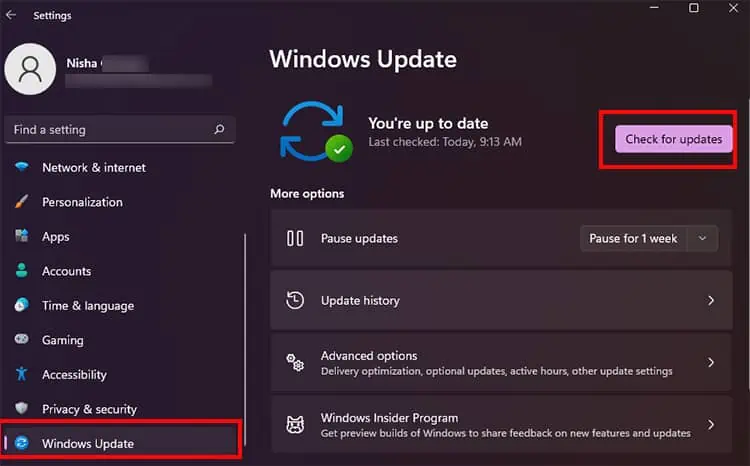
- On the left panel, choose Windows Update

- Click on Check for Updates option
On Kindle
- Tap on Settings
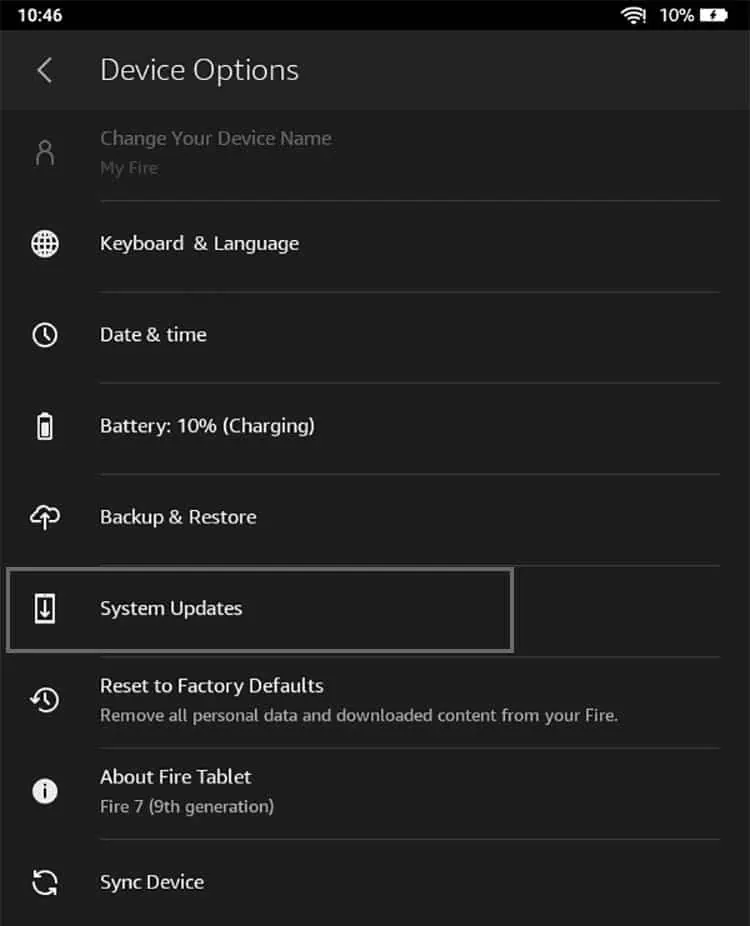
- Choose System Updates

- Select Check Now

Connect Fire Device as A Camera
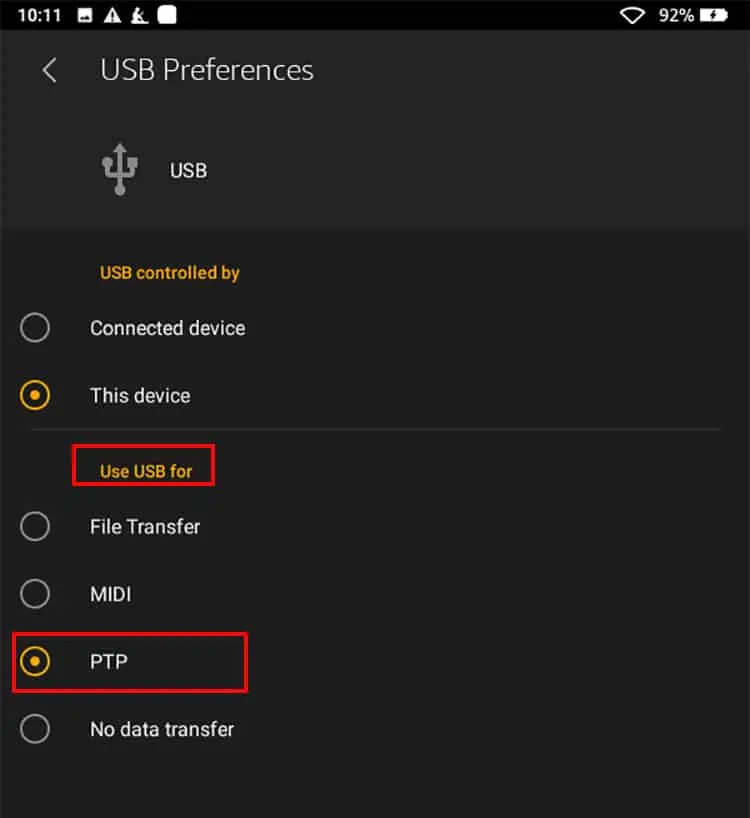
Another fix to solve Kindle Fire not showing up on your PC is to connect your device as a Camera (PTP). If this does not work, you can also select File Transfer. You should see the Connections menu on your notifications bar.
Here are the steps for it.
- On your home screen, swipe down the screen from the top to display Notification bar
- Now, choose Charging this device via USB

- In case you do not see this option, launch Settings
- Navigate to Connected Devices > USB

- Under Use USB for, choose PTP

- You can also select File Transfer.
Turn On ADB on Kindle
Your PC will not recognize your Kindle if you haven’t enabled ADB yet. If you use a first-generation Kindle, ADB is already on by default. However, for users having second and third generations, you must manually enable it. Then, your Kindle should show up on Windows.
You can check out the steps given below.
- Launch Settings
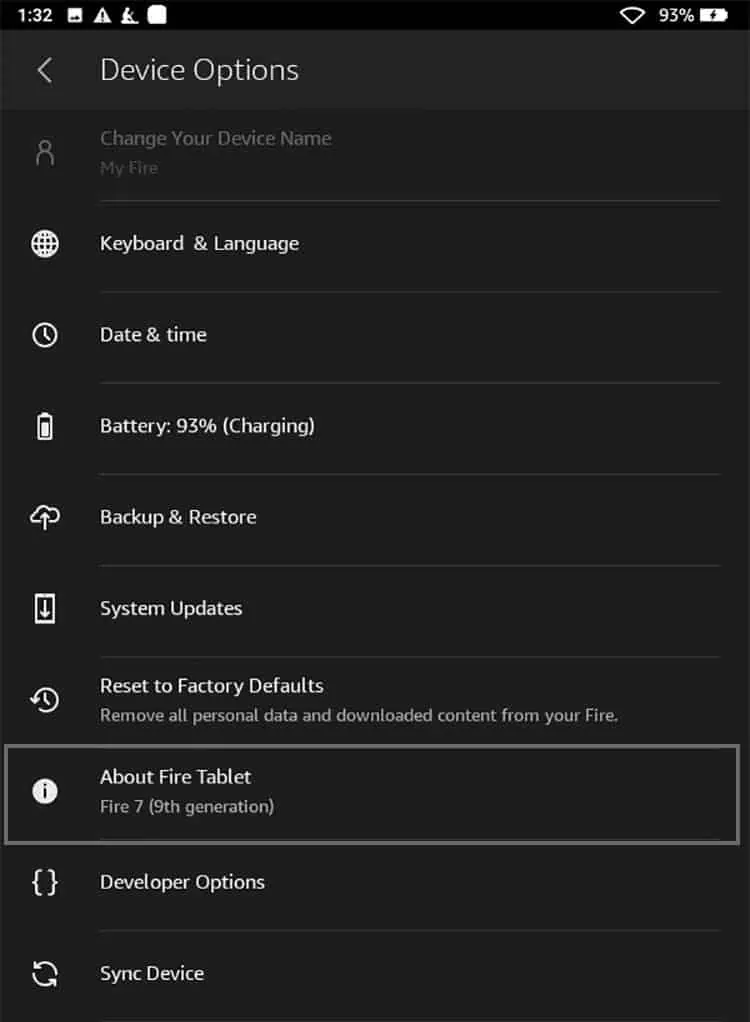
- Scroll Down to Device Options > About Fire Tablet

- Highlight Serial Number and tap on it for 7 or more times
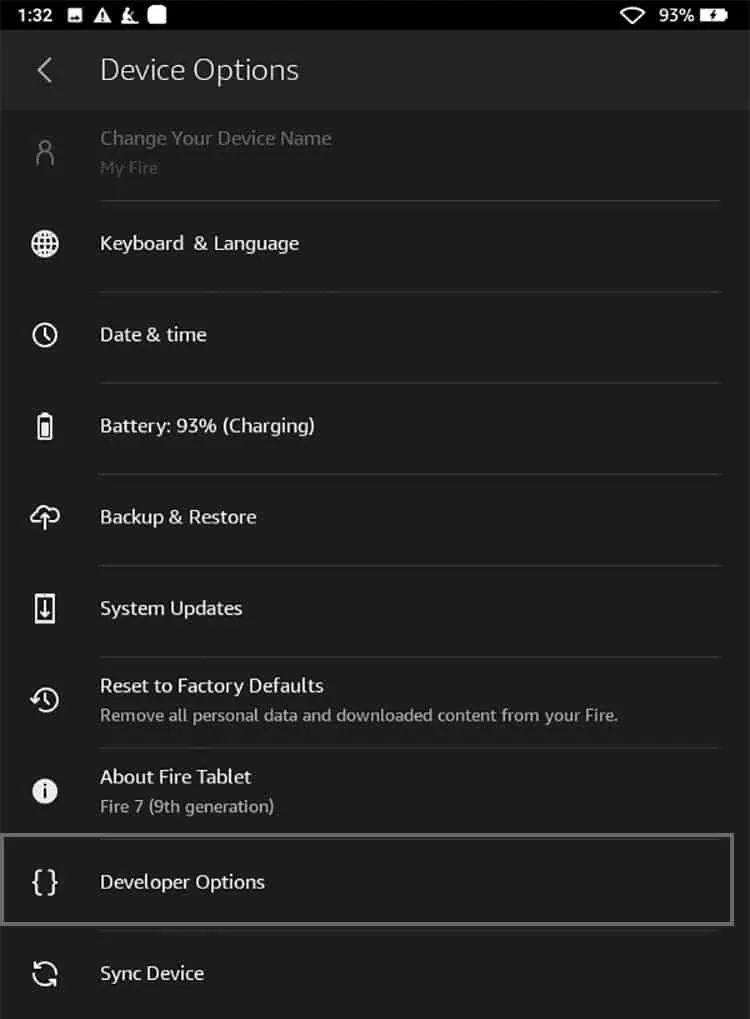
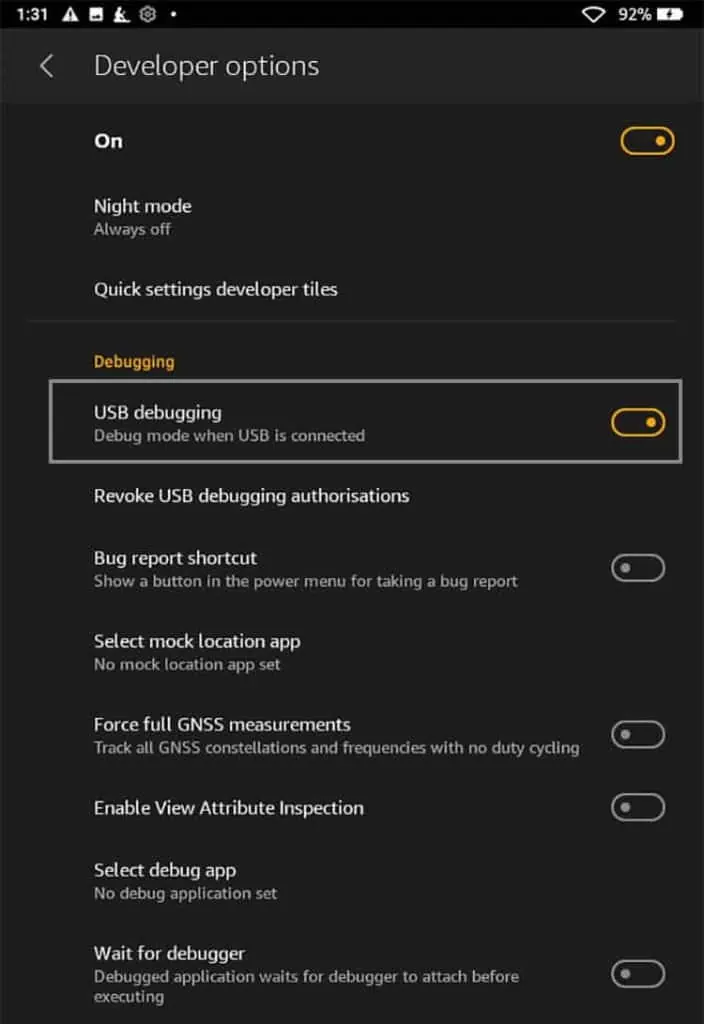
- Now on Device Options, tap Developer Options

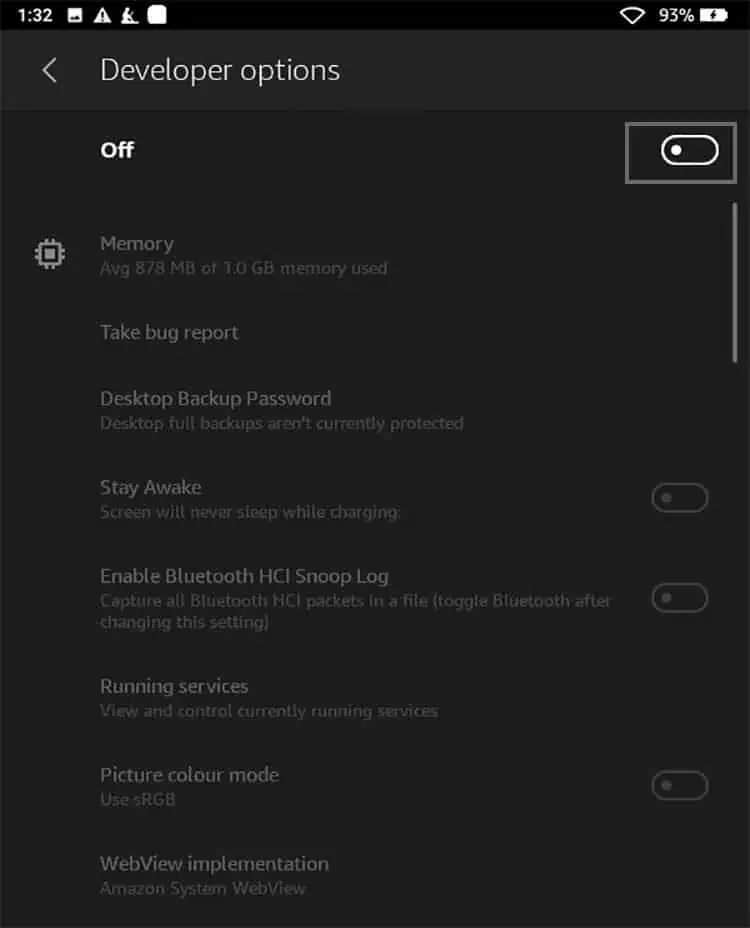
- Switch the toggle On at the top

- Under Debugging, drag the slider right to turn it On

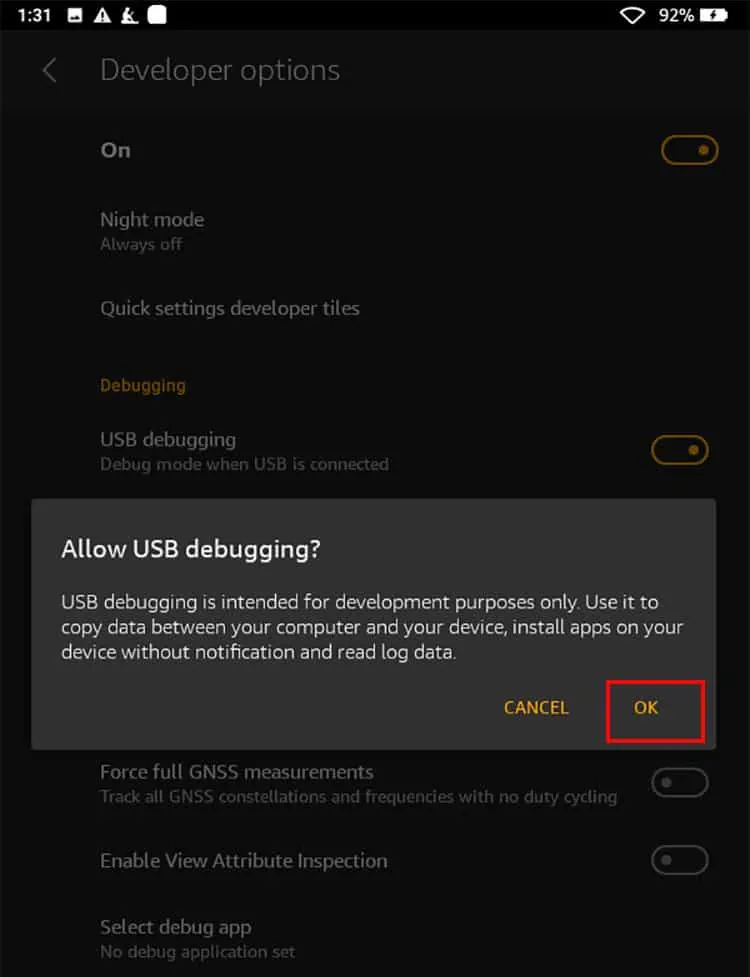
- Allow USB Debugging by choosing OK option on the pop-up

Update Driver
Although your Kindle is connected, you cannot see any internal storage if there is an issue with the driver. Or when the driver is missing on your PC. During such instances, you might as well see a red or yellow warning next to your device.
Therefore, another fix to troubleshoot the problem is to update the kindle driver on your Windows. Moreover, during the process, you can also manually install an MTP driver.
Find out the steps for it below.
- Press Windows + X keys
- Click on Device Manager
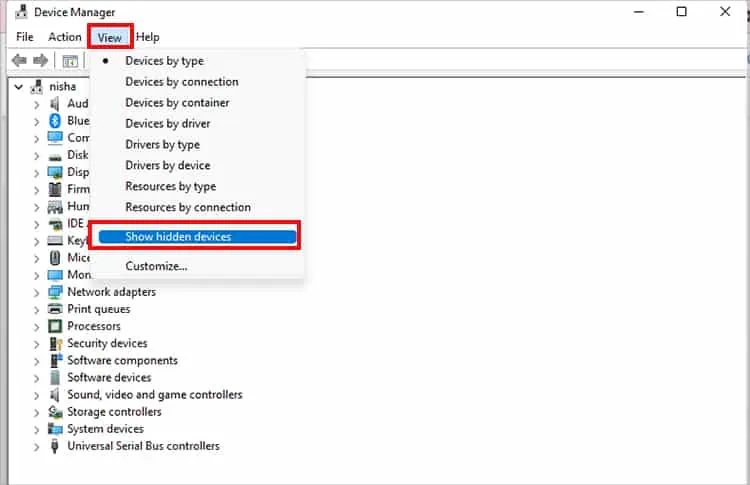
- Navigate to the View tab on the top menu bar
- Choose Show Hidden Devices

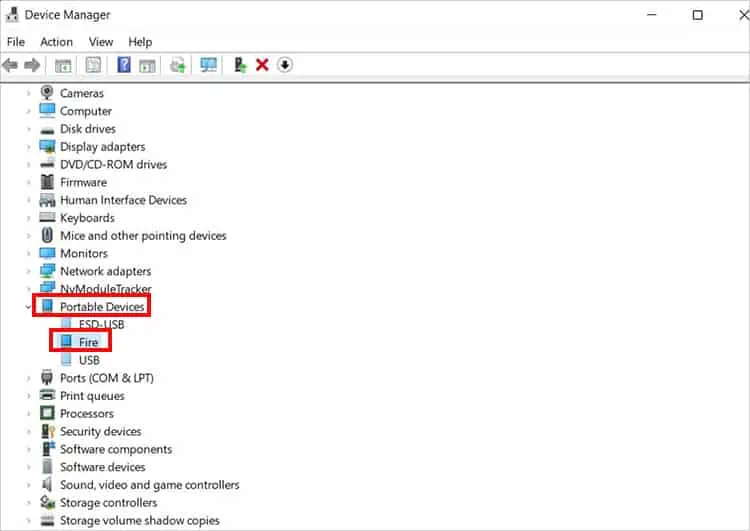
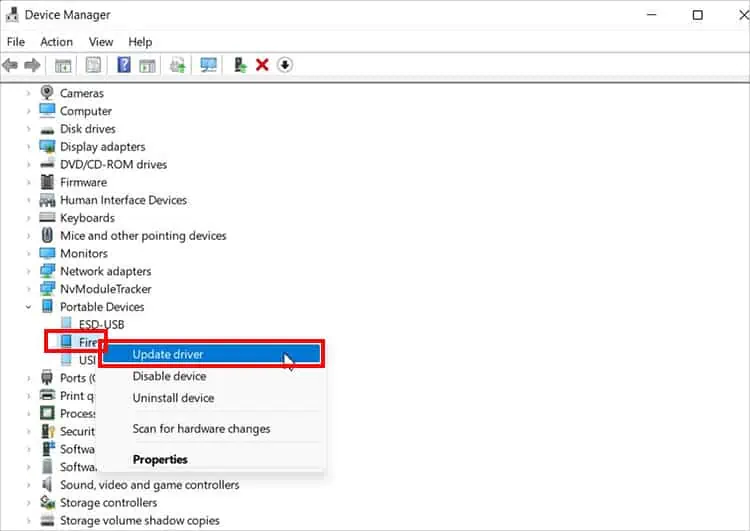
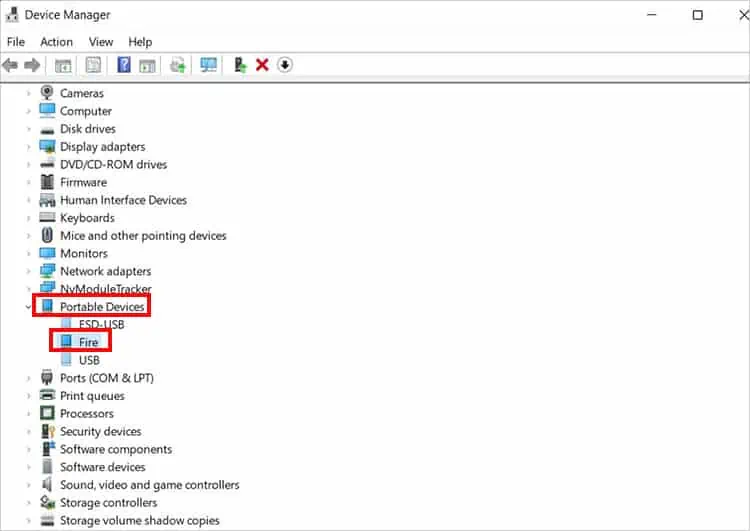
- Now, locate Portable Devices and click to expand the menu

- Highlight Kindle and right-click on it and select Update Driver

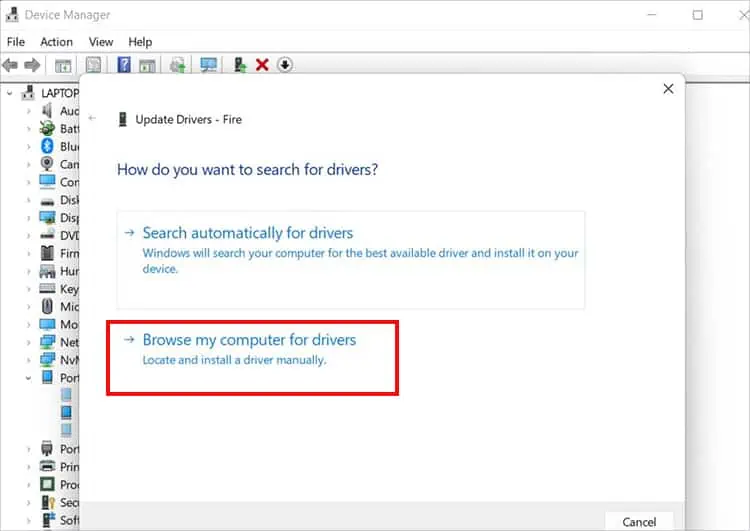
- Now, on the pop-up, click Browse my computer for drivers

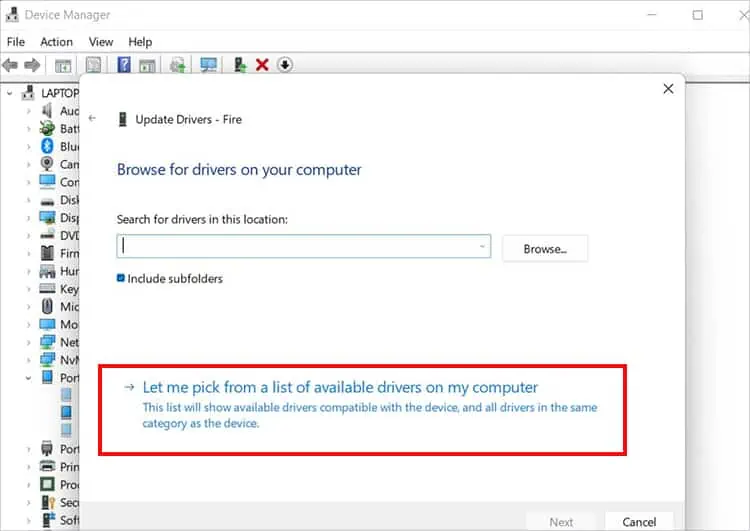
- Continue by selecting Let me pick from a list of available drivers on my computer

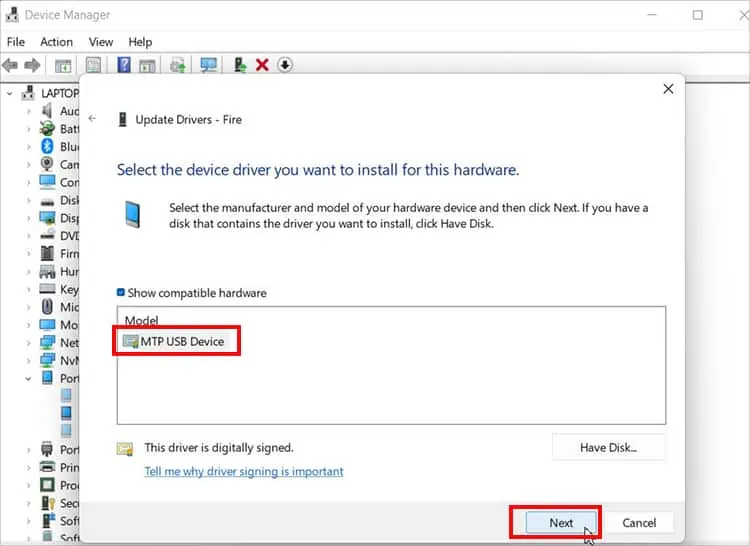
- Click on MTP USB Device and hit Next button

Reinstall Kindle Driver and USB Controllers
If updating the driver does not work, you can reinstall the driver. From your device manager, manually uninstall the driver and install it again. This might solve the issue of Kindle not showing up on Windows.
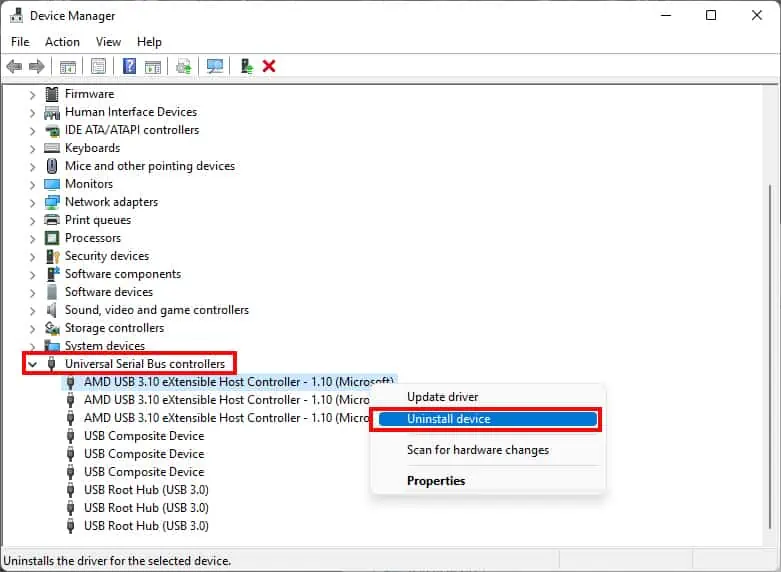
Also, another way to troubleshoot the problem is to reinstall USB controllers on your Windows. You can manually uninstall them from the device manager.
- Enter Windows + X keys together
- Choose Device Manager
- Expand Portable Devices

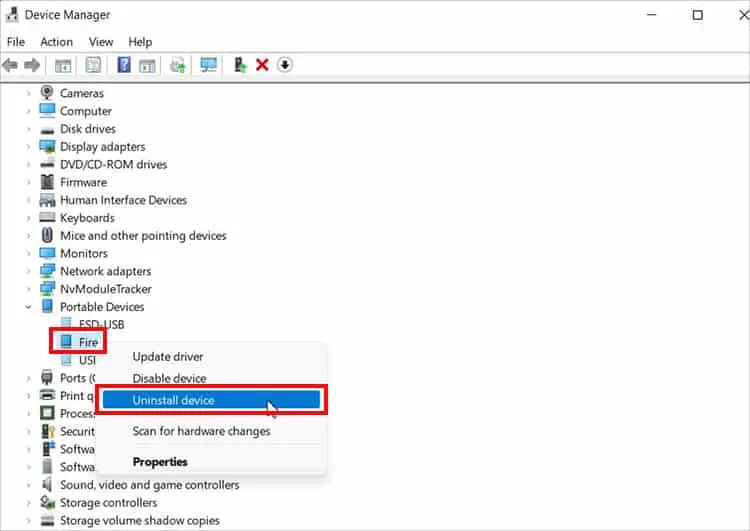
- Right-click on Kindle and pick Uninstall device

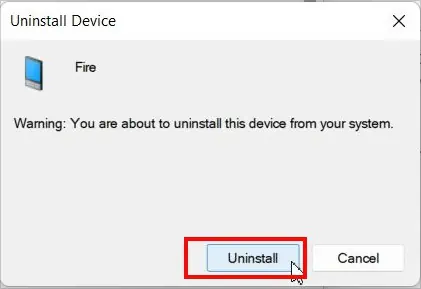
- Confirm Uninstall on the warning pop-up

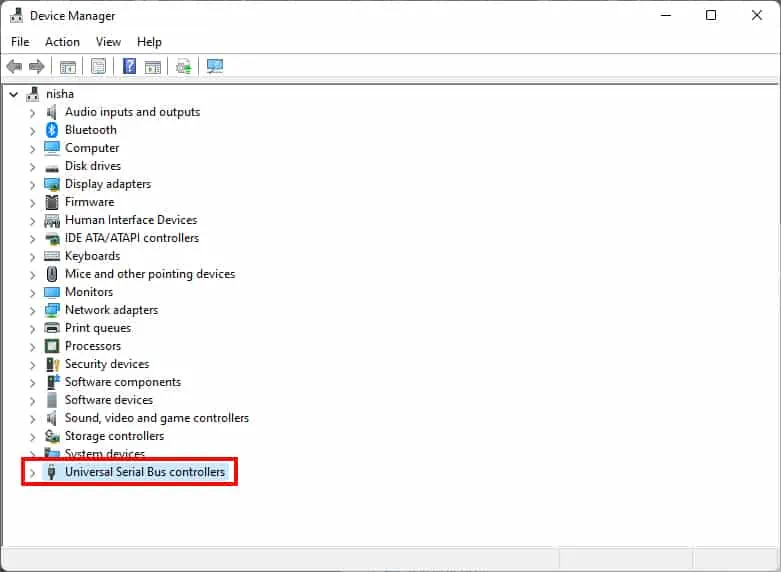
- Now, scroll down to locate Universal Serial Bus Controllers and expand menu

- Now, right-click on each USB controller and choose Uninstall

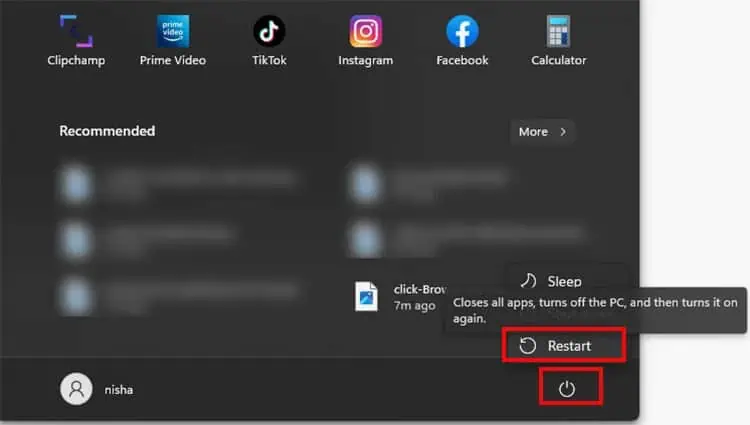
- Restart your device from the Start Menu

- Your PC will automatically Reinstall all the drivers

