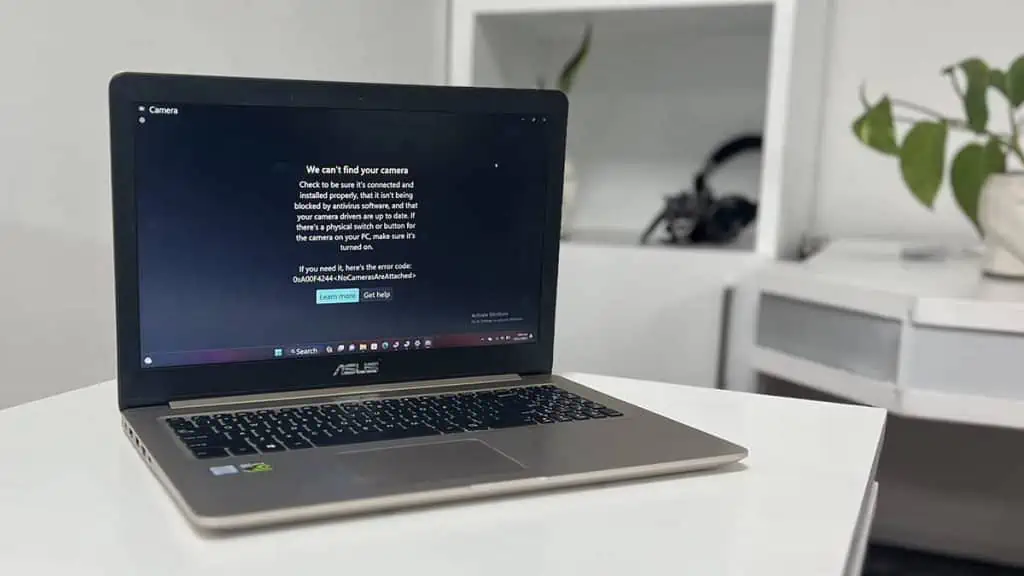
Whenever your laptop’s camera doesn’t work, it usually means that your computer can’t detect or access it.
There is a chance it might have been disabled by any means or your computer’s settings or some app is obstructing access. Issues with the driver and the physical hardware are also some likely causes.
To fix your laptop’s camera, make sure it is enabled and has proper access. You should also close any other app currently using the camera. Then, troubleshoot the driver by reinstalling or rolling it back.
You may need to repair or replace the physical device if there’s a broken connection or any damage.
Make Sure Camera is Enabled
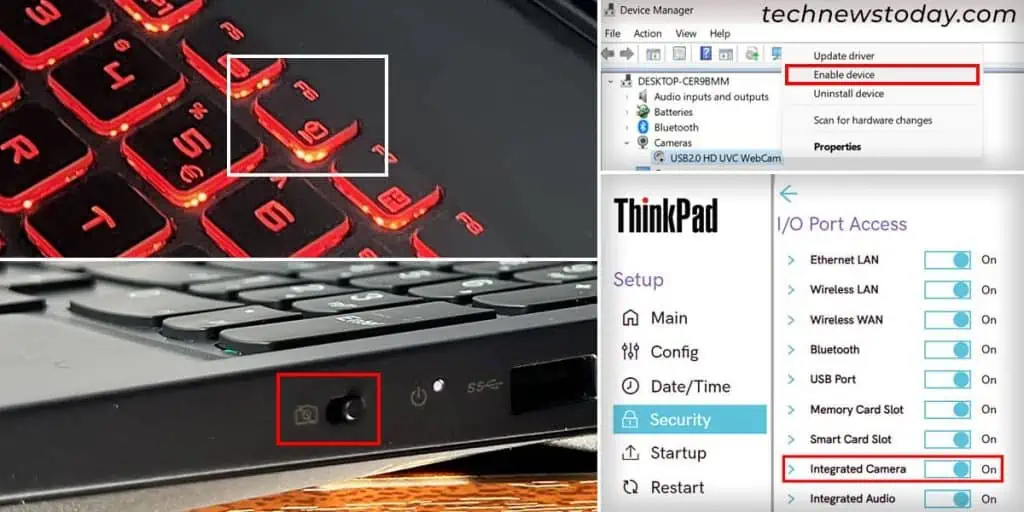
Most laptops contain multiple means to disable the built-in camera device. You can do so using the dedicated switch/shortcut, BIOS and even the Device Manager.
So check all such possible methods and make sure your camera is actually enabled. Here’s what you may need to do:
- Some laptops have dedicated buttons/switches on the sides or top to enable/disable the camera. Use them to see if the camera is enabled or not.
- Some laptops may have a shutter on the camera itself. Slide it to expose the camera lens.
- Some laptops may have keyboard shortcuts (especially on function keys) to enable or disable the camera. For instance, I can press Fn + F8 or F8 on my Dell Inspiron laptop to toggle the camera.
- Also, on my Lenovo laptop, enabling the camera switch after opening the camera doesn’t actually make it work. I have to restart the app as well. So see if the same applies to your laptop.
- Get to your laptop’s BIOS, look for the camera and make sure it is enabled. Check your laptop’s BIOS guide or user manual for the option’s location. In my Dell laptop, I found it at System Configuration > Miscellaneous Devices.
- You can also open the Device Manager (
devmgmt.mscon Run), expand Cameras and see if the camera is disabled (has a black downward arrow mark). In such cases, right-click on it and select Enable device. - Depending on your laptop, you may find the camera device under Imaging Devices or Sound, video and game controllers instead.
Allow Camera Access
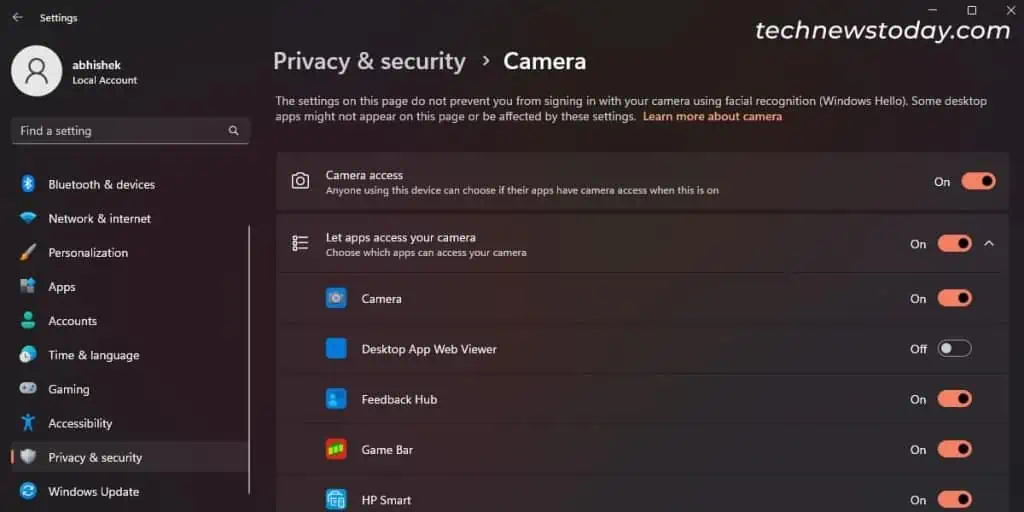
Windows comes with a privacy setting to address security threats from exposable media like camera or microphone.
Go to the relevant setting and make sure your system and app have access to the camera. For that,
- Press Windows + I to open Settings.
- Go to Privacy & security > Camera.
- Toggle on Camera access and Let apps access your camera.
- Go through the app list and enable all the necessary apps as well.
Some third-party antivirus apps may also have separate camera permission settings for privacy purposes. Go through your antivirus settings and make sure it is not blocking the camera access.
Close All Apps Using the Camera
When one application is actively using the camera, other apps won’t be able to use it.
In such cases, if you try opening the Camera app, it will say something like “Close other apps, It looks like another app is using the camera already.”
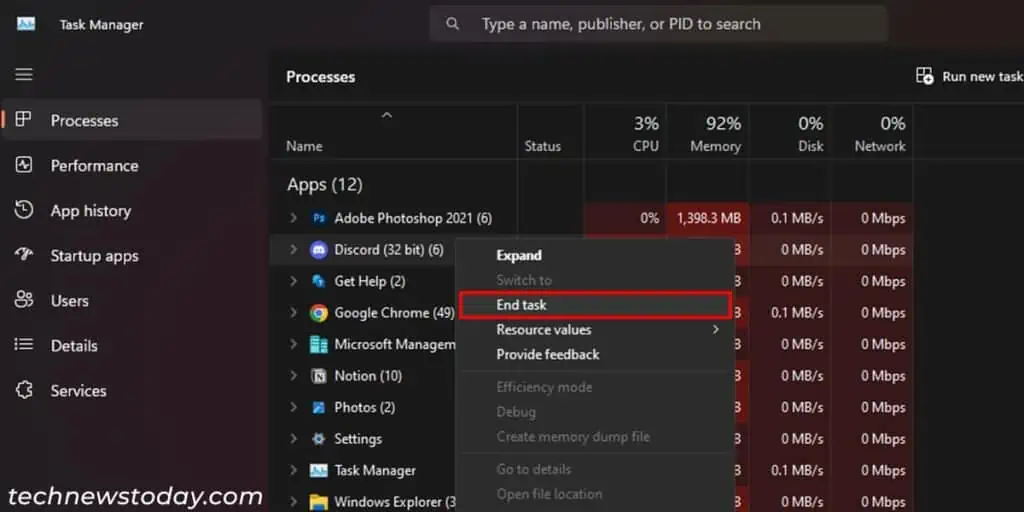
If you don’t know which app it is, you can look for and close all possible apps using the Task Manager. To do so,
- Open the Task Manager by pressing on Ctrl + Shift + Esc.
- On the Processes tab, look for apps that can use the camera.
- If you find any, right-click on it and select End task.
Reinstall or Roll Back Camera Driver
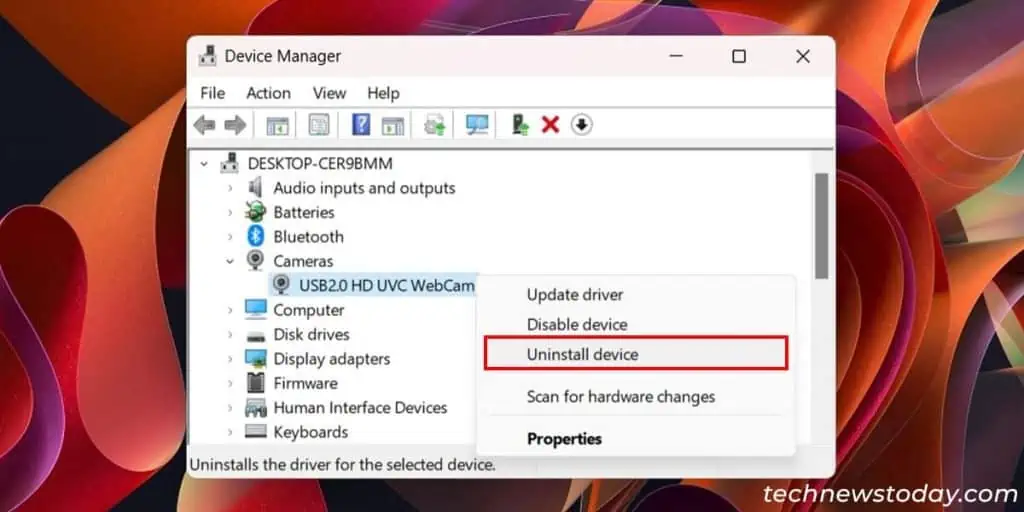
Issues with the camera driver may also prevent it from working properly. The best way to deal with such issues is to uninstall and reinstall the camera driver.
You can do so from the Device Manager using the steps below,
- Open Run by pressing Windows + R.
- Type
devmgmt.mscand press Enter. - Expand Cameras, Imaging Devices or Sound, video and game controllers and look for your camera.
- Right-click on it and select Uninstall device > Uninstall.
- Then, click on Action and select Scan for hardware changes. It will automatically reinstall the driver.
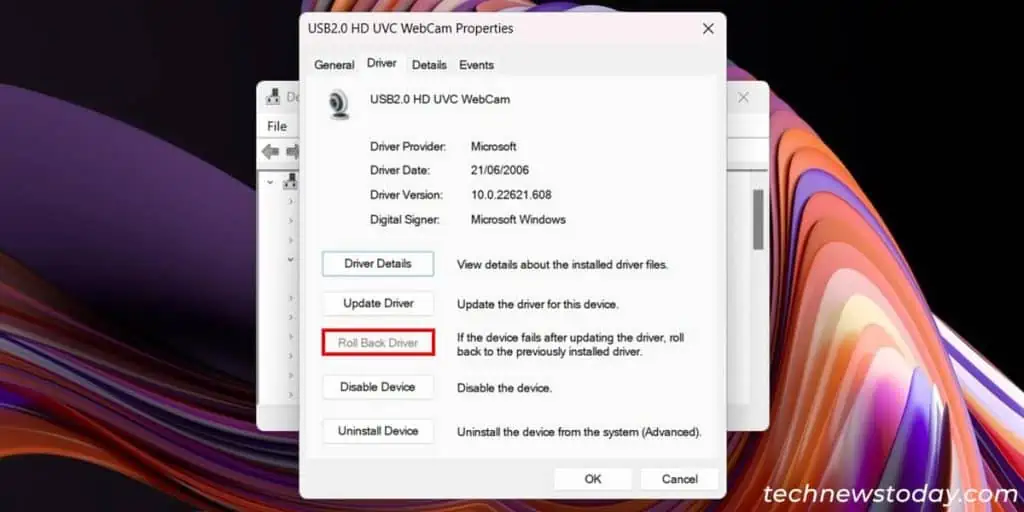
If reinstalling the driver didn’t help, try rolling it back to the previous version. It will take care of all undesirable issues in the current driver version. For that,
- Right-click on the camera device on the Device Manager and select Properties.
- Go to the Driver tab and click on Roll Back Driver. Confirm your choice.
If you can’t find the camera driver, your system may not have its driver. Perform a manual windows update to update or install the camera driver.
Check Connection Issues
If you still can’t find the camera device on the Device Manager, it indicates a connection issue or hardware damage.
If you are using an external camera, change its connection port. Also, see if it works on other devices. If not, it is damaged and needs a replacement.
To detect and troubleshoot any connection issues for the built-in camera, you will have to open the laptop and its screen bezel.
If you don’t have prior experience or knowledge on doing so, take help from the local hardware shops or service centers.
Note: We also have dedicated guides to troubleshoot camera issues on a few laptops. I recommend going through those for more detailed or additional solutions.
