Picture this: you just downloaded and installed an awesome new game, you open it up, hop on the first mission, and you notice something is wrong. You have a very powerful GPU, and this game shouldn’t be an issue for it at all. Well, the answer is straightforward: you are using the wrong GPU.
This article will show you how to get your laptop to use the discrete GPU instead of the low-power integrated graphics.
How to Spot if Your Discrete GPU Isn’t Being Used?
It might seem obvious at first, that you have abnormally low in-game FPS, but this isn’t the only way to know if your primary GPU is not utilized. The way to check first is simple:
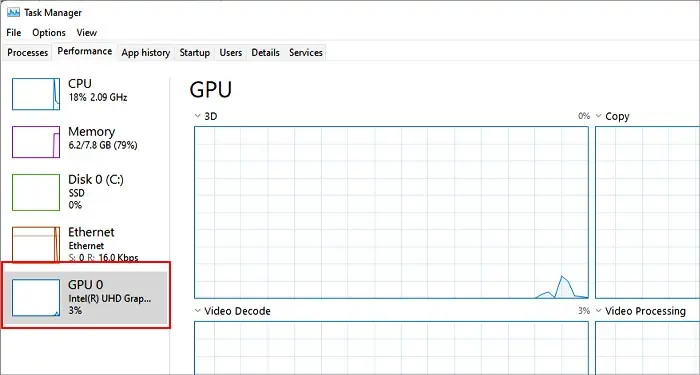
- Press and hold CTRL +ALT + DELETE and select Task Manager.
- Click on the Performance tab and look at the GPU section.

Suppose you notice that even though your game is clearly running, the usage of your dedicated GPU remains near 0 while your CPU/ APU is under heavy load. In that case, this is a clear sign that your main GPU isn’t utilized at all.
This is an important distinction since low in-game FPS can have multiple underlying causes, not just that your laptop is using the wrong GPU.
How to Fix Your Laptop Not Using the NVIDIA GPU?
While these steps are designed for laptops, most of the fixes can also be applied to a desktop PC in case it has an integrated graphics solution.
Manually Force the Application to Run With the Discrete GPU
There are several ways to do this. But, we will learn how it is done with the built-in Windows settings.
- Click on the Windows Start Menu
- Click on PC settings and click on System
- Find and click the Display tab
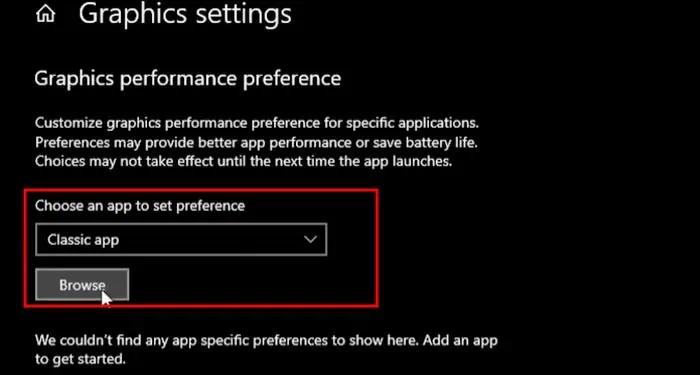
- Scroll down until you see the option called “Graphics settings” and click it
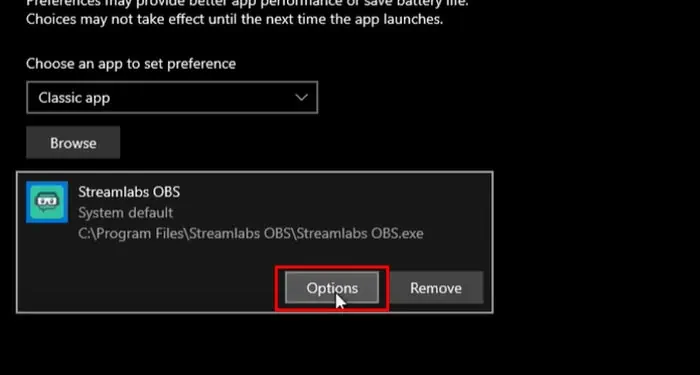
- Choose the app from the drop-down menu that you wish to be run with your discrete GPU

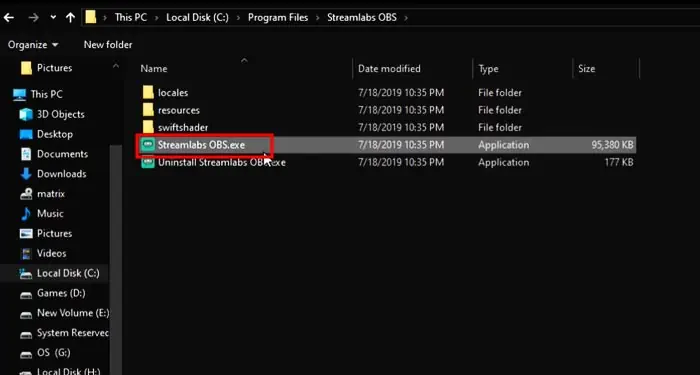
- If the application is non-Microsoft, click on “Desktop app” and click the “Browse” button
- Locate the .exe file of the game or application you wish to run with your primary GPU

- Once its selected, please click on the “Add” button underneath
- After this, click on “Options“

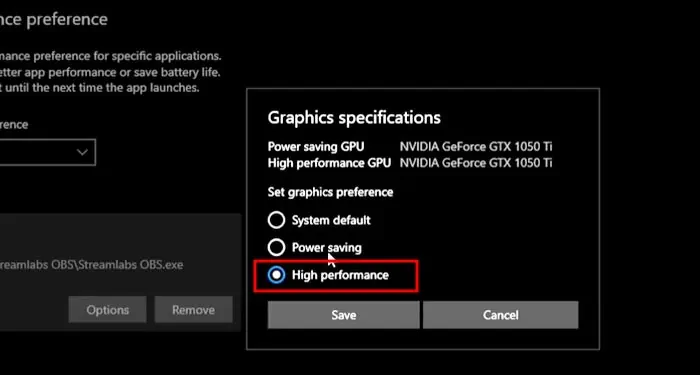
- You will see a new menu pop up that lets you choose the default GPU used to run this application
- Your main GPU will be listed under the “High Performance” option with its brand and model name below.

- Tick the round box with your primary GPU and click on Save to apply the changes
Restart your app and check if the proper GPU is being used now. If you did everything right, you should immediately notice that in your Task Manager, the primary GPU is now put under load when running the game or app.
Switch to the Discrete GPU From the NVIDIA Control Panel
This is another way of forcing the app to run with the discrete NVIDIA GPU. This solution works only for NVIDIA-powered laptops.
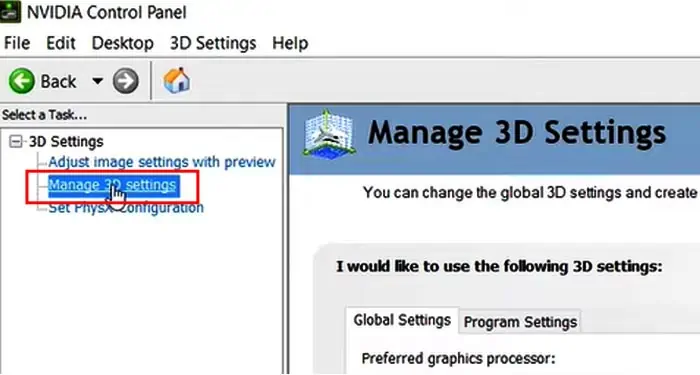
- Right-click anywhere on your desktop and click on NVIDIA Control Panel
- Click on “Manage 3D settings” on the left side of the menu under 3D Settings.

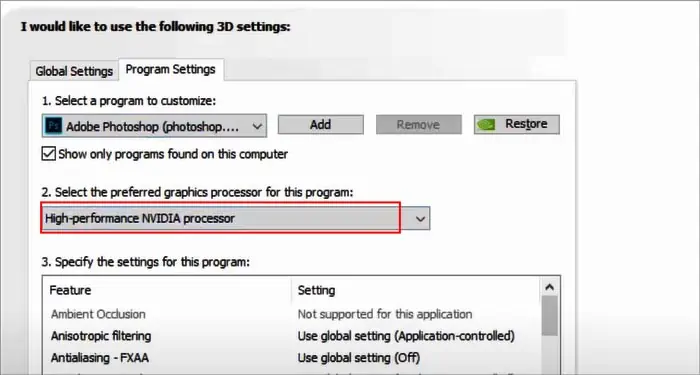
- Click “Program Settings” and select the app you wish to run with a discrete GPU from the “Select a program to customize” menu.
- Click on the Preferred graphics processor tab, select the high-performance NVIDIA GPU to be used as default and then apply these changes.

Update All Drivers
Games should automatically default to using your most powerful GPU. Since this is controlled mainly by the laptop drivers, having outdated drivers can cause your System to choose the wrong GPU. Here is a detailed guide on updating your GPU drivers in windows.
- Click on the Windows Start Menu
- In the search bar, type the words “Device Manager” and click on the application that comes up
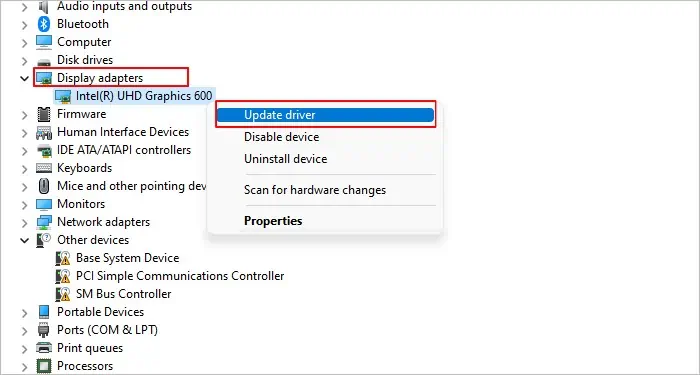
- You will see a menu pop up with various devices underneath; look for the “Display Adapter” tab and click on the arrow next to its name (this is where your GPUs will be listed)
- Right-click on NVIDIA GPUs name and click on “Update Driver”

Another great way to keep all your NVIDIA or AMD drivers up to date is by installing either the NVIDIA GeForce Experience app or AMD’s equivalent.
If you want a full guide on how to properly update all of your laptop’s drivers, including more advanced ones like the chipset drivers, we have a complete guide on how to do so here.
Check Your Laptops Battery Options
All laptops come with different modes for battery settings. Some of these modes force your hardware to run with low performance to preserve battery.
- Open up your Windows Start Menu
- Click on the tab on the side called “Control Panel“
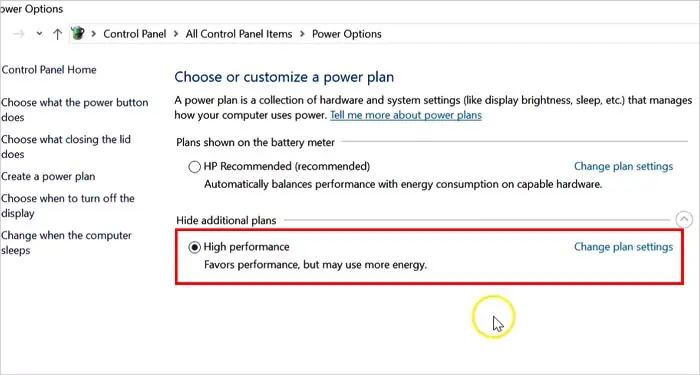
- Click on System and Security and then find “Power Options” and click it
- You will see a couple of options to select from
- Select the “High Performance” one and apply the changes

This method could fix your laptop always using the integrated low-performance GPU due to a conditional battery constraint.
Install Any Pending Windows Updates
This general troubleshooting step can also fix the issue with your PC defaulting to the wrong GPU.
Here’s how you can update your Windows:
- Click on the Windows Start Panel and click on Settings
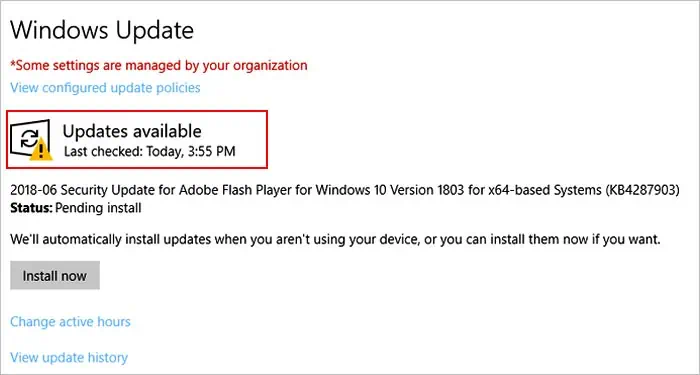
- Click on Update & Security and then click on Windows Update
- Select the “Check for updates” option and let then install any pending updates and restart your PC

This fix could work great since laptops come with slightly different software depending on the manufacturer’s brand.
Enabling Dedicated GPU in BIOS
Sometimes you have to access the advanced BIOS settings in order to get your laptop to recognize and start using your discrete GPU. Please note that depending on your laptop manufacturer, the exact steps for how to access this feature might vary. But the general steps to turn the GPU on can be followed, regardless. Here is how to do so:
- Restart your laptop and hit the BIOS prompt key (most common f10, f4 or f12)
- Once you are in your BIOS menu, look for a panel or menu option called “Advanced”
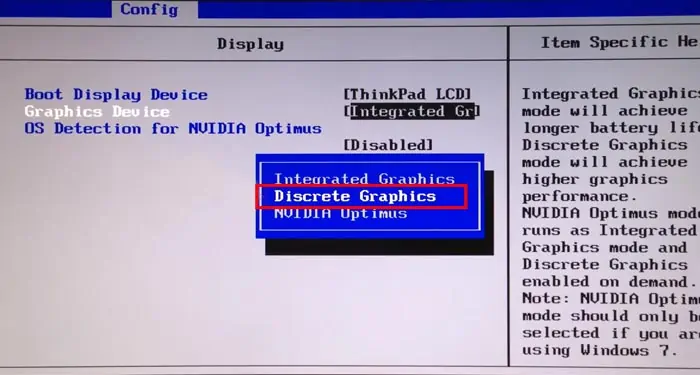
- Locate the option “dedicated GPU in bios” and open it
Find the submenu that says: Graphics and then choose “Discrete Graphics”
- Apply the changes and click save, then exit your BIOS, restart and check if the discrete GPU is properly being recognized.
Update Your BIOS
Updating your BIOS should be done as a last resort if the prior steps didn’t work. Before attempting to flash any new BIOS version, it’s paramount that you create backups for all your important files, as an incorrect BIOS flash can prevent your PC from functioning and corrupt system files.
Even though this fix is not advised, we have a comprehensive guide on how to update BIOS. Performing a BIOS update, when done correctly carries a lower risk and is a solution for many other PC-related issues.

